• Welcome to RCCrawler Forums.

    It looks like you're enjoying RCCrawler's Forums but haven't created an account yet. Why not take a minute to register for your own free account now? As a member you get free access to all of our forums and posts plus the ability to post your own messages, communicate directly with other members, and much more. Register now!

    Already a member? Login at the top of this page to stop seeing this message.

B-MOW's GSPEED V1-C1 Mojave Class 1 Build

@Topher Builds, what driveshafts are you using there? Originally with my build I was planning to use the stock SCX10 iii to save weight (being plastic). But as soon as I installed them noticed they are too big in diameter and rub while rotating. Just asking because now I will be ordering some driveshafts and just want to ordering new ones that have the same problem.

Thanks!

These are just some random eBay driveshafts. I’m not sure how durable they are but they were cheap ($10 a piece) so I’m giving them a shot. The shiny ones are a tight fit on the shaft (twss) but got on there with some effort.

Hey TB, question. It looks like you are using the 3D printed shim under the Creeper. Is that correct? I've been trying to use the shim, but I can't get the screws to screw into the Creeper with the shim in place.

Yessir. I used some longer hardware I had around here. Unfortunately my skid isn’t countersunk on the bottom right now so I just put a button head there temporarily.
 
Yessir. I used some longer hardware I had around here. Unfortunately my skid isn’t countersunk on the bottom right now so I just put a button head there temporarily.

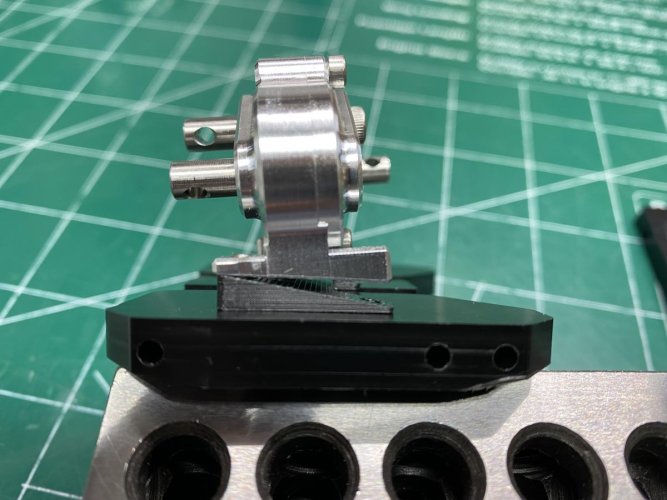
For some reason on mine when I try to use the shim I can't get the t-case to sit down on the shim when I tighten it down. The holes in the Creeper mounts are drilled at an angle for mounting without the shim. With the shim in place it looks like this. I must be missing something!!!!

Creeper Skid.jpg
 
You are right, I remember I wasn’t pumped about the way the hardware threaded into the t case but it did thread in. (Stainless hardware hardware). You may be able to carefully widen the hole on the skid a tad to let the hardware angle a bit.
 
For some reason on mine when I try to use the shim I can't get the t-case to sit down on the shim when I tighten it down. The holes in the Creeper mounts are drilled at an angle for mounting without the shim. With the shim in place it looks like this. I must be missing something!!!!

View attachment 395372

Hey Brian, enlarge the holes in your skid just a little and then start all four screws so they are biting a little thread and then tighten the screws a little at a time. I had the same problem and this worked for me. "thumbsup"
Ernie
 
You are right, I remember I wasn’t pumped about the way the hardware threaded into the t case but it did thread in. (Stainless hardware hardware). You may be able to carefully widen the hole on the skid a tad to let the hardware angle a bit.

Hey Brian, enlarge the holes in your skid just a little and then start all four screws so they are biting a little thread and then tighten the screws a little at a time. I had the same problem and this worked for me. "thumbsup"
Ernie

Ok, that makes sense! As I was staring at it I thought maybe I needed to angle the holes in the skid so that the screws would tighten down. It looks like I will also have to add a little more bevel to the hole so that the countersunk screw head will sit in the skid a little deeper so that it doesn't stick out.

I appreciate the help guys! Thanks so much!"thumbsup""thumbsup"
 
Made some good progress this weekend. I was able to get the links and skid all figured out. Also got the Creeper-T mirrored and installed.

So for the link problem that I was having, I found that the link set I ordered from ITW seems to have been made for the TGH Monkey Skid which require a longer rear lower link. I decided to use my spare TGH 2.Low mirrored skid that I recently purchased. With this skid I was able to move the rear lower links that I had on the rear and move them to the front lower links. The front lower links that I originally had on I moved them to the rear. These links are longer and work with the Monkey skid. As it sits now the wheelbase is near the 11.4" I was needing to run the TF2 Toyota body.

IMG_6392.jpg


I drilled and countersunk new holes in the TGH mirrored skid so that I could bolt up the Creeper-T. I had to drill and countersink the holes at an angle so that I could get the Creeper and the spacer mounted in. The mounting holes in the Creeper are tapped at angle. There is just enough room for the new holes without any room to spare. Using this skid does move the Creeper slightly more forward a tad, but that shouldn't cause any problems.

IMG_6393.jpg

IMG_6394.jpg

IMG_6395.jpg


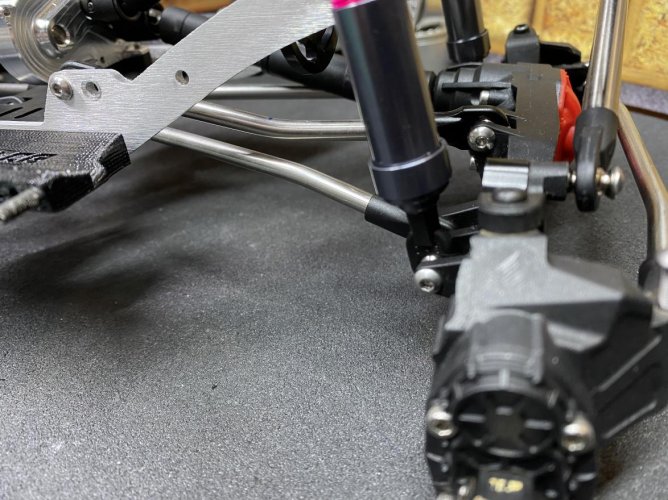
To fix the issue with the front upper link hitting the FMM when fully compressed, I put a slight bend in the straight link. I also had to length it a touch by threading the rod ends out. First pic the suspension is fully extended and the second is fully compressed. Should have great clearance now!

IMG_6396.jpg

IMG_6397.jpg


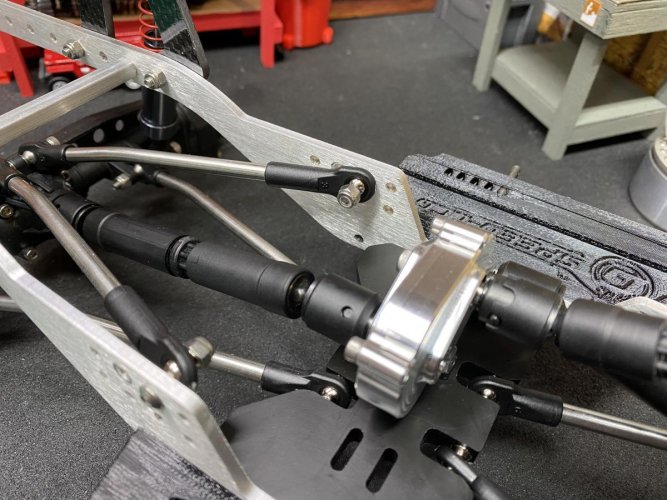
On the rear upper links I decided to use a Jato rod end to lengthen the links a little to straighten the axle and to shorten the wheelbase a tad. I moved the upper link inward one hole.

Also I whipped up a set of spare Axial WB driveshafts that I had in my spare parts bin. I had to mix and match different lengths of shafts to get the length that was needed.

The shaft going from the FMM to the Creeper took a bit of cutting and modifying to get it to work. It is very short, but should work for now until I can get the proper length shaft. My plan is to CA glue the shaft together and wrap it with a piece of heat shrink to hold it all together.

IMG_6398.jpg

IMG_6399.jpg
 
The install looks good bro. I wondered how this would work out. I really want a creeper t for my current C2 rig...


Lou
 
Lookin good brian! Glad u got your links figured out, it can be a bear sometimes. How long is the center section of the short shaft? Is it long enuf it wont fall out if it slides to one end? If it were me, i wouldnt glue it, id just use a piece of shrink tube. That way if u ever need to take it out, just cut the tube off n itll still slude to get it off the shafts. The tube will shrink around the raised part of the center shaft n keep it from movin on u when runnin the rig
 
The install looks good bro. I wondered how this would work out. I really want a creeper t for my current C2 rig...

Lou

Thanks man!"thumbsup" You definitely need to pick up the Creeper! It's beautiful to look at in person!:) Very nicely built and sits low so that it will not interfere with an interior. Oh, and 30% OD! Love it!


Lookin good brian! Glad u got your links figured out, it can be a bear sometimes. How long is the center section of the short shaft? Is it long enuf it wont fall out if it slides to one end? If it were me, i wouldnt glue it, id just use a piece of shrink tube. That way if u ever need to take it out, just cut the tube off n itll still slude to get it off the shafts. The tube will shrink around the raised part of the center shaft n keep it from movin on u when runnin the rig

Thanks bama!"thumbsup"

Yeah, so happy the links are figured out! It's sometimes like putting a puzzle together without a picture!:ror:

The center section is about 25mm. The inner section is about 18mm. Total length of the driveshaft is roughly 75mm. It probably won't slide out, but I should have made the outers a little longer. There is only about 5mm of the spline inside the outers. I was thinking that if I glue it and wrap it, it should make it stronger. If I needed to remove it, I could just take out the 4 screws holding the FMM and slide it forward a tad. I probably do what you said and just shrink wrap it and see how it holds up. If I see it start to wobble, then I'll add a little glue later on. Thanks for the tip!"thumbsup"
 
NIce work B-Mow!

I recently received another set of links from ITW and this time they were labeled with pen so there was no questions as to what went were! I imagine they have had a few people mention the links being slightly confusing to figure out what's what.
 
NIce work B-Mow!

I recently received another set of links from ITW and this time they were labeled with pen so there was no questions as to what went were! I imagine they have had a few people mention the links being slightly confusing to figure out what's what.

Thanks!"thumbsup"

That's great to hear they are labeling them now! That will make it much easier and cause less headaches!

I need to get another order in for a set of 12.3" hi-clearance links, so hopefully they will be labeled too!
 
Work on this build has been extremely slow lately. I've been at a stand still waiting on the TGH wheels to be back in stock. I have been holding off on the body work and rolling the fenders until I had the wheels and tires mounted up so that I knew where exactly how far out I wanted the fenders to flare.

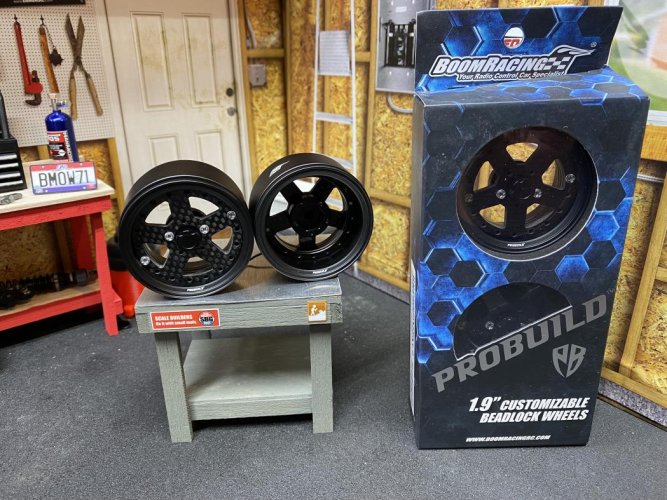
Since the TGH wheels have and are very hard to get hands on, I decided to check out the Boomracing Probuild wheels. For this build, I need a wheel that is offset enough to tuck the tires in under the fenders and clear the portals. The Probuilds have many different offset options and wheel faces to fit many builds.

Instead of ordering direct from Boomracing and then waiting weeks for them to arrive, I found a distributor here in the states that sells different styles wheels. Ordered a set and had them in a few days.

I decided to go with the CF5 carbon fiber/matte black wheels. Super nice wheels and the finish is top notch. They come with scale hardware for the beadlock and also standard hardware for those that choose not use the scale hardware. Very easy to build. The wheels and tires just about fell together and are a breeze to screw together.

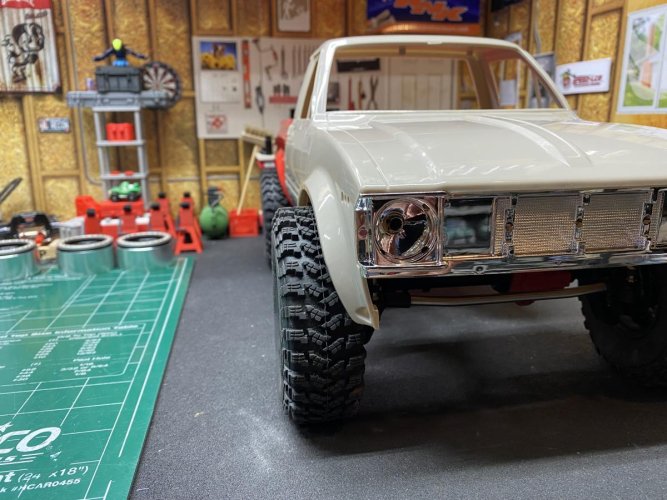
With the offset hub that was included, the tires are tucked in quite nicely under the fenders. Once I flare the fenders, I should be able to add some scale rotors or brass weights if needed and still have the tire covered enough to be legal.

The cool thing about these wheels is if I get tired of the look of the face plate, Boomracing gives other options to change up the look. Once I get the body painted and see how these CF face plates look, I may try out a different style of face plate.

IMG_7228.jpg

IMG_7235.jpg

IMG_7236.jpg

IMG_7237.jpg

IMG_7238.jpg
 
Excellent choice! I’ve been eyeing those boom racing wheels ever since they were posted on here. Came to the same conclusion for my c1, TGH wheels are hard to come by, and these seem to be readily available.

Are you planning on sharing the details of flaring/rolling the fenders? Interested to see that process.


Sent from my iPhone using Tapatalk
 
Looks awesome so far. I also have a set of Boomracing Probuild wheels, I think they are the easiest internal beadliock wheel to assemble.

And yes, please share the method you use for flaring. I "think" I have an idea how to but maybe there is a better method.
 
Excellent choice! I’ve been eyeing those boom racing wheels ever since they were posted on here. Came to the same conclusion for my c1, TGH wheels are hard to come by, and these seem to be readily available.

Are you planning on sharing the details of flaring/rolling the fenders? Interested to see that process.

Sent from my iPhone using Tapatalk

Yeah, same here. After I saw them here that got me thinking that these may work out to get the narrow width. And looks like parts and pieces to build these by the piece are also readily available.


Looks awesome so far. I also have a set of Boomracing Probuild wheels, I think they are the easiest internal beadliock wheel to assemble.

And yes, please share the method you use for flaring. I "think" I have an idea how to but maybe there is a better method.

Thanks! Agree! These wheels are sooo easy to build!


So for the flaring/rolling of the fenders. I haven't actually done it myself yet, but their is a YT video I've watched and it doesn't look all that hard. I do plan on posting pics and details once I start on it. Not sure how soon I'll get to it, but hoping to jump on sometime in the near future.
 
Freaking love those wheels! ESP the five bolt hub…

Lou

These are sweet wheels! I'll definitely be getting more sets of these for my other rigs!

Also forgot to mention, the alum center caps are threaded and screw into the hubs. Another nice design by Boomracing!
 
Last edited:
This is a beautiful build build B. Love that creeper trans. Some incision or MIP shafts would be pretty sweet in there.
 
I know everyone already said it, but those wheels are pretty sweet! I was thinking to get carbon fiber similar to those and then after perusing their website and cringing at the shipping costs, I went to a local store and picked out some from what they had their. But like you mentioned, you can buy extra face plates of a few different materials and finishes. These wheels are super nice simply based on how customizable they are.

Did your set come with the hubs? I wanted to get some but the local shop didn't have them at the time I was there last.
 
This is a beautiful build build B. Love that creeper trans. Some incision or MIP shafts would be pretty sweet in there.

Thanks smog!"thumbsup""thumbsup"

I do plan on getting another set of Incision driveshafts for it. I had these WB's on hand and just decided to use them for now. Oh and yeah, love how small and low the Creeper-T sits in there. It's built very well and from what I see it should/will be bulletproof!


I know everyone already said it, but those wheels are pretty sweet! I was thinking to get carbon fiber similar to those and then after perusing their website and cringing at the shipping costs, I went to a local store and picked out some from what they had their. But like you mentioned, you can buy extra face plates of a few different materials and finishes. These wheels are super nice simply based on how customizable they are.

Did your set come with the hubs? I wanted to get some but the local shop didn't have them at the time I was there last.

I didn't even check Boomracing's or Asia Tees shipping cost. I really didn't want to wait for them to ship clear across the ocean and then sit in custom's for weeks.:cry:

Yes mine did come with hubs. The first pic I posted of them is exactly how I got them. They also come with the scale hardware and a tool to install them and a tool to install the wheel nut. Check out Dixieland RC. That is where I got mine from. He has a few different styles and individual pieces for sale. I received mine in a couple days. Sure beats the 2-3 week or longer wait it would have been from overseas!
 
Back
Top