• Welcome to RCCrawler Forums.

    It looks like you're enjoying RCCrawler's Forums but haven't created an account yet. Why not take a minute to register for your own free account now? As a member you get free access to all of our forums and posts plus the ability to post your own messages, communicate directly with other members, and much more. Register now!

    Already a member? Login at the top of this page to stop seeing this message.

B-MOW's GSPEED V1-C1 Mojave Class 1 Build

I drove this almost exact setup today throughout 6 different courses, I was very impressed, your going to love it "thumbsup"
 
Looking wicked. The components are well thought out. Look forward to progress

Sent from my iPhone using Tapatalk

Thanks and thanks for checking it out!"thumbsup"


I promise, no more other builds until the V1-C1 is done!:lmao:

OK, I lied in this statement^^^^:lmao::lmao:

My new plan is to get back on this build this week WHILE I work on other builds!:)
 
Ok, well, I bet most that have commented on this thread have probably forgotten about this build, me included!:roll:

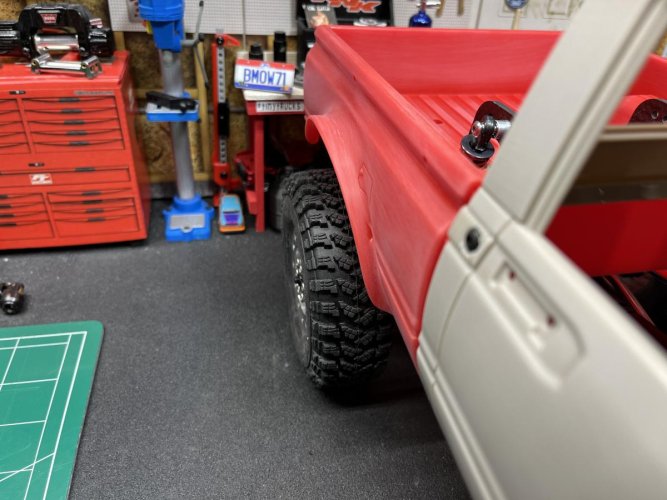
Anyways, back to the build and pleasantly pleased with how it is turning out. Spent the weekend working on flaring the fenders out to cover the tires.

I didn't get any pics of the steps I took to do the flaring as I was to into the process to remember to take any. To do the flaring, I used a 4" round glass candle that my wife recently threw away. It was the perfect size to match the tire size. I taped the glass container to my bench and slowly heated the body up to form the fender around the candle container. Did my best to make sure that each fender flare was flared out to the same distance.

After the flaring, I attached a piece of 100 grit sand paper to a piece of flat wood and sanded down the edge of the flares to shape them. I sanded off most of the rolled edge that I didn't need. I wish I would have got a picture of the fenders before I started sanding, but too late for that now!

I also cut and shaped the front fenders to match the grille. On the grille, I cut off the bottom half that has an area to attach the front bumper. It will not be needed and would be in the way of the front bumper/stinger that will be installed later.

After the fender flare sanding, I lightly hit the rest of the body with some maroon Scotch Brite to roughen up the surface so that I can get a coat of primer on it.

IMG_0937.jpg

IMG_0938.jpg

IMG_0939.jpg

IMG_0940.jpg

Let me tell ya, I was really worried about this whole process, but in the end and looking back, it really wasn't that hard. This step is what has been delaying this build and now that it is done I wish I would have done it sooner. Super easy if you take your time and slowly heat and shape a little at a time.
 
Dude, you did a great job! That is a beautifully stanced yota, just killer with the flares done up like that
 
^^^ I came here to say that SAME thing!!! ^^^

That thang is YEET!

(hope that means what I think it does, I don't follow modern slang...)

:lmao:
 
Dude, you did a great job! That is a beautifully stanced yota, just killer with the flares done up like that

Thanks smog! Appreciate!"thumbsup"

The stance does look good. Once the chassis is loaded with electronics and battery, the Dravtech shocks should come close to bottoming out and stuff the tires up into the wheel wells farther, thus lowering the COG a little more.

^^^ I came here to say that SAME thing!!! ^^^

That thang is YEET!

(hope that means what I think it does, I don't follow modern slang...)

:lmao:

Thanks durok!!"thumbsup"

YEET! I have no idea what that means, so I asked Google.:ror: Google says this: Yeet is a slang word that functions broadly with the meaning “to throw,” but is especially used to emphasize forcefulness and a lack of concern for the thing being thrown.

The Urban Dictionary says this: An Urban Dictionary entry from 2008 defined yeet as an excited exclamation, particularly in sports and sexual contexts.

I don't follow modern slang much either, so I guess we'll just roll with which ever one works!:lmao:

That yota looks great brian! Wat color are u thinkin?

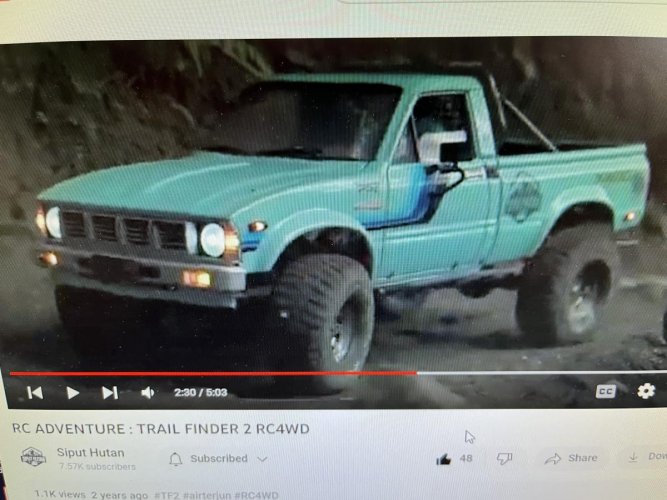
Thanks bama! When I started this build 2 years ago my plan was to go with Rustoleum Seaside. It looks somewhat like a seafoam blue. It's not a color that I would normally choose, but I saw a TF2 Mojave build with this similar color in a YouTube vid scale driving through the woods and I fell in love with that build and color!

So not sure if I'll still use the Seaside color or not. I did buy the can of paint back then, so I do have it in case I decide to use it.

I'll try to find a pic of that build and post it to see what everyone's thought are. It may look like complete ass to others! Who knows!:ror:
 
Seaside is def a good name for that color. It's an aquatic color. A surfboard would look right at home in the bed
 
That is a purdy color, looks good on the body style too. I agree with smog, it would make a nice 'surfer dude' kind of truck, with matchin surf boards in the bed
 
Seaside is def a good name for that color. It's an aquatic color. A surfboard would look right at home in the bed

That is a purdy color, looks good on the body style too. I agree with smog, it would make a nice 'surfer dude' kind of truck, with matchin surf boards in the bed

Right! It screams surfer dude truck! I thought a couple surfboards mounted in the bed would be fitting.


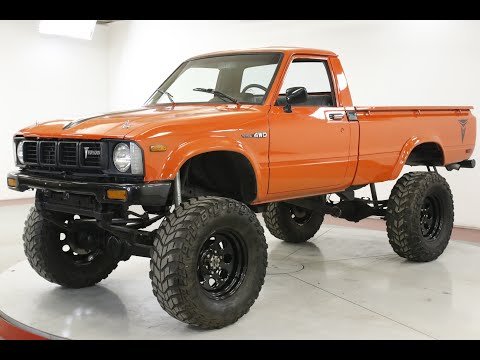
So I made a trip to Walmart to pick up another can of Seaside paint. As I was looking thru all of the paint colors, I decided to make an executive decision and change course. I think I may have mentioned this in one of the first post of this thread or somewhere else, but as a kid, one of my dads friends had a sweet '81 or '82 Toyota 4x4 pickup that I was in love with. I told myself that when I was old enough to drive I'd have one just like it. Well that never happened, but I've always wanted one. It was a Toyota orange similar to this one.

81 Yota.jpg


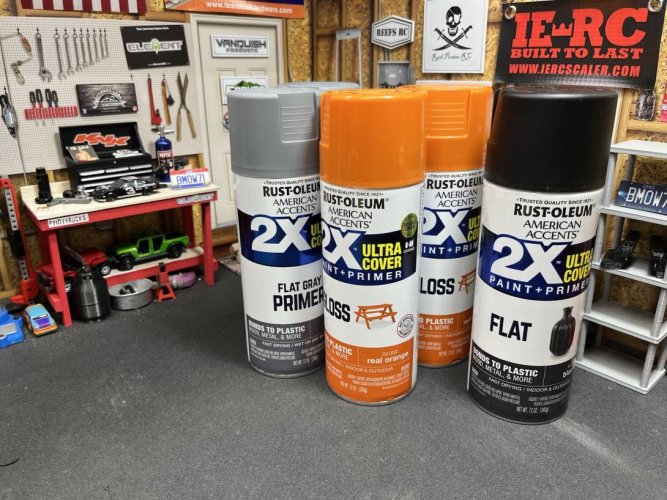
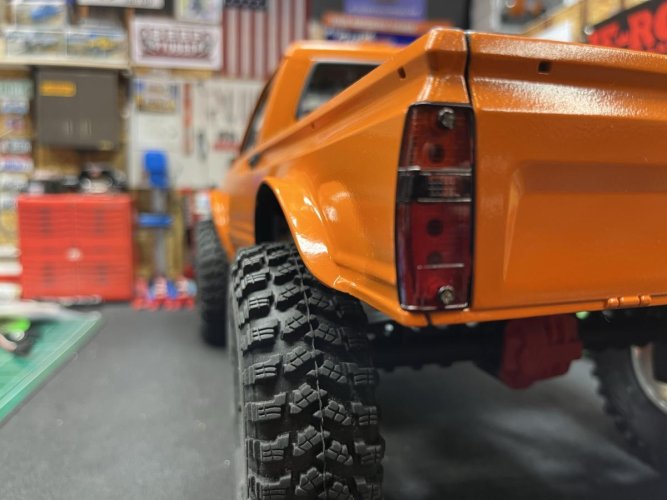
So I went with a couple cans of Rustoleum 2x Real Orange. I know orange is an over used color and most people aren't big fans of the color, but what the hell, let's try to recreate the truck of my dreams when I was a kid!!!

IMG_0993(2).jpg

Anyways, I'm going to save the Seaside blue for another Yota build that I have planned in the future. I think it will fit the look better on that build and I just might add a couple surfboards to it!
 
The orange is going to look good. That seaside blue was nice, too, but I don't think the orange will be disappointing, especially on that body.
 
The orange is going to look good. That seaside blue was nice, too, but I don't think the orange will be disappointing, especially on that body.

Yeah I think so too. I'm saving the Seaside blue for another, not so aggressive looking rig.
 
Couple coats of primer sprayed on today. It's starting to look more and more like something with each passing day!

Hoping to get the basecoat sprayed tomorrow after work. Maybe do a little wet sanding and then lay down some clear coat.

IMG_1020(1).jpg
 
Making great progress today on the V1 Mojave! Paint is just about finished and the interior primed and prepped for paint.

Hoping to have the body and interior all wrapped up this week so that I can get back to finishing up the electronics in the chassis.

IMG_1744.jpg


Here's a little sneak peek body pic. I'm liking how it is turning out!;-)

IMG_1747.jpg
 
Last edited:
Back
Top