• Welcome to RCCrawler Forums.

    It looks like you're enjoying RCCrawler's Forums but haven't created an account yet. Why not take a minute to register for your own free account now? As a member you get free access to all of our forums and posts plus the ability to post your own messages, communicate directly with other members, and much more. Register now!

    Already a member? Login at the top of this page to stop seeing this message.

B-MOW's GSPEED V1-C1 Mojave Class 1 Build

Looking good Brian, I’m looking forward to hearing your feedback on this thing.


Sent from my iPhone using Tapatalk
 
Looking good Brian, I’m looking forward to hearing your feedback on this thing.


Sent from my iPhone using Tapatalk

Thanks Tom!"thumbsup"

I secretly did a little wheeling around the basement without the body. I am impressed! I'll have more details later!:)
 
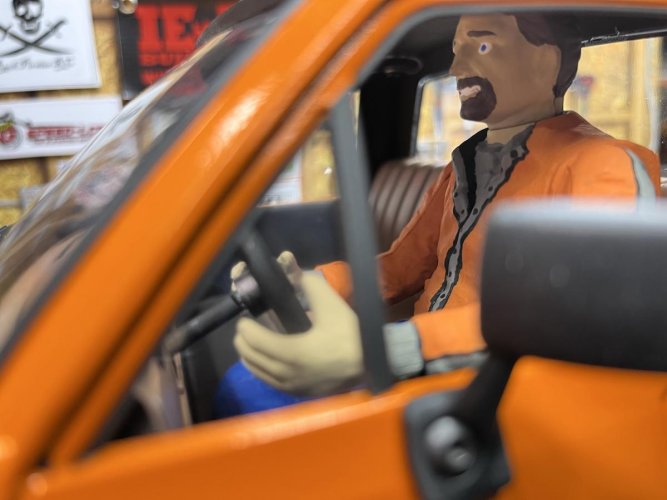
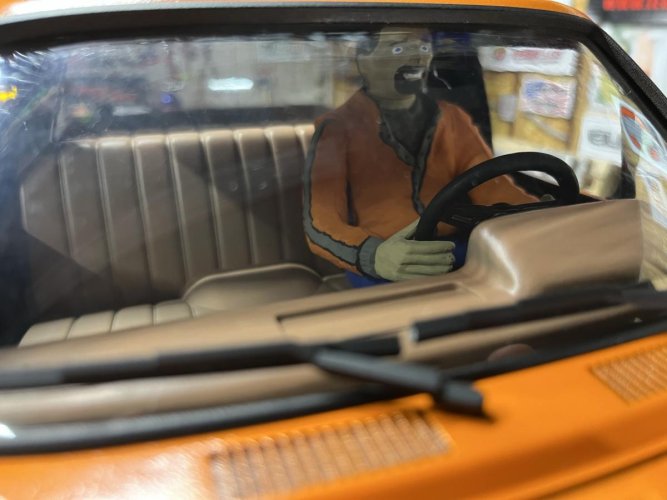
No interior is complete without a driver. Right! Well I don't have a fulltime driver for the Mojave yet, so I recruited a driver that has been hanging out for a few years in my VS4-10 Origin body. He has only seen very little drive time and has been itching to take the controls of a new rig. So I hired him to sit in the Mojave until I have a replacement driver.

Here he is sitting in the Origin. I had forgotten how good this interior looked. I really need to get this body back on a chassis and get it out on the trails!

IMG_1755.jpg

IMG_1757.jpg


Test fit in the driver seat. He looks right at home. Especially since he IS an RC4WD scale driver and is designed to fit in that there seat!

Almost forgot to mention, I ended up spaying the interior with my airbrush. First time using the airbrush, so it was a learning curve to get it to look good. Luckily it didn't turn out too bad! Not perfect, but looks the scale dirty interior look!

IMG_1759.jpg


A few poser pics of him sitting in the cab. He seems to like it. He's smiling!:)

IMG_1760.jpg

IMG_1761.jpg

IMG_1762.jpg

More to come soon. The body details are really close to being done!
 
great always impressed with your detailing and great photography. Those shots always come with enough detail and pleasant position. Plus your builts are always great.
 
great always impressed with your detailing and great photography. Those shots always come with enough detail and pleasant position. Plus your builts are always great.

Hey thanks Speedy!"thumbsup"

I try to get the best pic angle to show it off the best I can. Gotta give most of the credit to my iPhone 13. It's the one taking the great pics!:ror:
 
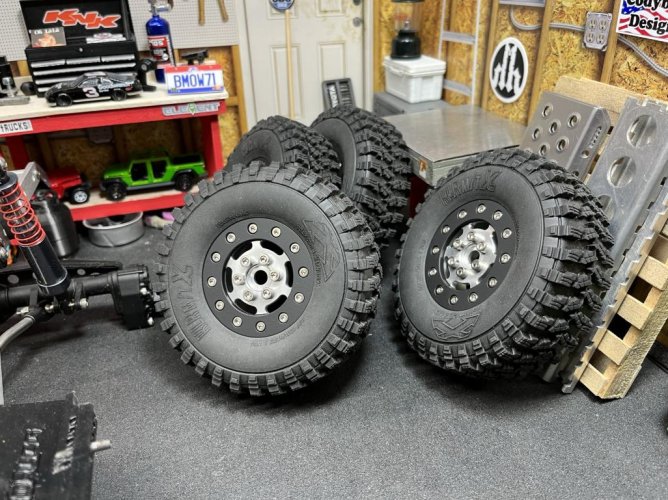
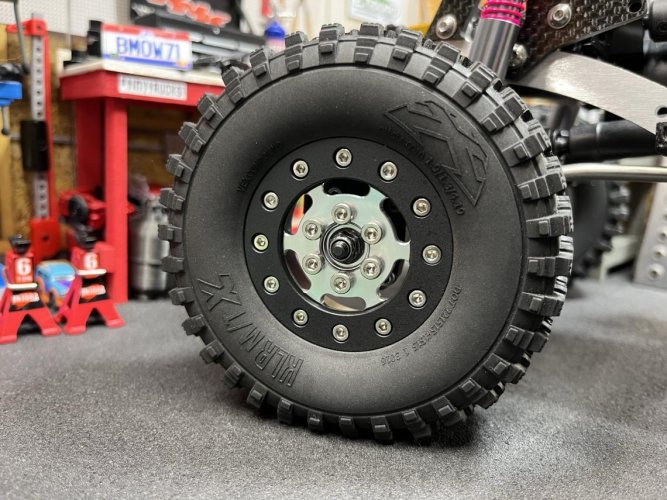
As I continue to work on the body details, I thought I'd spend some time on the wheels and tires. I really wasn't a big fan of the all-silver TGH wheels. I should have got the beadlock rings in a different color to break up all of that silver. So instead of order a new set and wait for them to be shipped, I decided to put some black paint on the rings. I know, I know, the paint will probably just get all scratched off. That'll be ok. The paint is just a temporary fix until I can get an order in for a set of black anodized rings.

Also while I had the wheels apart, I decided to vent the tires. I normally never vent my tires since my area is usually always muddy and watery. But since this rig will mainly be driven only on dry ground, I went ahead and poked holes in them. I recently picked up a leather punch with multiple size holes to pick from. I went with a 2.5mm hole at 12 and 6 o'clock.

Something also that I've been dying to try out is the hair buns in place of foams. I picked up a set of medium 3" hair buns at my local Dollar Tree for about $1 per bun. Super cheap way to stuff the tires with something that wont' mind getting wet and should keep its shape. Gotta give thanks to @DRIsotope for this cool tip! I've been hooked on watching his vids at the Crawler Canyon on the Tube and have been wanting to try this hair bun idea ever since I heard him talk about them.

IMG_1772.jpg

IMG_1773.jpg


All wheels and tires assembled. I think they look much better with the black ring. The matte black should look great with the matte black accents on the body.

I got to say, these TGH wheels are some of the easiest wheels that I've ever put together. So easy with out any fuss. They just slide right together. The hair buns fit great in these little 4.19" tires and they are easy to stuff in around the inner beadlock ring.

They feel really good mounted up. Just the right firmness. They also give a little more sidewall roundness compared to the stock foams. The stock foams were squared off and made the sidewalls of the tires squared off. The hair buns give the tires a more realistic look.

IMG_1774.jpg

IMG_1776.jpg

IMG_1777.jpg
 
Holy crap I need to check in more, been missing updates on this build!

Amazing work B!!!!

Sent from my SM-S906U using Tapatalk
 
Holy crap I need to check in more, been missing updates on this build!

Amazing work B!!!!

Sent from my SM-S906U using Tapatalk

As Ferris Bueller once said "Life moves pretty fast. If you don't stop to look around once in awhile, you could miss it"!:lmao:

On a serious note, this build is long overdue to be completed!:roll: So all of my focus is on it now to get it done, off the workbench and onto the rocks.

As always, thanks for stopping by and checking it out Mr. Tigris!"thumbsup"
 
On a serious note, this build is long overdue to be completed!:roll: So all of my focus is on it now to get it done, off the workbench and onto the rocks

A little over two years - sounds about right!
 
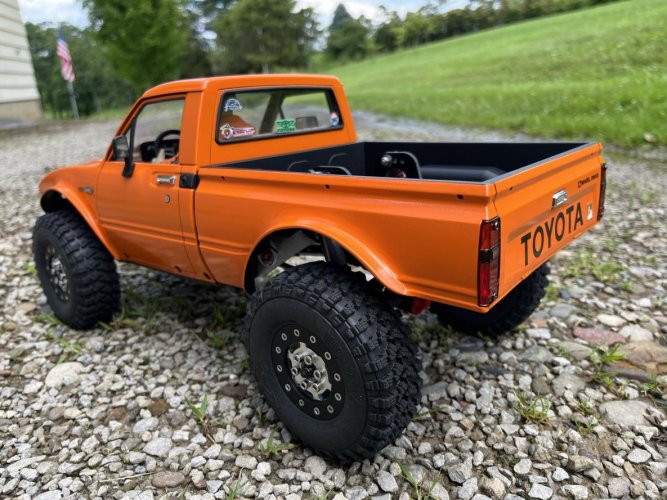
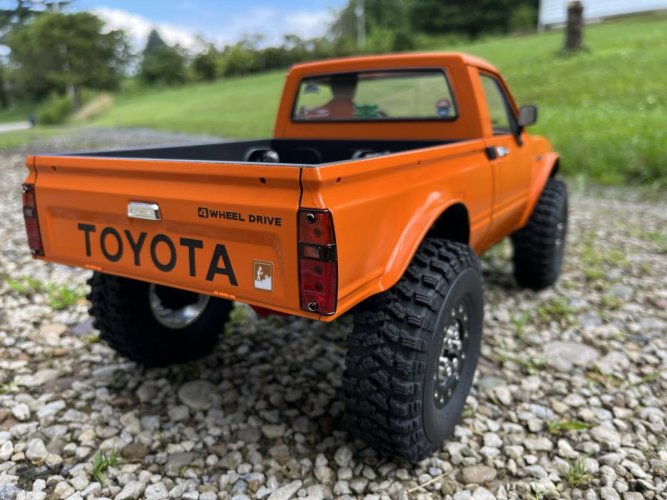
OK, as I wait for my order from Bentmetal Customs to be make its way from California, I figured I'd get some outdoor pics of the Mojave as it sits currently. All paint and details are complete, for now, decals applied and all that is needed is the front and rear bumper and rollbar.

First I'll share some example pics of the Bentmetal Customs items. They are currently ordered and being built and hoping to get them by the end of the week.

IMG_1809.jpg

IMG_1808.jpg


And the "as it sits now" pics. I'll have more details and pics once the bumpers arrive and they are installed.

IMG_1861.jpg

IMG_1862.jpg

IMG_1863.jpg

IMG_1864.jpg

IMG_1865.jpg

IMG_1866.jpg

IMG_1867.jpg

IMG_1868.jpg
 
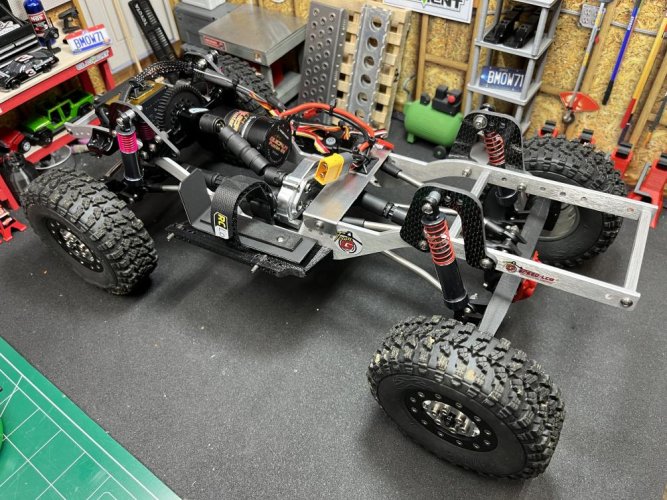
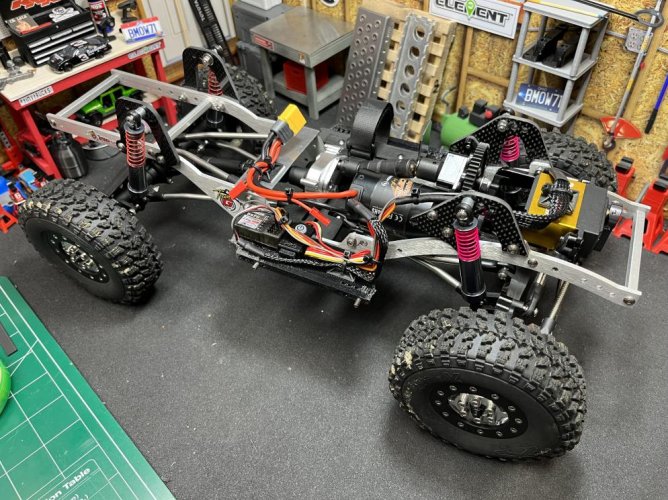
As I wait for the Bentmetal Customs bumpers to arrive, which should be here at the shop late today, here's a few underbody pics of the chassis and wiring debacle.

IMG_1894.jpg


Fabbed up a piece of Kydex to use as a battery holder. Easy battery in and out. The front flap of Kydex protects the battery front tire debris. Drilled a couple holes in the sliders and bolted it in.

Also in these pics is a piece of thin alum sheet I cut and ran across the chassis rails to have a place to tie down wires. I needed something to keep the wires out of the rear driveshaft and this was the easiest and lightest thing I could come up with. I still may come up with a better option later.

IMG_1895.jpg

IMG_1896.jpg


Here you can see just how close the Fusion SE motor is to the top shorty driveshaft. This is with a 13T pinion on the motor. After this pic, I did install a 15T pinion and it increased the gap a bit. The 15T pinion is the biggest I can put on because the bottom side of the motor is damn near hitting the front upper link mount. After a quick test drive, I feel that the 15T paired with the 1200kv Fusion gives enough wheel speed and still has super slow low speed with plenty of torque.

IMG_1897.jpg


Wiring job not great, but It'll do until I take the time to redo it!

IMG_1898.jpg

IMG_1899.jpg


Seeing this pic just reminded me that I still need to finish making the steering link. The plan was to wrap the all thread in a stainless steel tube just like the panhard link behind it.

IMG_1900.jpg

IMG_1901.jpg

IMG_1902.jpg
 
Thats lookin good brian! I wouldnt worry bout that lil wiring nest, the scale mice will take care of it for u lol. Cant wait to see those new bumpers n rollbar mounted in this beauty
 
Thats lookin good brian! I wouldnt worry bout that lil wiring nest, the scale mice will take care of it for u lol. Cant wait to see those new bumpers n rollbar mounted in this beauty

Thanks bama!!"thumbsup"

Bumpers and rollbar did arrive. There is a few modifications I want to make to them before they get sent to the paint booth.

More on that later!
 
This thing should be a performer, and it looks great to boot


Sent from my iPhone using Tapatalk
 
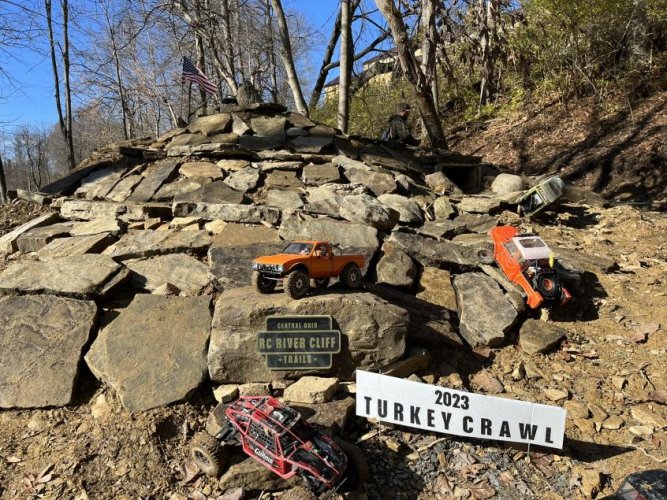
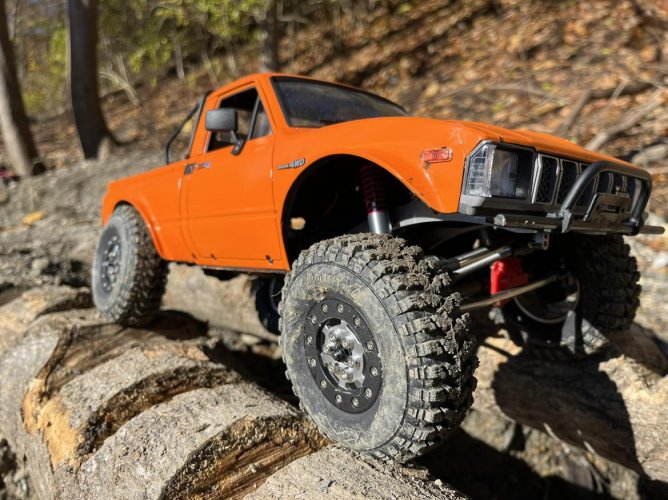
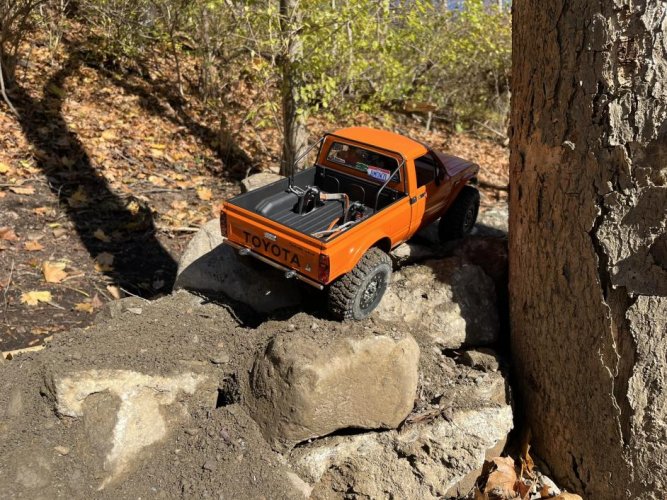
Finally got the Mojave out on some real rocks. I took it this past Saturday to a local event about 30 minutes from home.

The 1st annual RC River Cliff Trails 2023 Turkey Crawl. A group of veteran RC’ers spent the summer preparing a nice piece of land near the Mt. Gilead State Park. They put in a ton of work to make rock trails and different types of obstacles to drive on. It was cool to see Operation 11 Charlie there with there booth setup in support of our military veterans.

This rig was a blast to drive. It is so capable on tough terrain and is a smooth driver out on the trails. I will probably never comp this rig and it may just be a highly capable trail truck, but if I do decide to comp it, I know it'll be ready for whatever I throw at it!

It was like driving a sleeper truck. Everybody thought is was just a RC4WD TF2, until I picked it up to show them!:ror: Man it was fun to drive! Though I have to admit, I did have to learn how to drive it at first. I had my Phoenix portal out before this rig and the Phoenix was pretty much point and shot and it would go over anything. This Mojave is narrower and much lighter and was a completely different driving experience. Once I got my bearings, it was a dream to drive!:)

Edit: If you are on FB or Instagram, I have uploaded some running footage. I'm going to get all my vids sorted out and post them on YouTube soon.

IMG_3104.jpg

IMG_3087.jpg

IMG_3089.jpg

IMG_3088.jpg

IMG_3093.jpg

IMG_3090.jpg

IMG_3098.jpg

IMG_3095.jpg

IMG_3131.jpg
 
Last edited:
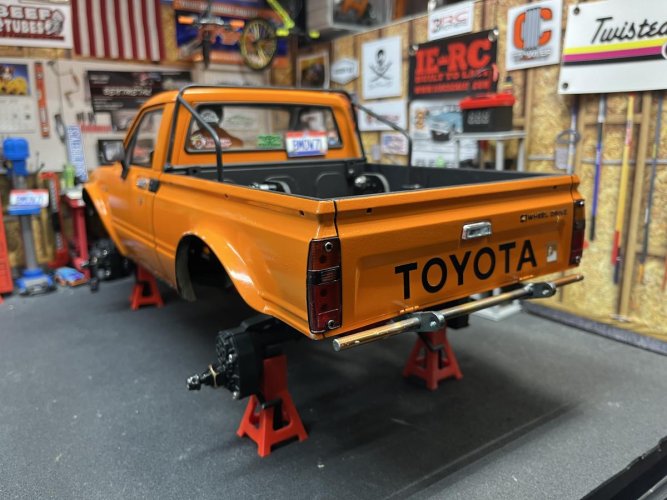
Took some time today to get the Yota cleaned up from its last outing last November.

The rear bumper that I had on there was a temporary add on just to protect the rear of the body. I didn't like how it looked and it wasn't mounted to the chassis very good. I was only able to get a bolt in on each side of the bumper mounts. I also didn't like how far back the bumper sat behind the tailgate.
IMG_4093.jpg

IMG_4096.jpg

So today I cut a new piece of 3/16" rod to match the width of the rear of the bed. The other bumper rod wasn't wide enough to protect the bed corners under the taillights. I had one set of Scale Metal Supplies bumper tabs left, so I got it silver soldered up. Again, not the prettiest, but it'll do.

I drilled a new hole in each side of the chassis rails so that I could get 2 screws on each bumper mount to hold it firmly.

IMG_4097.jpg

IMG_4100.jpg


In order to get the bumper up higher and tighter to the tailgate, I cut notches in the tailgate for the bumper mounts to slide up into. Not great for looks, but better for the departure angle.

I went ahead and sprayed some flat black paint on it to match the front bumper and roll bar. As the paint gets rubbed off and chipped, I'll let it weather itself with rust.

IMG_4098.jpg

IMG_4101.jpg


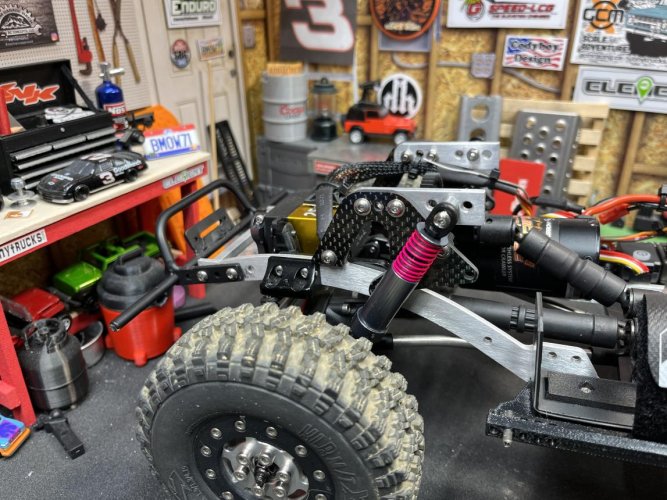
I wasn't happy with how tall the front end stood at full shock compression/ride height. The shocks were bottoming out and the front axle still had room to tuck into the chassis further. I decided to make a set of shock keys out of some scrap alum bar that I had. I mounted the shocks further back to get the up travel needed to lower the ride height.

I also had to notch out the front of the interior and windshield lexan where it attaches just behind the hood. With the shock keys installed, they were hitting on the front edge of the interior and wouldn't allow the body to clip into place.

Now the front end sits nice and low and looks much better. It matches the height of the rear end. I didn't have to adjust the rear shocks since they already had a good ride height.

After I got all of the modifications done, I took some brown paint and lightly dabbed all of the paint chips that the body received from its last outing. It's kinda hard to see in the pics, but I tried to mimic rust spots on all of the chipped paint. As I run this rig more and it gets more paint chips and scrapes, I'll add more brown or rusty paint in the future to help age and weather it.
IMG_4102.jpg

IMG_4103.jpg

IMG_4107.jpg
 
Nice little mod to the ride height and rear bumper. Such a good looking C1! I'm way overdue for some hardbody builds.
 
Back
Top