• Welcome to RCCrawler Forums.

    It looks like you're enjoying RCCrawler's Forums but haven't created an account yet. Why not take a minute to register for your own free account now? As a member you get free access to all of our forums and posts plus the ability to post your own messages, communicate directly with other members, and much more. Register now!

    Already a member? Login at the top of this page to stop seeing this message.

Where do I go from here?

So try try again!!! Thankfully the pin and retainer are the same in the front axle shafts, so at least I’ll be able to try and maybe run a pack or two through it.That setup is so stupid!, they put a 1 mm dia. pin on the dog bone side and a .05 or whatever stupid azz small size they used in the other. It makes no sense! I’m going to do something with that for sure.
 

Attachments

  • F76FEDA8-38E2-4BB7-B867-3875AF0712E9.jpg
    F76FEDA8-38E2-4BB7-B867-3875AF0712E9.jpg
    91.2 KB · Views: 366
Last edited:
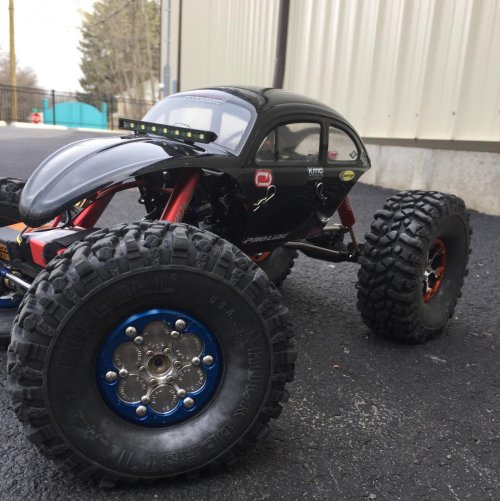
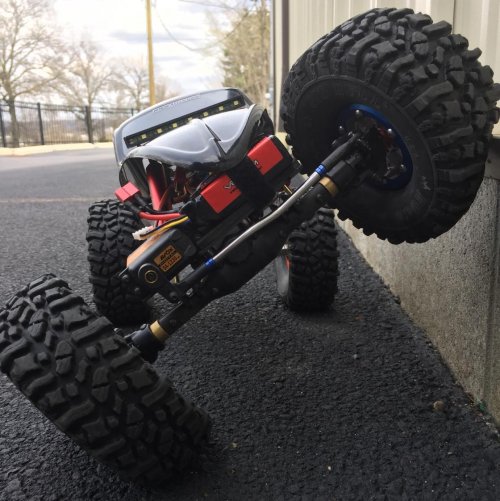
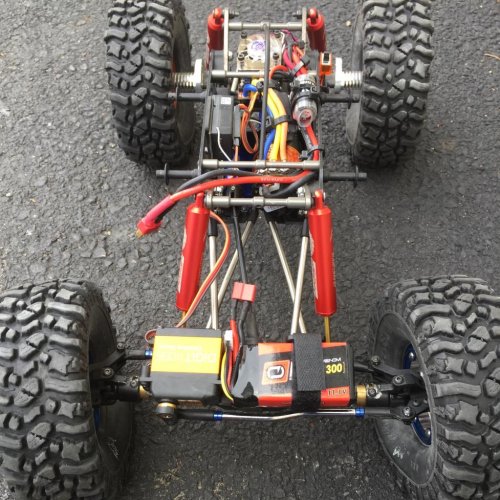
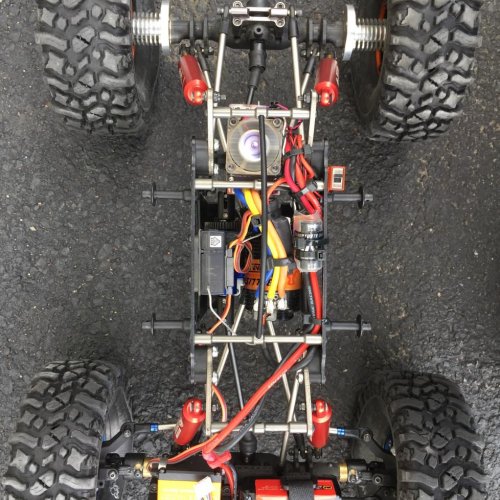
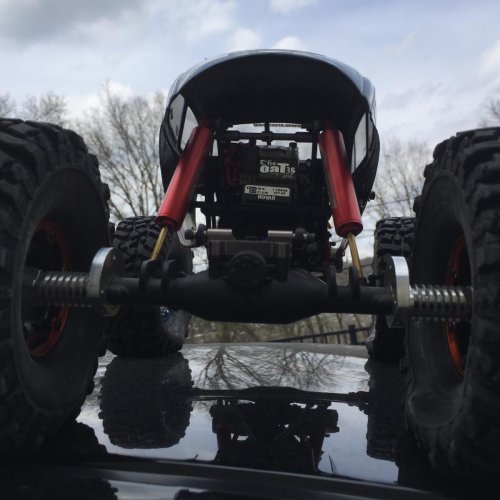
Got some different wheels and tires some VP DH II ‘s up front with 475 hubs ands set of VP SLW V4. Right now I have all the slugs in the front witch is way too much but I still haven’t got to crawl much with it, it’s been an extremely rainy spring so far . So I’ve just been working on it. Then in the back I put the stick on wheel weights inside got 2.5 oz in them.then wrapped them in Pitbull Rock Beasts 2.2 x 5 5/8.comp compound with the OTtSix foams I had. also stopped at the local hobby shop and got a couple new batteries , Venom 30c 3s 1300mah ,and re done all the wiring. And I replaced the steel steering rod with a Vp Ti 150mm x3/16 that’s about all I guess.
 

Attachments

  • 46ABE5B6-1848-4509-A1AD-002FE87870AC.jpg
    46ABE5B6-1848-4509-A1AD-002FE87870AC.jpg
    177.6 KB · Views: 343
  • 7D4A2CDF-36BB-4982-B372-29561017062D.jpg
    7D4A2CDF-36BB-4982-B372-29561017062D.jpg
    180.2 KB · Views: 341
  • 0A8EE890-42B3-40D8-93ED-74E517D4FA68.jpg
    0A8EE890-42B3-40D8-93ED-74E517D4FA68.jpg
    190.8 KB · Views: 340
  • 3E26E753-D61C-4CFD-BBB1-73A7CE25FA8B.jpg
    3E26E753-D61C-4CFD-BBB1-73A7CE25FA8B.jpg
    189.3 KB · Views: 359
  • 58400ADD-F6C1-4283-8948-2AF49FE15BD1.jpg
    58400ADD-F6C1-4283-8948-2AF49FE15BD1.jpg
    114.3 KB · Views: 347
Last edited:
did you put a spacer or weight under the battery?

It’s actually a piece of closed cell foam that the shocks were packed in. I was going to put a piece of double sided tape on to hold it in place but I really didn’t like the idea of all the other crap that would stick to it. As you can see in the pic the bottom come off the packing , it’s about 3mm thick, then I have double sided tape that is real thin basically just the sticky stuff on both sides and stuck it on.
 

Attachments

  • 1DF26E04-9E98-4BF1-9C5A-D41CC494838C.jpg
    1DF26E04-9E98-4BF1-9C5A-D41CC494838C.jpg
    111.2 KB · Views: 317
  • 83DE5511-607F-4857-B8C3-1415501CE526.jpg
    83DE5511-607F-4857-B8C3-1415501CE526.jpg
    109.7 KB · Views: 332
Last edited:
I made a little aluminum hold Down for the servo wire. I didn’t like how it looked way out and rubbed on the shock . Just a piece of thin ga. house hold flashing cut to length and used my body hole reamer to make the holes. I took the screws out pulled the o- ring off put the hold down on then reinstalled the o- rings to keep it as water tight as possible.
 

Attachments

  • 0D16C09F-D254-4A5B-8013-0307C48E455B.jpg
    0D16C09F-D254-4A5B-8013-0307C48E455B.jpg
    96.7 KB · Views: 334
Im going to de anodize the bead lock later on today then I’m going to try and anodize them myself . I just need to get an adjustable power supply and we will see lol. Looks easy on the web .
 
I made a little aluminum hold Down for the servo wire. I didn’t like how it looked way out and rubbed on the shock . Just a piece of thin ga. house hold flashing cut to length and used my body hole reamer to make the holes. I took the screws out pulled the o- ring off put the hold down on then reinstalled the o- rings to keep it as water tight as possible.

descent idea
 
Well I’ve gotten this far. Rings are stripped to bare aluminum. Anodizing tank made. I’m using titanium rod for the anode side . That’s the rode they are hanging from both the horizontal and vertical. I’ll use it for the cathode as well. Hope I have time to do them tomorrow idk we will see.
 

Attachments

  • 0201BF04-810D-40B6-B0AA-0B27E0A8FBF5.jpg
    0201BF04-810D-40B6-B0AA-0B27E0A8FBF5.jpg
    120.5 KB · Views: 347
  • 14F38BC2-776E-43A6-94CA-DBBF12E9F9AD.jpg
    14F38BC2-776E-43A6-94CA-DBBF12E9F9AD.jpg
    124.9 KB · Views: 312
  • 5D1EE3E0-AC46-48A8-BDD7-D4DCDCBFD4F3.jpg
    5D1EE3E0-AC46-48A8-BDD7-D4DCDCBFD4F3.jpg
    114.7 KB · Views: 310
  • 914D13CC-BA32-4F4B-A99D-F806A4201EBC.jpg
    914D13CC-BA32-4F4B-A99D-F806A4201EBC.jpg
    126.6 KB · Views: 300
First runs a flop. Need better anode wire. I tried titanium it anodized b4 the aluminum and killed the currant. Try again tomorrow
 
Yay the second time was a success!
 

Attachments

  • 2AD6BED1-D193-4037-A835-4C902D4C43ED.jpg
    2AD6BED1-D193-4037-A835-4C902D4C43ED.jpg
    115.7 KB · Views: 266
  • 8A7FB554-4ECC-49AA-B121-41F4C4A2E8C2.jpg
    8A7FB554-4ECC-49AA-B121-41F4C4A2E8C2.jpg
    193.4 KB · Views: 273
  • AD7BA6BE-58A5-43A2-B0E4-CA5BC95E4428.jpg
    AD7BA6BE-58A5-43A2-B0E4-CA5BC95E4428.jpg
    199.4 KB · Views: 278
Thank you tib. I’ve always wanted to try doing it so i figured what the hay. They aren’t perfect but they will match now. I bought an adjustable power head for doing anodizing so I may change all the colors make everything match side plates and all
 
Hey guys long time no see. I ran this rig all summer. I let my buddy control it and he thrashed on it, and I have to say it held up very well! Other than the driveshaft pins coming out the first time I had no other big problems. Now it’s tear down time to see if there is any internal damage. The only thing I can notice is there’s a lot of slop in the front axel. Well I can rotate the tire about a quarter turn or so . So I’m hoping Codyboy Designs is still Peckering around in his shop.. so it looks like I’ll be posting some stuff once I get it ripped down. I want to anodize all the aluminum to what I want and not to how it comes lol . I’m not sure what colors yet but no biggie yet lol. Ok I’ll ttyl have fun guys that’s what it’s all about !
 
Last edited:
Well I’ve been lookin for a while now for the right center driveshafts. There is a bunch of them out there but most of them are really big in diameter. So I just did a generic search on eBay 1/10 rock crawler and the first item was the perfect shafts they are the Hot Racing Axial AX10/SCX10 109-135mm. I also purchased a set of CCR lockouts for the back axle and have been rounding stuff up to get everything I need to get my anodizing stuff done . Looks like I have to pay the site to put up some pics. I’ll get that done this week.
 

Attachments

  • B86DEEB0-E862-4351-BA29-6ACAB2FB113E.jpg
    B86DEEB0-E862-4351-BA29-6ACAB2FB113E.jpg
    86.7 KB · Views: 127
Last edited:
Back
Top