• Welcome to RCCrawler Forums.

    It looks like you're enjoying RCCrawler's Forums but haven't created an account yet. Why not take a minute to register for your own free account now? As a member you get free access to all of our forums and posts plus the ability to post your own messages, communicate directly with other members, and much more. Register now!

    Already a member? Login at the top of this page to stop seeing this message.

Tips and Tricks Thread

Low body mounts for front and rear. Make sure to re-enforce your lexan body.
c5b59c2e.jpg


8485a23b.jpg


DSC02437.jpg
 
Re: factory honcho bumper mod!!

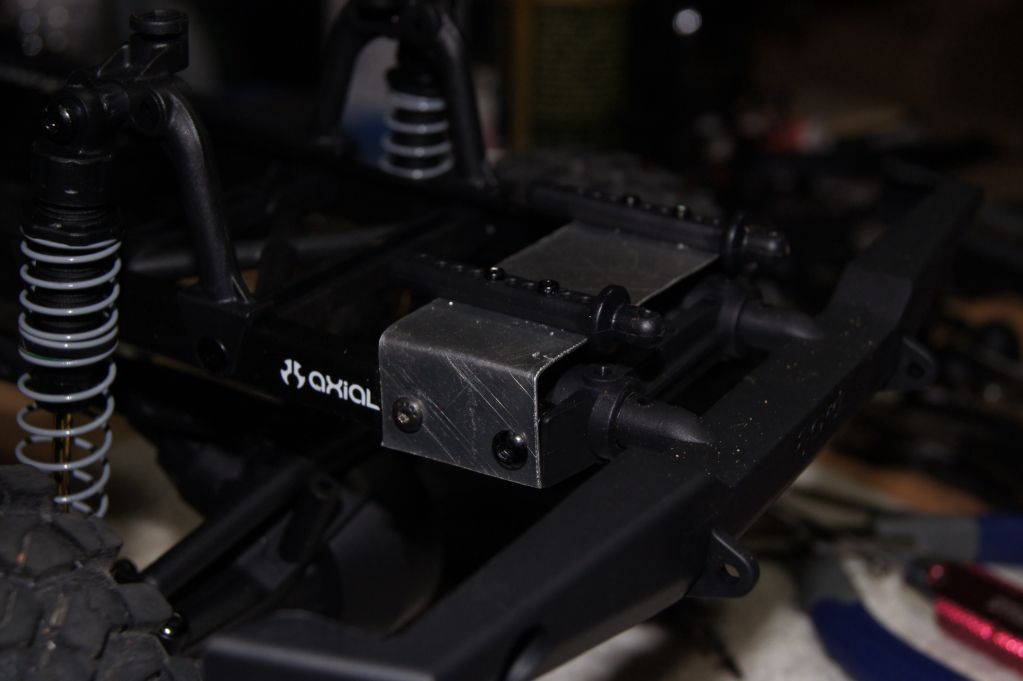
"ok once you have the bumper removed you will see the crossmember that holds the bumper.remove the crossmember and then set it on top of the frame,as shown in the pic.now is the time to take your measurments or like me make a pattern with the holes in it for quick tranfer over to your bracket material."


I just tried this with some spare parts that I never throw away. I know some of us will have broken rear shock towers from a Rustler, especially if it's a nitro. You can use the bottom center mounts to do this. It's beefy and the holes are lined up just right. A little filing to get it in shape is needed but very easy. I will get a picture soon. Worked perfect, no drilling required.
 
Little Axial 8-hole Resto!

I had some old worn out axial 8-hole beadlocks that the chrome started to flake on and the rings were all scratched to hell and decided to experiment with textures! :shock:

Well this paint is the best lookin so far with minimal prep just took a wire brush to the remaining flakes, cleaned the surface with some paint thinner and laid two coats about 15min apart and then 6hrs in the Texas sun and presto new life to old tired wheels and a big shout out to MThead for the sick FT03 rings!

IMAG0178.jpg


IMAG0179.jpg


IMAG0180.jpg


Sent From Outerspace Using my HTC-Freeze Ray Gun
 
I wrapped lead solder around a screwdriver a few times. Once thick enough used it in my axles along the shafts as added weight down low. Since my dingo was my first scale build I didn't think about weighing the tires first before gluing, so I had to come up with something else. Adds a fair bit of weight with no binding. Will take pics next time I open'er up. Also noticed that my associated truggy/buggy front springs work on the scx 10 and have excellent spring rates for it!
 
I was looking for ideas for lighting my Tamiya Hummer and ran across this from Roland rockshop. Sounds like a good idea.


use the cap off a sharpie.
cut the end where the clip is @ 1/2 in or less from end
whatever you want.
drill out the back and thread ur led threw,may have to use a lil heat.
violia a light bucket
Share
| Like
__________________
"ROLAND ROCKSHOP"
"..wear your scars like medals.."
Dinky Rc Team driver RC4WD
FEEDBACK
 
We all know how much our shock scx10 shocks leak... but I found a way to almost eliminate that!

1: Take off the cap on the bottom of the shock body
2: remove the bottom O- ring
3: repalce it with a traxxas blue O-ring

TIP: it is a tight fit, so be sure to get it in all of the way.

I hve done this, and it hasn't leaked since!

Good luck! "thumbsup"
 
ax10wannabe...you can bend your factory sliders up with alittle heat and make them form to the bodyjust like a real slider.mine was terrible when i first got it but didnt want to remove them so with some heating and bending i have got a fix..this is if you dont want to cut them and want to keep them on..

100_0839.jpg


100_0840.jpg


100_0843.jpg


100_0845.jpg


i hope this will help some!!!


is it me or is the third pic down, looks like your windows are open? pretty cool!"thumbsup"
 
I just did a headlight job on my JK and thought I would share it with the group. I took 2 Maglite flashlights and took them apart and used the buckets and lenses. Let me know what yall think.
 

Attachments

  • Rig6.JPG
    Rig6.JPG
    17.6 KB · Views: 6,015
  • Rig4.JPG
    Rig4.JPG
    11.9 KB · Views: 5,970
  • Rig1.JPG
    Rig1.JPG
    17.4 KB · Views: 6,028
  • Rig3.JPG
    Rig3.JPG
    12.9 KB · Views: 5,963
  • Rig2 (3).jpg
    Rig2 (3).jpg
    19.5 KB · Views: 6,020
So. What's up with bent links on a honcho?? Just throw and go?
Seems like a good idea for clearance. What size?
 
So. What's up with bent links on a honcho?? Just throw and go?
Seems like a good idea for clearance. What size?

Fronts lowers are 98mm and Rear lowers are 106mm fleabay has some 91mm and 101mm bent links and you could use a 5x6 spacer to get it to be 96mm an 106mm or some longer rod ends to get the right wheelbase again "thumbsup"

Sent from Outerspace Using My iFreeze Ray Gun
 
Subscribing....or trying to since I just got the new tapatalk2 forum app on my iPhone. Getting a honcho Friday. Trading my wraith for one
 
Someone said my favorite scx10 mod I did should be in here, so here it is.

I ran the Proline power Stoke scaler shocks on my old Honcho and really liked them. One of the best mods in my opinion for the scx10 trucks is to angle the shocks. I use a Level3RC lift mounted sideways, but a homemade setup could be easily made. This is my current Honcho I'm just getting started on. It has the stock shocks now but will be getting the Proline. This is what I mean by angling the shocks. It gives a little bit of lift and improves flex and stability. Also with this setup and the longer shock ends on the Proline power strokes, it clears 2.2 tires nicely.
NOTErized!
ge3a6ugy.jpg

NOTErized!
 
Last edited:
And one tip to make this easier to do,

If you mount the lift sideways the screws don't quiet line up with the holes in the shock hoop. They are very close but just a little off. You will need to start both screws and tighten them in evenly until the bracket tightens down to the shock hoop. If you just tighten one screw all the way in then try to put the other one in you will have a hard time. It works great.
 
Last edited:
Back
Top