• Welcome to RCCrawler Forums.

    It looks like you're enjoying RCCrawler's Forums but haven't created an account yet. Why not take a minute to register for your own free account now? As a member you get free access to all of our forums and posts plus the ability to post your own messages, communicate directly with other members, and much more. Register now!

    Already a member? Login at the top of this page to stop seeing this message.

B-MOW's Garage...Misc. Projects and Random Rig Builds

As mentioned in a previous above post, I'll be using the Phoenix body for the time being until I eventually pick up a clear Fordyce body. I spent this past weekend finishing up the body work and paint on the body and interior.

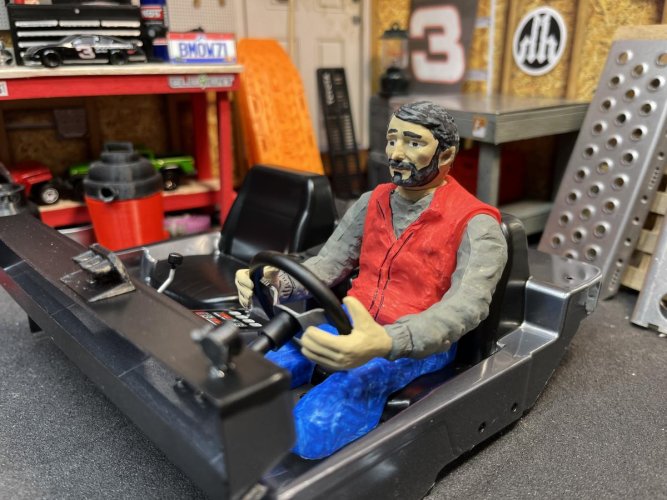
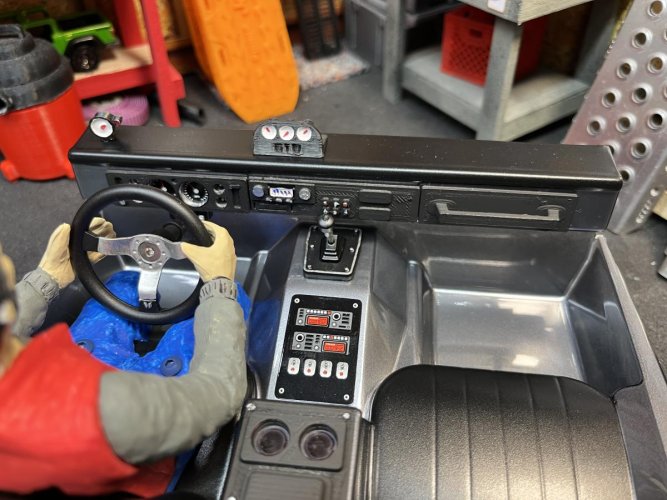
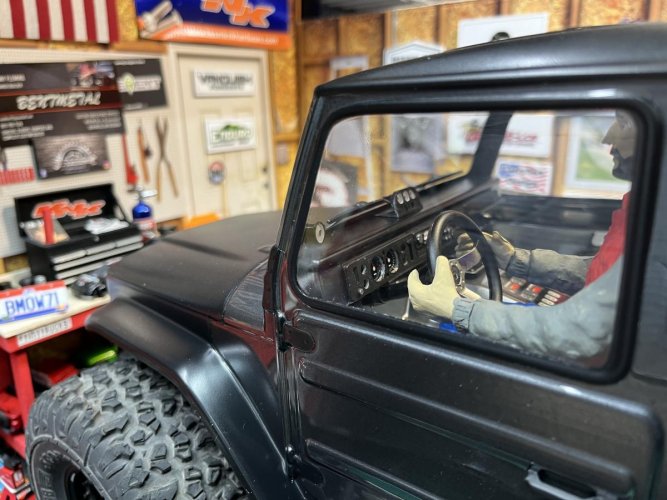
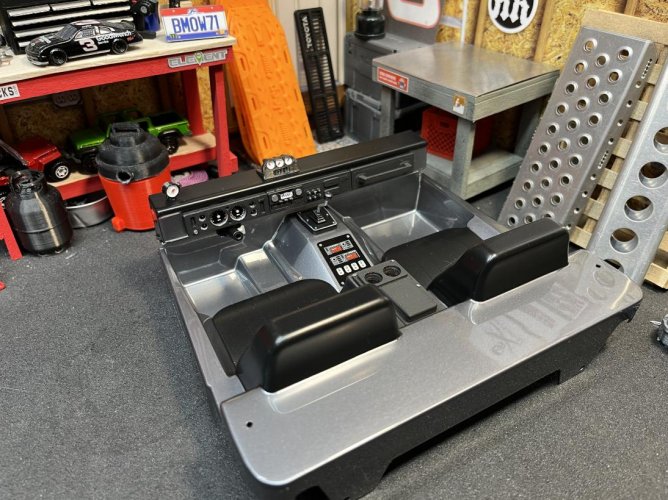
Did a simple paint job on the interior. No floor carpet, just bare steel floorboards, transmission hump and black vinyl seats and black vinyl dash pad. I added some 3D printed dash and cluster pieces and center console to jazz up the look a bit. Painted them a flat black and dabbed them with some color.

Also added an aftermarket 3D printed tachometer and gauge cluster on the dash to keep track of the engine performance.
IMG_2629.jpg


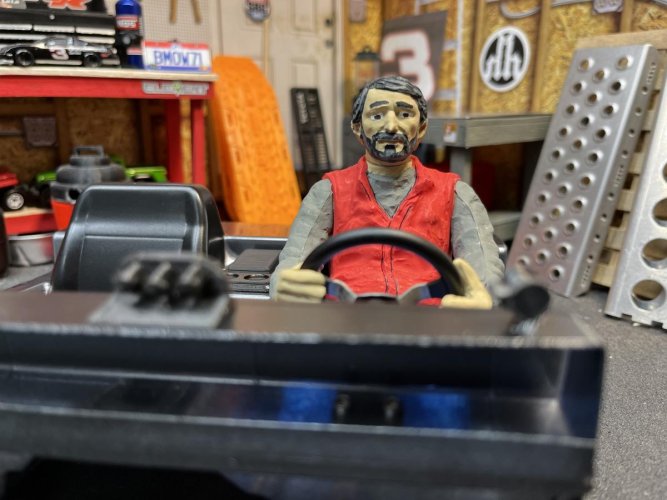
I talked Burt into putting on his Buckeye's jacket and strapping in to do the driving duties!:)

IMG_2631.jpg

IMG_2632.jpg

IMG_2634.jpg

IMG_2636.jpg

IMG_2637.jpg


I still have a few more body details to take care of, so I'll get them pics posted at a later date.
 
Last edited:
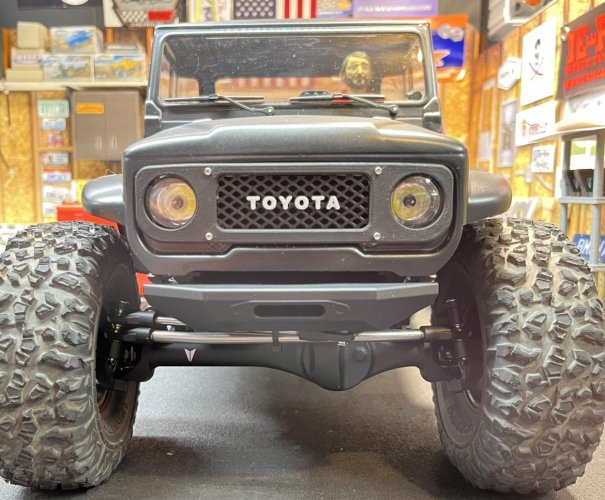
Back to the 3D printed grille. I found it on Etsy. It is designed, printed and sold by Shaka Hobbies. Very nice quality and looks great! The white Toyota lettering is actually white plastic printed on the black plastic grille.

The outer bezel is printed in white. I sprayed it with a couple coats of flat black paint. I probably should have sanded it first to make it look smoother.:roll:

The front body mounting pin goes thru the bottom of the grille, so we shall see how it holds up and if it will survive some rock bashing!

The light buckets have to be screwed on to the body first and the bezel covers the bucket screws. The other issue this grille may have is that the only mounting screws holding it to the body is the tiny screws that go thru the front of the bezel. Also in order for the black grille part to fit, you have to cut/trim a bigger hole in the lexan making the whole front headlight/grille clip weaker. I did line the backside of the lexan body with Gorilla tape before I installed the grille. Hopefully that helps to keep it all together!

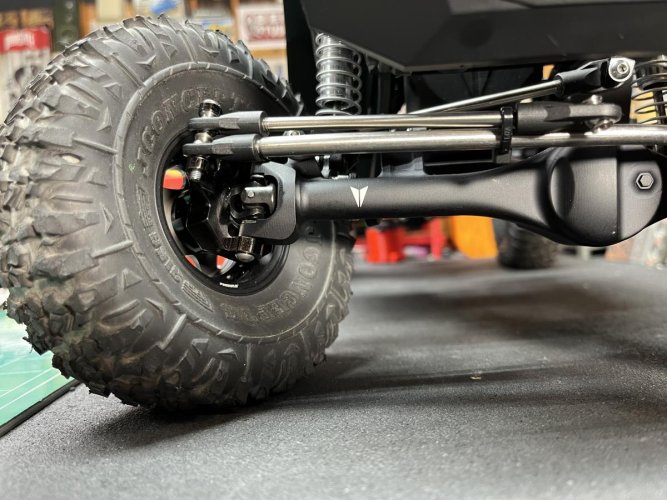
OH and just look at that axle!8)

IMG_2640.jpg


Back to the wheelbase stretch. Here show how much the front axle moved forward. The left piece of tape is the stock position. The middle is the 128mm link with stock rod ends and the right piece of tape is the 128mm link with 1 stock rod end and 1 RPM long rod end.

The front of the tire is nearly even with the front bumper. I'm hoping by moving the axle forward, I'll have less trimming of the fender flares for tire clearance when the tires turn and stuff into the fender wells. By lowering the shocks with the -5mm rod ends, the tires do rub the fender flares a bit.

IMG_2611.jpg

IMG_2612.jpg
 
Looking good so far. Pretty aggressive front axle position! Now that I’ve seen a few people do it, I’m wanting to do the same to my Phoenix.

The grille is a really nice touch as well, hope it holds up for you


Sent from my iPhone using Tapatalk
 
Looking good so far. Pretty aggressive front axle position! Now that I’ve seen a few people do it, I’m wanting to do the same to my Phoenix.

The grille is a really nice touch as well, hope it holds up for you

Sent from my iPhone using Tapatalk

Thanks Tom!

I was shocked that with that much forward push that there was no interference with any link or panhard link. I may do the same to my OG Phoenix.

The axle is nice, but those wheels have my total attention. Wow, they look nice! "thumbsup"

I'll have more wheel glamour shots and info for you later today!!:)
 
Dang brian, that grille looks great! Reminds me of that nelly song grillz lol.

Movin the axle forward really changed up the approach angle alot

Sent from my SM-A516V using Tapatalk
 
Dang brian, that grille looks great! Reminds me of that nelly song grillz lol.

Movin the axle forward really changed up the approach angle alot

Sent from my SM-A516V using Tapatalk

Thanks man! Nelly! I kinda see the similarity!:lmao:

I'm stoked at how well the front axle stretch turned out!

The axle is nice, but those wheels have my total attention. Wow, they look nice! "thumbsup"

These are Boom Racing ProBuild wheels. This set has been on a few of my builds and they never really found a home...until now.

When I purchased them new a couple years ago, the were the 1.9 CFS Adjustable Offset Aluminum Wheel Set. The had carbon fiber faceplates with black scale hardware and had the XT504 hubs. These were bought to go on my Class 1 GSpeed build so that I could get the narrowest axle width to keep the tires under the Hilux body. I wasn't happy with that, so they moved on to another rig.

IMG_2654.jpg


Currently this is how they are setup. I ditched the CFS carbon fiber faceplates and bought the 1.9 SV5 aluminum faceplates in gun metal and added some scale lug screws. I'm still undecided if I will adjust the faceplate offset to make the width wider.

I did have to modify the hubs to fit the VP style hexes that has the lip on them. I crudely used a big drill bit to make the step in them. Not pretty, but it works!:ror:

IMG_2651.jpg

IMG_2650.jpg

The cool thing about these wheels is that there are many different faceplate styles, colors, hub offsets and many different options to change the look. I now have a few sets of these and are one of my favorite wheels to use.

Dixieland RC in Georgia is the best place to buy these here in the states. He has the biggest selection to choose from and he ships them fast. These can also be found on asiatees.com, but the shipping cost and time may be higher.


Another set that I have are on my first Phoenix. These have the same SV5 faceplate in red and the wheel barrels are in chrome and have the black lug scale hardware. On these I have the faceplates mounted in a wider position.

IMG_7976.jpg
 
moving the axle forward gives it a really nice stance B-Mow... The Pro-builts are definitely in my radar at some point but I always get suckered into the CNC's and VP's but lets hope for some good deals over the Black Friday sales. Having the ability to change the offsets, faces, hubs and barrels is a game changer to optimize the looks and performance. The Dark Phoenix is looking sharp, The fordyce body is going to look great if you are going to give it a similar paintjob.
 
moving the axle forward gives it a really nice stance B-Mow... The Pro-builts are definitely in my radar at some point but I always get suckered into the CNC's and VP's but lets hope for some good deals over the Black Friday sales. Having the ability to change the offsets, faces, hubs and barrels is a game changer to optimize the looks and performance. The Dark Phoenix is looking sharp, The fordyce body is going to look great if you are going to give it a similar paintjob.

The ProBuilds are cool wheels because of the number of offset possibilities. I too normally use VP wheels, but when I need a special offset or look, the ProBuilds are my first choice. I too am looking forward to Black Friday deals!

Thanks! I'll have more pics of the Dark Phoenix later when I get it closer to completed. And yes, the plan is to paint the Fordyce body the exact same color and scheme. That way I can reuse the rear cage and bedsides since they will be the same color."thumbsup"
 
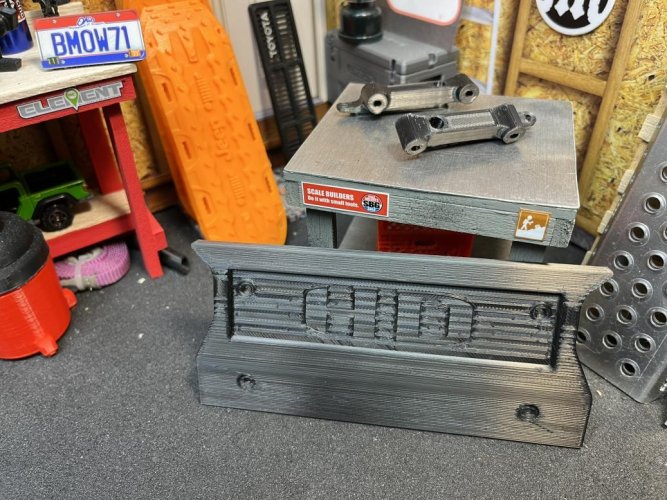
On one of the latest Harley Designs Fordyce budget build videos, he designed and printed a tailgate and a few different designs of roll bars and offered them up for free to download. Both look great and IMO give the bed area of the Phoenix and Fordyce a much better look.

I printed the tailgate and tailgate mounts and then gave them a quick scrub with some sandpaper. Added a couple coats of flat black paint to dull down the PLA filament look. I still want to add some detail to the tailgate and possibly imbed a spot for my license plate.

On the rollbar, I chose to print design #6. I thought this was the better looking rollbar. It's printed and de-tree'd. I still need to give it some sanding and then I'll add some flat black paint to it too.

I'll get better views of these once I have them completed. I still have some more details to add to the exterior body before I show it off.

IMG_2760.jpg

IMG_2776.jpg

IMG_2773.jpg

IMG_2777.jpg
 
The tailgate looks good. Might have to print one for my Phoenix

Hey thanks! I wish it would have come out a little smoother, but it'll be ok once it gets dirt on it. I think once I add more detail to it, it will look even better.
 
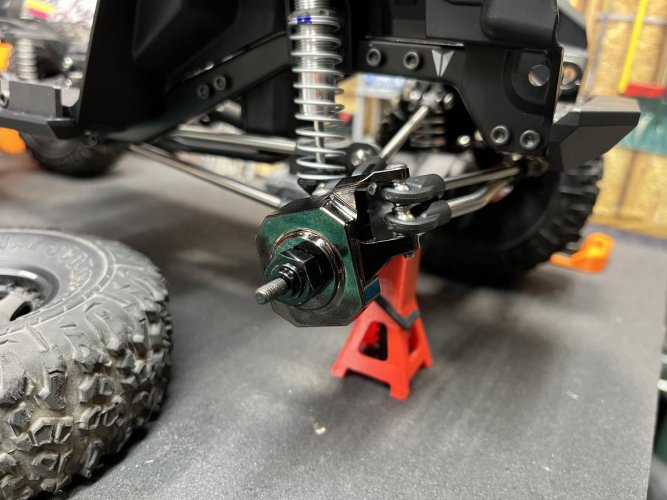
Small update. I received the motor and brass knuckles yesterday. Also picked up another Twisted Tree RC antenna for this build. Love these little antennae!

For now I installed the SSD brass knuckles. Man these look so good in person. I have these same brass knuckles on my Element Enduro and they have been great!

I'll get the motor dropped in at a later date. I'm still waiting on alum standoffs and alum motor plate for the VFD Twin.

IMG_2805.jpg

IMG_2812.jpg

IMG_2813.jpg
 
Do you get more angle with the SSD knuckles?


I didn’t, but I think I need to remove the limiting screw that is in the aluminum axle housing. With the screw removed it should get the same or more steering angle.

I’ll pull the screws out tomorrow and let you know.


Sent from my iPad using Tapatalk
 
Way behind on updates and a lot has happened since the last. Not sure where to start so I’ll just start with this.

My newest Fordyce build with a Phoenix body that I last posted about did get completed (well, enough to drive, they’re never really finished are they!). I’ll try to start where I last left off. Since I’m using the VFD Twin and I have the OD locked into the smaller overdrive option which right now I can’t remember what the percentage is. I decided to cut the lever off so that I could free up some space on the slider. My plan is to mount a waterproof receiver box in this spot.

I cut the lever off just enough to sit right inside the OD box. Luckily a blank off plate is included on the parts tree in the kits. I also snipped off the OD servo mounts on the slider to free up more space.

I left the DIG lever alone for now. It is locked out and I may add a servo for that in the future.

fea54d4453efa00a7d2f4cc2ef37927c.jpg


9fdb779b1804b84d23e366facb8d6204.jpg


1b770d978099df6a538e9c0ee4e9bddb.jpg


Sent from my iPad using Tapatalk
 
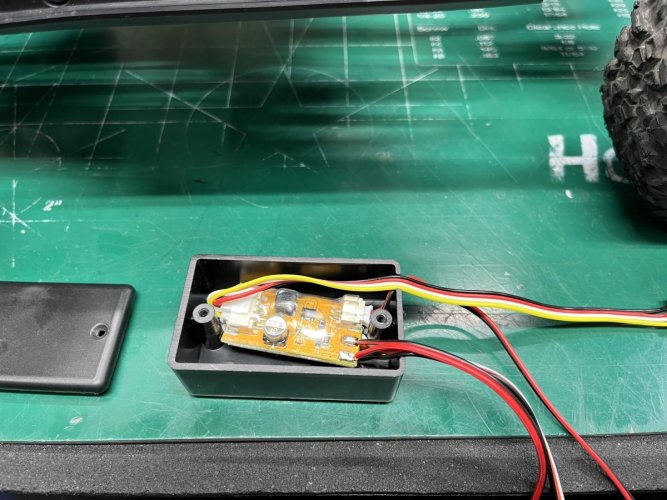
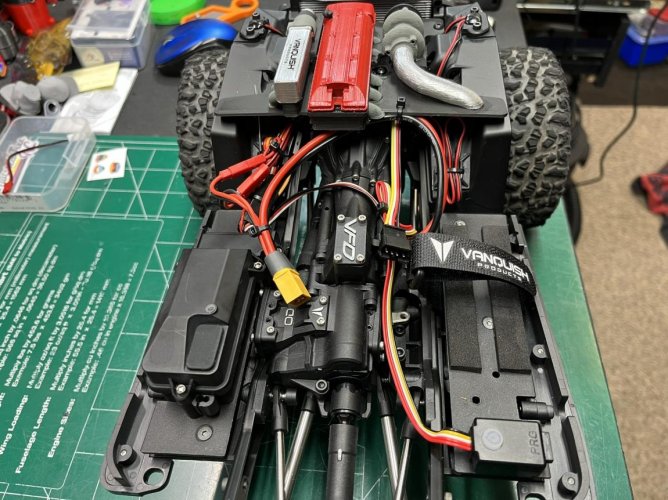
Here's the next batch of pics. These are showing that the electronics are in and functional. I picked up a cheap receiver box to house the Incision light kit control board. It's not completley waterproof, so I squirted some silicone caulk around the lid and wires. It fit perfectly up beside the steering servo and is low enough that the @HarleyDesigns 3D printed motor bolts right in above it.

IMG_3048.jpg

IMG_3052.jpg


For the receiver box, I found a Traxxas clone on the Amazon. It fit perfectly beside the OD box on the slider. I did have to use spacers to lift the slider plate up so that the rec. box would bolt on flat.

I also spaced up the slider plate on the passenger side so that I could mount by battery on this side. Mounted the on/off switch right behind the batter area.

In these pics, you can also see that I mounted the rock lights into the inner fenders. I used my black glue gun stick to cover the LED light on top to help keep the light from shining in the cab.

The @HarleyDesigns 3D printed motor painted and attached. I painted this one to match the one that I sent to @indybama a few weeks ago for his Phoenix.

IMG_3053.jpg

IMG_3054.jpg

Next up is the exterior body details. Soon!!!!!
 
Here's the last of the garage pics before The Foroenix;-) get backed out and heads for the trails.

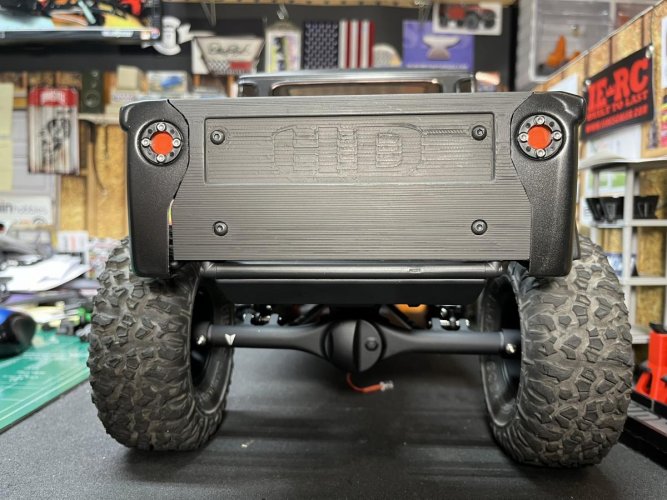
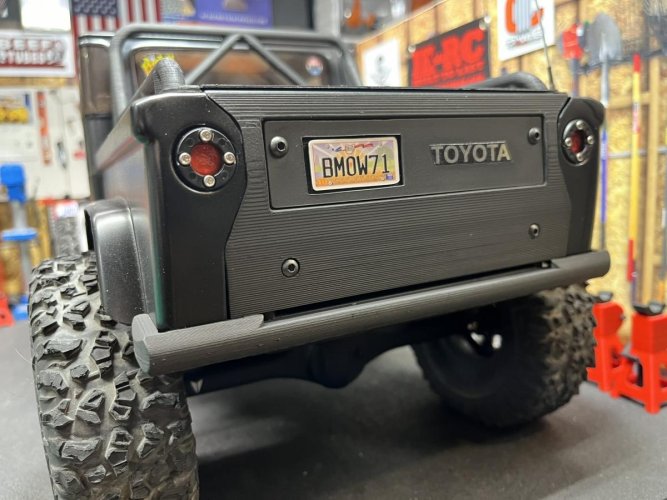
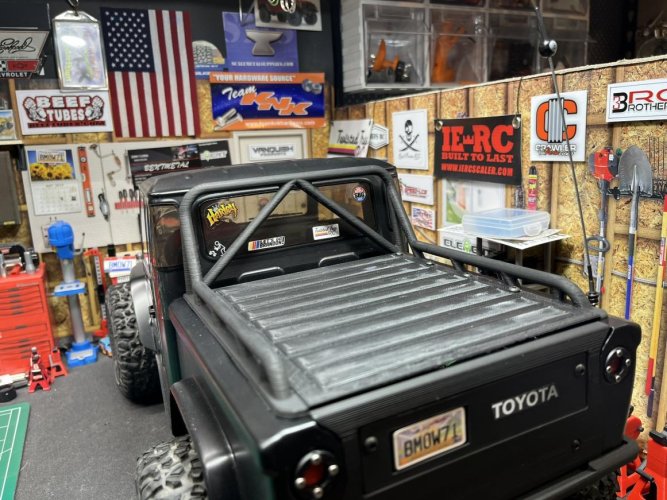
On the @HarleyDesigns 3D printed tailgate, I shot it with a few coats of flat black paint. I needed a place to mount my license plate, but wasn't sure where to put it. I decided to attach it to the tailgate and then I cut a piece of .040 styrene to fill in the recess in the tailgate. It gives it the appearance that the license plate is sunk in and it also protects it from getting torn off.

I threw on a Toyota decal, but not sure if it'll stay. I'd like to find a Toyota decal that is a little bigger that fills in that area better.

Also pictured is a 3D printed bumper. I added that so that the rear corner of the bedsides don't get gouged and scared from rock rash. I also painted it a flat black.

IMG_3061.jpg


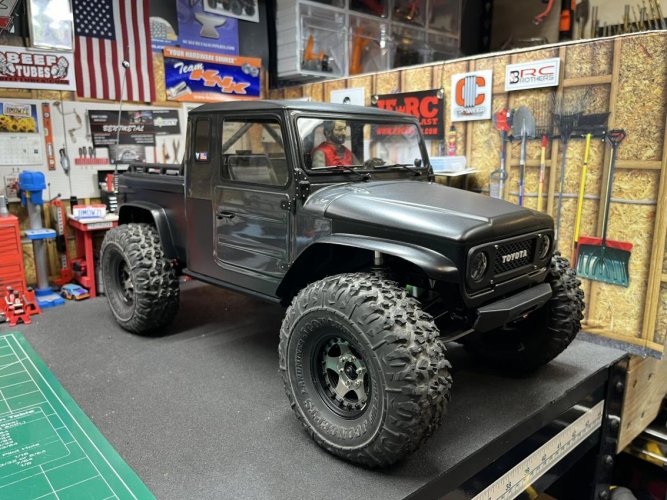
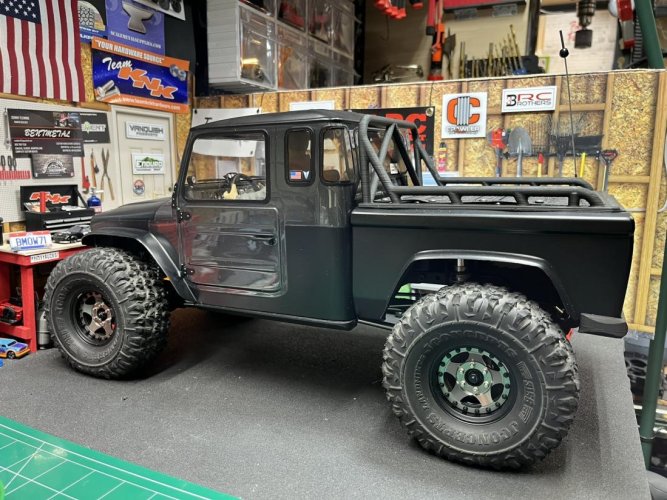
I sanded and painted the @HarleyDesigns roll bar before I mounted it. Also pictured is the @Imthatguy bed tonneau cover. I debated on leaving the bed area open like I did on my Phoenix portal, but I wanted a different look on this rig. I think it looks pretty damn good with the bed all closed in.

Almost forgot to mention, I also added a Twisted Tree RC antenna with an 8-ball on the tip. These little springy antenna are cool to see swaying back and forth out on the trail!:)

IMG_3062.jpg


Since I pushed the front axle forward and the body is sitting low, I trimmed the fender flares a bit. At full flex the tires just barely rub the body. I also had to trim the sides of the front bumper so that at full steering lock the tires would not rub the bumper.

I don't think I mentioned the body color yet. I used Tamiya PS-23 Gun Metal on the underside. I cut the outside film to mask off the Gun Metal and windows. I sprayed Tamiya PS-5 Black on the outside. All of the black that is on the outside including the window trim was topped with a few coats of Tamiya PS-55 Flat Clear.

The hood and door hinges are also painted black on the outside. I used a silver Sharpie pen to "dab" in the bolts that hold the hinges onto the body.

IMG_3055.jpg

IMG_3058.jpg

IMG_3059.jpg

IMG_3063.jpg

Next up will be the first run out on the rocks.8)
 
Looks damn good Brian [emoji1303][emoji1303]


Sent from my iPhone using Tapatalk
 
Back
Top