• Welcome to RCCrawler Forums.

    It looks like you're enjoying RCCrawler's Forums but haven't created an account yet. Why not take a minute to register for your own free account now? As a member you get free access to all of our forums and posts plus the ability to post your own messages, communicate directly with other members, and much more. Register now!

    Already a member? Login at the top of this page to stop seeing this message.

jebster's creeper

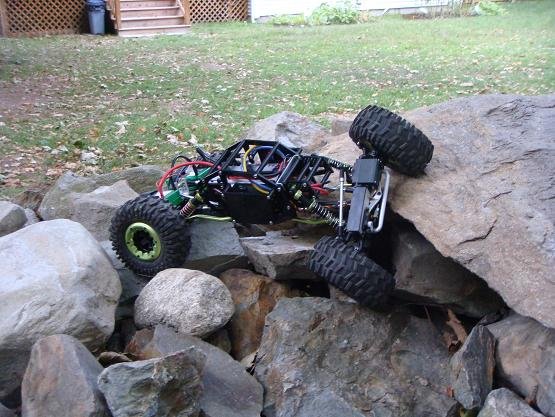
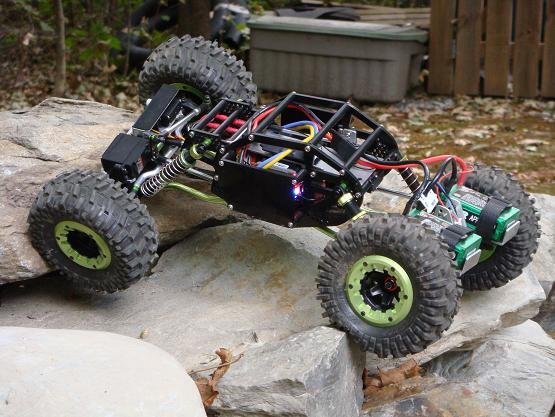
no rush on the short nose replacement parts. i'm looking forward to getting them but i'm planning on having a blast with this thing on the rocks. sweet chassis! you came up with a winner in my opinion!

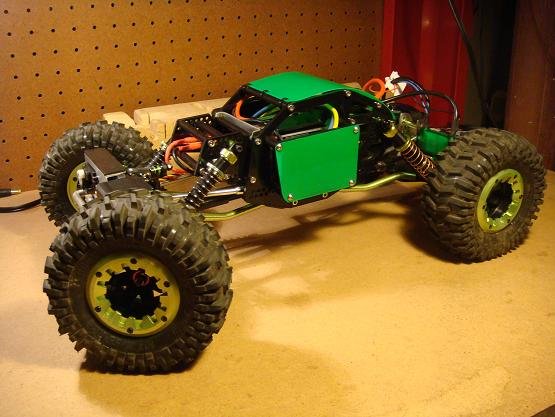
this is my first crawler and i'm loving it. i missed the time years ago when i could just tweak and tune an rc car. but i'm definitely addicted now. the wish list is growing: brushless motor, aluminum wheels, new tires, new servo and bec, 4/5 channel 3-position module (i have a tq2.4 4 channel radio and want the 3 position dig versus 2 position i'm running now; somebody in the electronics forum is putting together something)... all i need now is a second income!

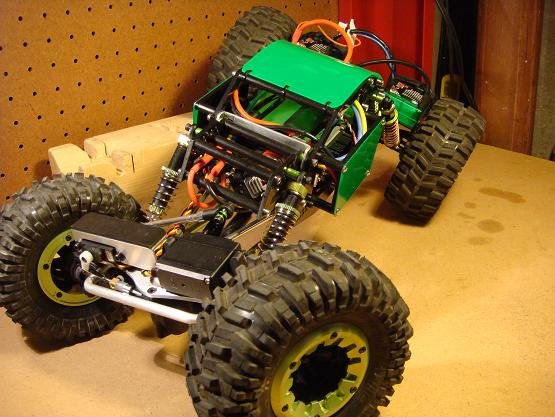
oh yeah, and some lights. the days are getting pretty short!
 
Sweet build dude... I like your alum fabwork... very clean... looks like a "fun" wiring project too :ror: ...

If you go brushless, might I suggest the dirt-cheap HobbyKing route... 35A Turnigy ESC and a 1000kV outrunner for $40 is a good place to start if you're strapped for cash and still wanna experiment... Tons of torque and good wheelspeed, also very efficient and easy on batteries... With the right timing and punch setup there's very little cogging and good low-speed control... I get about 35-40 minutes out of a 1300mah 3S... and that's with 4WS and a cooling fan for the ESC (which it doesn't really need)...

Just one more suggestion - flip your shocks upside-down... Won't make a big, or even a noticeable difference, but every little bit helps... "thumbsup"

speedyg, you have a build thread on here, right? i think i saw your outrunner combo you mentioned. looked sweet. did you have any mounting issues with the outrunner as far as space? i was thinking about getting a novak 18.5 brushless given i already have the goat esc but that would be $80 compared to the $40 you mentioned for an esc and motor. i'm thinking it over.

i appreciate the compliment on the aluminum. a hacksaw, vice, a couple files, drill press and a whole lot of patience is all it takes! ;-) i do miss growing up and having access to my dad's machine shop but i can't afford that kind of equipment for a hobby.
 
oh yeah, wiring is fun. i have a servo stretcher to get the diff servo working (the tq2.4 doesn't have EPA on the 3-5 channels). i'll have another 4/5 channel model i'll be adding in and then a bec. things are getting tight in there. plus, adam (ab designs) has got me thinking about lighting. maybe a light bar on top and a pair mounted on the rear link plate to provide rear lighting. lots and lots of wires!!!

that brings me to a question that i might have to go to the electronics forum for but i thought i would add it here. i planning on getting the castle 10A bec. do i have to get the castle link to set it up? i know it is only $20 but that is money i could spend elsewhere. wouldn't be as bad if i had other castle equipment i could use it with but i don't. i'm going to end up spending $40 to get a $20 piece of equipment working.
 
As far as I can tell, you'll need the Castle Link to program the output voltage only if you want to change the output voltage from 5.5V to something else (5.5V being the factory default)... Maybe you have an RC buddy that has one you could borrow...? The C.L. software is free to download ...http://www.castlecreations.com/downloads/cl_beta_info_071910.html?subId=696

As far as my build goes - I'm still waiting for a new set of tranny gears since mine stripped about three teeth off an 8341a gear a while ago... I hear it's not an uncommon problem with these trannies... The motor I have (Turnigy AerodriveXP 1000kV outrunner) only cost me $14 or so... Since you already have a brushless ESC...... Only thing is, you'll have to make an adapter plate for it to go from the motor's 19mm mount screw spacing to the Creeper's 24mm spread (seeing as how you're handy with the tools of the trade this should only take you a 1/2 hour like it took me ;-))...

Also a note on lighting... If you decide to get anything from HobbyKing you might as well look up these...

http://www.hobbycity.com/hobbycity/...gh_Density_R/C_LED_Flexible_Strip-White_(1mtr)

And for an added "cool" effect you can add one of these to switch 'em on and off... Ya know, since you like wiring stuff and all... :mrgreen:

http://www.hobbycity.com/hobbycity/...oduct_Name=Turnigy_Receiver_Controlled_Switch_

Hope all this helps... Keep up the good work! "thumbsup"
 
Jeff you can order the CC BEC 10amp from Holmes Hobbies preset to what ever voltage you want. I have a link of my own cuz if I change servos I may need it.

i hadn't thought about needing the link if i end up changing servos and want to go from 6.0V to 7.2V. it's nice that Holmes Hobbies will set it up for you but i agree that the extra $20 to have future options isn't a bad deal.
 
As far as I can tell, you'll need the Castle Link to program the output voltage only if you want to change the output voltage from 5.5V to something else (5.5V being the factory default)... Maybe you have an RC buddy that has one you could borrow...? The C.L. software is free to download ...http://www.castlecreations.com/downloads/cl_beta_info_071910.html?subId=696

As far as my build goes - I'm still waiting for a new set of tranny gears since mine stripped about three teeth off an 8341a gear a while ago... I hear it's not an uncommon problem with these trannies... The motor I have (Turnigy AerodriveXP 1000kV outrunner) only cost me $14 or so... Since you already have a brushless ESC...... Only thing is, you'll have to make an adapter plate for it to go from the motor's 19mm mount screw spacing to the Creeper's 24mm spread (seeing as how you're handy with the tools of the trade this should only take you a 1/2 hour like it took me ;-))...

Also a note on lighting... If you decide to get anything from HobbyKing you might as well look up these...

http://www.hobbycity.com/hobbycity/...gh_Density_R/C_LED_Flexible_Strip-White_(1mtr)

And for an added "cool" effect you can add one of these to switch 'em on and off... Ya know, since you like wiring stuff and all... :mrgreen:

http://www.hobbycity.com/hobbycity/...oduct_Name=Turnigy_Receiver_Controlled_Switch_

Hope all this helps... Keep up the good work! "thumbsup"

that lighting looks pretty cool. i would have to see if i could make it work for my needs.

i need a little clarification. outrunners aren't sensored, right? i know for the inrunner (like the novak 18.5) you need it to be sensored to help on the low end control. $14 for a motor to try out brushless sounds pretty good to me.
 
I've never seen a sensored outrunner before, I think it's mostly because they're made for planes (spinning a prop slowly seems pointless i guess)... As long as your ESC has adjustable timing advance, it should work okay... I have my advance set at 3.25 degrees, and under the right throttle conditions it turns real smooth and crawls at half the speed of my 2S Rooster/55t in my AX without cogging...

The Turnigy ESCs are really quite impressive considering the amount of programming options they have for how inexpensive they are... I've got three now (18A, 35A and 60A), and all use the same programming card and have the same features... This is the one I'm using in the Creeper...

http://www.hobbycity.com/hobbycity/...roduct_Name=Turnigy_Brushless_ESC_35A_CAR_ESC
 
so, got about an hour on the rocks this afternoon (i'll post pics later) and the beast is doing aweson. the 4VP didn't alter balance or cg in negative way and has added a lot of shock/link flexibility. in particular my front end always felt pretty soft so getting the shocks a little more vertical has given it a more solid response without changing springs/oil.

one issue to pop up. when i was engaging my dig it was slipping on occassion, which has never happened in the past. i had to shift the servo a little to fit the new chassis and this changed the dig servo link alignment some. i'm hope the issue is the new linkage angle is prevent me from getting full engagement. i'll be playing around with it tonight. that does lead me to a question if it is the worst case: has anyone stripped out gears in their dig unit?
 
I've not stripped out any dig gears though I did notice that the longer I used the servo that came with the dig the more I started having issues with it not fully engaging or slipping. I ran it for about 2 months in the prototype and 3 weeks on the production version and I started having a similar issue last week. I had to adjust the endpoints and that helps alot but I did notice that the servo doesn't seam to throw as well as it use to and the cheep plactic servo horn I'm running is bending and flexing alot so it might be just the case of upgrading the servo and the horn a little bit.
 
so, got about an hour on the rocks this afternoon (i'll post pics later) and the beast is doing aweson. the 4VP didn't alter balance or cg in negative way and has added a lot of shock/link flexibility. in particular my front end always felt pretty soft so getting the shocks a little more vertical has given it a more solid response without changing springs/oil.

one issue to pop up. when i was engaging my dig it was slipping on occassion, which has never happened in the past. i had to shift the servo a little to fit the new chassis and this changed the dig servo link alignment some. i'm hope the issue is the new linkage angle is prevent me from getting full engagement. i'll be playing around with it tonight. that does lead me to a question if it is the worst case: has anyone stripped out gears in their dig unit?

Hey Jeff,,,yeah bro anytime you change the location of something with a linkage its going to affect the throw,,even if the move is very slight. Moving something like a dig servo or steering servo 1mm one way or another can affect the throw positive or negative by any number of degrees. Remember,,drive angle on linkages are exponential. Re-calibrate your dig servo with your radio and all should be fine. I dont think you really need to worry about stripping the dig gears,,,thats the stout end of your trans.
 
Hey Jeff,,,yeah bro anytime you change the location of something with a linkage its going to affect the throw,,even if the move is very slight. Moving something like a dig servo or steering servo 1mm one way or another can affect the throw positive or negative by any number of degrees. Remember,,drive angle on linkages are exponential. Re-calibrate your dig servo with your radio and all should be fine. I dont think you really need to worry about stripping the dig gears,,,thats the stout end of your trans.

glad to hear it is most likely the engagement. i'm running a tq2.4 on my creeper which means the 3-5 channels don't have EPA. i've learned to tweak via servo horns and linkage lengths but it is a pain. maybe if i come into money i'll upgrade!
 
ok. so it was the linkage and not the dig itself. moved the servo a little and everything is working good.

cut out some bodies panels and painted them. then i realized i grabbed a fluorencent green! :cry: 
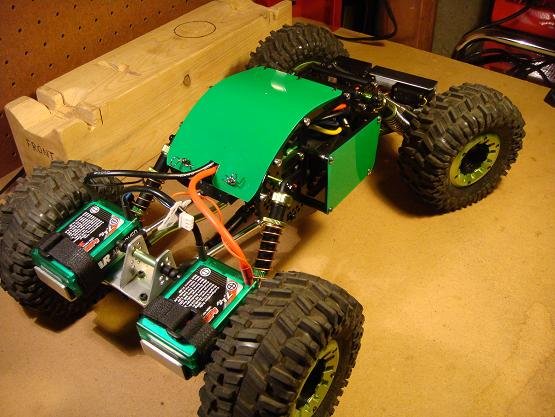
oh well, i'll see what they look like once the paint dries. if i don't like it lexan is pretty cheap.
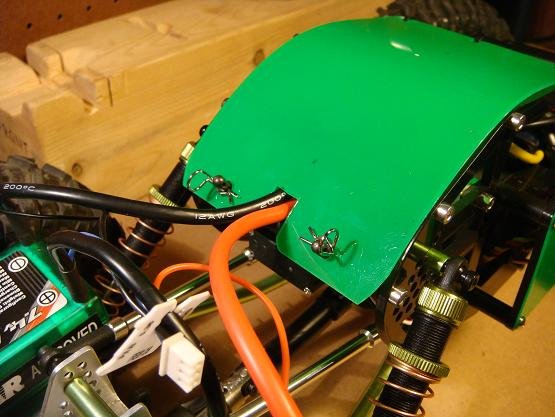
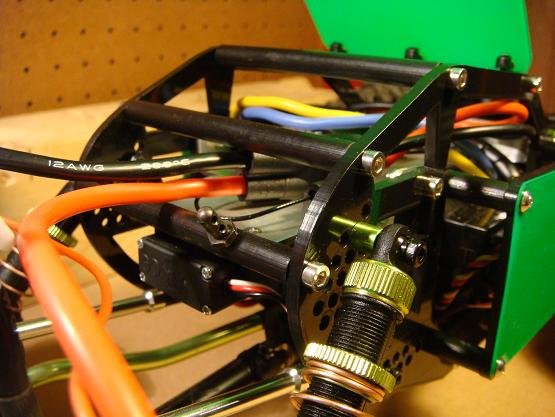
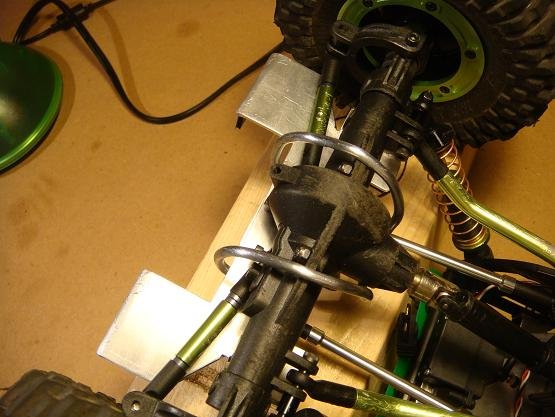
here are the pics from running around the yard earlier today...
 

Attachments

  • DSC03029v1.jpg
    DSC03029v1.jpg
    80.7 KB · Views: 407
  • DSC03030v1.jpg
    DSC03030v1.jpg
    85.9 KB · Views: 379
  • DSC03031v1.jpg
    DSC03031v1.jpg
    84.9 KB · Views: 369
  • DSC03032v1.jpg
    DSC03032v1.jpg
    93.8 KB · Views: 381
  • DSC03033v1.jpg
    DSC03033v1.jpg
    92.1 KB · Views: 383
  • DSC03036v1.jpg
    DSC03036v1.jpg
    79.1 KB · Views: 427
  • DSC03039v1.jpg
    DSC03039v1.jpg
    82.2 KB · Views: 394
  • DSC03041v1.jpg
    DSC03041v1.jpg
    96.1 KB · Views: 432
  • DSC03044v1.jpg
    DSC03044v1.jpg
    75.4 KB · Views: 394
  • DSC03042v1.jpg
    DSC03042v1.jpg
    91.9 KB · Views: 415
Them bateries on the back look like they should be a jet pack :)... that would be cool, a jet powered creeper. I ment to ask you, did you have any problems with the doors hanging up on the rocks with the spacers behind them?
 
Them bateries on the back look like they should be a jet pack :)... that would be cool, a jet powered creeper. I ment to ask you, did you have any problems with the doors hanging up on the rocks with the spacers behind them?

the doors did catch a couple times but not alot. i just back it up and take a little different line. the rock piles i'm climbing have some pretty narrow and pointed rocks so even if the doors were flat against the side of the chassis i would still catch on occassion. i like having my esc and receiver where they are at so i'm ok with the compromise.

maybe someday i'll look at making some skidplates that curve in towards the bottom of the chassis, similar to the original kydex plates i made (see first couple pics in this thread). but no rush, just having fun with the creeper as is.
 
so, fluorecent green it probably not a good color. oh well, i'll get some more lexan and try again. i'm considering getting some digital camo decals instead of painting the next set of panels. i saw freqeskins woodland digital camo skin for the xr10 and like the pattern.
by the way, i used the stock creeper battery tray posts to hold the rear of the top cover down. got the idea from adams 4VP thread. works good. didn't get out on the rocks today but posted a few pics from the workbench.
 

Attachments

  • DSC03046v1.jpg
    DSC03046v1.jpg
    63 KB · Views: 371
  • DSC03047v1.jpg
    DSC03047v1.jpg
    73.4 KB · Views: 393
  • DSC03048v1.jpg
    DSC03048v1.jpg
    71.4 KB · Views: 356
  • DSC03049v1.jpg
    DSC03049v1.jpg
    64.9 KB · Views: 355
  • DSC03050v1.jpg
    DSC03050v1.jpg
    67 KB · Views: 370
rmdw, your pipe skid plate got me thinking. i ran by the hardware store and they didn't have the right sized pipe. when i got home i found an old length of stainless steel rod. i came up with skid rods that i hope prevent the rear axle from catching on sharp edges. it is also pretty light and easy to clip on. a couple pics below. i'm thinking about doing something on the front axle but i have less room to work with.
 

Attachments

  • DSC03051v1.jpg
    DSC03051v1.jpg
    67.3 KB · Views: 399
  • DSC03052v1.jpg
    DSC03052v1.jpg
    61 KB · Views: 349
  • DSC03053v1.jpg
    DSC03053v1.jpg
    59.5 KB · Views: 392
  • DSC03054v1.jpg
    DSC03054v1.jpg
    64.4 KB · Views: 343
Back
Top