• Welcome to RCCrawler Forums.

    It looks like you're enjoying RCCrawler's Forums but haven't created an account yet. Why not take a minute to register for your own free account now? As a member you get free access to all of our forums and posts plus the ability to post your own messages, communicate directly with other members, and much more. Register now!

    Already a member? Login at the top of this page to stop seeing this message.
Looking good so far Tim. While I would agree that any of the snags you have run in to are minor, this tends to be one of the reasons I wait out new kits for a bit. Looking forward to seeing you're finished product. Any ideas on color yet? If I were a betting man, I'd say Orange? Having said that, I think the same Blue as your Grom would look stellar.

Thank you. The wheels I have are red so orange would clash. I'm planning on doing gun metal.

I do love that blue, but I used it far too much on RC bodies for a while there.
 
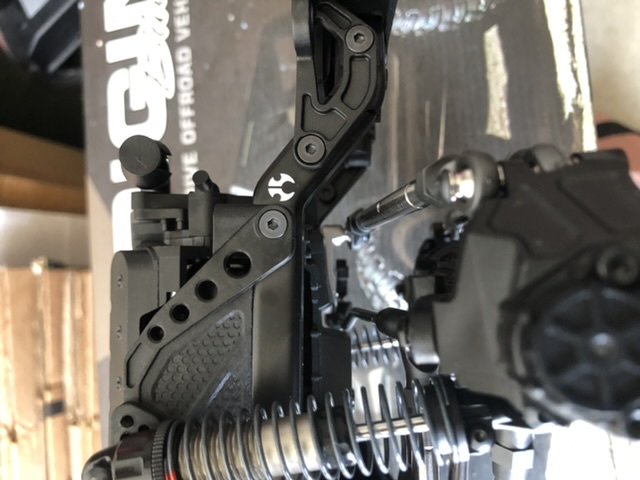
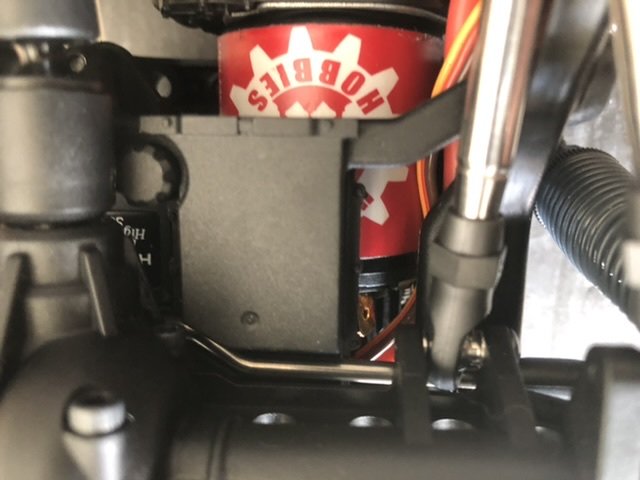
And here's where we get to our first speed bump in the build. The servo doesn't fit in the servo mount. A servo mount that doesn't fit a servo is kinda useless.

It was at this point that I realized my servo mount trimming job was subpar. It may be difficult to tell from this photo, but the servo is pushing the shock tower outwards. Well, heck, that's not going to do. So despite Johnny 5's best efforts, we have to disassemble

I got out my Ryobi portable "Dremel" and went to work. This is where I stopped. I tried to smooth this out and remove all of the ribs and steps in the plastic.

And from the top, you can sort of see that I removed the stupid, corner gusset which appears in the lower left corner of the servo opening as oriented in this photo. After this, the servo fits nicely.

Rich said this part is being revised to accept more servos so if you get a kit at a later date you hopefully won't have to make this modification. It kinda baffles me that it left the manufacturing plant this way though. Maybe they only tried Spektrum servos...I don't know. Shit happens though and this is a minor speed bump rather than a deal breaker or roadblock.

Rich also said this all up front, it was designed around a spektrum servo, But it will be addressed. I also needed a trim with my PM470, all of twenty seconds with my exacto, Perfect and fitted as told to in manual.
shows the size variations in servo cases, I know my older PM 420 is a hair larger corner to corner.
 
Last edited:
Rich also said this all up front, it was designed around a spektrum servo, But it will be addressed. I also needed a trim with my PM470, all of twenty seconds with my exacto, Perfect and fitted as told to in manual.
shows the size variations in servo cases, I know my older PM 420 is a hair larger corner to corner.

I either missed that he said that or I saw it and forget that I did. Was it on the SCX10 III thread on here?

I agree, it's an easy fix. It shouldn't stop anybody on this site, but we aren't the "norm". A newbie may get stumped and that's why I mentioned it.
 
Long time no update! I've been busy wrenching and painting...more like screwing up paint, but that's typical if you know anything about my painting skillz. Now let's pickup some speed on this thread.

I hate stupid packaging. The Tekin BXR was held to the cardboard box with booger glue. Usually that stuff comes right off of the product. This shit would not. I fought and fought and still couldn't get all of it off - even with alcohol. Good packaging doesn't have to be aggravating. Minor complaint. It's Tekin so I know the ESC will be worth it.


Once you install the axles to the chassis it becomes clear why the Panhard bar is so spindly. It barely clears up front. But this truck does let you fully compress both shocks at the same without any interference up front. Nicely done, Axial. I did adjust the ends on this link so that it couldn't move backwards and interfere with the fake oil pan. That oil pan interferes with the servo mounting and the Panhard bar and it just doesn't need to be there at all. I think the servo mount is going to be a popular upgrade if its done right. That will help with making room for a beefier Panhard bar as well as allowing a bigger selection of servos without the need to modify it.


You also realize the rear drive shaft is too short. At full compression of the rear suspension, you still have about 1/4" of space. I don't know if this is going to be a problematic driveshaft that pops out, but it's certainly something to watch.


The drive hexes are held on by a somewhat small 2mm pin with only a 1.5mm hex head. Those that like crazy power may snap these pins. It's another area to watch.

Axial does include the spacers to remove some slop around the axle shafts though so that's good. I'm a big fan of these spacers because I hate the unnecessary slop.


Then I went onto installing the rest of the parts on the chassis.

I stripped this screw that attaches the front shock tower brace because of the martensite plastic.


Here you can see how it's going to be impossible to easily remove the upper links when the chassis fully assembled.


The sliders are a two-piece design. Interesting that these were made in two pieces, but the assembled part is nice and compact and sturdy.


The floorboards look like a throwback to the SCX10 II - not a good thing IMO. All these support ridges on the bottom are snag points. I will definitely be doing something to fix this.

Also, the slider doesn't match up to the floorboard. Do you see the gap between the two parts? I just have to ask why this was done. It doesn't make any sense to me. This gap is more places for sticks and leaves to get caught. I wish the slider butted right up against the floorboard.


Unlike the sliders, the bumpers tuck in all the way - awesome! Some bumpers of the past wouldn't let you tuck them all the way in unless you drilled another hole for the pin screw. That's not necessary here. Great, little touch!


The inner fenders are a very welcome addition. They are made of thinner plastic and light weight enough for most scale guys to keep them attached. They aren't as light as Lexan, but they are much sturdier so there's a trade off.

The inner fenders have spots for rock lights ala Traxxas. But, unlike Traxxas, Axial doesn't include block-off plates which is a fail IMO. Inner fenders with holes are much less effective.


I designed some blockoff plates if you are interested. Your design idea may vary.

https://www.thingiverse.com/thing:4249467

 
Because of the stripped screw for the shock tower brace, I ordered a new shock tower and brace. I knew the brace would get damaged while trying to remove or cut the stripped screw. I tried to pull the shock tower brace off and it came right off without much effort at all. This plastic is really soft and it broke easily as you can see below.


I tapped about half the depth of all of the holes on the new shock tower. I also put a drop of silicon shock oil on the screw for a little bit of lube. It did seem to help.


This is how I oriented my motor and wires to clear the motor cover.


The motor cover was pinching my servo wires - maybe because the Holmes servo has more - so I notched the cover.


Here's my electronics setup. The BXR is tiny and weighs next to nothing. I love it. You do have to solder a capacitor on the outside, but that's part of why Tekin ESC's are so tiny.

It was a fight to get all all of the wires from the electronics through the water seal plug in the receiver box. I have the servo, ESC, ESC drag brake adjustment wire, shift servo and dig servo. All of these wires actually bulged out the receiver box so I had to squeeze it just a bit to get the lid on tight. It looks like the ESC wires will interfere with the shift servo, but I double checked and they do not.


And, finally, we have a roller!


Looking great Jato!!

I am very interested to see how everyone's motor/ESC combos work out in regards to slow crawling ability vs max wheel speed.
Some of the videos I watched stated that there was not much of a spread between the two speeds in the transmission, so it will be great to hear your opinion on that.

Keep on keeping on "thumbsup"
 
Build looks good. I think your panhard bar is twisted wrong, the S curve should lay flat in the oil pan cutout at full compression.
 

Attachments

  • 9EED51D1-5906-4104-A104-30DF6A6548B8.jpeg
    9EED51D1-5906-4104-A104-30DF6A6548B8.jpeg
    84.5 KB · Views: 873
  • DB86C8A1-629A-4207-8E38-7860799D1C94.jpeg
    DB86C8A1-629A-4207-8E38-7860799D1C94.jpeg
    71.6 KB · Views: 835
Looking great Jato!!

I am very interested to see how everyone's motor/ESC combos work out in regards to slow crawling ability vs max wheel speed.
Some of the videos I watched stated that there was not much of a spread between the two speeds in the transmission, so it will be great to hear your opinion on that.

Keep on keeping on "thumbsup"

Thank you!

This is a smooth ESC and motor combo for sure and plenty fast for me on stock gearing, but I've only tested it in the house. Only a trail run will give me a real sense of where it stands.

The spacing of the 2-speed is pretty close for sure. It'll be personal preference if you like it and/or think you need it.


Build looks good. I think your panhard bar is twisted wrong, the S curve should lay flat in the oil pan cutout at full compression.

Thank you.

Oh I see what you mean. I double checked the manual and I guess I overlooked that. My Panhard bar doesn't interfere with anything as it sits now so I don't plan on changing it, but thanks for the heads up.
 
Thank you!

This is a smooth ESC and motor combo for sure and plenty fast for me on stock gearing, but I've only tested it in the house. Only a trail run will give me a real sense of where it stands.

The spacing of the 2-speed is pretty close for sure. It'll be personal preference if you like it and/or think you need it.


Thank you.

Oh I see what you mean. I double checked the manual and I guess I overlooked that. My Panhard bar doesn't interfere with anything as it sits now so I don't plan on changing it, but thanks for the heads up.

Sorry for the crappy pics. Yeah i put mine together that way at first because its confusing in the manual. I saw the SBG video where he showed how it was supposed to lay in the oil pan at compression. I love your wheels, I want to order some red wheels for mine, i think it’ll clash perfectly, plus I don’t have any red wheels yet so it gives me an excuse to buy a set.
 
Sorry for the crappy pics. Yeah i put mine together that way at first because its confusing in the manual. I saw the SBG video where he showed how it was supposed to lay in the oil pan at compression. I love your wheels, I want to order some red wheels for mine, i think it’ll clash perfectly, plus I don’t have any red wheels yet so it gives me an excuse to buy a set.

No worries. I appreciate the photos. That explained everything to me.

Thank you. I bought cheap red wheels because I wasn't sure if I'd like them. So far I do and I think they look good with my body.
 
Speaking of the body, have I warned you guys how much I suck at painting yet? :ror:

I decided to go Tamiya Gun Metal with this one backed by black. I was thinking about backing it with gold because the rumor is that color makes metallics "pop," but I got lazy and wanted this body to be finished so I went right to a black backer. I was also unsure about painting the roof black. After the paint was dry the decision was made for me because there were lots of imperfections in the paint on the roof. I think it's because I tend to spray heavy, thick layers of paint, no matter how hard I try to spray light, and metallics just don't like heavy coats. So I used the overspray film as masking. Except I forgot three, very important pieces. Notice anything wrong with my paint job?

It's a shame because, outside of this big screw up, the paint looked pretty good.

So, do y'all have any methods of removing paint from Lexan that doesn't include brake fluid or damage to the Lexan?


I have to say I've never been so thankful in my life to see smoked window decals before. I hate window film decals and typically don't use them, but I will in this case. I just need to find out a technique to get them flat on the Lexan.

 
I have to say I've never been so thankful in my life to see smoked window decals before. I hate window film decals and typically don't use them, but I will in this case. I just need to find out a technique to get them flat on the Lexan.

They did the same tinted window stickers with the SCX10 2012 Wrangler. You say you suck at painting but those are some really clean lines around your windows. I would not use the stickers for window tint. Buy the Tamiya window tint and spray that instead. It will look much cleaner with the nice cuts you have around your windows already IMO.
 
I would say put the stickers on to gloss up the finish and call it limo tint on the back glass. Gonna be hard to take that off cleanly I think.
 
If you have any scrap lexan big enough to be the windows you could cut the windows out and glue new ones in from the inside.
 
I thought you were just going for the blackout, '70's van look :)
Yeah, you're not getting that off cleanly.

It looks sort of utilitarian but it came out pretty good. I know you don't like to paint any more than I do but your results are always serviceable! "thumbsup"
 
They did the same tinted window stickers with the SCX10 2012 Wrangler. You say you suck at painting but those are some really clean lines around your windows. I would not use the stickers for window tint. Buy the Tamiya window tint and spray that instead. It will look much cleaner with the nice cuts you have around your windows already IMO.

Thank you! I thought about the Tamiya tint, but that means I have to cleanly remove the paint from both sides of the window.


I would say put the stickers on to gloss up the finish and call it limo tint on the back glass. Gonna be hard to take that off cleanly I think.

I thought about that, but I think the finish of the paint will prevent the decals from laying flat and any imperfections are amplified by the glossiness of the window decals.

There are some paint removers from Tamiya (Body Cleaner), Testors (ELO) and Delux Materials (Strip Magic). I just have to figure out which ones are safe for Lexan.


If you have any scrap lexan big enough to be the windows you could cut the windows out and glue new ones in from the inside.

So you want me to get hurt? :lmao: The only thing that may be worse than my painting skills are my X-Acto skills. It is a good idea though!


I thought you were just going for the blackout, '70's van look :)
Yeah, you're not getting that off cleanly.

It looks sort of utilitarian but it came out pretty good. I know you don't like to paint any more than I do but your results are always serviceable! "thumbsup"

What happens in the Jeep stays in the Jeep and if the Jeep is a rocking don't come knocking!
 
Thank you! I thought about the Tamiya tint, but that means I have to cleanly remove the paint from both sides of the window.

Ohh I thought you were talking about the passenger side windows, not the hard top windows..... OK that will not work there very well...
 
Back
Top