Because of the COVID-19 quarintine, weekends have become dedicated almost exclusively to relaxing or RC building.
This was an RC weekend. This kit only needs more painting so I'm sure some of you can guess what I was working on. For the rest of you, we've given up hope. :lmao:
Nothing makes me shake in my slippers more than painting, especially when it's detail stuff that requires a steady hand such the driver head.
The whites of the eyes got pretty good. I impressed myself here. I was tempted to leave the possessed, demon eyes like this, but I continued on.

Eyes and hair added. His hair color turned out to be similar than mine which was a nice bonus. "The one eye is a little jacked" as my girlfriend put it, but this is up close. Zoomed out the driver looks pretty good for my lack of skill level so I'm happy with how this turned out. Of course, when looking at this photo I realized he was missing eyebrows so those were added later - with a toothpick. I should have painted his lips, but I didn't want to push my luck too far.

I decided to use the cowboy hat. Personally, I hate hats so I never wear them unless it's winter and I plan on spending time outside. In that case I a wear a beanie. Why the cowboy hat? Because it reminds me of the old school, Tamiya driver figures for some reason.
The flesh and cowboy hat were painted with flat paint. The rest of the interior was coated with Tamiya Flat Clear to dull it a bit. A great tip from a number of members on here. After painting the driver's shirt white and blue it reminded me of Fred from Scooby-Doo and I can't unsee it. Oh well. :ror:

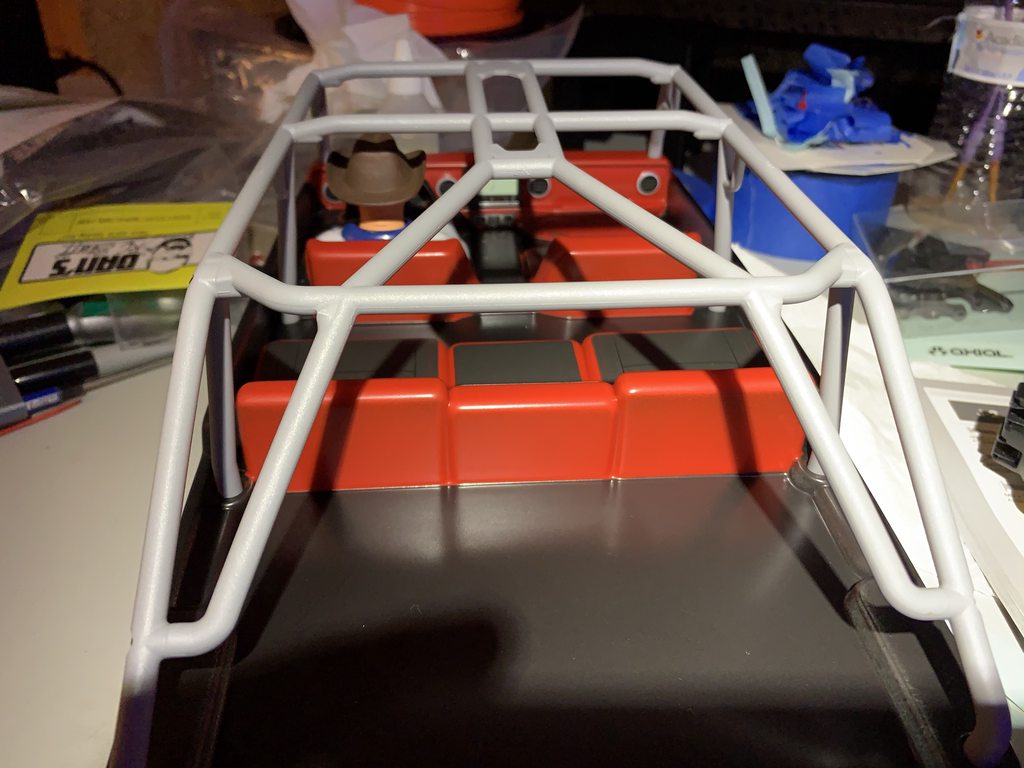
OK enough babbling about the driver. Now onto the interior. The lazy half of me wanted to spray it black and be done with it. But I knew an all black interior inside a dark gun metal and black Jeep just would look pretty bad. So I decided to mask it off and hit some of it with Duratrax Bright Red. Masking this interior, like most others, is so tedious. I know painters charge a lot of money, but they earn it. I'll happily pay to avoid this part.
There are definitely lots of flaws with the interior, but you'll never see them once it is installed in the body.
I was going to leave the seats all red, but it just looked like too much so I gave in and applied the seat decals. I'm happy with the way it looks.
I thought about paining or dying the cage black, but I'm kinda glad I didn't. I like the contrast it provides.
Overall, I'm pretty happy with the results.


")


 Replacements are on order from KNK.


