• Welcome to RCCrawler Forums.

    It looks like you're enjoying RCCrawler's Forums but haven't created an account yet. Why not take a minute to register for your own free account now? As a member you get free access to all of our forums and posts plus the ability to post your own messages, communicate directly with other members, and much more. Register now!

    Already a member? Login at the top of this page to stop seeing this message.

House’s 2022 Sporty

Which of course now the tie rod doesn’t clear the link mount… :roll:
You can see it has a long way to go to hit the steering stops.
 

Attachments

  • 646A154E-EBB6-4B1E-8469-DCBD58A605F0.jpeg
    646A154E-EBB6-4B1E-8469-DCBD58A605F0.jpeg
    140.7 KB · Views: 542
  • C1BCEE6F-E536-41E9-B76A-1567B935A1F1.jpeg
    C1BCEE6F-E536-41E9-B76A-1567B935A1F1.jpeg
    127.1 KB · Views: 447
  • B7172375-5A1D-40BD-8EA9-D56F745F20E8.jpeg
    B7172375-5A1D-40BD-8EA9-D56F745F20E8.jpeg
    99 KB · Views: 440
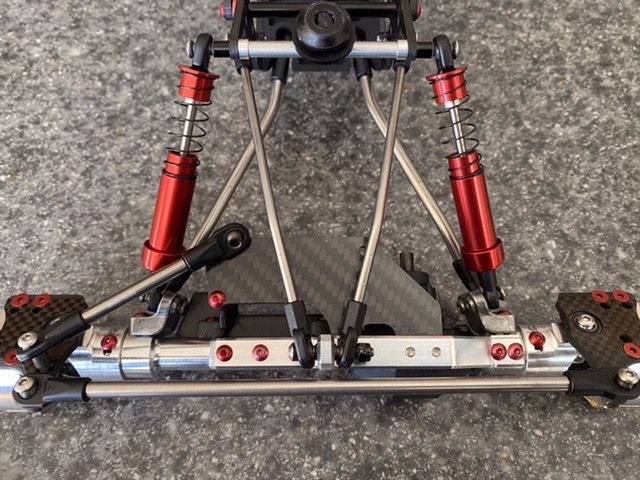
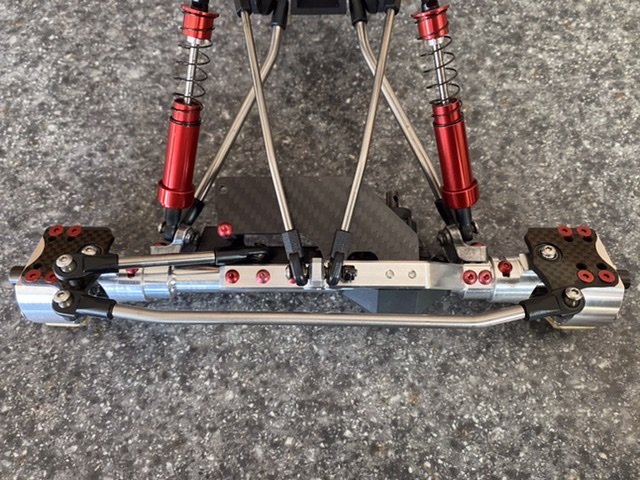
So back out comes the old little machinist vice to put two small bends in the tie rod, a half turn out on each rod end, and wa-la, back in business with full turning radius… 8) (It looks like it is hitting at full lock, but it isn’t)
 

Attachments

  • 792B45A5-AFF6-458D-8626-B2A0B1F4FFF3.jpeg
    792B45A5-AFF6-458D-8626-B2A0B1F4FFF3.jpeg
    155.7 KB · Views: 440
  • 854B4BEE-173E-46C5-89BB-6C5DC721655C.jpeg
    854B4BEE-173E-46C5-89BB-6C5DC721655C.jpeg
    116.7 KB · Views: 432
  • A1B0E8BF-7720-47E2-832B-400603CFB574.jpeg
    A1B0E8BF-7720-47E2-832B-400603CFB574.jpeg
    112.5 KB · Views: 426
Hard to see the rear shock limiting in this pic, but it made a difference for sure…
Starting to look like a comp crawler!
 

Attachments

  • 62D79179-D73F-4979-9B46-23E0E0F68DA9.jpeg
    62D79179-D73F-4979-9B46-23E0E0F68DA9.jpeg
    107.8 KB · Views: 426
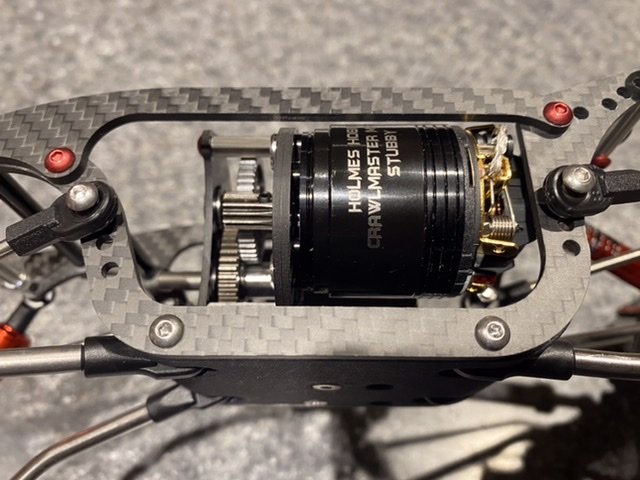
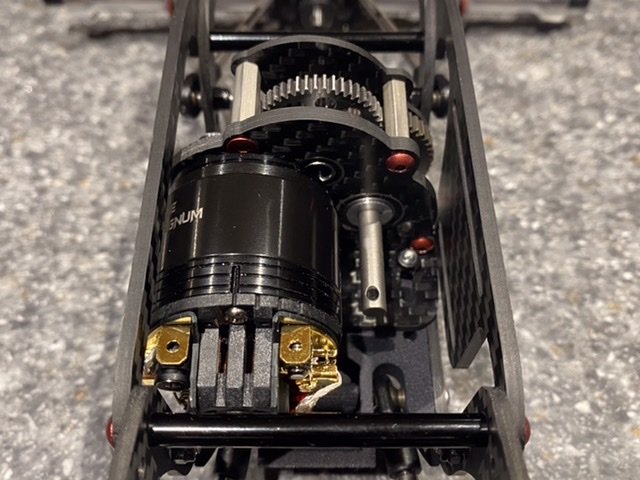
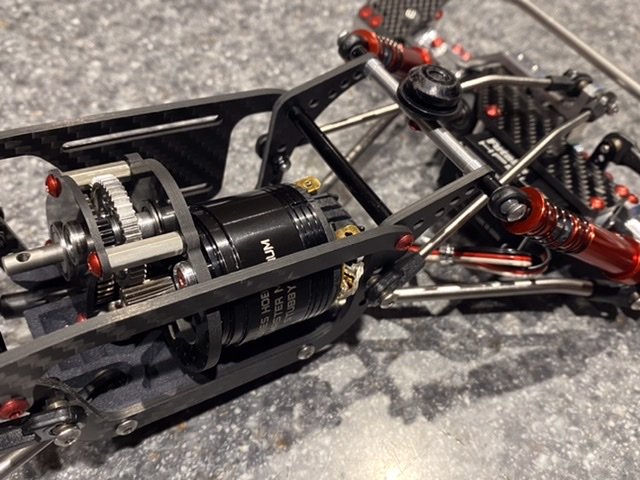
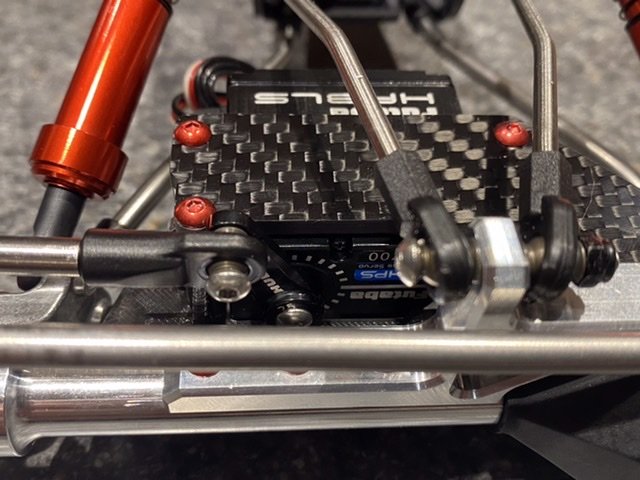
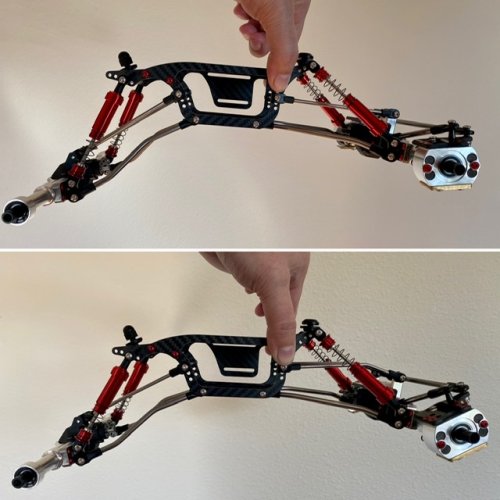
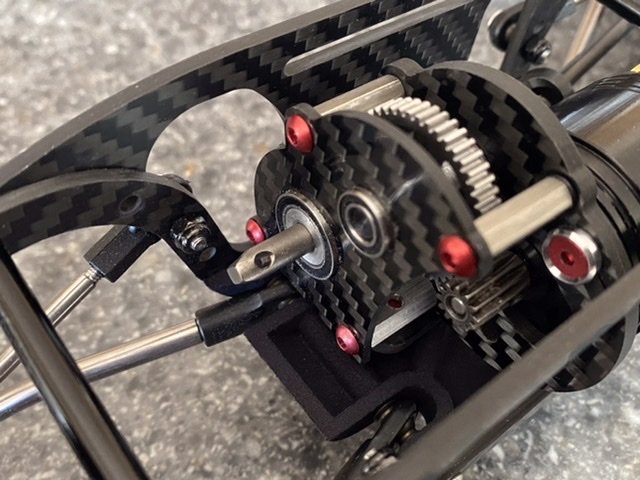
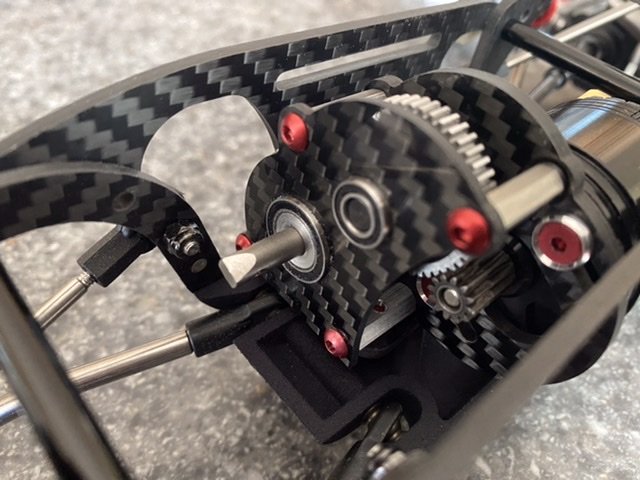
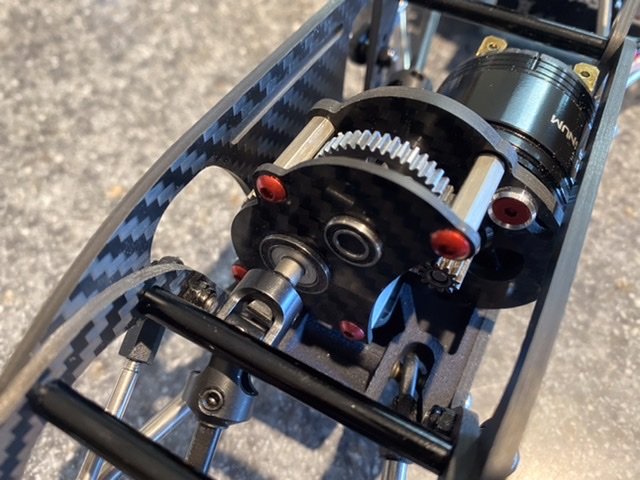
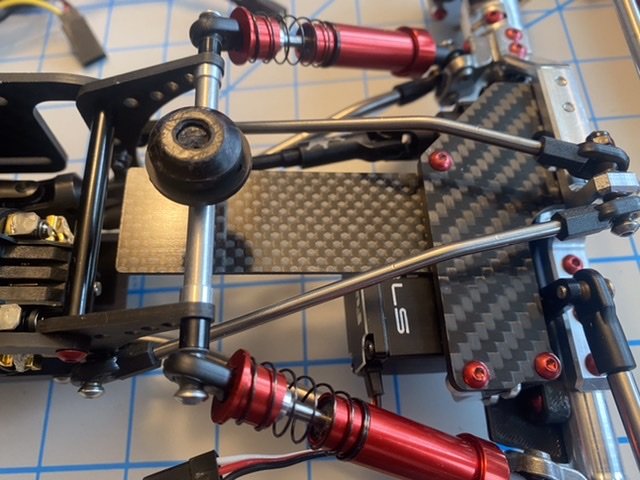
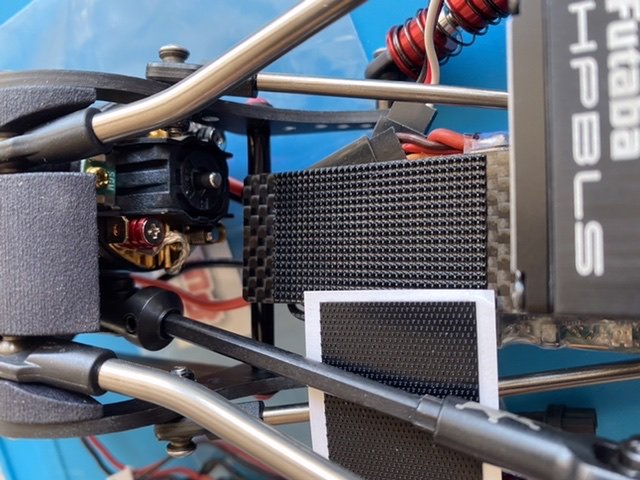
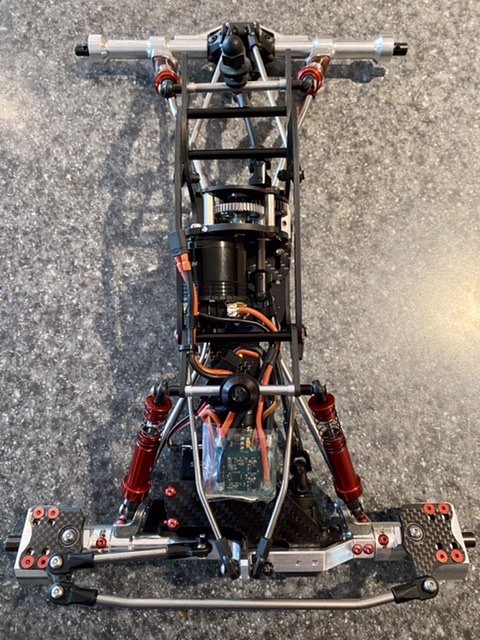
Got the servo nestled down into it’s little home and the motor/trans fastened down.
I also removed the spacers from the motor side of the chassis since there was enough clearance.
 

Attachments

  • F2234E2D-7C33-41E7-ADEE-F8FC7CCCBA23.jpeg
    F2234E2D-7C33-41E7-ADEE-F8FC7CCCBA23.jpeg
    101.7 KB · Views: 413
  • 5E201A1F-7B42-4A13-9FC8-77AC72BA444D.jpeg
    5E201A1F-7B42-4A13-9FC8-77AC72BA444D.jpeg
    106.1 KB · Views: 403
  • DEBB7D29-99B6-4974-9EE9-703E466CA5C3.jpeg
    DEBB7D29-99B6-4974-9EE9-703E466CA5C3.jpeg
    106.8 KB · Views: 406
  • 2111D14F-B5F3-4010-A9D2-612522E75934.jpeg
    2111D14F-B5F3-4010-A9D2-612522E75934.jpeg
    124 KB · Views: 416
  • 6AFA3BB8-3745-4F01-B186-D1E788631DD7.jpeg
    6AFA3BB8-3745-4F01-B186-D1E788631DD7.jpeg
    102.3 KB · Views: 413
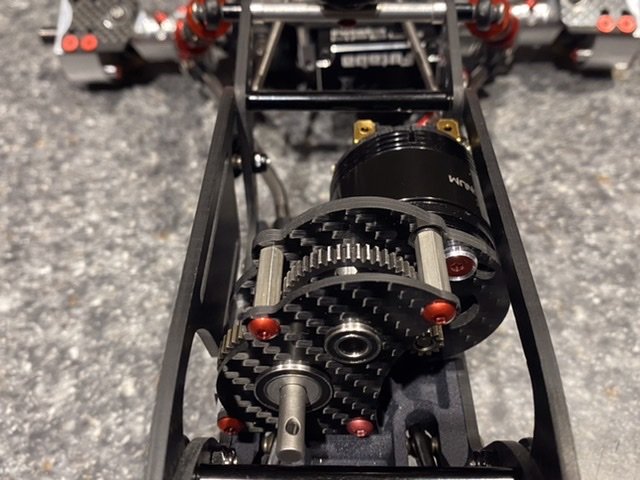
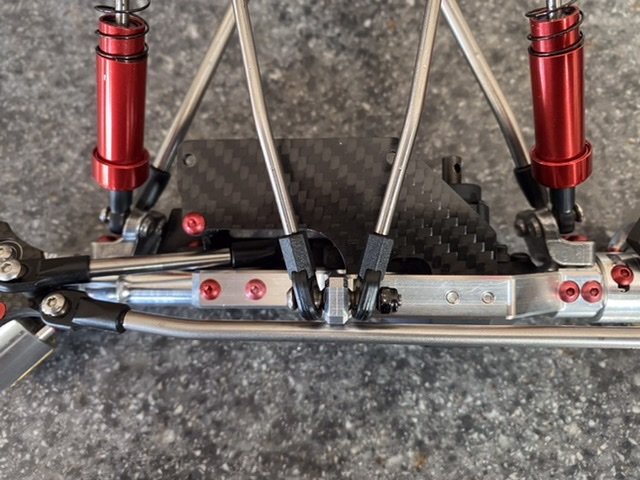
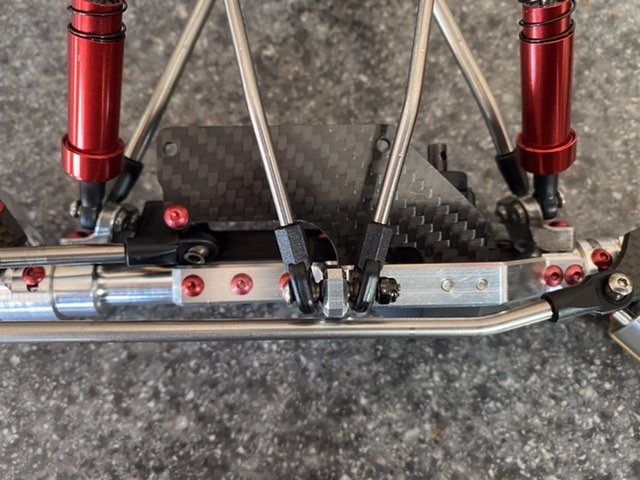
So I figured I would throw the drive lines in, that should be quick and simple!
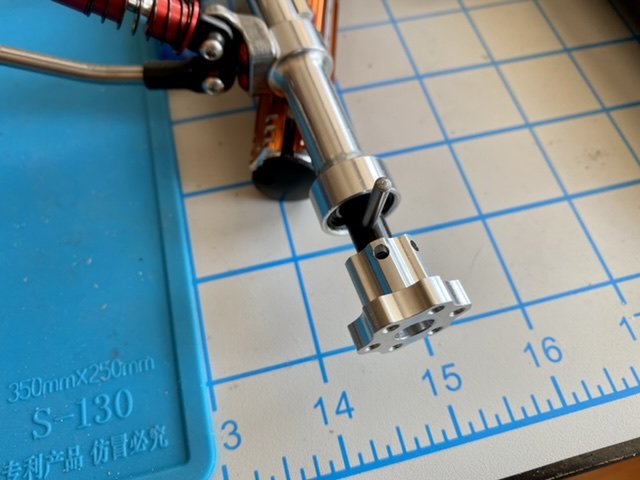
Put the ends on, mocked up the shafts for length, cycled the suspension to see shortest and longest lengths, marked, cut, deburred, installed, BIND. :x
Took me a few minutes to realize that the tangs on the universal joint were binding on the transmission output shaft at full droop….
So shortened the shaft a bit and put a bevel on it and everything seems to be working properly now.
 

Attachments

  • 692C7BB2-5221-4038-A2C2-9BC5E4C5D715.jpeg
    692C7BB2-5221-4038-A2C2-9BC5E4C5D715.jpeg
    109.2 KB · Views: 394
  • 768B280E-812C-45A1-9FDF-BA7548879F75.jpeg
    768B280E-812C-45A1-9FDF-BA7548879F75.jpeg
    102.1 KB · Views: 390
  • DC30F7AB-48C5-46DC-B097-F791CD59A17E.jpeg
    DC30F7AB-48C5-46DC-B097-F791CD59A17E.jpeg
    112.5 KB · Views: 387
Time to start coming up with a plan for the electronics… :???:
 

Attachments

  • A41EE2D0-C873-4CBF-9ECE-29450846D182.jpg
    A41EE2D0-C873-4CBF-9ECE-29450846D182.jpg
    81 KB · Views: 380
Nothing too crazy, but somewhat tidied up at least…
 

Attachments

  • B86512F2-91C5-4382-AAD0-FE8BB824D3AB.jpg
    B86512F2-91C5-4382-AAD0-FE8BB824D3AB.jpg
    80.8 KB · Views: 354
Thanks.
I ended up modifying the lengths. I believe the lengths they offer in the Sucker Punch kit right now are for AR60 axles, so hopefully they will make a kit with the correct lengths for these axles soon. You can order separate links to get close enough to use though.
This is where it sits right now:
FU - 118
FL - 113
RU - 116
RL - 114
*Note: It still needs to go on the wheelbase jig to dial it in perfect*
 
Exploring a few different battery and electronics mounting options, but as usual, nothing is easy and there are pluses and minuses of every setup…
 

Attachments

  • D07F9CA1-8021-495A-BCA2-8E432373A378.jpeg
    D07F9CA1-8021-495A-BCA2-8E432373A378.jpeg
    111.1 KB · Views: 335
  • 33998368-CB99-457A-A1CB-5D4ECAED51C5.jpeg
    33998368-CB99-457A-A1CB-5D4ECAED51C5.jpeg
    112.1 KB · Views: 338
There really isn’t that much of a difference between the 450 battery and the ESC/BEC/RX combo…
 

Attachments

  • 0182764E-5C77-412E-BCC2-5757A252F196.jpeg
    0182764E-5C77-412E-BCC2-5757A252F196.jpeg
    88.3 KB · Views: 342
  • 1F4206BC-ED33-41B5-A546-E6D291D5CFD1.jpeg
    1F4206BC-ED33-41B5-A546-E6D291D5CFD1.jpeg
    105.5 KB · Views: 337
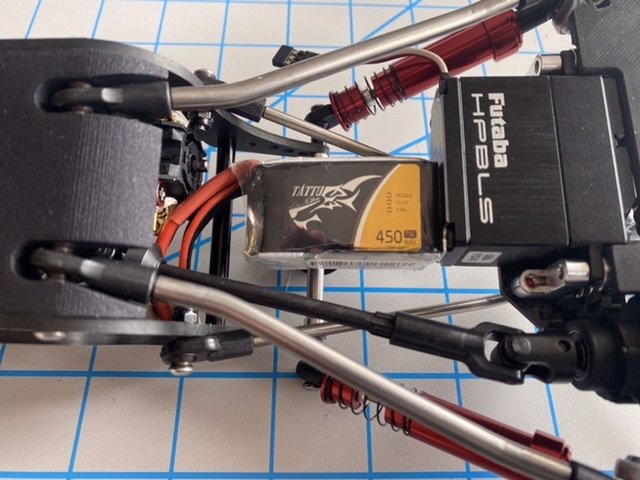
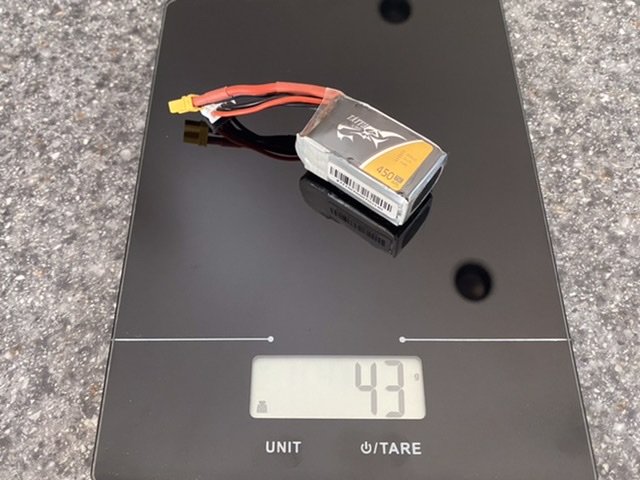
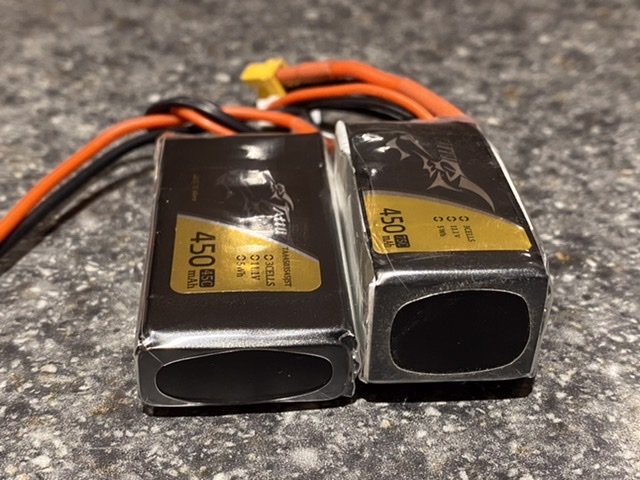
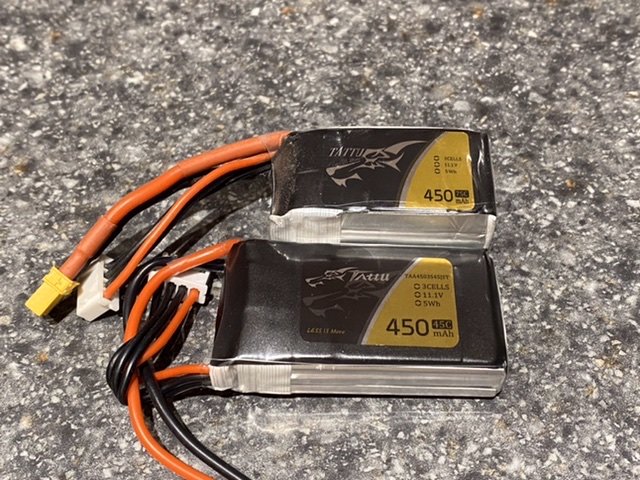
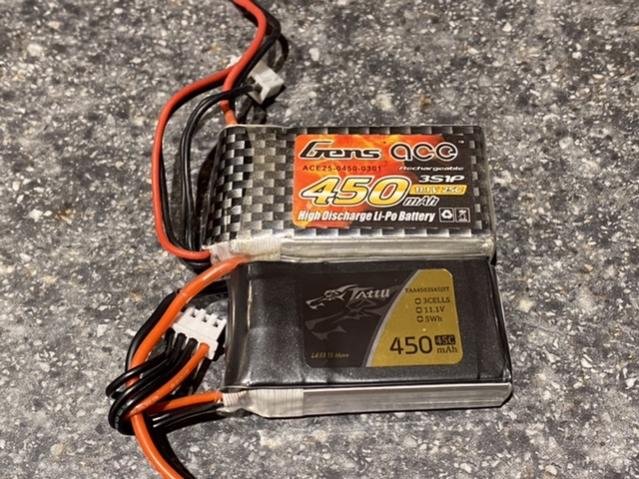
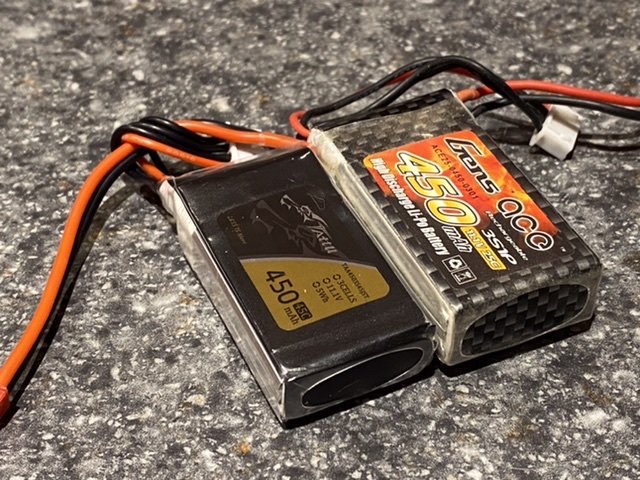
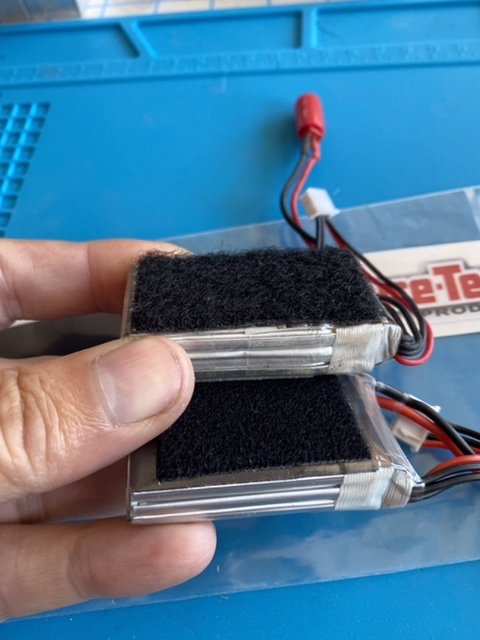
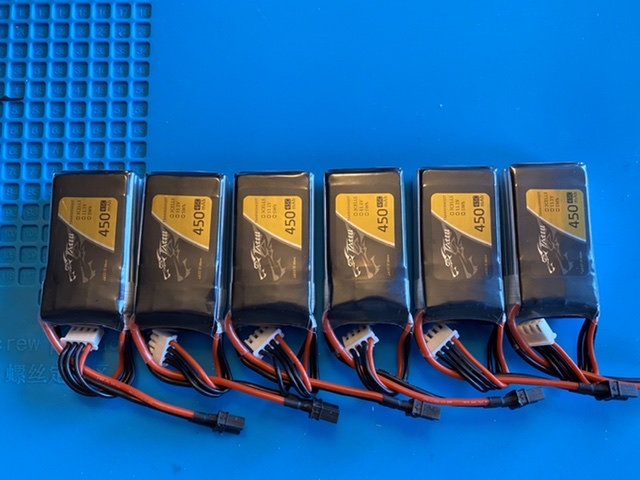
So I was running into some battery clearance issues that I wasn’t really happy with and had to deal with our wonderful Northern California wildfire evacuations so this sat on the table for a few weeks for me to stare at… I was contemplating using my old 25C GensAce batteries instead of the 75C Tattu’s and Nabil mentioned that the new Tattu 45C batteries are similar in size to the old ones… I like the fitment of the flatter battery with this horizontal servo setup so these will most likely be what I end up using. Here are a few pics of the size difference between the 75C and 45C as well as the 45C versus the 25C. As you can see the newer ones are even slightly smaller than the old ones. Win!
 

Attachments

  • D3455738-E753-4308-8537-F3071305AECD.jpeg
    D3455738-E753-4308-8537-F3071305AECD.jpeg
    121.3 KB · Views: 283
  • A56CEEA5-1893-43D5-A826-F3E4A35DCBDC.jpeg
    A56CEEA5-1893-43D5-A826-F3E4A35DCBDC.jpeg
    169.5 KB · Views: 278
  • 6DB49DD6-14E2-4F4A-BE0B-63AB44A61F3E.jpg
    6DB49DD6-14E2-4F4A-BE0B-63AB44A61F3E.jpg
    76.3 KB · Views: 263
  • 6CFC13EE-6663-4527-910C-2902CCFBD701.jpeg
    6CFC13EE-6663-4527-910C-2902CCFBD701.jpeg
    171.2 KB · Views: 281
Last edited:
New batteries are received, leads shortened, and black XT30’s installed.
Also found some new low profile Velcro that I am liking so far…
 

Attachments

  • 75F33B26-6D0C-44AC-AE5E-5D1E4F766B87.jpeg
    75F33B26-6D0C-44AC-AE5E-5D1E4F766B87.jpeg
    127.3 KB · Views: 237
  • 17F37329-F55A-421F-8F55-74425AED3AC9.jpeg
    17F37329-F55A-421F-8F55-74425AED3AC9.jpeg
    86 KB · Views: 242
  • F448FD46-B51B-4B24-B8D7-52007080A036.jpeg
    F448FD46-B51B-4B24-B8D7-52007080A036.jpeg
    96.2 KB · Views: 248
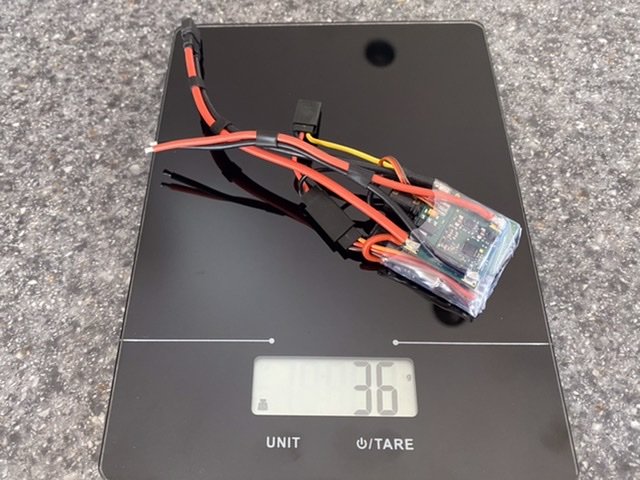
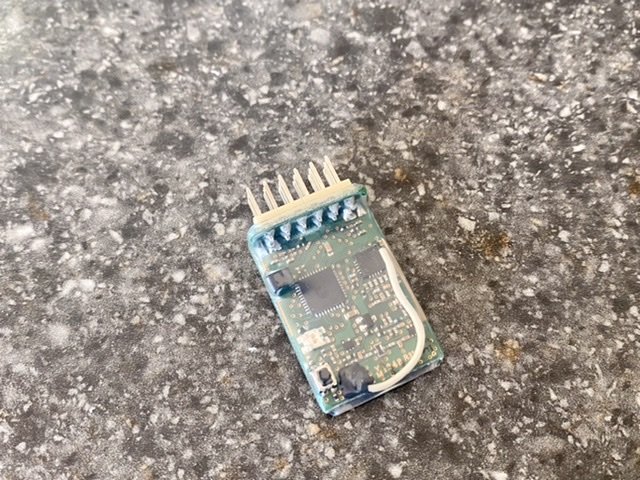
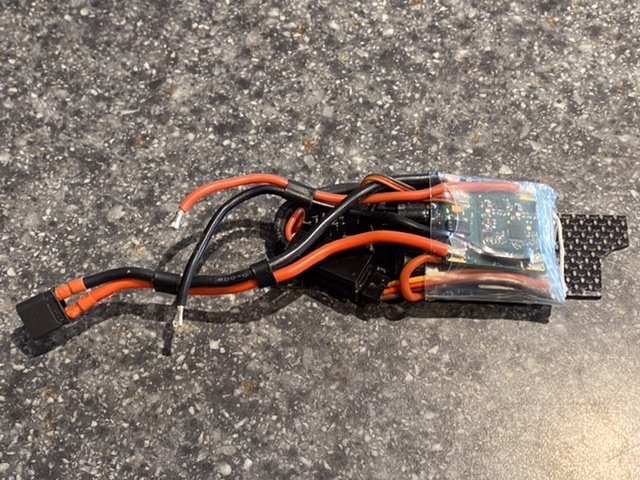
I also learned that the Futaba R2106GF receivers are either really sensitive to shrink wrap over the antenna or the antenna is too close to something that interferes with it if you shrink it like this. Your radio will lose signal less than 2 feet away… NOT recommended.
 

Attachments

  • 819F26BD-637B-411C-85D7-6F22F27839CC.jpeg
    819F26BD-637B-411C-85D7-6F22F27839CC.jpeg
    166.9 KB · Views: 255
This forced me to take my electronics package back apart, so I reassembled it even a little tidier, but with the antenna more in the open, and it seems to have make a world of difference. Weird.
 

Attachments

  • E7E149E0-EC1A-41EE-85EC-7841B767F3D9.jpeg
    E7E149E0-EC1A-41EE-85EC-7841B767F3D9.jpeg
    171.7 KB · Views: 241
  • 45817469-E447-4A54-8EEB-7219FAAE420E.jpg
    45817469-E447-4A54-8EEB-7219FAAE420E.jpg
    75.3 KB · Views: 245
  • 9A6143F4-38CC-48C9-A838-154FC95955AC.jpeg
    9A6143F4-38CC-48C9-A838-154FC95955AC.jpeg
    162.8 KB · Views: 244
And, just like everything else with this car, it decided to F with me some more… :ror:
 

Attachments

  • 6ADFD92B-3FDD-4B79-841B-10FD3FCE01F5.jpeg
    6ADFD92B-3FDD-4B79-841B-10FD3FCE01F5.jpeg
    80.1 KB · Views: 228
What a great build. I’ve overlooked it many times since I’m not into the old comp crawlers, but I appreciate the attention to detail.

I will be keeping track from now on, thanks for sharing.


Sent from my iPhone using Tapatalk
 
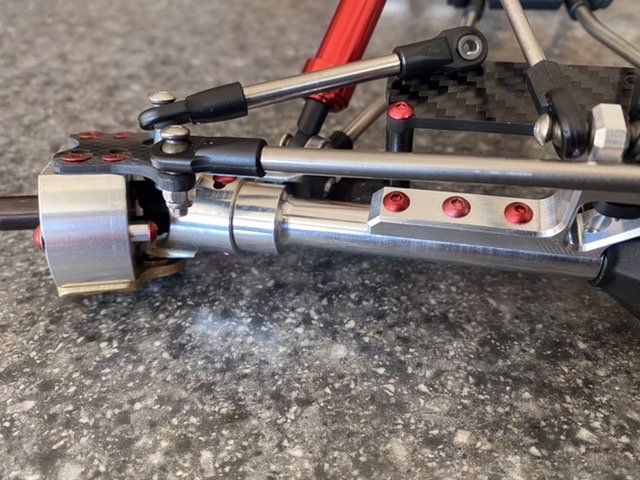
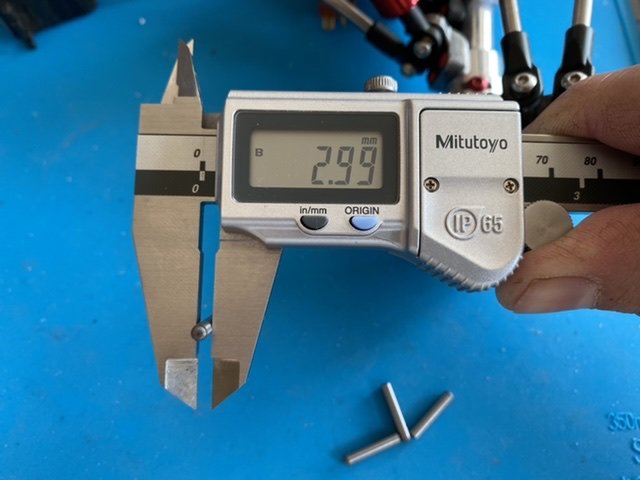
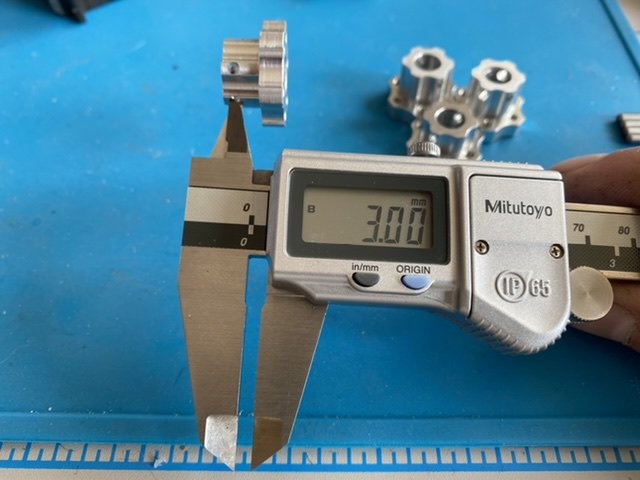
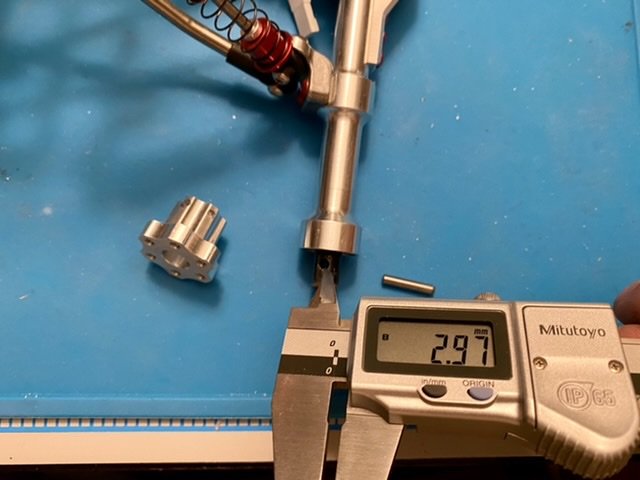
The stubs seem to be oversized and the pin holes seem to be undersized…
I love tight tolerances and no slop, but these can’t even be hammered on/through.
It would be easier to machine the aluminum hubs than the steel axles, but then other hubs still won’t fit, so I guess I will be tearing the axles back apart again. :x
 
Last edited:
Well the pin issue was the axle holes so I clearanced them with a 3mm drill.
There was under .001” difference but steel on steel made them a no go…
 

Attachments

  • 215F0129-D569-48D8-9D47-2312F9AB659D.jpeg
    215F0129-D569-48D8-9D47-2312F9AB659D.jpeg
    72.2 KB · Views: 191
  • 84185E7C-6CF5-4D8C-BEB3-A10F4A723D35.jpeg
    84185E7C-6CF5-4D8C-BEB3-A10F4A723D35.jpeg
    80.4 KB · Views: 189
  • 34EB2710-2BE2-4480-B771-0B7C930D0809.jpeg
    34EB2710-2BE2-4480-B771-0B7C930D0809.jpeg
    69.5 KB · Views: 191
Last edited:
Back
Top