• Welcome to RCCrawler Forums.

    It looks like you're enjoying RCCrawler's Forums but haven't created an account yet. Why not take a minute to register for your own free account now? As a member you get free access to all of our forums and posts plus the ability to post your own messages, communicate directly with other members, and much more. Register now!

    Already a member? Login at the top of this page to stop seeing this message.

B-MOW's TRX-4m Mini Blue Bronco

I bought a bearing kit for my Bronco but they are still in the parts bin. Be interested to hear your thoughts on them. The Defender pickup conversion is looking good!!

I installed the Jims Bearings bearings in my Bronco. I believe the bearings are a must. The diffs and trans spins so much freer and with the smooth freeness means better battery run times.

These Injora bearings I put in the Defender look very similar to any ordinary sealed bearing and they feel smooth to spin.

Thanks! I'll have more to share on the Defender body soon.
 
Picked up a nice LED light bar off of the Amazon. It is molded to fit right in behind the roof rack on the Bronco. Not gluing or screwing needed to mount it. Just fits in under the rack and is held in tight.

I drilled a tiny hole in the roof behind the light to run the wires down into the interior. Used my glue gun to put a dab of black glue over the wires and hole to seal it off. Used the glue gun to attach the wires inside the interior.

For now, I unplugged the LED lights in the bumper so that I could plug in the roof lights and the headlights into the receiver. I'll probably put a Y-connector in the receiver so that I can plug in the bumper lights and the roof lights at a later date.

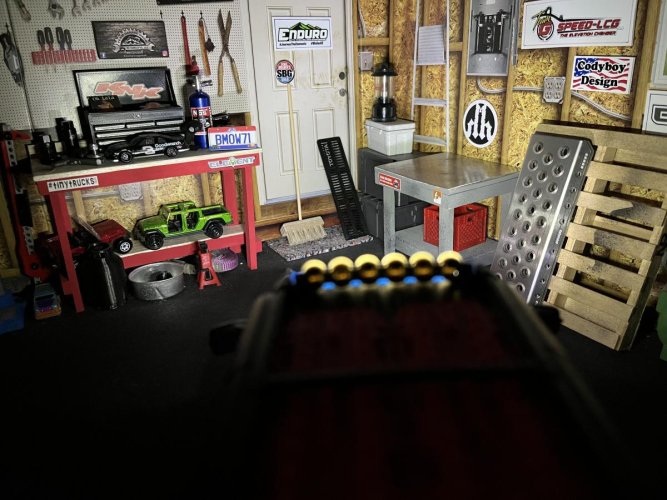
Adds a nice look to the Bronco. I turned off the lights in the garage to show how super bright all of the LED lights are.

IMG_0979.jpg

IMG_0982.jpg

IMG_0983.jpg

IMG_0984.jpg
 
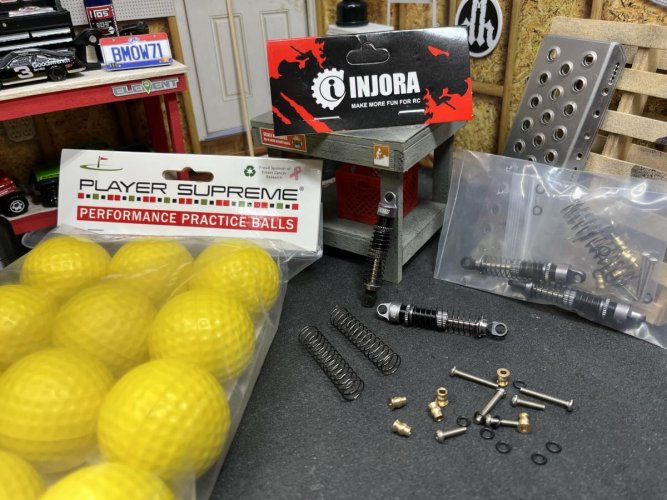
Some new stuff purchased for the little minis! Picked up some Injora 53mm shocks for the Bond Spectre Defender to replace the stock plastic shocks.

Also stopped by my local Meijer's to pick up some beer and decided to sing by the sporting section. Found these foam practice balls. They looked the perfect size to cut in half and make tiny gates for the TRX-4m's.

IMG_1005(1).jpg


I gotta say, for the money these Injora shocks are really nice. All alum bodies and caps and comes with two sets of springs. I filled them with Traxxas 20wt oil and they feel really smooth and I have not seen any of them leak a drop of fluid yet.

I did add Noleen to the shaft seals to make sure the fluid stayed in the shock bodies where it belongs.

IMG_1006(1).jpg


Cut the balls in half and numbered them. They are the perfect scale size for these little rigs.

IMG_1008(1).jpg

IMG_1009.jpg
 
Lights working very well! I bought the same beadlocks and painted them gold with some Tamiya brush on paint, wow looks good! Did you use the brass internal rings?

Your lower links look good too, my Traxxas steel set has quite a lot of side to side axle play compared to the stock all plastic links.

I bought the same jar of Noleen grease, best way to go when building shocks and it doesn't end up leaking out like the little tubes.
Nice use of the golf balls too!
 
Last edited:
Bronco is looking excellent B. Great idea to use the practice balls as gate markers. I'll be keeping an eye out for some of those for sure. A heads up on that light bar. I put the same one on my Bronco and I really like it. It did however crack in the middle after a couple roll overs. I glued it with some CA glue and so far it has held up. I do plan to glue a strip of "something " across the back of the light bar to increase it's rigidity.

Sent from my SM-G950W using Tapatalk


Great idea on the light bar reinforcement. I wondered how it would take rollovers. I haven’t driven it much since it was installed, but will get it fixed up before the next drive. Thanks for the tip![emoji1303]


Sent from my iPhone using Tapatalk
 
Spent a good part of the morning working on the Bond Spectre SVX Defender. Pretty much finished up the body with the bed section, cage and roof rack. On the full body cage, I cut down the rear of the cage given it an angled look like a rollbar type. I used a piece of heat shrink to join the two pieces together to form a single bar.

The Defender Customs bed insert fit in nicely. Added a little E6000 around the edges to hold it in.

IMG_1829.jpg

IMG_1831.jpg


On the roof rack, I cut down the full length rack that comes with the Defender. To make the rack that closely matches the 1:1 Spectre build, I had to cut the back section of the roof rack off of the body that came with the Defender chassis.

I attached the 2 halves of the racks together by melting the plastic with a solder iron. I then used JB Weld instant glue to attach the rack to the body cage.

IMG_1820.jpg

IMG_1821.jpg

IMG_1828.jpg


Next up was attaching the RC Plate Shop license plates. These plates closely match the original plates that are on the 1:1 Spectre SVX Defender that I have based this build off of. On the roof rack and can be seen in the previous pic, I cut and glued a flat piece of plastic to the rack to give the upper license plate a place to attach too.

I used a thin piece of servo tape to the plates to attach them to the body and cage.

IMG_1827.jpg

IMG_1832.jpg

More pics and updates coming soon. For some reason either my computer or this forum wouldn't let me upload any more pics.:flipoff: So I'll do these updates in batches!!
 
Part 2 of today's update. Picked up a set of wheels and tires a couple months back that closely resemble the originals on the 1:1. After mounting the tires, I felt that they were too big and the sidewalls were way too soft. The tire would rollover onto itself on a sidehill.

IMG_0752(1).jpg

IMG_0753(1).jpg


I ended up swapping the tires out for the ones that are now on the rig. The are from Injora and are smaller in diameter, have a better sidewall and they came with tiny foams. These fit the wheel opening better and the fender flares will not need any cutting. They are super soft and grippy!

IMG_1830.jpg


These pics are as it sits now. Bodywork and details are complete. There is a few more small details that I want too add, but for the most part it is done.

The original 1:1 Spectre SVX Defender had a black gloss paint. I decided to go with a matte black finish. I think the matte finish looks better and it was way easier to paint without messing around with clear coats!

IMG_1824.jpg


This front bumper is from Defender Customs and is 3D printed. Super nice print and is an identical copy of the 1:1 version. It even comes with a grille and Land Rover badge.

IMG_1825.jpg

IMG_1826.jpg


Last update of the day. I installed the Traxxas Defender light kit. The kit comes with all needed light buckets and screws. Easy to install and adds a nice and bright and good looking lights to the rig.

Just like the Bronco light kit, the brake lights turn on when the rig is stopped. The brake lights turn off when moving forward and the reverse lights come on when going backwards.

IMG_1835.jpg

IMG_1836.jpg

Next update will be all about the interior. It's 3D printed, painted and ready to be installed. Just waiting for my driver to get here!
 
Excellent build thus far B. You've done a great job replicating the original.

Sent from my SM-G950W using Tapatalk
 
Excellent build thus far B. You've done a great job replicating the original.

Sent from my SM-G950W using Tapatalk

Nice looking rig you did a great job making it look like the the original.

Thanks guys!"thumbsup"

It has been a fun and enjoyable build. I just ordered a light bar to go in front of the roof rack. Once it arrives I'll get it installed.

Thanks for stopping by!:)
 
After a long search for a driver to pilot the Spectre SVX Edition Defender, I have finally hired one. It's tough to find a qualified tiny person that fits in these mini interiors.:ror:

He is a well known celebrity that can't wait to be fitted in behind the wheel! I'll introduce him later!:)

IMG_1893.jpg
 
Back
Top