• Welcome to RCCrawler Forums.

    It looks like you're enjoying RCCrawler's Forums but haven't created an account yet. Why not take a minute to register for your own free account now? As a member you get free access to all of our forums and posts plus the ability to post your own messages, communicate directly with other members, and much more. Register now!

    Already a member? Login at the top of this page to stop seeing this message.

B-MOW's TRX-4m Mini Blue Bronco

Those cuts are incredibly precise for such a small body. Nice job. I can't wait to see the end result. I have to admit I'm curious to see what you do with the bed area.
 
I agree that is a cool looking Defender. Can't wait to see what yours is going to look like. You have a good start for sure.
 
Those cuts are incredibly precise for such a small body. Nice job. I can't wait to see the end result. I have to admit I'm curious to see what you do with the bed area.

Thanks! I am extremely happy with the cuts. Shouldn't take to much fill to smooth them out, if any.

I have something cool in store for the bed. I'll unveil it soon!:)

This took an interesting turn!

Sent from my iPhone using Tapatalk

It'll have a "License To Kill" if "Tomorrow Never Dies"!;-)

I agree that is a cool looking Defender. Can't wait to see what yours is going to look like. You have a good start for sure.

Thanks Gramps!"thumbsup"
 
Oh man....I can tell this is going to be good!! I'll be watching closely. :)

Thanks for following along!"thumbsup"

Hoping to get some more work done to it this weekend. Looks like rainy days ahead, so that means more bench time!:)
 
I concur, your cuts are excellent and like your choice of modification. Kinda fun that those bodies are of the hard variety
 
Picked up an unpainted Traxxas Defender body a few months back and was unsure which direction to take it.

Body cut and glued together. Simply cut it with a hobby knife and did the score and snap method. A little sanding to smooth out the cuts and then glued together.

I need to give thanks to Defender Customs on YouTube for the easy step-by-step instructions to layout and cut the body.

Next I'll get the protection cage cut to fit the modified body. Hoping to get some paint laid on it this week before the weather turns bad this weekend. More to follow later!


Looking good Mister Bond....James Bond that is! Watched that guys tutorials the other day, very good stuff.


I concur, your cuts are excellent and like your choice of modification. Kinda fun that those bodies are of the hard variety


Yes, loving the styrene so many mods and relatively easy to do.
 
I concur, your cuts are excellent and like your choice of modification. Kinda fun that those bodies are of the hard variety

Thanks smog! I'm glad that these are hard bodies and not lexan. Easy to modify with simple cutting tools and styrene.

Looking good Mister Bond....James Bond that is! Watched that guys tutorials the other day, very good stuff.

Cheers mate!"thumbsup"

Yeah, he does have some easy to understand vids for modifying these Defender bodies.
 
Just got back from buying a bunch of popcorn. Ready to hibernate at the computer and watch this build.

Thanks for tuning in. I'll try to get this movie rolling soon! Weather and adult life has slowed down the build here lately!
 
Sneak peak at my RC Plate Shop latest purchase. Saw them posted on F-Book and should be shipping out shortly.

Look close, you'll see the tiny Bond UK plates. Also pictured are a set of USA Flag plates for an upcoming build.

IMG_0767.jpg
 
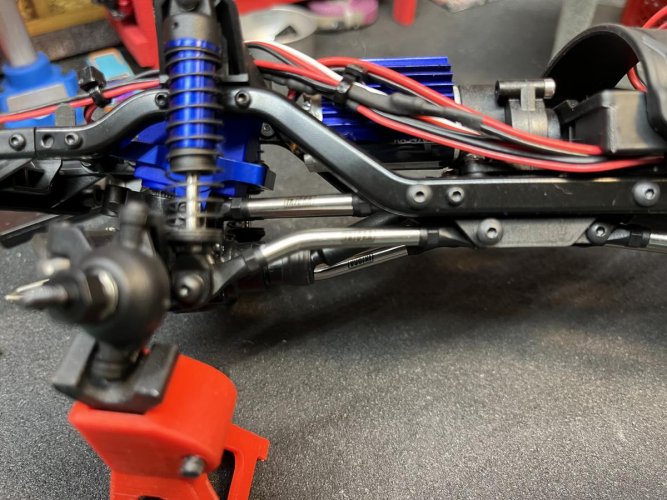
Some progress has been made since the last post. As I wait for the weather to cooperate so that I can apply paint (this weekend should be beautiful here in Ohio and the plan is to open up the paint shop), I purchased a set of high clearance links on the Amazon. These are the Injora flavor. The links are stainless steel and look great. The rod ends are molded well and they come with brass balls.

IMG_0891.jpg

IMG_0892.jpg


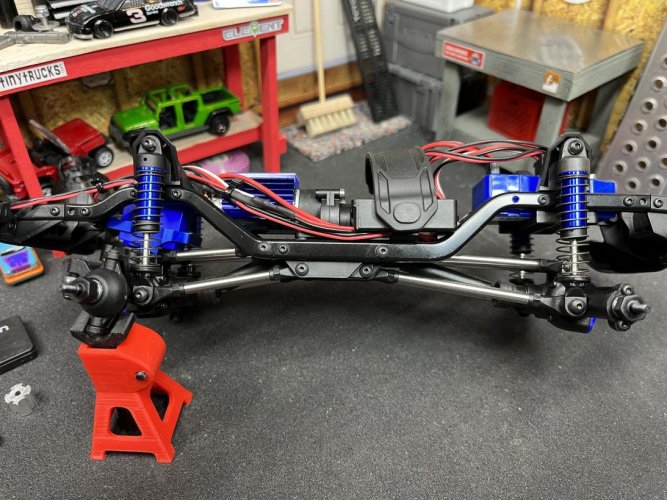
So after I installed the rear links I noticed that with the high clearance link that the driveshaft hangs way down below the link letting it be exposed to serious rock rash and abuse. That's not going to work, so I decided to flip the links and put the high clearance links in the upper position and move the upper straight links to the lower position. Luckily both the upper and lower links are the same length so swapping them was not an issue.

IMG_0893.jpg

IMG_0894.jpg

That's looks better and the suspension still moves to full compression even with the high clearance links in the upper position.

Now onto the front links. Same issue with the front high clearance link. The driveshaft hangs way to low for my likening. I even tried to install the link upside down just to see how far the link would hang down. You can see in the pick that the passenger side link is flipped. I think it hangs down too far. Unfortunately these front links are not the same length and the uppers cannot be swapped for the lowers.

IMG_0903.jpg

Next up is my fix for the high clearance link debacle!:roll:
 
Since I didn't like the look of the high clearance links installed, I decided to get a set of stainless steel straight links. I found these on Amazon and they have the same type of rod end with stainless steel balls instead of the brass like the high clearance link set has. Once again, these links look well made and the rod ends looked to be molded well.

The plan is to get them installed later today to see how they look and work.

IMG_0902.jpg


While I was at my local Hobbytown yesterday I noticed that the had just received in the new tan and orange colored Land Rover TRX-4m's. After a quick debate with myself, I decided to pick up the new tan colored one.

The plan is to use this new rig for my Bond 007 Defender SVX Spectre Edition build that I am currently working on. This way I can still drive my Bronco without having to swap out bumpers and body when I want to drive the Bond ride. Hoping to get the modified Land Rover body painted this weekend and get the SVX Spectre Edition completed so that I can get it out on the dirt.

This picture makes the tan look like a mustard color. In person it really looks like a baby shit brown. I may have to hit it with a flat clear to dull the shine and make it look a little better!

IMG_0901.jpg
 
awesome I am still on the fence on picking one of these trx4ms... and seeing your builds always steers me to pull $$$ out of my wallet... Back to your build .... looks like flipping the links on the rear even helped the driveshaft angle.
 
Last edited:
awesome I am still on the fence on picking one of these trx4ms... and seeing your builds always steers me to pull $$$ out of my wallet... Back to your build .... looks like flipping the links on the rear even helped the driveshaft angle.


Always glad to help to spend others dollars![emoji3]

Might as well jump off that fence! For the money, these little rigs are well worth it![emoji6] 1/10 scale driving experience in a much smaller package!


Sent from my iPhone using Tapatalk
 
Got the straight links installed on the Bronco. Much better now that the links protect the driveshaft better. Being that the rig is so small I really don't see the need for the high clearance links.

IMG_0912.jpg


So since the links turned out so well on the Bronco, I picked up another set for the Bond Spectre Defender. Also picked up a set of Injora bearings to try out. Bearings look good and roll smooth. We'll see how they do. I'm sure they'll be much better than the stock bushings that it came with.

IMG_0918.jpg


Links and bearings installed. Here's the pile of parts that was taken off. While I had the whole rig disassembled, I went ahead and added the metal rings and heat shrink to the driveshafts replacing the stock o-rings.

IMG_0921.jpg


And finally got a good coat of primer and flat black laid down on the body. I didn't get a pic of it, but I did make a slurry out of the plastic bits that I had cut out of the body. Mixed them with a little MEK and filled the cracks. Very little sanding was needed and then applied the paint.

IMG_0922.jpg


The light kit will be getting installed when the body gets assembled. Update on that soon.

IMG_0923.jpg
 
I bought a bearing kit for my Bronco but they are still in the parts bin. Be interested to hear your thoughts on them. The Defender pickup conversion is looking good!!
 
Back
Top