-
Welcome to RCCrawler Forums.
It looks like you're enjoying RCCrawler's Forums but haven't created an account yet. Why not take a minute to register for your own free account now? As a member you get free access to all of our forums and posts plus the ability to post your own messages, communicate directly with other members, and much more. Register now!
Already a member? Login at the top of this page to stop seeing this message.
You are using an out of date browser. It may not display this or other websites correctly.
You should upgrade or use an alternative browser.
You should upgrade or use an alternative browser.
3D Printers and Printing
- Thread starter Greatscott
- Start date
In S3D all the short cuts will be listed next to the command in the menu if it has one. Any of the icons down left/right, hover over it and you will see the tool tip that shows the command name and its shortcut.

Once you find it, you know it. I think I was expecting this function to be on the shortcut bar. I do like the "Arrange Parts" feature.
The printing continues!!!
I REALLY need to dig into Fusion 360 and learn how to draw my own parts. Until then, I have been scouring Thingiverse for stuff to print that I find useful.
Here are a couple of my latest prints...
One of the practical prints are these Deans plug covers to mark which packs are charged. I used cable ties for this, but I like these little covers, they are pretty slick. I pulled the *.STL file off Thingiverse, and after reading a lot of comments that the prints might have to be scaled to fit, I printed one off with the red PLA I had loaded in my printer.
 Untitled by Scott O, on Flickr
My tester fit perfectly, but I saw an obvious flaw. So, I changed out the red PLA for blue and printed off 25 of these. Nope, I do not have 25 packs, that many would be very unnerving to maintain, but I wanted spares because I know I will lose them.
 Untitled by Scott O, on Flickr
And boom...
 Untitled by Scott O, on Flickr
Of course, a color like yellow or orange would be better for standing out, but the blue works.
I also printed of some sand ladders, I just need to figure out where to mount them. This set will go on my TRX4, but I want to run off a couple more sets for my other scalers...
 Untitled by Scott O, on Flickr
 Untitled by Scott O, on Flickr
As far as the printer itself, it is working pretty well. I have been experimenting with different first-layer adhesition techniques, so far I am liking AquaNet, but every tells me that it will clog up stuff like the nozzle and fans. The only thing I can think of is that the fumes of the AquaNet off-gassing as it dries. I take the mirror off the bed, clean it and apply a fresh coat away from the printer.
Also, I am still fighting bed leveling, I think the carriage that the build plate sits on isn't quite flat, but it isn't bad and something I can deal with. With that, I am now thinking I want a smaller volume printer so I can have both working at the same time, and might just go ahead and pull the trigger on a Lulzbot Mini-2.
https://www.thingiverse.com/thing:2507493
I usualy search on yeggi not thingiverse because it searches multiple sites at once. Usualy everything is on thingiverse though.
Sent from my SM-N950U using Tapatalk
Still looking for a BEC bracket. I guess this kind of reinforces the need to learn Fusion 360 and make my own.
I printed off the one several people have suggested, and technically it works, but is certanly not designed for the 10A CC BEC that we all know and love.
 Untitled by Scott O, on Flickr
 Untitled by Scott O, on Flickr
Also, I am still fighting bed leveling, I think the carriage that the build plate sits on isn't quite flat, but it isn't bad and something I can deal with. With that, I am now thinking I want a smaller volume printer so I can have both working at the same time, and might just go ahead and pull the trigger on a Lulzbot Mini-2.
Seems common for their beds. Getting a BLTouch can help figure a warped bed out for ya.
If I can voice an opinion real quick. Get this printer dialed in first, get all the mods and quirks fixed before diving into a second unit. I thought the same way after my first one and held back thankfully. It kept me from fighting with 2 different brands/types and let me still print and do things while I set my second one up.
Theres still a lot you can do to this one not to make it print faster but be more reliable and efficient. "thumbsup"
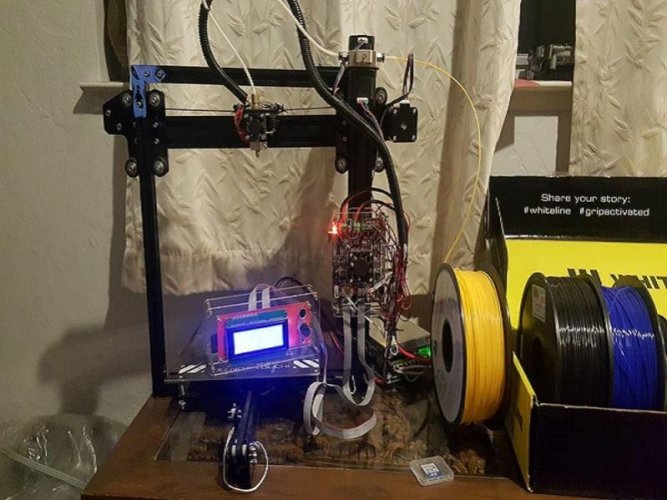
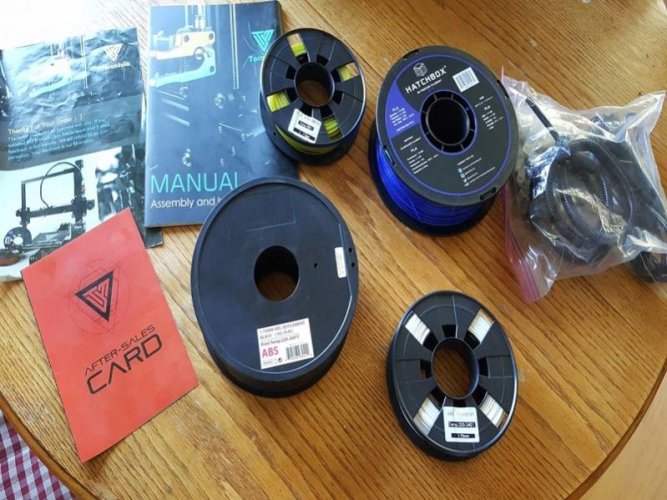
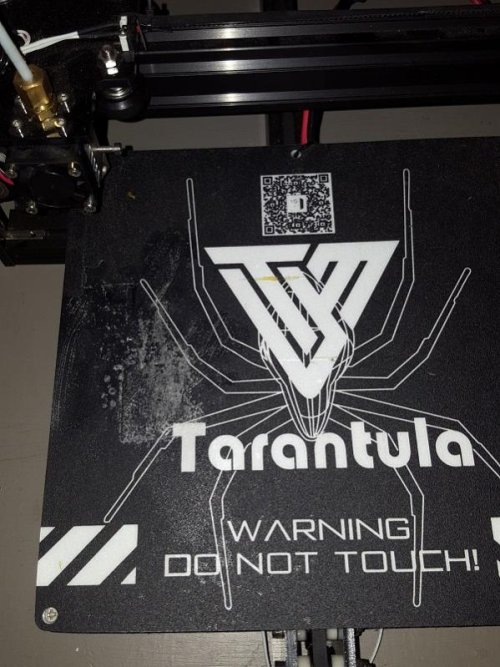
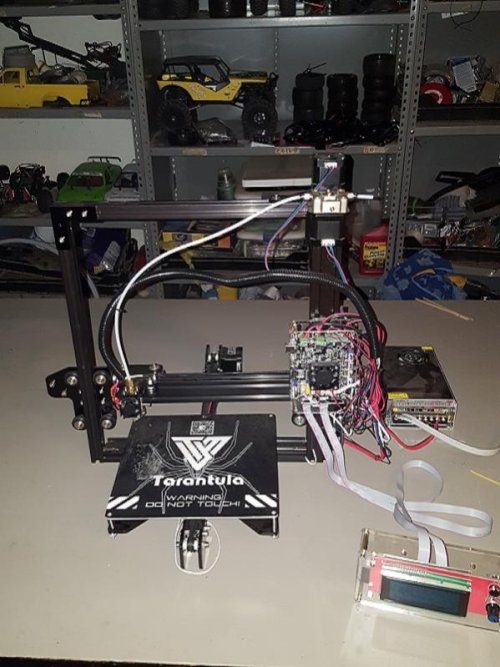
I just scored my 3rd printer in less than a couple months for $60, its a Tevo Tarantula that has a 9'' x 9'' x 9" build area, so now I have a small size, a medium size and now a large size 3d printer
Attachments
If I can voice an opinion real quick. Get this printer dialed in first, get all the mods and quirks fixed before diving into a second unit. I thought the same way after my first one and held back thankfully. It kept me from fighting with 2 different brands/types and let me still print and do things while I set my second one up.
THAT is what I am fighting, especially when I have a print running on the printer and have another I am itching to print in another color.
I just scored my 3rd printer in less than a couple months for $60, its a Tevo Tarantula that has a 9'' x 9'' x 9" build area, so now I have a small size, a medium size and now a large size 3d printer
SCHWEET, CONGRATS!!!
I will say that the brick attached to the right pillar looks a little scary.
Last edited:
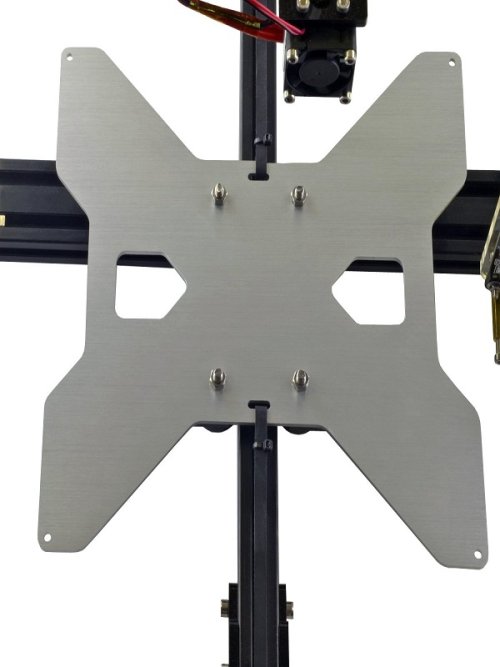
I got my $60 Tevo Tarantula and the Y carriage plate is broke in the front left corner, guess that is a common thing with the Tevo's but $42 I can get a aluminum Y carriage and new Borosilicate glass print bed, since the bed plate is in pretty bad shape and the glass bed is cheaper than a new sticker or a sticker and magnetic plate, So its a cheap too upgrade the carriage and glass bed
Attachments
Voodoobrew
I wanna be Dave
Tried to msg you but Tapatalk ug.Still looking for a BEC bracket. I guess this kind of reinforces the need to learn Fusion 360 and make my own.
I printed off the one several people have suggested, and technically it works, but is certanly not designed for the 10A CC BEC that we all know and love.
Untitled by Scott O, on Flickr
Untitled by Scott O, on Flickr
Absolute Beginner Livestream Recordings: https://www.youtube.com/playlist?list=PL40d7srwyc_NopbOnJ4IARIvSrTT1pp5m
I will see what I can do for a bec mount.
So many ways to do it but what's preferable and universal?
Sent from my SM-N950U using Tapatalk
Voodoobrew
I wanna be Dave
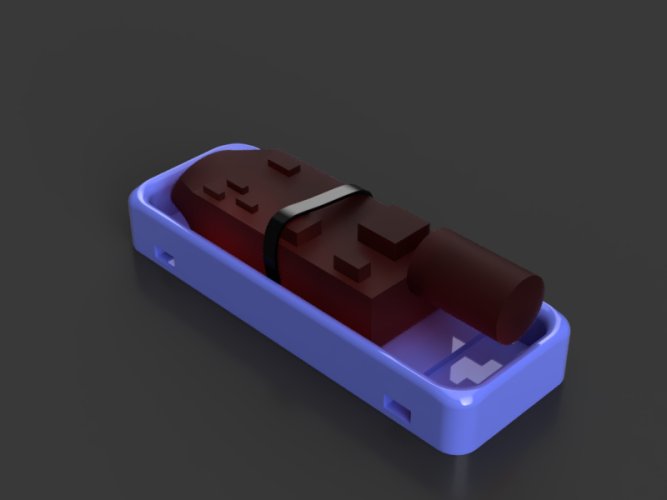
Made a few Mounts for the 10A Castle BEC, nothing fancy but Fit is better.
Edit: Lol you probably want the link huh
For printing: https://www.thingiverse.com/thing:3735064
For Designing: https://a360.co/2S1vkit
Edit: Lol you probably want the link huh
For printing: https://www.thingiverse.com/thing:3735064
For Designing: https://a360.co/2S1vkit
Attachments
Made a few Mounts for the 10A Castle BEC, nothing fancy but Fit is better.
Edit: Lol you probably want the link huh
For printing: https://www.thingiverse.com/thing:3735064
For Designing: https://a360.co/2S1vkit
WHOLLY CRAP DUDE!!!! THAT IS PERFECT!!! ... Downloaded!!!!
Many thanks!
Well, I have gotten one of my "practical" prints out of the way.
The bulk of my RCs run off of my DX5R or my DX5C, and it gets a little confusing at times as to what radio runs which RC. So, I printed out Autobot and Decepticon icons. All of the DX5R RCs are the Autobots, and the DX5C are Decepticons, easy-peasy!!!!
 Untitled by Scott O, on Flickr
Also, I am trying to figure out which way to adjust my print bed, the picture below shows the back of the icons, the ones to the right were printed on one side of the bed, the ones to the left the other. Which is the most correct for how they the bed-side of the print should look?
In other words, should prints be smooth, like the ones on the right, or should they have some texturing, like the ones on the left?
 Untitled by Scott O, on Flickr
Last edited:
Voodoobrew
I wanna be Dave
Pla likes to be smashed down, petg likes a little more height. So kinda depends on what you print with. If it sticks all smashed down I would go with that myself, looks nicer if it's visible.
Sent from my SM-N950U using Tapatalk
Sent from my SM-N950U using Tapatalk
Pla likes to be smashed down, petg likes a little more height. So kinda depends on what you print with. If it sticks all smashed down I would go with that myself, looks nicer if it's visible.
Sent from my SM-N950U using Tapatalk
That is PLA. Instead of trying to bed level wholistically, I am trying to tweak it in based on what I see from my prints. My right side was a little too high, so I came down two notches. I am currently in the middle of a flexi Bat-symbol print, my next print will be the BEC cases, and I will come up on the left side by one notch.
Voodoobrew
I wanna be Dave
That is PLA. Instead of trying to bed level wholistically, I am trying to tweak it in based on what I see from my prints. My right side was a little too high, so I came down two notches. I am currently in the middle of a flexi Bat-symbol print, my next print will be the BEC cases, and I will come up on the left side by one notch.
Depending on the board and if it is an issue you can turn up the power on the drivers for the stepper motors with a tiny screwdriver. I had to do this because the right side kept sticking during prints, making the bed unlevel mid print sporadically.
Great input on the bottom of my prints. Right now I am tweaking my bed level a little between prints to get both sides to look the same.
To prove just how easily amazed I can be, I printed off a set of dolphins and didn't pay any attention to over hangs or anything that might need supports. I realized when I was looking at my finished print just how much of an overhang there is on the fins of the fish, and it just blew my mind that the printer was able to span this gap with no supports.
 Untitled by Scott O, on Flickr
 Untitled by Scott O, on Flickr
To prove just how easily amazed I can be, I printed off a set of dolphins and didn't pay any attention to over hangs or anything that might need supports. I realized when I was looking at my finished print just how much of an overhang there is on the fins of the fish, and it just blew my mind that the printer was able to span this gap with no supports.
 Untitled by Scott O, on Flickr
 Untitled by Scott O, on Flickr
Voodoobrew
I wanna be Dave
Wow anything after 55 degrees and I get spegetti
Sent from my SM-N950U using Tapatalk
Sent from my SM-N950U using Tapatalk
The adventure continues...
My charger has been down for a while, so I really haven't done anything with my batteries in a while. This last week I received my new Venom 4-channel charger and have balanced charged everything I have. As a result, I have been able to use the "full" caps for my Deans, so far each one has fit perfectly and it is a lot easier to tell what is charged and what isn't.
Last night I printed out another useful item, a stand for my TRX4s. This stand beats the dog-snot out of the Duratrax stands I was trying to use. Those Duratrax stands fit most of my RCs just fine, but were just not made for the TRX4, I couldn't cycle the steering or run the ESC without tires hitting the stand and causing all kinds of workbench chaos.
https://www.thingiverse.com/thing:3580134
Overall the print went just fine. I am still amazed at the level to detail that can be printed, the lettering on this stand is super crisp. The file itself is a little odd, and it didn't catch it until I was done with the print, the file has two if the large (foot) sides, but only one of the braces, you need to to make the whole mess work. So, a quick second print and I had all of the parts. I think this is because the two sides are mirrors of each other, and the braces are exactly the same.
 Untitled by Scott O, on Flickr
My printer did have a little trouble with this print. The large sides have countersunk holes for the screws, my printer did not print these well, they actually turned out semi translucent, and would have never held the screw properly. As a result, I went with 20mm screws (the print author recommends 16mm), and washers.
 by Scott O, on Flickr
 by Scott O, on Flickr
Given the inserts for the braces had no support, the printer actually did pretty well.
 by Scott O, on Flickr
I tapped out the holes with a 3mm tap and whallah...
 by Scott O, on Flickr
And... my current TRX4 project, now able to turn the steering and wheels...
 Untitled by Scott O, on Flickr
My charger has been down for a while, so I really haven't done anything with my batteries in a while. This last week I received my new Venom 4-channel charger and have balanced charged everything I have. As a result, I have been able to use the "full" caps for my Deans, so far each one has fit perfectly and it is a lot easier to tell what is charged and what isn't.
Last night I printed out another useful item, a stand for my TRX4s. This stand beats the dog-snot out of the Duratrax stands I was trying to use. Those Duratrax stands fit most of my RCs just fine, but were just not made for the TRX4, I couldn't cycle the steering or run the ESC without tires hitting the stand and causing all kinds of workbench chaos.
https://www.thingiverse.com/thing:3580134
Overall the print went just fine. I am still amazed at the level to detail that can be printed, the lettering on this stand is super crisp. The file itself is a little odd, and it didn't catch it until I was done with the print, the file has two if the large (foot) sides, but only one of the braces, you need to to make the whole mess work. So, a quick second print and I had all of the parts. I think this is because the two sides are mirrors of each other, and the braces are exactly the same.
 Untitled by Scott O, on Flickr
My printer did have a little trouble with this print. The large sides have countersunk holes for the screws, my printer did not print these well, they actually turned out semi translucent, and would have never held the screw properly. As a result, I went with 20mm screws (the print author recommends 16mm), and washers.
 by Scott O, on Flickr
 by Scott O, on Flickr
Given the inserts for the braces had no support, the printer actually did pretty well.
 by Scott O, on Flickr
I tapped out the holes with a 3mm tap and whallah...
 by Scott O, on Flickr
And... my current TRX4 project, now able to turn the steering and wheels...
 Untitled by Scott O, on Flickr
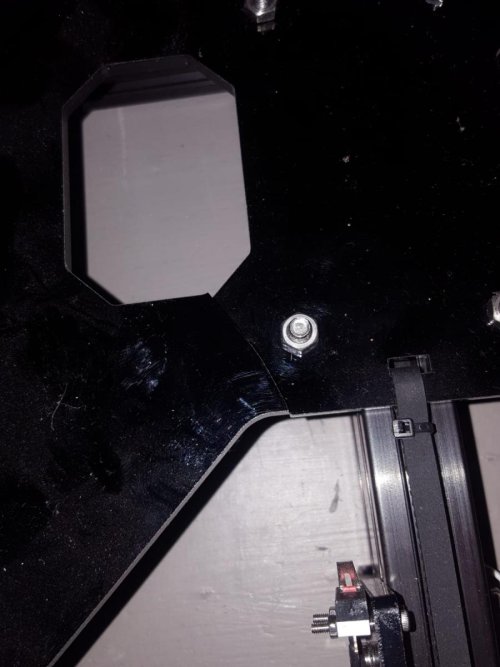
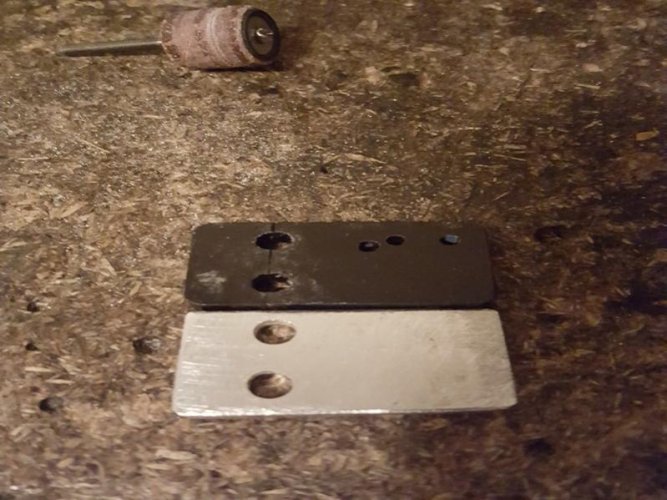
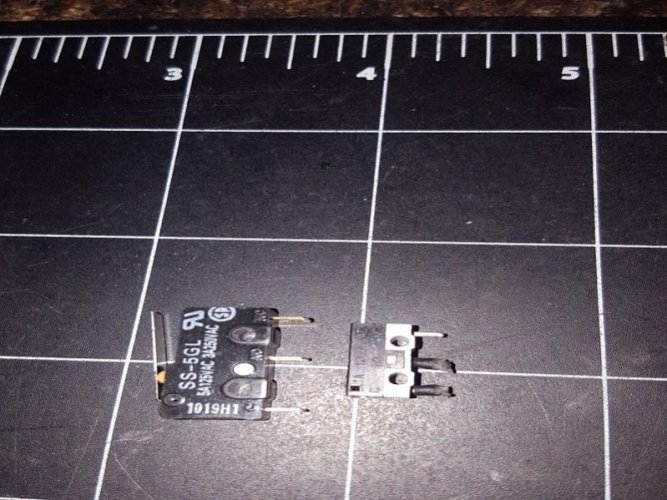
I got the Y carriage installed and had to flip the Y axis motor on the belt for the Y axis, so the carriage now goes back and hits the limit switch then goes forward too home the Y axis, the switch for the Y axis had to be replaced cause it was broke and the plastic limit switch mount must of been cracked cause it broke pulling the broke switch off, I made a new mount out of some aluminum plate, the next problem is the switches are 2 different sizes and have to make sure its make the correct contact with the Y carriage and is at the right height, the Tevo is pain in the ass so far
Attachments
Nightmares like your was/is my biggest fear in getting into 3D printing. That is why I almost pulled the trigger on the Lulzbot Mini2, no muss, no fuss, you feed it G-code and it poops out prints.
Sent from my iPhone using Tapatalk
Sent from my iPhone using Tapatalk
Voodoobrew
I wanna be Dave
Y U NO ADD SLOTS TO MOUNT TO ADJUST HEIGHT!?!?
lol see now Facebook crowds can understands, I'm bilingual!

Sent from my SM-N950U using Tapatalk
lol see now Facebook crowds can understands, I'm bilingual!

Sent from my SM-N950U using Tapatalk
Similar threads
- Replies
- 2
- Views
- 500

