-
Welcome to RCCrawler Forums.
It looks like you're enjoying RCCrawler's Forums but haven't created an account yet. Why not take a minute to register for your own free account now? As a member you get free access to all of our forums and posts plus the ability to post your own messages, communicate directly with other members, and much more. Register now!
Already a member? Login at the top of this page to stop seeing this message.
You are using an out of date browser. It may not display this or other websites correctly.
You should upgrade or use an alternative browser.
You should upgrade or use an alternative browser.
What did you do to your TRX-4 today?
- Thread starter Miatardo
- Start date


Yesterday I made a light switch out of an old servo. Info on that here http://www.rccrawler.com/forum/electronics/576389-light-switch-servo.html
I used this idea on the Traxxas light kit which uses a single signal wire to tell the light controller to turn on, so instead of this powering the lights it just acts as a signal. I wired in one wire to the positive output on the servo board to connect to the light controller trigger which was plugged into one of the channel 1 slots.
I've now plugged my servo switch into one of the empty channels that used to control the diffs (and the light controller plugs into this) and now the 3 position switch on the remote triggers the lights on and off. I had these channels and the switch free because I'm using HeyOk's diff controller
<iframe width="560" height="315" src="https://www.youtube.com/embed/qXDk8lK2pQY" frameborder="0" allow="autoplay; encrypted-media" allowfullscreen></iframe>
Last edited:
Tossedman
RCC Addict
Took mine crawling.
<iframe width="560" height="315" src="https://www.youtube.com/embed/HIHkj7rpQa8?rel=0" frameborder="0" allow="autoplay; encrypted-media" allowfullscreen></iframe>
<iframe width="560" height="315" src="https://www.youtube.com/embed/HIHkj7rpQa8?rel=0" frameborder="0" allow="autoplay; encrypted-media" allowfullscreen></iframe>
Topher Builds
I wanna be Dave
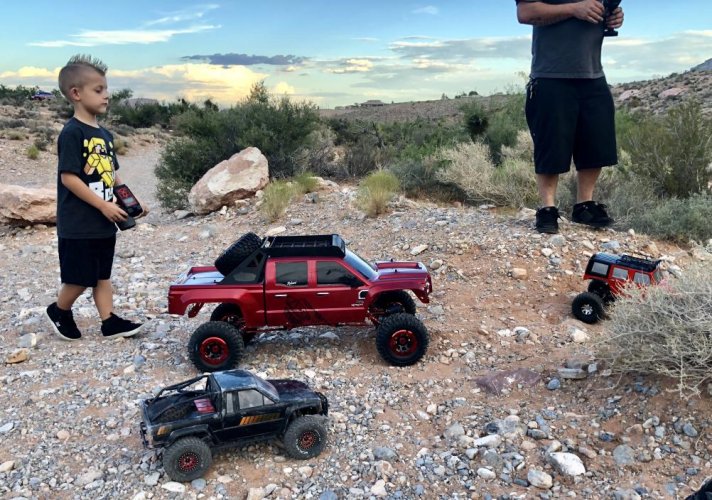
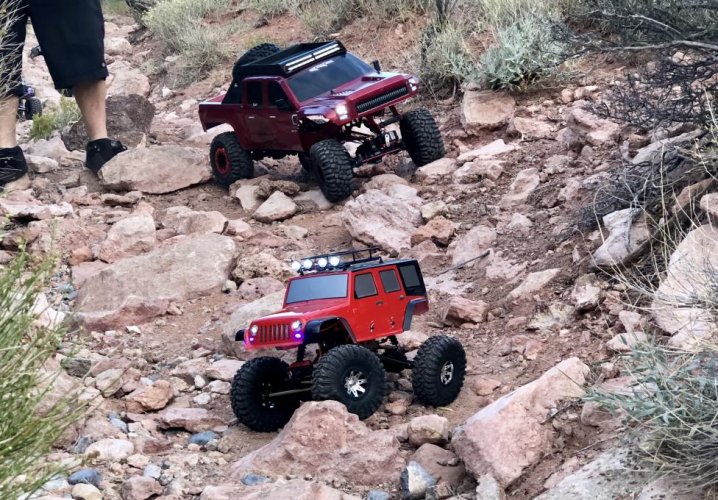
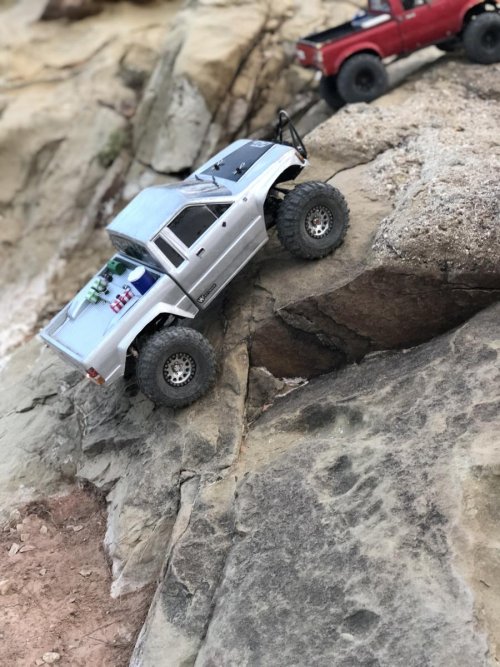
Been getting a lot of trail time in with the trx4 lately and it’s such a blast. Tonight one of the big boy red cats was out on the trail, driven by the littlest fellow of course.
I picked up some second hand chanquish wheels with Predator super swampers and dual stage foams, they have been doing great. Some more spring options on the way.
I picked up some second hand chanquish wheels with Predator super swampers and dual stage foams, they have been doing great. Some more spring options on the way.
Attachments
Topher Builds
I wanna be Dave
Still haven't figured out what to do for the rear body mounts to fit in the bed of the new RC4WD Taco...
A lot of us are using the X01 (traxxas super car) body mounts. Check out this thread as we get into some detail with pics on it http://www.rccrawler.com/forum/traxxas-trx-4/600446-hilux-update-bed-questions.html
Itali83
RCC Addict
Made my own radiator out of zip ties laid out on gorilla tape to keep them straight.

Installed the mytrickrc light kit. I’m not impressed by this kit really. Wish I had paid more attention to the specs on it. No brake lights, very big and heavy control unit that needs to be mounted to the body instead of chassis for COG minded guys like me. The marker lights are orange instead of yellow.

Put the spare tire on.

Ben
Sent from my iPhone using Tapatalk
Installed the mytrickrc light kit. I’m not impressed by this kit really. Wish I had paid more attention to the specs on it. No brake lights, very big and heavy control unit that needs to be mounted to the body instead of chassis for COG minded guys like me. The marker lights are orange instead of yellow.
Put the spare tire on.
Ben
Sent from my iPhone using Tapatalk
BadBeard
Rock Stacker
Had my first trail carnage today while out filming at a new local spot. The TRX4 bronco got tangled in some tall grass. The grass was soft and there wasn’t much so I thought I could safely cross it, nope it was definitely a trap haha. It’ll be an easy fix though and I recovered all the pieces that fell out.


Sent from my iPhone using Tapatalk
Sent from my iPhone using Tapatalk
It's the Grass's way of saying 'Stay off my lawn!'
My guess is that the rod end on the shock was just about to unscrew anyway as that really shouldn't happen, just patch it back up and dont be afraid of the grass, lol
My guess is that the rod end on the shock was just about to unscrew anyway as that really shouldn't happen, just patch it back up and dont be afraid of the grass, lol
BadBeard
Rock Stacker
It's the Grass's way of saying 'Stay off my lawn!'
My guess is that the rod end on the shock was just about to unscrew anyway as that really shouldn't happen, just patch it back up and dont be afraid of the grass, lol
Oh we’ll be going back there for sure. I think it’s going to be a great place to shoot some general Trailing footage lots of narrow foot paths and rocks to climb on plus water and mud. I will be checking the rest of the rod ends just to be sure they’re snug. For my first breakage it’s quite minor and I’m very happy about that.
Sent from my iPhone using Tapatalk
")
BadBeard
Rock Stacker
BadBeard, what company makes the shocks that you have on your TRX-4?
They’re HSP 100mm all aluminum shocks, found them on eBay. It was a cheap way to lift the truck just enough to make the 2.2 boggers fit with out rubbing.
Sent from my iPhone using Tapatalk
I used these.

Sent from my SM-N910P using Tapatalk
They’re HSP 100mm all aluminum shocks, found them on eBay. It was a cheap way to lift the truck just enough to make the 2.2 boggers fit with out rubbing.
Sent from my iPhone using Tapatalk
Sent from my SM-N910P using Tapatalk


Thought this mod would be quick and easy but every step of the way there was something fighting me. Not even planning to run this bumper much since it has such poor approach angle but my buddy gave me the winch for free so I figured I'd buy a bumper to put it on. Primarily for show whenever I finish my new Bronco body... not even going to hook it up.
Anyway... Decided that since there are so many synthetic ropes out there, that I'd keep this old skool and use steel cable ( even though this winch isn't period-correct). So had to disassemble the winch to wrap the new cable then use tape to keep it from un-spooling as I put it all back together and started mounting it up. Had to enlarge the 4 holes on the mounting plate, then had to cut a couple mm off the fair-lead mounting screws to clear the front of the winch... tight tolerances everywhere and tiny hardware made install ( incl thread-lock) a royal b!^@h... very little room for tools! Also I thought the Warn decal looked "off" ( incorrect red color and it was printed askew and adhered crooked) so I ditched it and instead used a darker red Warn decal and backed it with chrome mylar to give it the correct look. Whole project took much longer than expected. I may get a proper thimble/ shackle mount but I'm using a hook and adj collar/ for now. Unfortunately the winch sits so far fwd that you can't even see the cable very well but at least it's done and looks pretty decent imo.


Anyway... Decided that since there are so many synthetic ropes out there, that I'd keep this old skool and use steel cable ( even though this winch isn't period-correct). So had to disassemble the winch to wrap the new cable then use tape to keep it from un-spooling as I put it all back together and started mounting it up. Had to enlarge the 4 holes on the mounting plate, then had to cut a couple mm off the fair-lead mounting screws to clear the front of the winch... tight tolerances everywhere and tiny hardware made install ( incl thread-lock) a royal b!^@h... very little room for tools! Also I thought the Warn decal looked "off" ( incorrect red color and it was printed askew and adhered crooked) so I ditched it and instead used a darker red Warn decal and backed it with chrome mylar to give it the correct look. Whole project took much longer than expected. I may get a proper thimble/ shackle mount but I'm using a hook and adj collar/ for now. Unfortunately the winch sits so far fwd that you can't even see the cable very well but at least it's done and looks pretty decent imo.
freakinjeeper
Newbie

Spent a few minutes mounting tires.. This thing just keeps getting better! Tested the winch out and happy with it although a steel bumper would be better as far as being a little more solid. Still happy with it either way..
Sent from my iPad using Tapatalk
Did some bumper mounting work.
Swapped the front mount to the back to raise the bumper and bring it in a little.
Before:

After:

Then I modified a 10.2 front mount to fit on the TRX4 frame rails, which basically gave me a 0V 0H mount.
Before:

After:


Swapped the front mount to the back to raise the bumper and bring it in a little.
Before:
After:
Then I modified a 10.2 front mount to fit on the TRX4 frame rails, which basically gave me a 0V 0H mount.
Before:
After:
Inspector86
RCC Addict
I installed new RC4WD SCX10ii Cherokee XJ aluminum bumpers front and rear on my #3 TRX4. Really like the look and fit. I'm using a LURC Zero vertical offset 3D printed bumper mounts front and rear. I then adjusted the body mount posts so the body just sets on the bumpers. Once the body height was set I spaced the rock rails up as necessary to capture the body rocker panels in the groove. This resulted in greatly improved approach and departure angles and the body supported on all four sides.


Last edited:
underscorepatrick
Newbie
started building my trx4 kit =]
Similar threads
- Replies
- 6
- Views
- 2K
- Replies
- 31
- Views
- 7K