• Welcome to RCCrawler Forums.

    It looks like you're enjoying RCCrawler's Forums but haven't created an account yet. Why not take a minute to register for your own free account now? As a member you get free access to all of our forums and posts plus the ability to post your own messages, communicate directly with other members, and much more. Register now!

    Already a member? Login at the top of this page to stop seeing this message.

Topher Builds a Sherpa - Rear Portal Class 2 comp truck

Topher Builds

I wanna be Dave
Joined
Dec 11, 2017
Messages
2,554
Location
Las Vegas
This one is sort of a birthday build and last hurrah for me as the darn pandemic is going to shrink my rc budget drastically for the near future, but I’ve been kicking around the idea on how to pull one of these off and had to go for it.

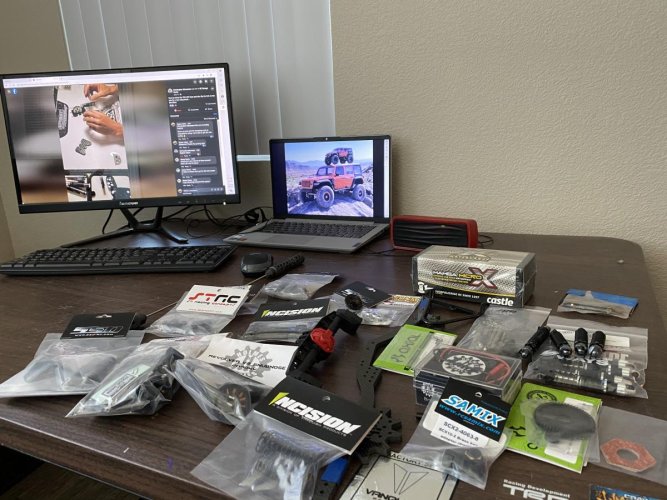
I don’t have any parts on hand but I do have things ordered now so the build is starting to take shape.

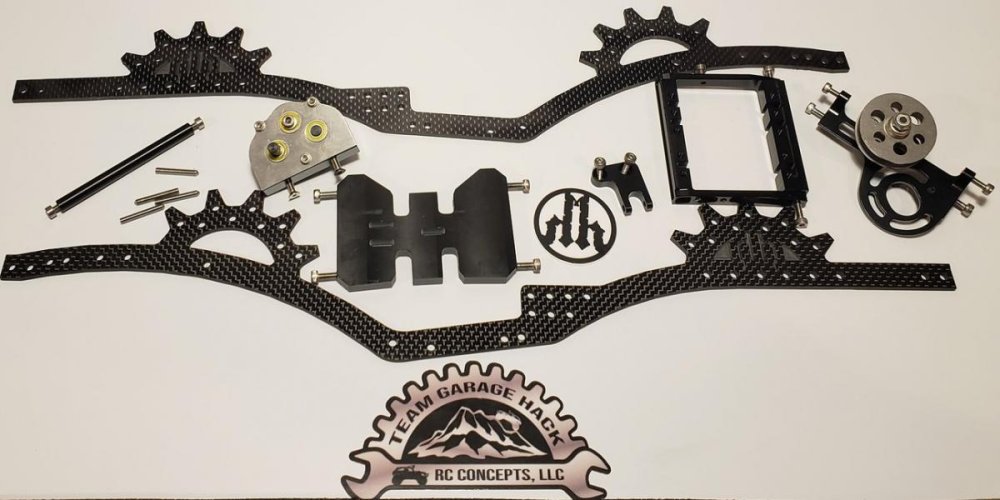
HH/TGH Sherpa Expert Chassis Kit (includes forward mount and t case)
Axial AR45P rear portal axle
SSD Diamond Front Axle and brass knucks brass chubs
90mm incision front shocks
80mm incision rear shocks
Incision drive shafts
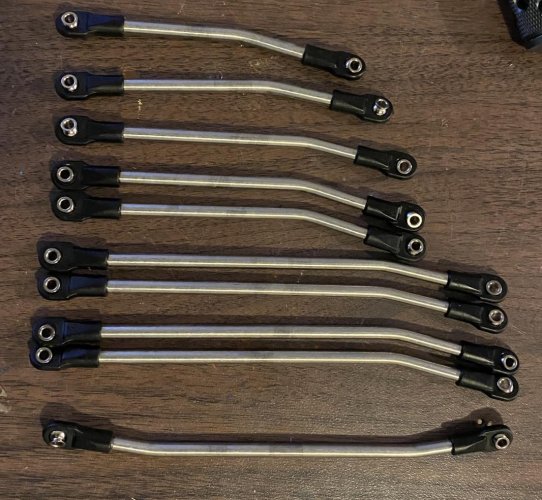
Hardcore RC 12.5” wb links
Mamba micro x
HH snub nose v2 revolver 2040kv
HH v3 servo

That’s the basics of it. May end up changing the shocks at some point but want to see how it does with the different sizes and the rear portal. I’m going to run the reverse cut dead loc racing gears in the Ssd diamond front axle to fix the counter rotation of the portals but allow me to maintain a high pinion on both axles.

The axial portals have a reduction of 1.91 iirc so there’s a lot of room to make up for. I’m going to approach this 3 ways, first with the TGH wild OD portal gears (35%), AR44 diff 27/8 OD (10%) and then I’m hoping to find a way to get the OD on the t case to output to the rear by moving some shafts around (maybe mirrored skid?) for another 15%. I’m hoping this leaves me with somewhere around 30% OD up front.

Open to any thoughts and feedback. My plan B is to run a GC4.2 t case as I’ve already eyeballed that one and think I could get the OD to the back very easily there.

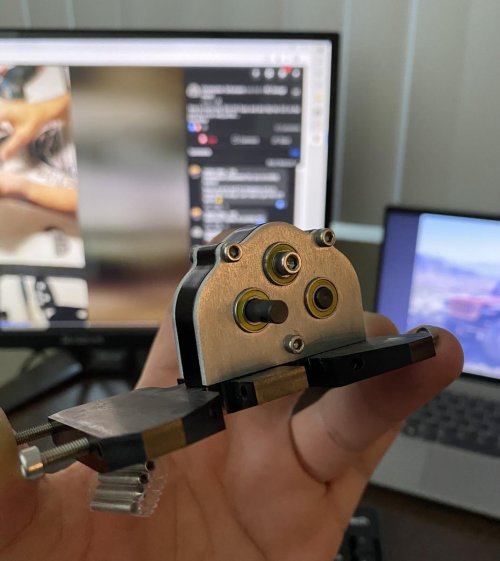
Thanks for reading along. Pic below from the TGH site
 

Attachments

  • D2471463-9BC7-41A5-BEAE-144A0D9265AB.jpg
    D2471463-9BC7-41A5-BEAE-144A0D9265AB.jpg
    86.7 KB · Views: 3,623
Last edited:
I've been looking at this chassis kit. Just can't seem to pull the trigger on any of the comp chassis yet. I'll be watching your build though!
 
Another cool looking build I will be following!

Nice list of parts!

Happy Birthday TB in case I missed it![emoji512][emoji322]


Sent from my iPad using Tapatalk
 
As mentioned, it really is a cool parts list. The single portal and well thought out gearing plan are intriguing. I couldn't comment beyond to say 30% sounds assertive and sets it up nicely for climbing and carving out those tighter lines. I had no idea Holmes was even .producing a chassis. He named it aptly I would say. Having spent several months of my youth hanging around the Nepalese Himalayas, its makes me smile thinking back on the things I have seen some of those men porter along the most remote single-track trails...mind blowing really.

Anyhow, very cool. If its the last one for bit, its a build certainly deserving of your pause. Thanks for putting it up!
 
Thanks everyone. The sentiments and interest are appreciated.

BMow my birthday is a few weeks away so you didn’t miss anything but thanks anyway!

Just got some great news from the team garage hack crew. Christopher Schumann went live and posted a video to the RC garage hacks group that showed how to flip the OD to the rear. It’s as easy as flipping plates and swapping outputs so I’m getting even more excited for this now.

Hopefully parts start showing up next week so I can share some progress.
 
Another awesome build...put me on toast, I'm jelly.

I like that the Sherpa rails have a lot of skid plate angle. Breakovers will be killer on this thing.
 
Following these shenanigans... love your builds bro. I’m stoked to see how this shakes out.

Lou
 
Happy early bday topher!!!!

Looks like the start of another one of your great builds.
 
So far, what are your thoughts between the I think 3 different comp chassis you've built? I'd like to build at least one.
 
After going through the parts that have started showing up I remembered that I had just ordered links last week, from hardcore RC so it will be a few weeks before this gets to a slider.

JRH says v3 servos are in route an should be available in 1-2 weeks so hopefully I can snag a couple of those and then figure out a body and I’ll be ready to rock by the time the links show up.

Anyway, I got to building and started with the rear axle. As mentioned earlier the rear axle has a 1.91 gear ratio that I’ll need to speed up to get a driveable ratio with the straight front axle. This means fitting as much overdrive as I can in the rear axle and using the t-case to close the gap. The rear axle is being built with OD diff gears and the TGH wild OD portal gears.

When I got to installing the OD portal gears I ran into fitment issues that I wasn’t expecting. I’m not sure if this is because it’s a rear axle, or possibly AR45P specific, but the rear portal box is slightly smaller than the front and causes clearance issues with the OD gears. (See pic)

I took a knife out and made some room to get them to spin. It thins out the material near the threads for the portal cover screws. The axle doesn’t spin as smoothly as I’d like with the portal gears in but it is functional and shouldn’t cause any issues, can still spin by hand. I forgot to snap an after pic but I will later if I tear into them again to try and free things up.

So far, what are your thoughts between the I think 3 different comp chassis you've built? I'd like to build at least one.

I haven’t really done anything with the Sherpa but stare at it longingly so not much to comment on there, but it sure looks like fun. My main question here is if I’ll want more shock mounting location options than what’s on these rails.

The tgh/ gspeed v3 and the game changer 4.2 have both been a blast to drive. I couldn’t easily say which performs better. As far as working on them, the gspeed is a little simpler as the GC4.2 uses the nylock nuts most places, but it’s nice that the gc4.2 kits come with everything you need, including upper driveshaft, servo mount, braces, and even links with the stage 3 kit.
 

Attachments

  • 4EF3B10A-41A6-45DA-89E3-DC3EEBD76299.jpg
    4EF3B10A-41A6-45DA-89E3-DC3EEBD76299.jpg
    148.5 KB · Views: 3,209
  • 0721AB1B-7815-49E4-80AB-AC37D8F94EBD.jpeg
    0721AB1B-7815-49E4-80AB-AC37D8F94EBD.jpeg
    111.2 KB · Views: 3,202
Links have shipped from hardcore RC! Time to get back to this build.

If work settles down a tad I should have a slider next week.
 
Getting back to it. Next step after building the rear axle was to reverse the overdrive in the T-Case.

This was really simple, just pop the covers off the tcase. Pop the bearings. Flip both covers around. Put the big gear and output on the passenger side going out to the front, center input stays the same, and then the little gear and output on the driver side going out to the rear. The front of the tcase is the direction that the angle points to, which offsets the angle of skid to maintain good driveline angles.

Going to try and knock out the chassis next.
 

Attachments

  • B7EEC864-A7DC-4346-82EC-507F7BD4EF27.jpg
    B7EEC864-A7DC-4346-82EC-507F7BD4EF27.jpg
    175 KB · Views: 2,869
  • FAE2D048-AD9B-4BC2-BAA3-D042FCA49289.jpg
    FAE2D048-AD9B-4BC2-BAA3-D042FCA49289.jpg
    101.5 KB · Views: 3,118
Last edited:
Forgot about the front motor mount, let’s taco bout that for a little bit as I’ve added some shims to these to help get rid of some play in the spur shaft.

First pic. Just the normal motor mount. Here I’ll remove the cover that has TGH printed on it, 3 screws on back.

Second pic. I add a shim here on top of the top bearing, I didn’t take another pic with the shim on but it doesn’t need a lot. Make sure the shaft still spins free after buttoning it back up so you know you didn’t over shim.

3rd pic. I’ll also add a shim on the outside of that cover, this helps give some space between the slipper plate and the motor mount cover once the full slipper is assembled.

4th pic on the output of the spur I’ll add a plastic spacer and some shims to tighten up the driveshaft. At this point there is very little movement in the spur shaft and it spins nice, smooth, and straight.
 

Attachments

  • C463D1C2-9AC5-47EA-8CEC-3C07CA2C3CCF.jpg
    C463D1C2-9AC5-47EA-8CEC-3C07CA2C3CCF.jpg
    98.2 KB · Views: 2,762
  • 9CF9A2A7-3816-4198-9F49-9D19E7C1ED42.jpg
    9CF9A2A7-3816-4198-9F49-9D19E7C1ED42.jpg
    94.4 KB · Views: 2,778
  • B2CFF29D-DCF5-4A96-A0A0-14CDB46CD893.jpg
    B2CFF29D-DCF5-4A96-A0A0-14CDB46CD893.jpg
    93.3 KB · Views: 2,804
  • 120A4F21-51D3-4E95-BFD8-4C8FC03B20AA.jpg
    120A4F21-51D3-4E95-BFD8-4C8FC03B20AA.jpg
    83.8 KB · Views: 2,835
And links.... from hardcore rc

Top to bottom should be...

Steering drag link
Pan hard
Front upper
Front lower x 2
Rear upper x 2
Rear lower x 2
Steering tie rod
 

Attachments

  • 1097A59D-DCE1-4100-B85C-B4B6AAD5B6A1.jpg
    1097A59D-DCE1-4100-B85C-B4B6AAD5B6A1.jpg
    182 KB · Views: 2,748
Thanks for compiling that "thumbsup". Seems like the only place to find instructions and detailed veiws is in facebook videos, which i can see in the background :mrgreen:
 
Back
Top