• Welcome to RCCrawler Forums.

    It looks like you're enjoying RCCrawler's Forums but haven't created an account yet. Why not take a minute to register for your own free account now? As a member you get free access to all of our forums and posts plus the ability to post your own messages, communicate directly with other members, and much more. Register now!

    Already a member? Login at the top of this page to stop seeing this message.

Shop Holmes

The only benefit I see of running an automated lathe is that I get to spend time on the net between batches. Don't quite trust this thing to run by itself yet, last time I walked away we lost 20 gallons of coolant because the spindle was siphoning it!
 
I had a few questions about the spool design, since it seems to bear similarities to other spools. I've never actually had any spools for axial rigs, the only ones I have are for the Twin Force from YotaChump. So I started with a blank slate and measured the stock parts and worked backwards.


There are just a few basic dimensions that are critical on the spool. The width from gear to bearing seat, the bearing seat diameter, the engagement holes for the ring gear, and the slot for the shaft. Everything else is cosmetic. The first thing I did was figure out the flange width needed. Normally I would fire up CAD software and do FEA tests, but I've been around crawlers to know that 0.050" of thread engagement is enough. So in the name of safe engineering we bumped it to 0.075". . We needed a "shank" slightly larger than the bearing ID to give it a seating area, so I bumped up the diameter to the next round number of 0.4". From there I used the Mazatrol conversational programming to shape the part, using the radius feature to smooth things from shank to flange. Everything basically fell into place based on the options of programming, nice and round inch numbers, and my machines natural capabilities.


Its kind of a plain jane design really. I'll do something a bit fancier looking soon.
 

Attachments

  • spools.jpg
    spools.jpg
    39.2 KB · Views: 584
Here is the next part we are running today. It is a stainless stud for an idler pulley for an ebike company, Ebikes.ca AKA Grintech. Just followed their drawings on this one, not a lot of interpretation on my behalf.


Stainless kinda sucks to machine, its hard on the tools and slow to machine.
 

Attachments

  • idler-studs.jpg
    idler-studs.jpg
    58.6 KB · Views: 586
Should be back on spools tomorrow, gotta cut puller faceplates this week too and I'm stalling changing it all back over to aluminum cutting tools until I get a hundred or two spools done.
 
Yeah, kinda like a wheel. 6 hole wheels all end up about the same looking.


Used a half inch two flute carbide endmill to hog off the flat spot on the idler stud. It was nice to see the shavings fly so fast! Wish we had enough live tool spots to keep it in for light spools. Just need one more holder. I swear, just one more. Double sided. Two double sided. And a collet chuck on the subspindle.
 
Its kind of a plain jane design really. I'll do something a bit fancier looking soon.

Why bother, other than to just make the machine cut nice parts? No one has made see-thru diffy covers for the AR60 axles. I love the look of the ARB "lockers" that another vendor makes, but it's pointless (to me) because no one can see them once they're installed. "thumbsup"
 
More for a little bit of weight savings I guess. You are right that hidden parts are hardly worth making fancy looking just for looks sake.


I've been looking at what is needed to cut titanium today, spent about an hour researching the insert geometries and materials needed. Not so tough really, just a bit different take on feeds and speeds with properly shaped tools.
 
I hope my reply didn't across as being negative, I'm all for making beautiful detailed "scale" parts as much as the next guy. I enjoy the creativity side of it, and if someone has a scale garage, a nicely detailed "locker" spool would look really cool on the work bench or in the back of the truck for a trail fix.

I've tried to make some clear resin diffy covers for the AR60's, it's a process that I'm still struggling with.
 
Not negative at all. I'm always open to input and see it as constructive criticisms or thought.


Interesting take on when it would be good though. I would probably make that out of stainless or a good aluminum alloy so it didn't rust sitting out over time.
 
Hey John, what type of stainless are you cutting? And at what SFM and feedrate?

At my new gig, Ive moved on to a lot of stainless and exotic materials.

You know how to reach me if you need input.
 
Had been cutting 303 stainless. Running at 343 and 0.012 roughing / 579 and 0.0059 finishing at .112 depth.


First world problems today running faceplates. What I have learned is that the jaws that grab parts get burnished over a few hundred grabs. Then the parts begin to slip, tear apart, and get thrown off the chuck. That typically unscrews the eject spring that pushes each part into the bucket, so after that happens the part doesn't get thrown off the chuck and it slams the old part into the new one waiting for transfer. Today I started a 4 foot bar and got 7 parts in before the crash, which just wasted time more than anything.


It is an interesting problem that took a combination of things to fix. I can't increase the jaw contact area, don't have an extra set of jaws to modify. I can't increase the jaw pressure because it blows up the part (inner grip). The first thing I did was to score the jaws with a knife, it helped for about 20 parts. Then it kept happening again after the burnishing won over. So I increased the wall thickness a thou, reduced all chamfers to 0.010, and decreased my subspindle feeds and speed about 33% or until I hit the lowest levels of the inserts' happy range. All that added up to a fix that lasted.
 
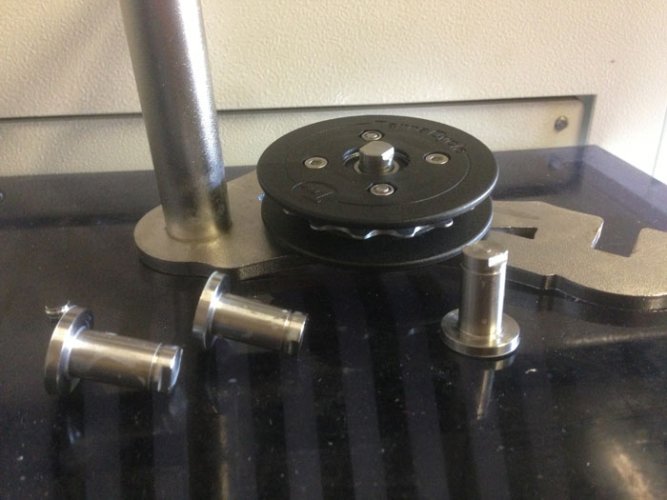
Just curious John, I dont know your order of operations on that part, but why not an OD grip? When I made those parts and decided to start using two spindles, I was going to do all the OD turning, use a groover for the step into the can and do the face drilling on the front spindle. Then move to the second spindle and do the ID boring and be done.

I had the programs ready to go, but never got around to the setups. I know on my machine clearance would have been very tight when parting off, but I had 10" and 8" chucks where I believe you have 8" and 6" chucks if I remember right? would be easier to get in there without a freakishly long parting tool.

As far as stainless goes, 303 is stupid easy. Basic rule of thumb a lot of guys will say is steel is this fast, and stainless is about half that. Blasphemy as far as 303 is concerned. I ran 303 over 600 sfm with good results. More than that and tool life would suffer. I wanna say that roughing tool was .030" radius WNMG, 550 sfm, .100" doc (would take .150 no problem if needed) and .012 in/rev. Finishing tool was .015" radius DNMG, 600 sfm, .01" finish pass, .007 in/rev.

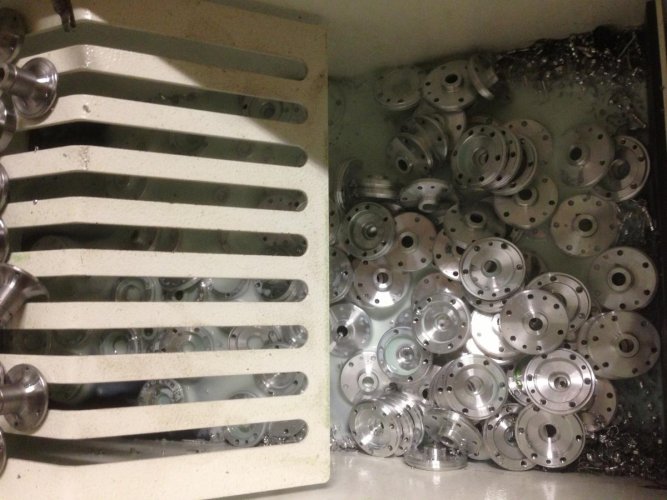
We made two identical parts from 1018 CR steel and 303 SS. Turning, drilling, tapping and partoff. Numbers almost identical between the parts as far as feed, speed, and runtime.

You should try Hastelloy C-276 sometime. Or maybe Stellite Alloy 6. Yummy!
 
I have a 10" and 6" chuck I think. I know the main is 10. With some 2.5" long jaws I can get two plates per inch without modifying my groove holder. Got some 3" jaws that would put the waste just a bit over parting blade width, but both sets were cut wrong and Huron doesn't plan to make them again soon.


I'm ID holding so we can do the venting without a second process. I can't cut the face first then transfer, not without a few more dual sided tool holders and all new mini and micro boring bars. After this batch I will have a solid 8 weeks to look things over and think about ways to reverse it before the next run. At least, I have learned a lot about workholding issues over a few hundred parts so I can avoid it down the road. Now I'm just trying to get a handle on tool life, so far I keep making mistakes and breaking tools before I run into regular wear problem.


Good info on the stainless cutting there. I'm using 015" radius roughing tools right now, I bet we could push a lot harder with a bigger nose. This is way too much machine for a newbie like myself to be cut loose on, good thing the boss is pretty lax about the keys.
 
Back
Top