-
Welcome to RCCrawler Forums.
It looks like you're enjoying RCCrawler's Forums but haven't created an account yet. Why not take a minute to register for your own free account now? As a member you get free access to all of our forums and posts plus the ability to post your own messages, communicate directly with other members, and much more. Register now!
Already a member? Login at the top of this page to stop seeing this message.
You are using an out of date browser. It may not display this or other websites correctly.
You should upgrade or use an alternative browser.
You should upgrade or use an alternative browser.
First kit build was a phoenix and its not done!
- Thread starter Lomanman
- Start date
Got the kit together in 1 night a couple days before i had to pack and leave with the idea being to run it the next day.... next day i was at the RC shop troubleshooting/warrantying a brand new spektrum 6 channel reciever. fast forward to now we realized theres some settings in the DX5C that make it hard to bind at first. I took the brake completely off in the transmitter and turned exponential steering off and was able to bind the reciever. the reciever takes some time to boot up but when it comes on the mamba x comes to life and loved being calibrated. we were having major issues getting it to work with the reciever that came with the dx5c. theres been a wave of people buying the dx5c and dx5c rugged/spektrum 6100at bundle. and we all ran into the same issue. the reciever needs some time to boot up. we were expecting it to boot up like the older recievers we were putting in the truck to test it. made us think the reciever was dead on arrival. bad enough the RC shop was just bundling spektrum 515 recievers with the dx5c.
Attachments
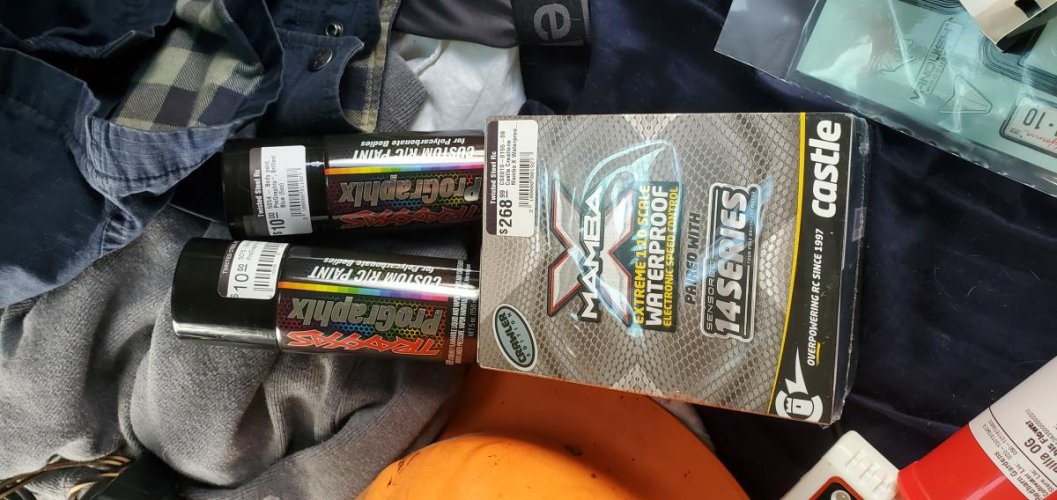
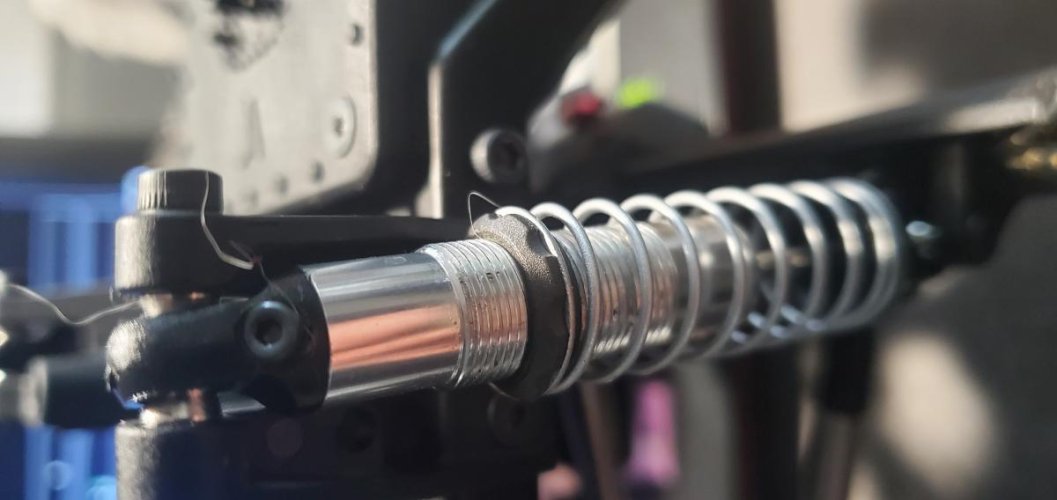
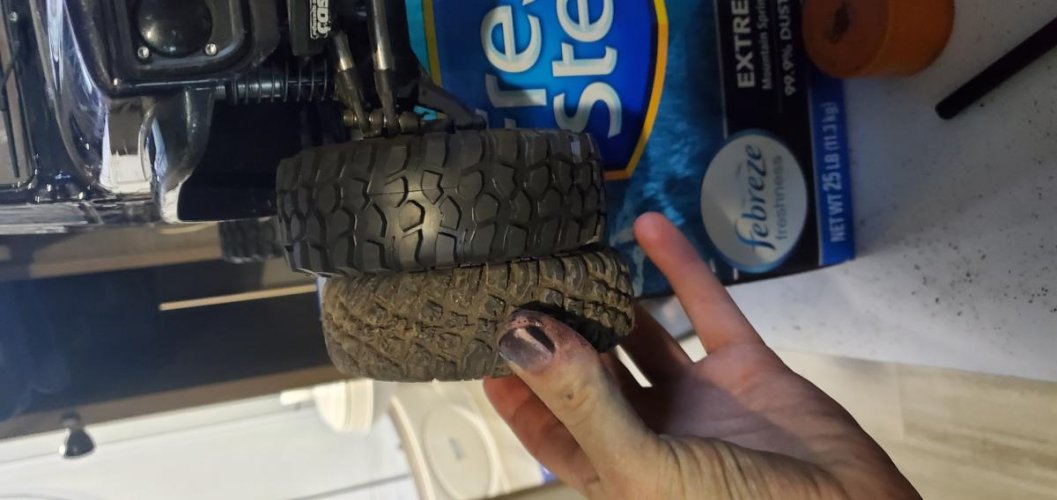
those were the only issues. meat and potatoes was there. the kit was wonderfully packaged and those building this kit LOOK FOR THE REPLACEMENT SHOCK COLLARS they are in a bag by themselves. the ones on the tree are too soft. the threads flex and jam up really easily. theyll slam on in a pinch but the ones in the bag are of a higher standard. they go on like butter, hold their position, and are easy to adjust. i did not install dig or overdrive servos as i went kinda spendy on motor/esc and tx/rx. shes a solid rig with no dig! im going to do the ol nitrile glove mod on the dig and od levers, however because next paycheck i will slap some servos in there and connect it up. i feel like it will offset my esc mounted to the passenger skid.
Attachments
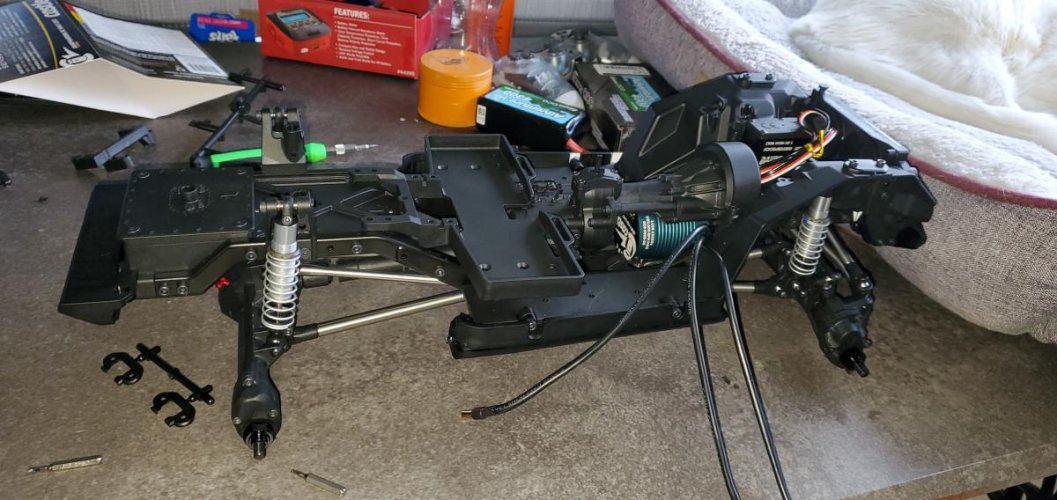
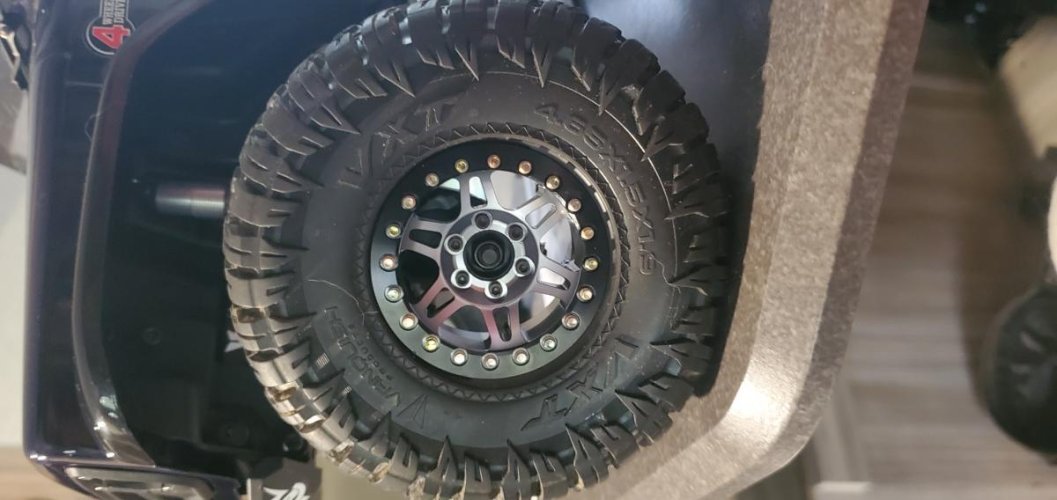
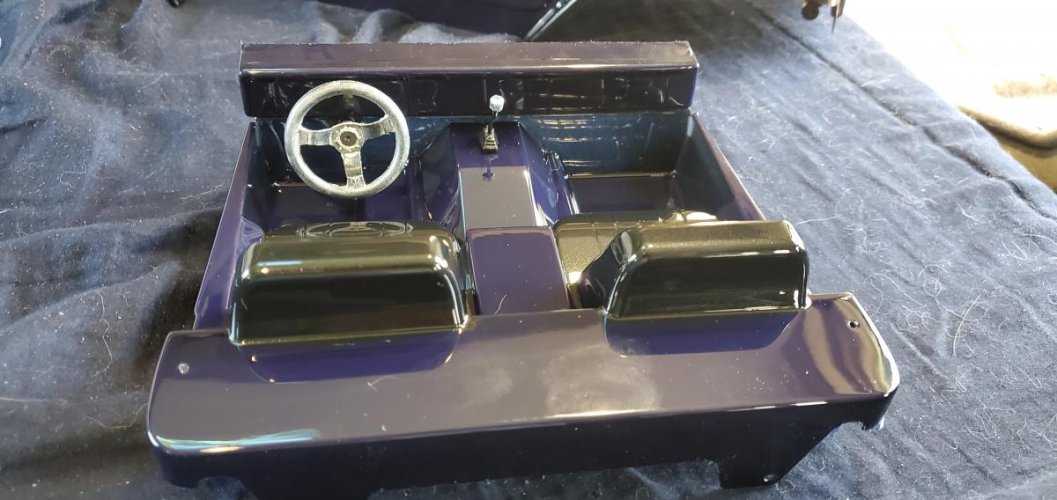
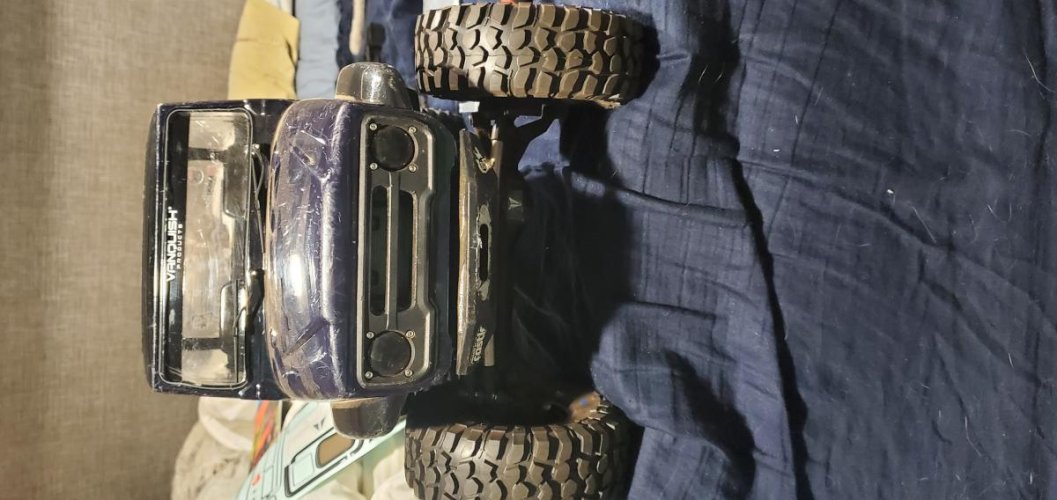
Now I've just been tidying up the wiring, securing the reciever, placed some clear plastic over the servo winch mount and made a pass thru for the on switch to mount to. Now I just poke my finger through the steering links and turn it on and off in the field. Got some nice ssd wheels when I went to get the warrantied reciever and it's ready to crawl for a while before I start figuring out what kind of performance I wanna get out of it. Now that's its at a point I can wheel I just need to grab some paint t9 touch the window trim up because my custom mask job wasn't the best.
Attachments
The bed will also be added the same time I lay some paint in the window trim. I'll paint it up with the same blue with black/silver flake. The flakes don't show much but when they do it looks like a blue bass boat is trying to come out from deep within. I think doing the window trim will make the imperfections only noticeable up close and all this knowledge will go towards a future truck paint job. I did pretty good for working out of a camper I think
Attachments
Looking good! Good choice of electronics as well.
People don’t typically like the vxt’s but man that sucker crawls upside down!
Sent from my iPhone using Tapatalk
People don’t typically like the vxt’s but man that sucker crawls upside down!
Sent from my iPhone using Tapatalk
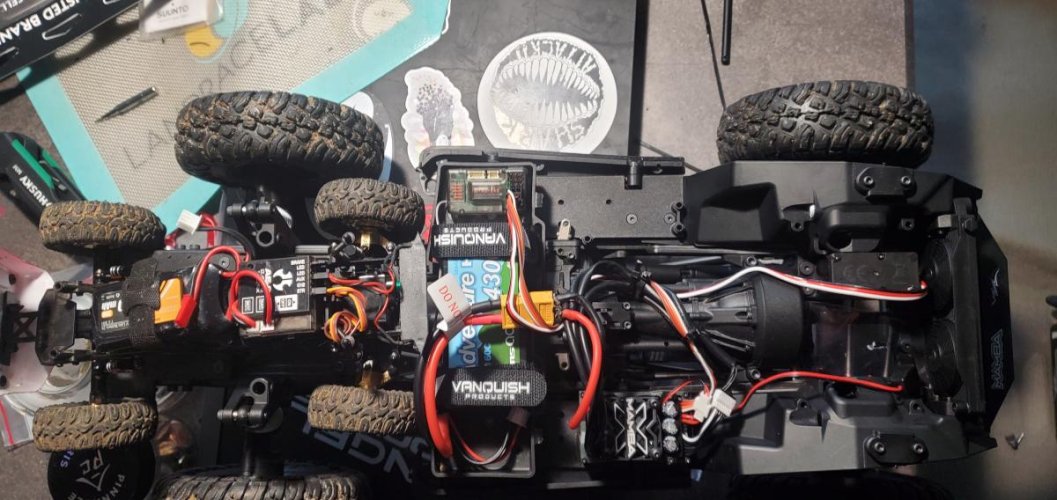
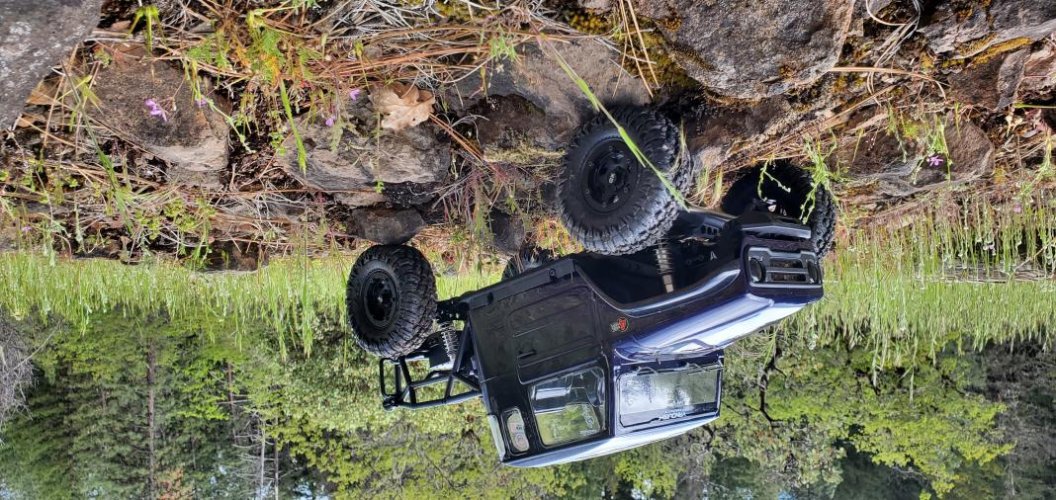
The control this thing has on the rocks was absolutely satisfying. Easy to slide up and over things that you don't even have the clearance for. Just don't hang a pumpkin up is all I've seen so far. The portals lend themselves really well to the low climb rocky obstacles. It doesn't flex an insane amount but was exactly the kind of weight transfer I was hoping it would have. Any 1 corner isn't too heavy to throw it around with how slow you can crawl it and take the time to make small adjustments. I would really love to make some tube bumpers.
Attachments
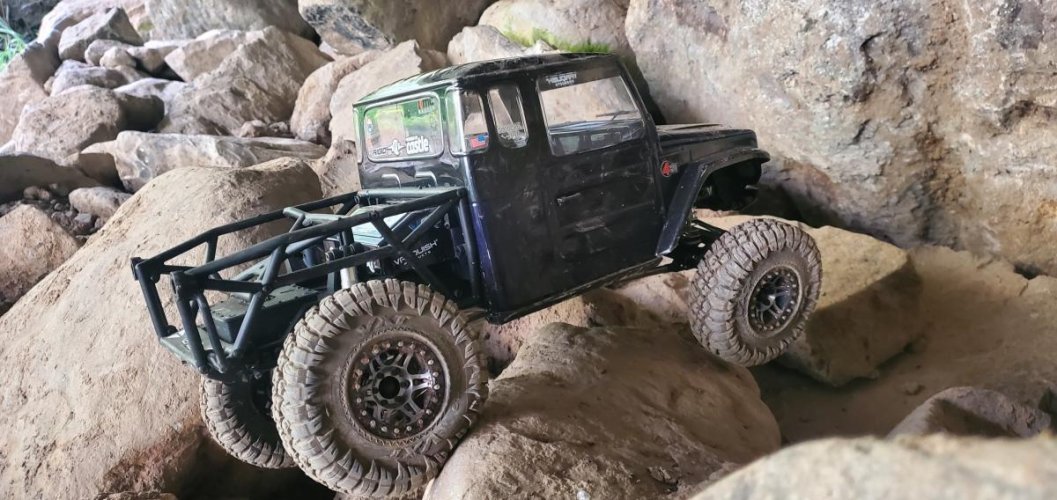
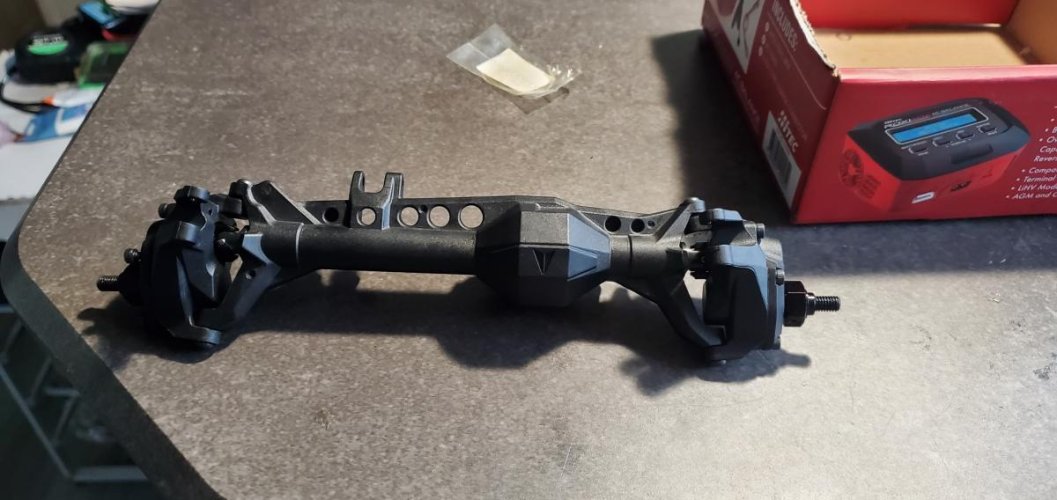
The control this thing has on the rocks was absolutely satisfying. Easy to slide up and over things that you don't even have the clearance for. Just don't hang a pumpkin up is all I've seen so far. The portals lend themselves really well to the low climb rocky obstacles. It doesn't flex an insane amount but was exactly the kind of weight transfer I was hoping it would have. The brass in the axles that they give you seems to be perfect for the weight of it now.
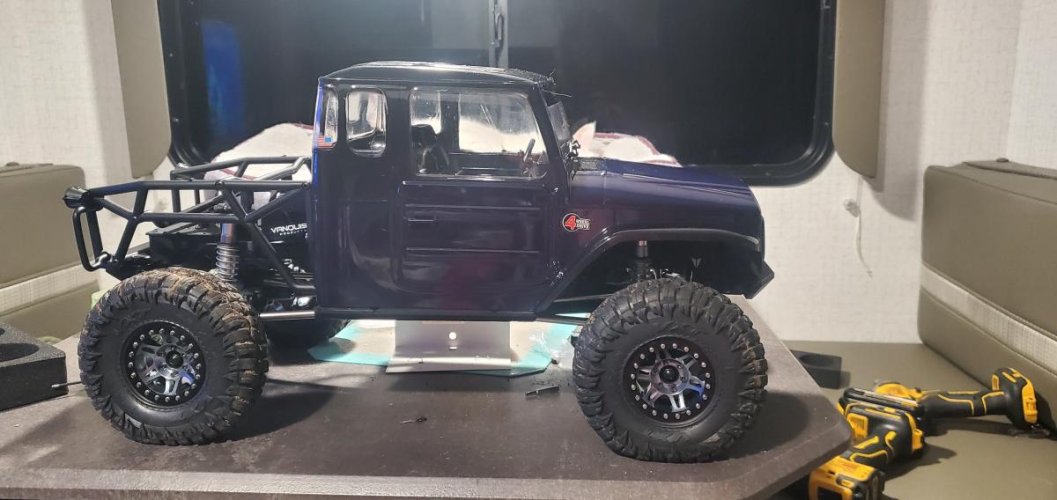
I finished my first ever kit build!
Great job on your first kit build ever! Good choice! Them SSD wheels sure do look nice on there!"thumbsup"
People don’t typically like the vxt’s but man that sucker crawls upside down!
Sent from my iPhone using Tapatalk
I wish my VXT's gripped as good as those do!:lmao:
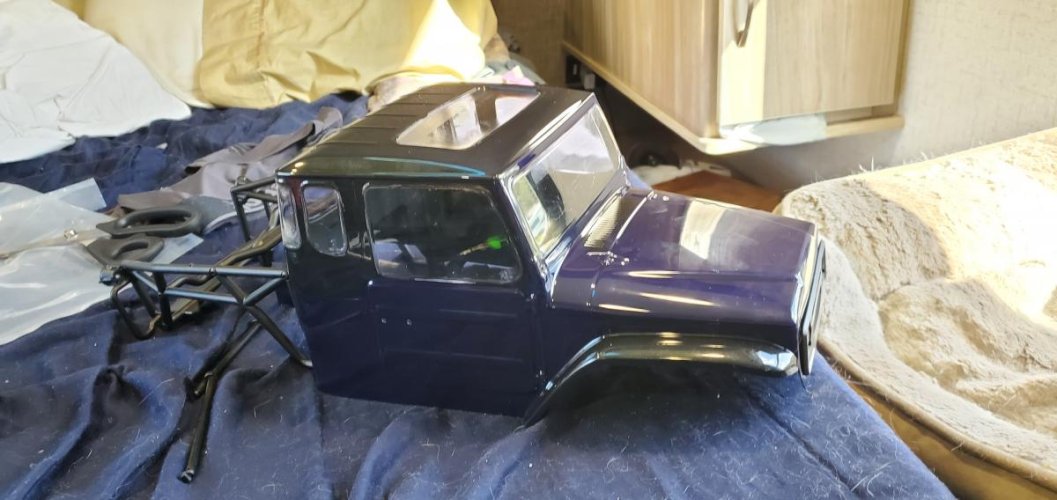
I wanted to paint the radiator and have it visible. So I cut out the grill and painted the radiator white so it'll show in that dark little crevice it sits in. This thread is now in real time whereas I was just catching everything up in an unorganized way.
Attachments
Thanks! It's been a blast and getting to finally work it I'm seeing the vxts like to find traction rather than have it before hand lolLooking good! Good choice of electronics as well.
People don’t typically like the vxt’s but man that sucker crawls upside down!
Sent from my iPhone using Tapatalk
I think I'm sold on the kits now too. It was nice just sitting in the shop n laying out a bunch of stuff and choosing what sounded like the direction I wanted.Great job on your first kit build ever! Good choice! Them SSD wheels sure do look nice on there!"thumbsup"
I wish my VXT's gripped as good as those do!:lmao:
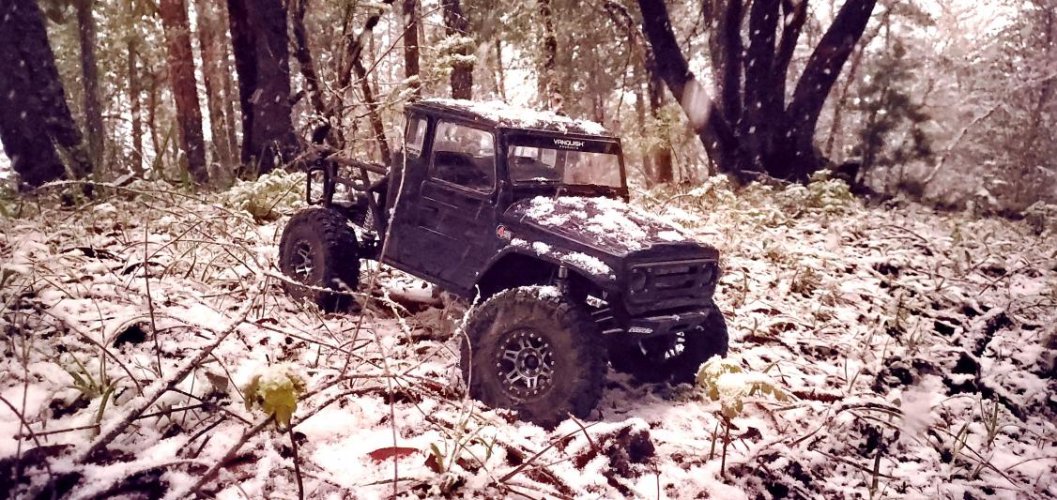
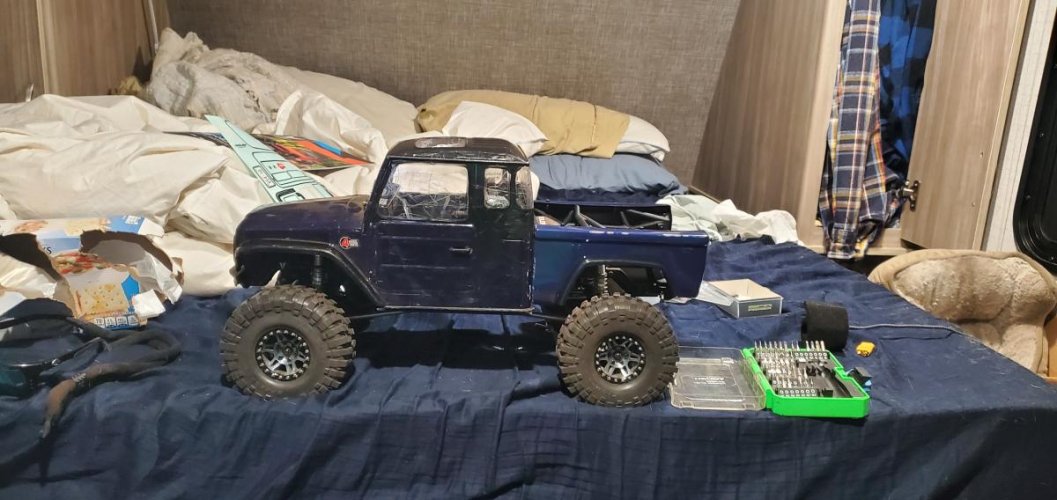
Finished the bed today and I knew coming back and doing the paint would end up different. Itll catch up to the rash that the cab has I'm sure. I added steel +3mm offset ssd hubs to compliment the ssd wheels. I was able to run the proline krawlers gaining tire under the fender but keeping a similar amount of tire outside the fender. I'll test her out tomorrow and probably do a lil comp soon with it
Attachments
Similar threads
- Replies
- 7
- Views
- 2K
- Replies
- 35
- Views
- 4K
- Replies
- 110
- Views
- 8K
- Replies
- 13
- Views
- 1K