• Welcome to RCCrawler Forums.

    It looks like you're enjoying RCCrawler's Forums but haven't created an account yet. Why not take a minute to register for your own free account now? As a member you get free access to all of our forums and posts plus the ability to post your own messages, communicate directly with other members, and much more. Register now!

    Already a member? Login at the top of this page to stop seeing this message.

CK Fly V1 build

kineteks

Quarry Creeper
Joined
Feb 5, 2009
Messages
281
Location
Warwick
I haven't done a build for a while now so here's my attempt at a middle weight Fly/Berg.
Parts list is something like:

Axles
Berg cases "melted" and moderately lightened
Mannomann 2nd & 3rd gears
lightened Berg big gears
Boca SS/ceramic bearings
SDS Super 300 front CVDs
DLUX aluminum rear axles
RCBros lockers
Clover tubes
VP Cs & knuckles
KL Designs knuckle weights
KL Designs carbon cover plates
home made upper link mounts
home made battery & electronis mounts

Chassis/suspension
CK Fly V1 (reg & short cab included!)
CK Ti links
7075 steering links
SCX alloy shocks w/Traxxas bladders & cap mod
Fastener Express aluminum hardware
home made body panels
DLUX carbon beadlocks
Voodoo & Losi BC tires
CI DD foam inserts

Electronics:
Tekin FXRs smashed
CC BEC (see above)
JR 8711 servo
JPH 37T motor
Futaba T7C stick TX
Futaba mini RX
TP 480 & Hyperion 450 Lipos

...time to get to work:mrgreen:
 

Attachments

  • Get busy.jpg
    Get busy.jpg
    158.2 KB · Views: 1,207
  • Rear case.jpg
    Rear case.jpg
    65.6 KB · Views: 1,212
  • Front case.jpg
    Front case.jpg
    73.1 KB · Views: 1,235
  • Clover tubes.jpg
    Clover tubes.jpg
    71.9 KB · Views: 1,255
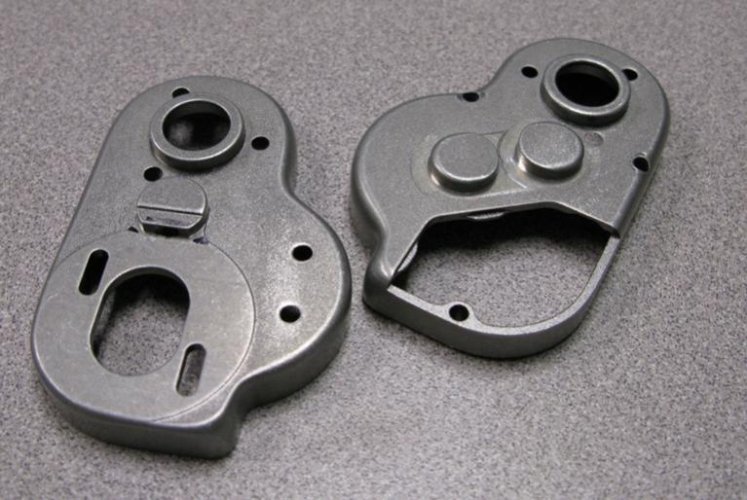
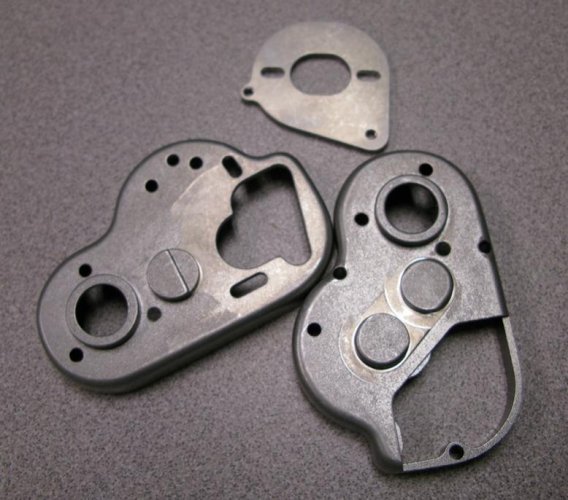
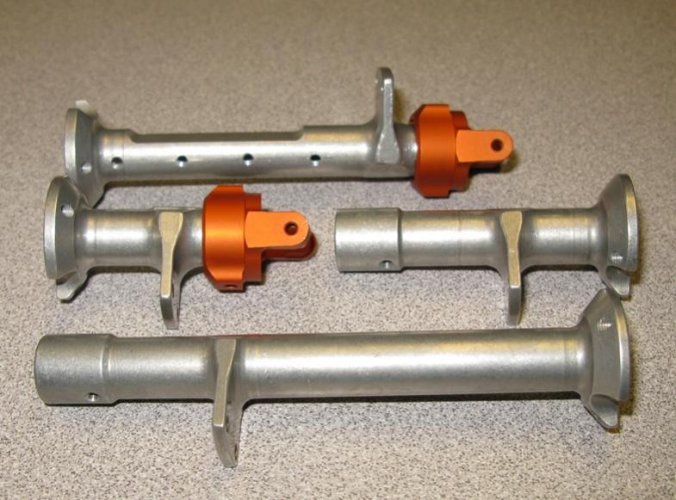
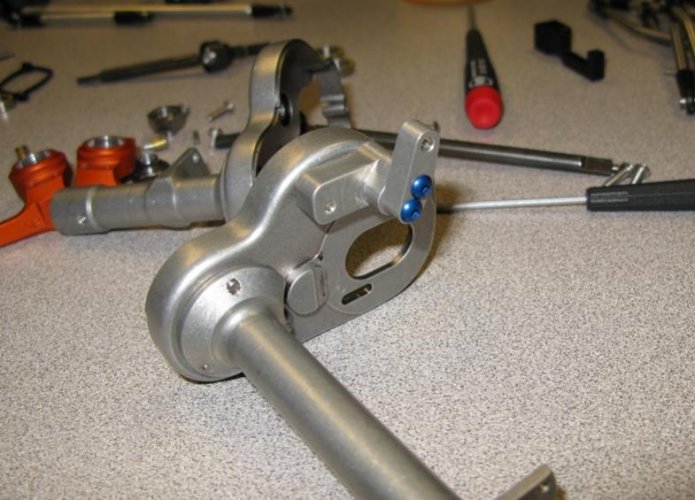
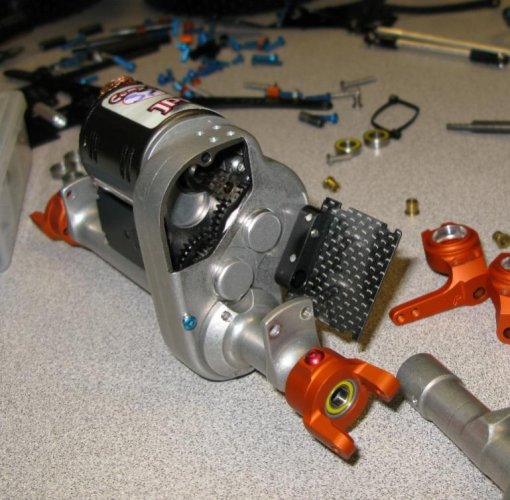
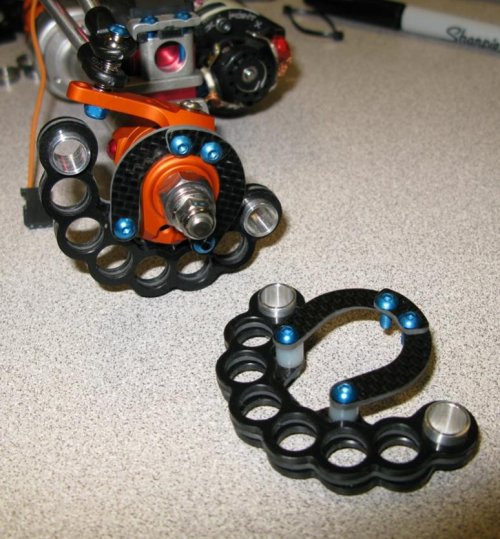
Case work was a combo of time on the mill and then cartridge rolls in a die grinder, files & sandpaper... after that they spent the weekend in a tumbler which makes the mistakes disappear! The front motor mount plate allows 9-13T pinion gears with the relocated motor. The Clover tubes were in my stash and required a little touching up. The servo cut-away was deepened and the rear tubes were opened up to 3/8" for the monster DLUX aluminum axles. The rear bearing pockets were bored for DLUX sized bearings.
 

Attachments

  • Bore bearing pocket.jpg
    Bore bearing pocket.jpg
    63.6 KB · Views: 1,171
Have a pic comparing the 2 cabs?

And I must say I really like your front case/motor plate setup. Looks super clean and easily adjustable. Good work
 
I'll try to get a pic of the two cabs, Dr Frank's XR Fly build shows both, though I think he's still running the tall cab... if he's still running a Fly:mrgreen:

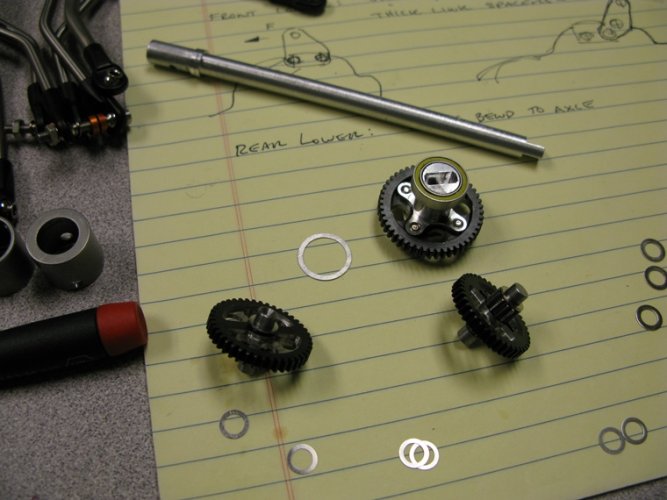
I lightened a couple of sets of gears, the second is headed for my new DLUX carbon axles! ...so much to do....
I don't know why but the gear fit in these cases, or maybe this set of Mannomann gears, was a little sloppy so though I've never done it before I shimmed the gears with a combo of Ofna & Tamiya shims. I left a little play but it did seem to smooth things out a bit. we'll see how they hold up.
 

Attachments

  • Lighten gears.jpg
    Lighten gears.jpg
    161.3 KB · Views: 1,358
  • Shim gears.jpg
    Shim gears.jpg
    162.4 KB · Views: 1,093
I'm leaving the bearing retainers off the rear tubes as the bearings are a decent press in so the retainers won't contribute anything but weight. The rear upper link is a work in progress...
The beefy DLUX axles with Bully hexes are a stout combo and add lightness to boot! Nice parts. I need to get some of Erik's Delrin hubs though, that'll be even sweeter.
 

Attachments

  • rear link mount.jpg
    rear link mount.jpg
    67.3 KB · Views: 1,079
  • rear together.jpg
    rear together.jpg
    65.4 KB · Views: 1,121
  • Bully hex.jpg
    Bully hex.jpg
    166.5 KB · Views: 1,046
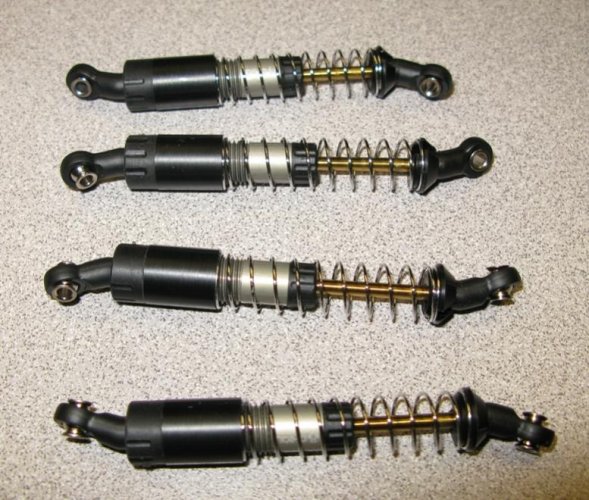
For my first go around with SCX alloy shocks I read up on Egressor's & Del Monte's mods & threw in some angled ball ends from the AX10 linkage kit. They add about 6 mm to the overall shock length when you finish cutting everything down but allow a narrower upper mount with no binding. I've got the Traxxas bladders in there, drilled the caps & assembled with Assoc green slime but they're still a bear to get filled & bled so that they feel good:evil: I've got 5mm internal limiters in them right now and expect to add some external as well. Threaded adjusting collars and spring cups were whipped up here in the shop. The cups are slotted so I can swap springs without pulling the lower ball end.
 

Attachments

  • SCX shocks.jpg
    SCX shocks.jpg
    103.9 KB · Views: 1,129
Those gears are gangsta! Got a weight for them?

Very cool build so far, cant wait to see more.
 
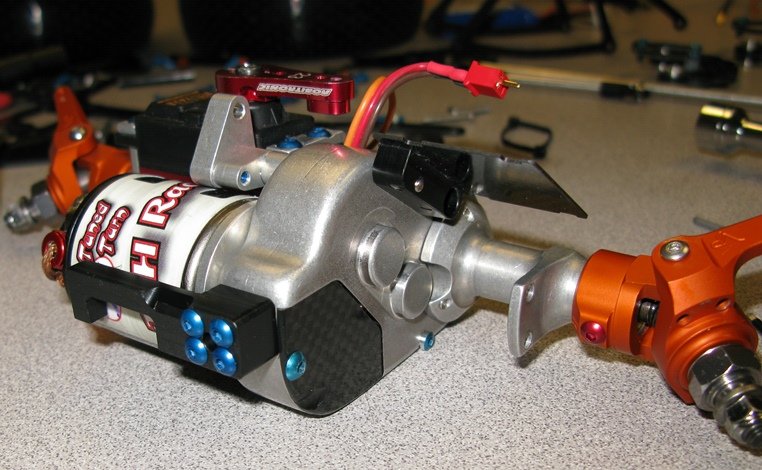
Getting to work on the front..... made a upper link mount to clear the relocated motor & servo along with some servo stand-offs. I'll mount the battery up front (position stolen from Harvo's rig...) so I made a little plate for that. The Clover tubes needed to be turned down to fit the VP chubs, the fit's so tight that I had to make a fixture to press them back off! ESC is going behind the motor, so another Delrin/carbon mount there. The VP knuckles got bored for a bigger OD bearing as the SDS axles are 6 mm.
 

Attachments

  • Bore VP knuckle.jpg
    Bore VP knuckle.jpg
    67.3 KB · Views: 953
  • ESC mount.jpg
    ESC mount.jpg
    174 KB · Views: 1,377
  • Servo mount.jpg
    Servo mount.jpg
    70.4 KB · Views: 1,077
  • Battery mount front.jpg
    Battery mount front.jpg
    86 KB · Views: 1,025
  • Battery mount back.jpg
    Battery mount back.jpg
    90.2 KB · Views: 1,115
The gears do look cool but aren't all that light compared to what Will's new gears are going to be coming in at. 1st & second gears are just a touch over 7 grams, my scale says 7.10 & 7.15. Oddly second gear, which has the built-in spacer, was the lighter of the two. The final drive gear just has 4 holes poked in it and is 9.52 grams. I was hoping to get some of those bitchen RCBros gears for the carbon axles but if they're not ready I guess the second set of these guys will need another date with the milling machine:mrgreen:

Yep, the front plate's for the battery and the mount in back is for a second carbon plate that'll carry the ESC/BEC and ghetto RX mount....
 
Thanks Tom:mrgreen: it was your "Chamäleon" build that inspired the "melted" cases!
...made a 7075 tie-rod & steering link, then added the most awesome knuckle weight set-up, KL Designs. They almost make sticking with Super 300s worth it. I'll hate to give them up when I start looking for more steering:cry:

...did I mention the KL Designs carbon gear cover plates? Kevin makes bitchen stuff.
 

Attachments

  • Tie rods.jpg
    Tie rods.jpg
    59.4 KB · Views: 879
  • KL knuckle weights.jpg
    KL knuckle weights.jpg
    106.6 KB · Views: 1,110
Electronics... I hate 'em. They mess up the clean, mechanical look of a comp crawler, they burn up when you dump your rig in the water and the good stuff costs an arm & a leg... but playing with these things wouldn't be as much fun if we were just pushing them across the floor so....
Smashed FXRs it is... stacked one on top of the other and used some 14 AWG copper wire to join them at the battery traces. Stole an idea for shrinking a CC BEC, forget the source, and pulled the top plate off. TQ 18 ga wire runs out to the battery & motors, with MP-Jet 2.5 mm bullet connectors on the battery. When all was said and done I couldn't mount the RX on the pile without it fouling the upper links so for the time being it's cantilevered off the ESCs on a floppy Lexan mount. Ghetto but I'm getting anxious to see this thing run!
 

Attachments

  • Smashed FXR 1.jpg
    Smashed FXR 1.jpg
    167.7 KB · Views: 928
  • Smashed FXR 2.jpg
    Smashed FXR 2.jpg
    142.6 KB · Views: 947
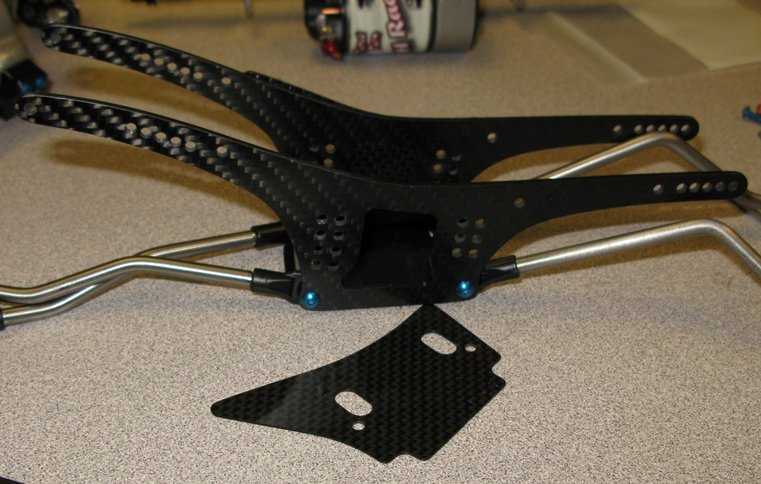
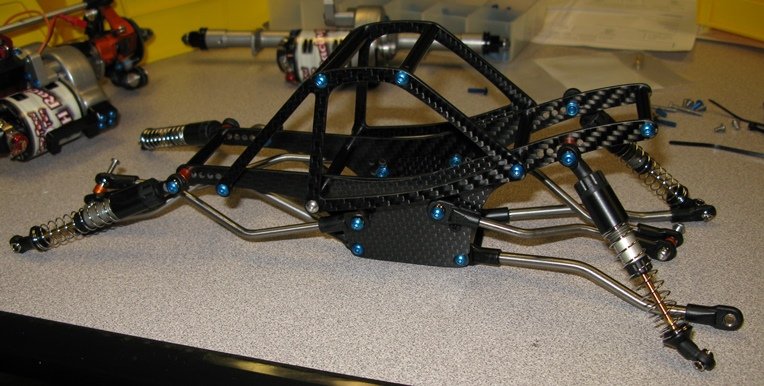
getting the chassis together now... cut some new body panels, CF for the sides and slightly smaller hood & roof in Lexan. I ended up taking ~6mm off the front upper links to get everything in the right place with my link mounts, otherwise the CK Fly/Berg link set was spot-on. WB is just under max with the links as straight as they'll go"thumbsup" I had to sand a slight notch in the front gear cover plate to clear the RF lower link when fully flexed but otherwise everything clears. The angled shock ends are absolutely bind free.
 

Attachments

  • chassis 1.jpg
    chassis 1.jpg
    132 KB · Views: 886
  • side panel.jpg
    side panel.jpg
    172.2 KB · Views: 828
  • chassis 2.jpg
    chassis 2.jpg
    159 KB · Views: 883
  • Front axle on.jpg
    Front axle on.jpg
    133.5 KB · Views: 1,016
Back
Top