-
Welcome to RCCrawler Forums.
It looks like you're enjoying RCCrawler's Forums but haven't created an account yet. Why not take a minute to register for your own free account now? As a member you get free access to all of our forums and posts plus the ability to post your own messages, communicate directly with other members, and much more. Register now!
Already a member? Login at the top of this page to stop seeing this message.
You are using an out of date browser. It may not display this or other websites correctly.
You should upgrade or use an alternative browser.
You should upgrade or use an alternative browser.
B-MOW's Vanquish H10 Optic Kit
- Thread starter B-MOW71
- Start date
The Vanquish Products F10 third member’s arrived and installed. I went with the clear version to break up all of the black colors and make them easier to see.
..
Added detail on each to keep the confusion to a minimum. Nice VP!

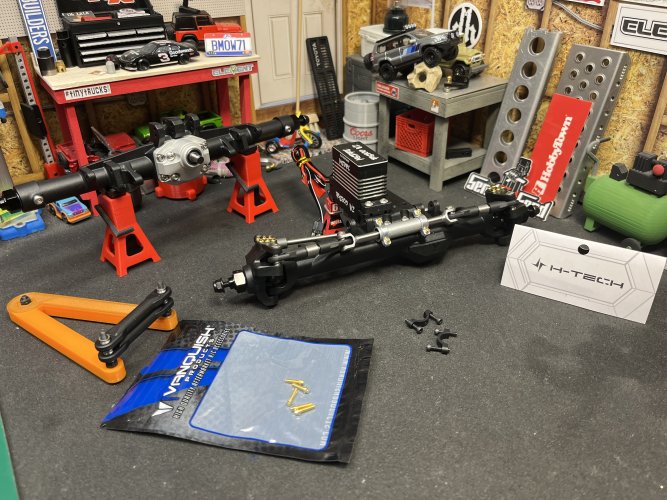
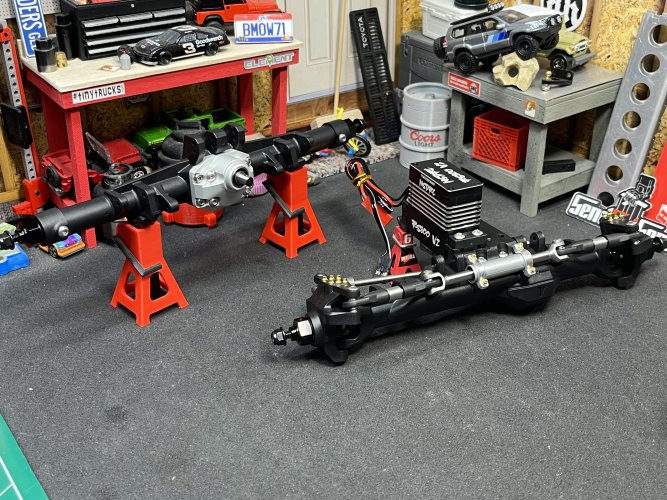
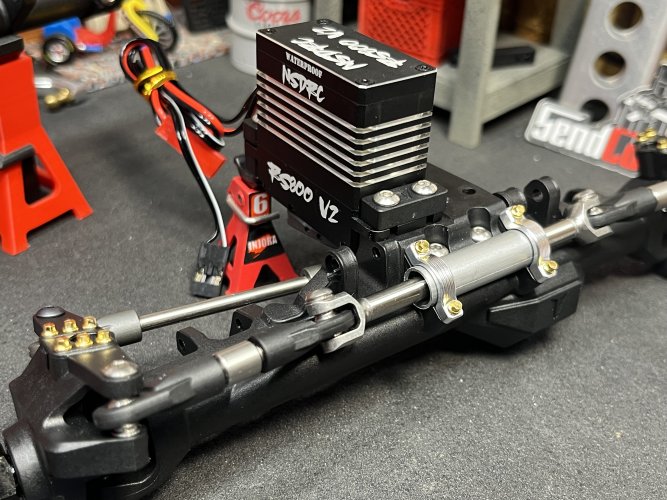
Front and rear axles finished…for now. Added the H-tech hydro ram clamps and some scale hardware. Also installed the NSFRC RS 800 V2 servo. Not shown is the VP 20mm servo horn.
What is shown is the stock plastic short rod ends were removed and replaced with a spare set of VFD Twin shift lever links. I do have a set of VP machined rod ends on order to replace the nylon ends.
..

Added detail on each to keep the confusion to a minimum. Nice VP!

Front and rear axles finished…for now. Added the H-tech hydro ram clamps and some scale hardware. Also installed the NSFRC RS 800 V2 servo. Not shown is the VP 20mm servo horn.
What is shown is the stock plastic short rod ends were removed and replaced with a spare set of VFD Twin shift lever links. I do have a set of VP machined rod ends on order to replace the nylon ends.


cul8tr
Rock Crawler
Holy crap that's even better with the white outline. lmao
Crisp n clear pics awesome. Love the extra detail work.
Crisp n clear pics awesome. Love the extra detail work.
Which size scale hardware did you use?
Looks good as always. I need to do that to my steering here soon.
They are the M2x8 GR8 (VPS01712) scale hardware from VP.Which size scale hardware did you use?
Thanks!Looks good as always. I need to do that to my steering here soon.
Perfect. I have plenty of M2x8-ish scale hardware at home.They are the M2x8 GR8 (VPS01712) scale hardware from VP.
Thanks!
I know H-Tech offers the hydro steer clamps, but who sells the metal cylinder?
The metal hydro cylinder came into existence by way of Uni-Ball silver paint marker.Perfect. I have plenty of M2x8-ish scale hardware at home.
I know H-Tech offers the hydro steer clamps, but who sells the metal cylinder?
Last edited:
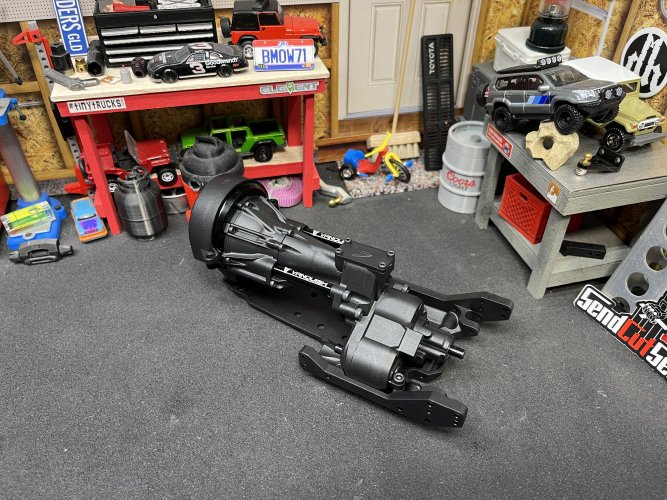
Onto Bag C, the VFD tranny. This version of the VFD comes with the black alum motor plate, alum motor plate standoffs, alum bearing plates and sintered metal gears.
The VFD is always an enjoyable build. All internals fit together with precision. Installed the VFD on the supplied skid and lower cage mounts (at the moment I can’t remember what they are called).
Current plan is to pull one of my VFD Twins out of another build and drop it into the Optic. I think having the DIG option in the Optic would be a nice choice and installing the Twin would be the easiest and cheapest way.


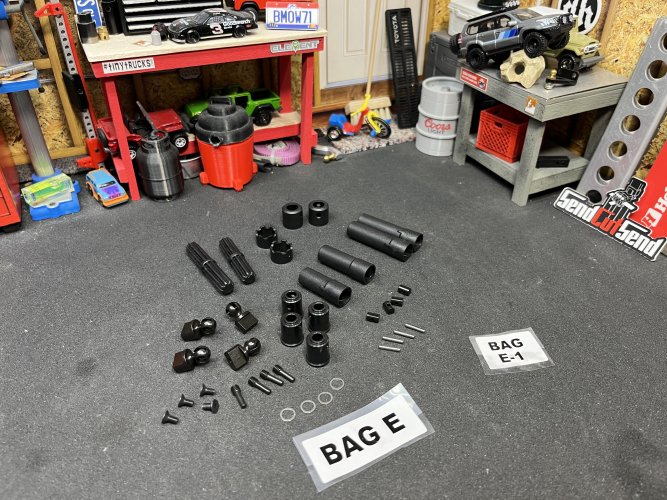
Next up, Bag E - ISD10 driveshafts and Bag F - Incision H10 link set. Both bags aren’t the most interesting, but a much needed part of the build.
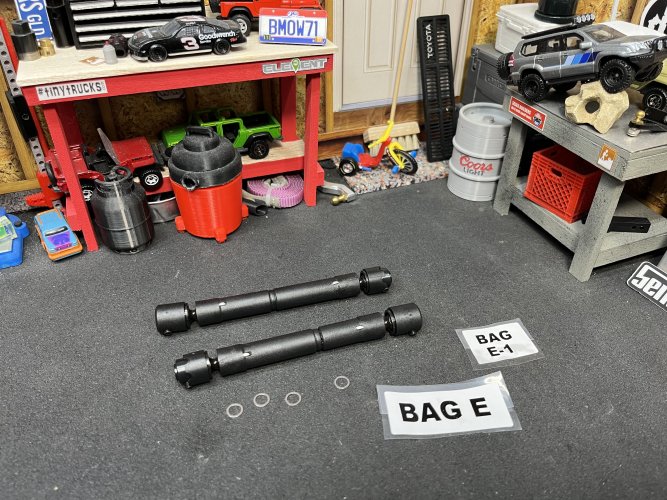
The driveshafts are very similar to the Axial version, but these Incisions are IMO built better and add a nice addition on the side of the housings with a marker making it easier to get these “in phase”. I always add a silver paint marker mark on them to help see the mark.
Be careful not to lose the 4 included shims. They may be needed in the future.
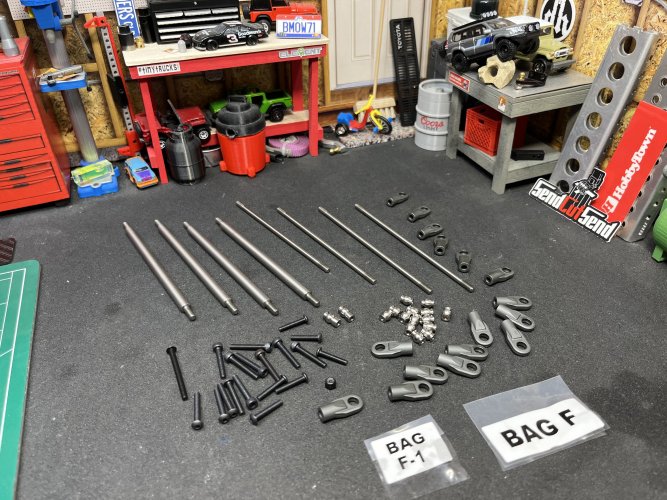
The links. Not much to see here. They do include the Pro rod ends that are molded in a more rigid material to help minimize the rod ends stretching. I personally have never had an Incision rod end stretch, but have heard others having that issue.
Another note is that the front and rear link lengths are the same length putting the tranny skid directly in the center of the axles. This will be my first rig with this type of setup, so not sure what to expect with the breakover capabilities.
The driveshafts are very similar to the Axial version, but these Incisions are IMO built better and add a nice addition on the side of the housings with a marker making it easier to get these “in phase”. I always add a silver paint marker mark on them to help see the mark.
Be careful not to lose the 4 included shims. They may be needed in the future.


The links. Not much to see here. They do include the Pro rod ends that are molded in a more rigid material to help minimize the rod ends stretching. I personally have never had an Incision rod end stretch, but have heard others having that issue.
Another note is that the front and rear link lengths are the same length putting the tranny skid directly in the center of the axles. This will be my first rig with this type of setup, so not sure what to expect with the breakover capabilities.

The shocks found in the D Bag are up next. These are the Incision S8E 90mm scale shock using the aluminum hard anodized bodies. The lower cartridge comes pre-installed from the factory.
Also pictured is a set of TiN coated shock shafts, red machined alum shock caps & red machined alum spring collars. I forgot to order the machined shock pistons, so they’ll be installed the next time the fluid gets replaced.

These shocks are not loved by many because of their alleged history of spewing shock fluid. I for one have had great luck with these shocks. I have over 7 sets of these in use on a variety of rigs and none of them leak fluid.
I think the key step into keeping these shocks leak free is to remove the lower cartridge and apply green slime or equivalent to the X-ring seals. I use Noleen fork suspension grease which looks very similar to the Factory Team Green Slime. I also install the X-rings and spacers onto the shock shafts before they are pushed into the shock body. Then I install the snap ring to hold the assembly in place. This helps to keep the seals from getting torn when installing the shock shaft. The bleeder screws in the shock caps keep the socks from being overfilled if done properly.
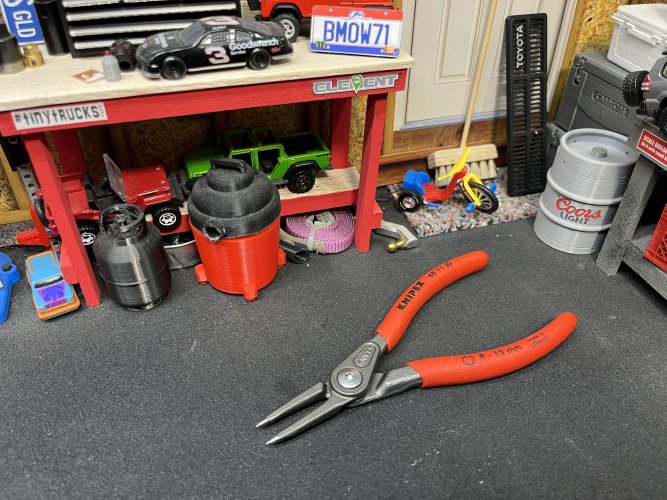
I use a pair of Knipex mini snap ring pliers to install the snap ring. I filed down the tip of the pliers to so that they would fit down inside the shock body better.
I normally use 60-70 wt. fluid in these shocks. I’ll be starting out with 60wt to see how it performs.
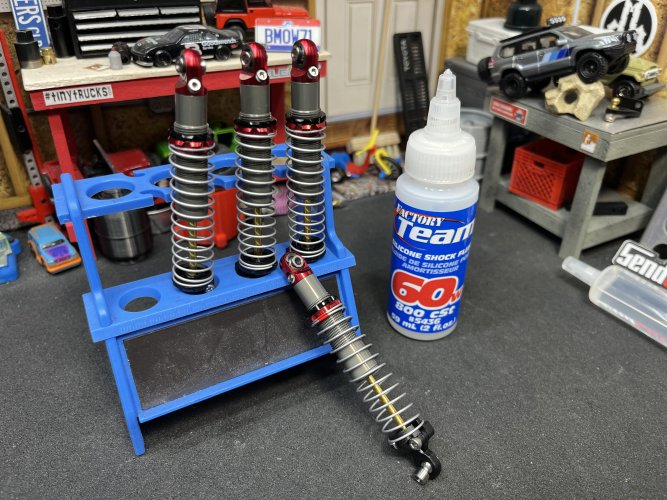
Also pictured is a set of TiN coated shock shafts, red machined alum shock caps & red machined alum spring collars. I forgot to order the machined shock pistons, so they’ll be installed the next time the fluid gets replaced.

These shocks are not loved by many because of their alleged history of spewing shock fluid. I for one have had great luck with these shocks. I have over 7 sets of these in use on a variety of rigs and none of them leak fluid.
I think the key step into keeping these shocks leak free is to remove the lower cartridge and apply green slime or equivalent to the X-ring seals. I use Noleen fork suspension grease which looks very similar to the Factory Team Green Slime. I also install the X-rings and spacers onto the shock shafts before they are pushed into the shock body. Then I install the snap ring to hold the assembly in place. This helps to keep the seals from getting torn when installing the shock shaft. The bleeder screws in the shock caps keep the socks from being overfilled if done properly.
I use a pair of Knipex mini snap ring pliers to install the snap ring. I filed down the tip of the pliers to so that they would fit down inside the shock body better.
I normally use 60-70 wt. fluid in these shocks. I’ll be starting out with 60wt to see how it performs.


OSRC
I wanna be Dave
Me too! Following all the Optic builds and living vicariously.
Those shocks look sexy with the red parts!  I almost pulled the trigger on the hardened shafts, but then thought do they really offer any benefit? Probably not. They look nice though.
Supposedly they are slicker and more scratch resistant.
The Nitride coating does create a more smooth surface on the shafts, which will have less stiction potential and generally just work much better. Now if the shocks don't leak... Guess we'll see, my first VP rig/shocks.
Obviously disassembling the cartridge and rebuilding with green slime is the better way, but on one of the livestreams, Brandon said to put your finger over the hole on the bottom of the shock, add a few drops of oil in the shock, then gently slide the shaft through. Ive done that trick on my last 2 sets of their shocks and they are holding oil. My previous sets leaked a lot.The Nitride coating does create a more smooth surface on the shafts, which will have less stiction potential and generally just work much better. Now if the shocks don't leak... Guess we'll see, my first VP rig/shocks.
following along in the background, nice build as always
Me too! Following all the Optic builds and living vicariously.
Well honestly I bought them cause they look good and if they provide a smoother stroke, then it’s a bonus!Those shocks look sexy with the red parts!I almost pulled the trigger on the hardened shafts, but then thought do they really offer any benefit? Probably not. They look nice though.
Bag G, the cage is next. The kit cage comes in black nylon. Nice molding and design. My only wish was that the cage that was included was the gray. Probably a good move on Vanquish’s part to include the black since the big craze right now is buying the gray cage and dying them a different color. I’ll have more on that later.

Nice to see an included interior. It’ll be getting some paint detail to look more realistic.

H-Tech bump stops were a must for more scale detail. Cool that actually work!

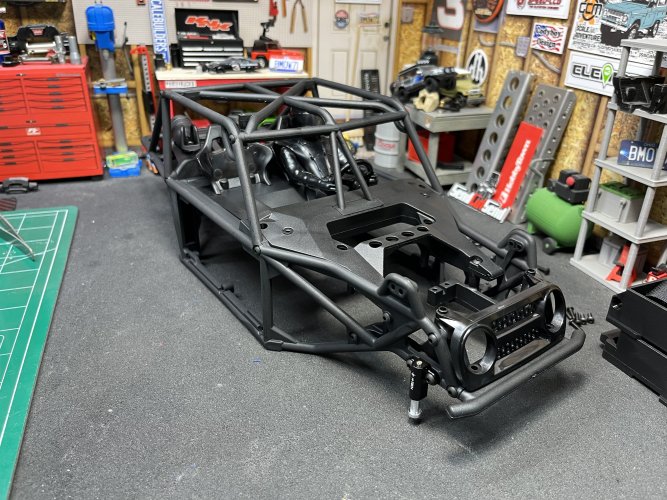

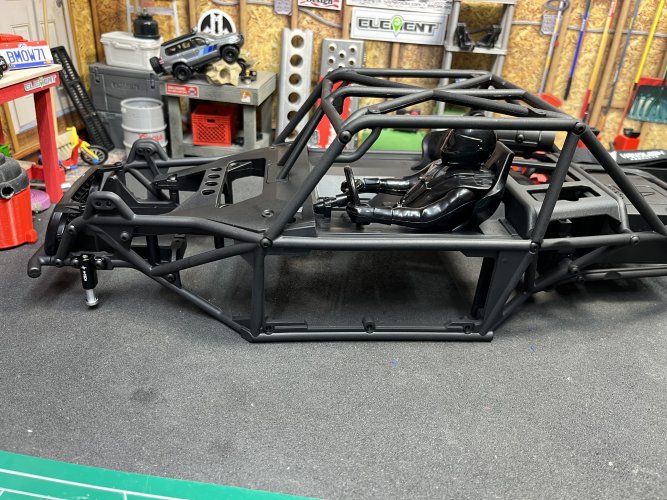

Nice to see an included interior. It’ll be getting some paint detail to look more realistic.

H-Tech bump stops were a must for more scale detail. Cool that actually work!


Looks great Brian, thanks for sharing.
I’m definitely interested to see what you have in store for the green panels
I’m definitely interested to see what you have in store for the green panels
Similar threads
- Replies
- 58
- Views
- 3K
- Replies
- 28
- Views
- 2K
- Replies
- 15
- Views
- 661
- Replies
- 0
- Views
- 309

