Great pics of the teardowns! I really need to check my portal gears (which I should have done when I put the brass portal covers on, lol). I went with 60wt oil for my shocks and it made a pretty big difference, much better than the stock oil IMHO.
-
Welcome to RCCrawler Forums.
It looks like you're enjoying RCCrawler's Forums but haven't created an account yet. Why not take a minute to register for your own free account now? As a member you get free access to all of our forums and posts plus the ability to post your own messages, communicate directly with other members, and much more. Register now!
Already a member? Login at the top of this page to stop seeing this message.
You are using an out of date browser. It may not display this or other websites correctly.
You should upgrade or use an alternative browser.
You should upgrade or use an alternative browser.
B-MOW's SCX10 III JT Gladiator Trail Warrior
- Thread starter B-MOW71
- Start date
Great pics of the teardowns! I really need to check my portal gears (which I should have done when I put the brass portal covers on, lol). I went with 60wt oil for my shocks and it made a pretty big difference, much better than the stock oil IMHO.
Hey thanks!"thumbsup"
After seeing some of the portal gears in both my JLU and the Gladiator installed backwards, I'd say there is a good chance that you may have 1 or 2 backwards too. Also, the gears were too dry for me, so adding more grease to them should help with wear and help keep water out if the axles get submerged. I put a fair amount of grease around the bearings and stub axles so that water would have a harder time entering the portal case.
I may try a thicker oil in my shocks after I get some time on it. The 40wt stilll might be too thin. We'll see!
Weather was fairly decent here this past weekend so I was able to get some of the painting done. I ended up using the Rustoleum Truck Bed Liner for the top of the bed rails and lower rear quarter panel behind the wheel opening. I used Tamiya Black PS-5 Black for the rear vertical stripe topped with Tamiya PS-55 Flat Clear.
Also sprayed the inside of the body black so that the body did not look so transparent.
In the process of getting the bed all taped up and ready for paint.

I was looking to do something different on the paint scheme, so I did a quick Google search and found a pic of the Hemi version of the JT Gladiator. Not exactly what was pictured, but close enough for me. I cut out some tiny JT lettering, but left out the "HEMI" because I couldn't get them tiny letters cut out.

I did get the cab painted, but did not get any pics. I'll post up pics of the complete body when it is all put back together.
Also sprayed the inside of the body black so that the body did not look so transparent.
In the process of getting the bed all taped up and ready for paint.

I was looking to do something different on the paint scheme, so I did a quick Google search and found a pic of the Hemi version of the JT Gladiator. Not exactly what was pictured, but close enough for me. I cut out some tiny JT lettering, but left out the "HEMI" because I couldn't get them tiny letters cut out.

I did get the cab painted, but did not get any pics. I'll post up pics of the complete body when it is all put back together.
Phildirt
RCC Addict
Looks so much better with the black backing. Good job on the stripe/lettering too!
Looks so much better with the black backing. Good job on the stripe/lettering too!
Nice work!
Sent from my moto z4 using Tapatalk
Man, that looks great! I've been thinking about painting the hardtop section on mine black, maybe over the Christmas shutdown.
Thanks guys!"thumbsup" I noticed on some of the videos I've watched, you could see the taillights shinning thru the inside of the bed. Not a good look!
@derekmac, I think they look better with the black tops! I painted my 10.3 JLU black with flat clear, but on my JT I used the truck bed liner. It seems to be a little bit heavier, but looks more like 1:1 tops with the texture look.
A few more details I was able to get done while I was watching paint dry!:ror:
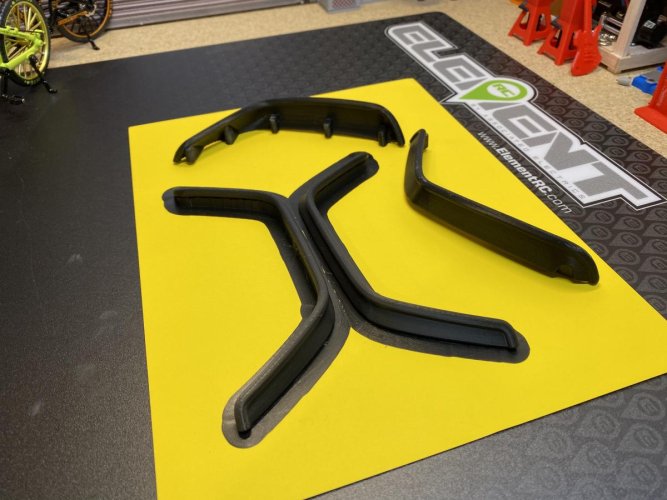
I purchased the Knight Customs JT Gladiator 3D print package from Myminifactory. I was able to get a few of the items printed over the weekend.
Here are the fender flares. I'm planning on adding the Rustoleum truckbed liner to these.
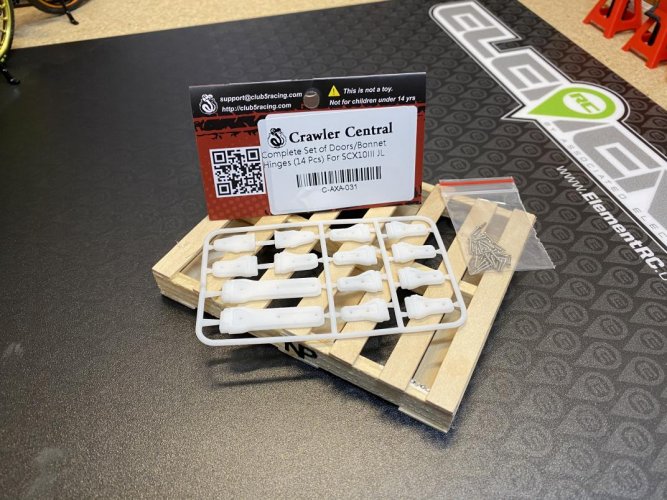
Purchased another set of the Club5 Racing JLU door hinges. The first set I bought was for my JLU and really liked how they added scale detail to the body. After I purchased these, I noticed they have a separate kit made just for the JT. Look to be the same kit minus the rear tailgate hinges. Will be adding black paint to these. Can't wait to fiddle with these micro-tiny screws!:ror:
A few weeks ago I got the wheels and tires mounted up. The wheels are cheapy Amazon specials with a set of cheapy beadlock rings.
I originally bought the Pitbull Rock Beast XL's for my Axial 10.2 a few years back. I never really liked how big they looked on the rig, so I removed them and they have been sitting on the shelf ever since. I think these will look good on the JT and are about the same size as the stock Nitto tires.

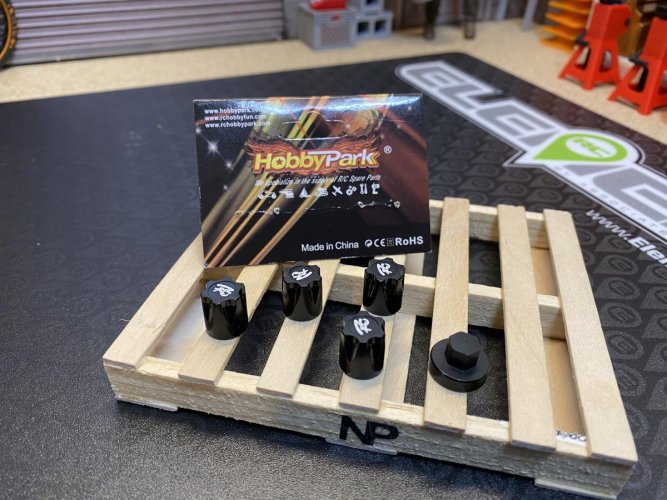
Also picked up these center caps. They come with the tool to install/remove them and fit the hubs perfectly.
I purchased the Knight Customs JT Gladiator 3D print package from Myminifactory. I was able to get a few of the items printed over the weekend.
Here are the fender flares. I'm planning on adding the Rustoleum truckbed liner to these.

Purchased another set of the Club5 Racing JLU door hinges. The first set I bought was for my JLU and really liked how they added scale detail to the body. After I purchased these, I noticed they have a separate kit made just for the JT. Look to be the same kit minus the rear tailgate hinges. Will be adding black paint to these. Can't wait to fiddle with these micro-tiny screws!:ror:

A few weeks ago I got the wheels and tires mounted up. The wheels are cheapy Amazon specials with a set of cheapy beadlock rings.
I originally bought the Pitbull Rock Beast XL's for my Axial 10.2 a few years back. I never really liked how big they looked on the rig, so I removed them and they have been sitting on the shelf ever since. I think these will look good on the JT and are about the same size as the stock Nitto tires.

Also picked up these center caps. They come with the tool to install/remove them and fit the hubs perfectly.

Brian,
Careful with the bed liner spray. I acquired a JK body that was done that way on the top and ender flares. It is still tacky after 2 years.
OH, wow! That's not good!
I sprayed a few light coats and it seems to have cured well after sitting overnight. I did spray the top with black paint first, so the truckbed liner isn't really that thick. I definitely keep an eye out on it.
Thanks for the heads up!"thumbsup"
RCBrutus
Quarry Creeper
I have used the same truck bed liner technique for my inner fenders and truck beds on my Ultra, also using the Rustoleum product. Took overnight for them to fully cure but after that no issues with mine.
I have found it adheres to the surface well, and takes a really good rash to cause it to scrap off. Even stands up to bending/twisting well as it is a pliable material. Adds a lot to the scale appearance too.
Personally I would not use it on a part that was going to receive a lot of rock rash as it will probably wear off quick. But for the more protected pieces or if you are just trailing I think the appearance it adds is a nice touch.
I have used the same truck bed liner technique for my inner fenders and truck beds on my Ultra, also using the Rustoleum product. Took overnight for them to fully cure but after that no issues with mine.
I have found it adheres to the surface well, and takes a really good rash to cause it to scrap off. Even stands up to bending/twisting well as it is a pliable material. Adds a lot to the scale appearance too.
Personally I would not use it on a part that was going to receive a lot of rock rash as it will probably wear off quick. But for the more protected pieces or if you are just trailing I think the appearance it adds is a nice touch.
Glad to hear that it adheres well and can take some abuse. This is my first time using it and I really like how it looks!
I’ve always used black paint topped with flat clear on my other bodies and it has held up well. Looking forward to seeing how the truck bed liner holds up.
Sent from my iPhone using Tapatalk
Those hubs look great. I used the ssd ones on my 10.3 JLU. Wish the made them for the VS4-10.
Sent from my moto z4 using Tapatalk
For the money they’re not bad. I do like the looks of the SSD hubs. I need to get a set of them to try out.
I just checked to see if these China hubs fit my VP hubs on my VS4-10 and they fit like a glove. So they should fit your VS4-10 if you’re running VP SLW hubs.
Sent from my iPhone using Tapatalk
I will check them out. I know the vs410 at least the ultra the shafts and the nut is larger than the axialFor the money they’re not bad. I do like the looks of the SSD hubs. I need to get a set of them to try out.
I just checked to see if these China hubs fit my VP hubs on my VS4-10 and they fit like a glove. So they should fit your VS4-10 if you’re running VP SLW hubs.
Sent from my iPhone using Tapatalk
Sent from my moto z4 using Tapatalk
I will check them out. I know the vs410 at least the ultra the shafts and the nut is larger than the axial
Sent from my moto z4 using Tapatalk
Oh yeah your right. I forgot the Ultra is different. I only have the Origin and PRO, so I wasn’t able to try them out on an Ultra.
Sent from my iPad using Tapatalk
Had some free time last night to get the Gladiator bed put back together.
I added the Knight Customs tool accessories that I 3D printed. Added some paint and topped it with a clear coat to protect the paint. These printed great, but it took awhile to clean out all of the supports that were used to print this.
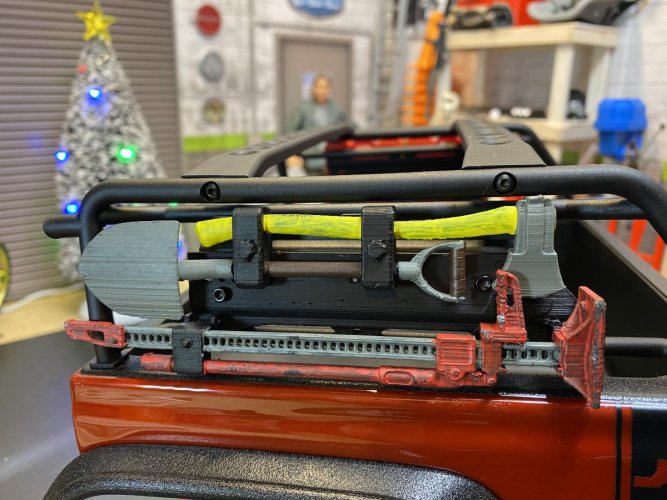
I installed the Knight Customs JT Gladiator fender flares. These were an easy print and turned out great. I sprayed them with a couple coats of Rustoleum Truck Bed Liner.
My LED shop lights made them look whiter than they actually are. They have a nice black textured finish in person. I'm sure the edge of them will get some rock rash, but I'm hoping the tops of them will keep the bed liner look. If the edges get to beat up, I can always just reapply the bed liner to the edges.
I really like how the bed liner came out on top of the bed rails with the flat black vertical JT stripe on the rear of the bed. I got lucky with the masking and did not have much if any bleed thru.

Also found a Rotopak file on Thingiverse. Still need to add a bit of weathering to them.
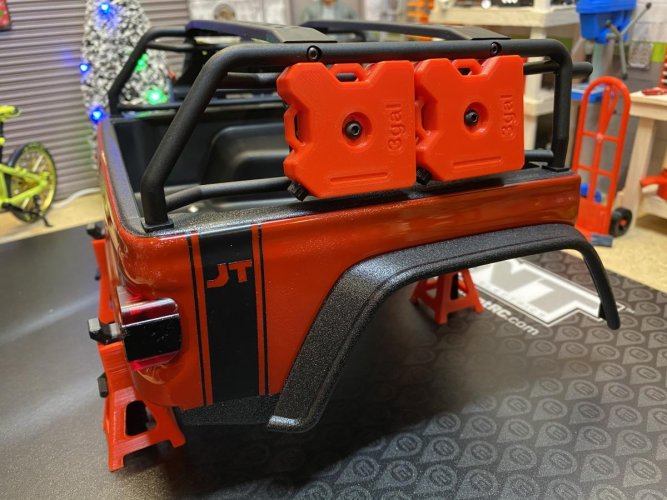
I added the Knight Customs tool accessories that I 3D printed. Added some paint and topped it with a clear coat to protect the paint. These printed great, but it took awhile to clean out all of the supports that were used to print this.

I installed the Knight Customs JT Gladiator fender flares. These were an easy print and turned out great. I sprayed them with a couple coats of Rustoleum Truck Bed Liner.
My LED shop lights made them look whiter than they actually are. They have a nice black textured finish in person. I'm sure the edge of them will get some rock rash, but I'm hoping the tops of them will keep the bed liner look. If the edges get to beat up, I can always just reapply the bed liner to the edges.
I really like how the bed liner came out on top of the bed rails with the flat black vertical JT stripe on the rear of the bed. I got lucky with the masking and did not have much if any bleed thru.

Also found a Rotopak file on Thingiverse. Still need to add a bit of weathering to them.

Topher Builds
I wanna be Dave
Excellent work so far BMow! Hey what’s the brand of that thin white tape you’re using? Looks handy.
Love the hand cut JT logo too "thumbsup"
Love the hand cut JT logo too "thumbsup"
The hi-lift jack came out awesome! Great job!
Sent from my moto z4 using Tapatalk
Hey, thanks!"thumbsup" I need to touch up the red since it got scraped when I took out the JT for a quick run when I first got it.
Excellent work so far BMow! Hey what’s the brand of that thin white tape you’re using? Looks handy.
Love the hand cut JT logo too "thumbsup"
Thanks TB!"thumbsup"
It is 2mm Tamiya masking tape made for curves. I found it and 5mm tape at my LHS. It works great for straight and curved lines. Holds an edge great with zero bleed thru. The Tamiya tapes come in different widths and styles.
The JT letters didn't turn out the way I wanted, but they will do! They were a pain to cut by hand! I really need to get one of them vinyl cutting machines!
Similar threads
- Replies
- 52
- Views
- 4K
