• Welcome to RCCrawler Forums.

    It looks like you're enjoying RCCrawler's Forums but haven't created an account yet. Why not take a minute to register for your own free account now? As a member you get free access to all of our forums and posts plus the ability to post your own messages, communicate directly with other members, and much more. Register now!

    Already a member? Login at the top of this page to stop seeing this message.

B-MOW's Element GK-Ecto-Knightrunner Build

I love a good pw body!

I get not wanting to chop up the bed too much, and also the ecto does make sense since this is an element rig after all. I’d like to see your treatment on ecto body…


Sent from my iPhone using Tapatalk
 
Very nice B. I think you can forget about the Ecto body, this is looking sharp, sexy and mean.

Thanks smog!"thumbsup"

I'm struggling to make myself cut this body. I think twade has the solution I'm looking for!


I love a good pw body!

I get not wanting to chop up the bed too much, and also the ecto does make sense since this is an element rig after all. I’d like to see your treatment on ecto body…

Sent from my iPhone using Tapatalk

Me too!:) I think you hit the nail on the head. I'm gonna wait for the Ecto body and echo the paint scheme on it!;-) It's easy enough to duplicate and it saves the PW for my other build.

Nice idea! Thanks!"thumbsup"
 
Mail has arrived and new parts are here! Another order from Rock Pirates RC on the bench. I decided to try out their battery tray and body post holders. The body post holders line up perfectly with the holes in their shock towers so that they can be mounted wherever needed.

IMG_8262.jpg


As I mentioned in a previous post, the driveshaft was hitting the stock battery tray. The same thing is happening with the RPRC tray. So I did a little whittling on the tray to make room for the driveshaft.

IMG_8276.jpg


All clear now!:)

IMG_8277.jpg


The body post holders installed. I used an extra set of short body post that I had extra from my VS4-10 PRO build.

IMG_8278.jpg
 
That Power Wagon came out nice, and I agree on being patient for the Ecto body.

Hey thanks Goro!!"thumbsup"

Yeah, I agree too. My mind is made up. I'll be getting the Ecto and adding this color scheme to it.


And a small update. No pics, just my mind wandering!

I got to thinking about this rig long term and what my original plan was for it. I think the plan is about to change. More on that later.:)
 
I got to thinking about this rig long term and what my original plan was for it. I think the plan is about to change. More on that later.:)


Many build has taken a sharp left turn after too much “thinking”

I’m intrigued


Sent from my iPhone using Tapatalk
 
Nice, can't wait to see where you go with it Brian.

I still need to convert my Gatekeeper to an Ecto, which I think will eventually become my go to rig. My Sendero was that rig, before I started doing more of the scale trail stuff.

I think I'm up to 5 Enduros now all set up differently! :shock:
 
Many build has taken a sharp left turn after too much “thinking”

I’m intrigued

Sent from my iPhone using Tapatalk

So true!:)


Nice, can't wait to see where you go with it Brian.

I still need to convert my Gatekeeper to an Ecto, which I think will eventually become my go to rig. My Sendero was that rig, before I started doing more of the scale trail stuff.

I think I'm up to 5 Enduros now all set up differently! :shock:

I think you're gonna like the conversion! I haven't even driven mine yet and I can already tell it's going to be kicka$$ out on the rocks!
 
Hey thanks Goro!!"thumbsup"


Yeah, I agree too. My mind is made up. I'll be getting the Ecto and adding this color scheme to it.


And a small update. No pics, just my mind wandering!


I got to thinking about this rig long term and what my original plan was for it. I think the plan is about to change. More on that later.:)

Funny how that works. I can relate to the changing of plans from original. I had the Trailrunner as a whole lined up for just a 1.55/3.8 fairly stock trail rig but now I just have the clear body... Will start a build thread when I receive parts. :)
 
Funny how that works. I can relate to the changing of plans from original. I had the Trailrunner as a whole lined up for just a 1.55/3.8 fairly stock trail rig but now I just have the clear body... Will start a build thread when I receive parts. :)

No doubt! It seems to happen to me a lot! I really need to quit thinking!:roll:

Can't wait to see what you got cookin' with the Trailrunner!
 
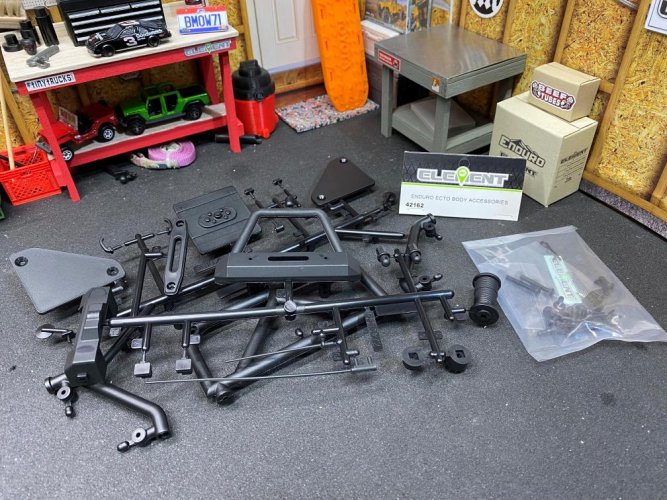
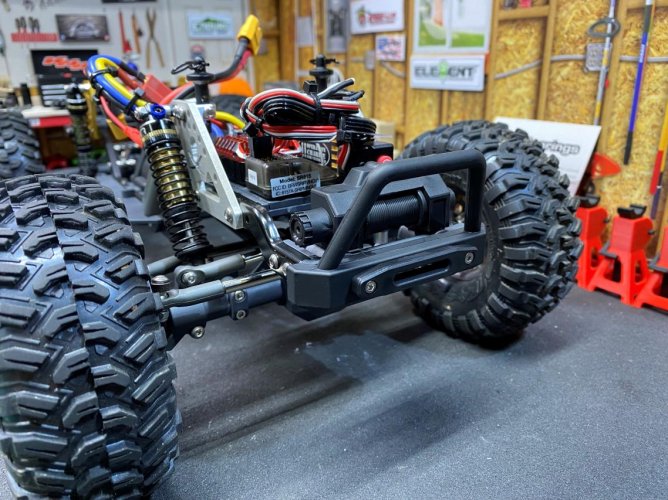
One last update on the GK-Ecto as I wait for parts to come back in stock. The Ecto front bumper and accessories did arrive and I got it installed. This will be the last update for now until I can get the Ecto clear body ordered.

IMG_8346 (2).jpg

IMG_8347 (2).jpg


So as I mentioned a few post back, I've decided to go a different route with this build.

Looking back at my first post of this thread, this was the plan:

"The end goal is to use this kit to build this kit using the IFS and Knightrunner body to build a tiny version of my 1:1 Toyota Tacoma. In the meantime though, my plan is to pick up an Ecto body and see just how good these rigs are. I've heard many good things about the Ecto and how good it does right out of the box and how it will drive lines and keep up with most flat rail chassis'. We shall see!!"

Well, after building the GK-Ecto and really liking how it looks and how it has all come together, I've decided to keep this as an Ecto permanently. And since the price of the Gatekeeper Builders Kit is still crazy cheap, I went ahead and picked up another GK Kit.

This new GK Kit will now be the GK-Knightrunner build that I previously had planned for the Ecto. With a few orders of parts, this new build will evolve into the tiny version of my 1:1 Tacoma.

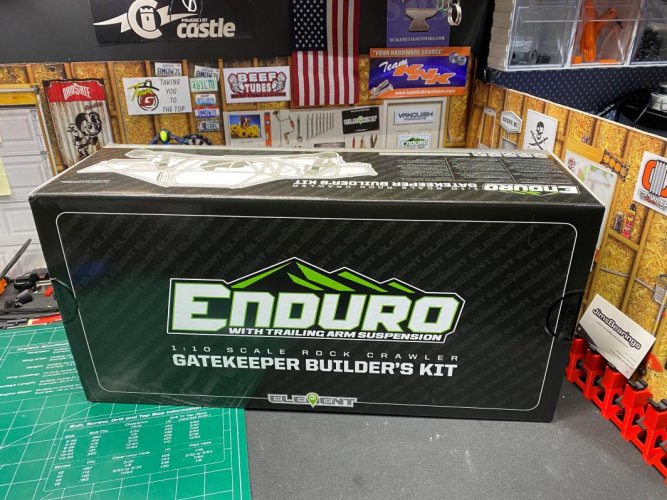
A couple orders arrived this past week to start the new build. A new GK Builders Kit and a shipment of assorted parts sent directly from Element RC. Speaking of Element RC, I think out of all my many orders, Element has the nicest looking and well packaged packages. They always do a great job on securing everything in the box and the tape job on the outside is fantastic!"thumbsup"

IMG_8345 (2).jpg

IMG_8317 (2).jpg

I'll be cracking this box open later today and starting on the build. More to come later!:)
 
WHAT????? someone on here would dare change their mind on the way a build is going???? I would never do that!!!!!!!!!!!!!:lmao::lmao::lmao::lmao:
I will be tuned in Brian. "thumbsup"
 
This Ecto is really clean looking so far! It would have been a shame to let those front towers go to waste.

By the way the Gatekeeper interior fits the Ecto body pretty nicely. Not too bad on the trimming at all.


Sent from my iPhone using Tapatalk
 
WHAT????? someone on here would dare change their mind on the way a build is going???? I would never do that!!!!!!!!!!!!!:lmao::lmao::lmao::lmao:
I will be tuned in Brian. "thumbsup"

Oh...well that's a relief! At least I'm not the only one!:lmao::lmao::lmao:

Thanks for tuning in!"thumbsup""thumbsup"


This Ecto is really clean looking so far! It would have been a shame to let those front towers go to waste.

By the way the Gatekeeper interior fits the Ecto body pretty nicely. Not too bad on the trimming at all.

Sent from my iPhone using Tapatalk

Thanks Phyro!"thumbsup" I know, I was struggling with the idea of tearing the front end off to add the IFS. The front towers are staying now!;-)

Good to know about the GK Interior fitting the Ecto. Thanks!"thumbsup" I'll definetly be using it in the Ecto body if I can ever find one in stock!:cry:
 
Started working on the new GK-Knightrunner this past weekend. I'll be building it similar to the GK-Ecto.

My plan was to add the IFS to the GK kit, but now that the Element IFS is discontinued and very hard to find, I had to rethink my plan. Then, come to my surprise, a member here on RCC came to my rescue!

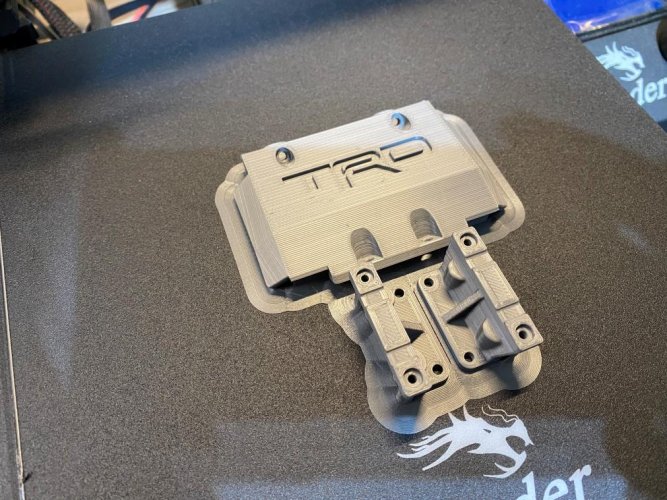
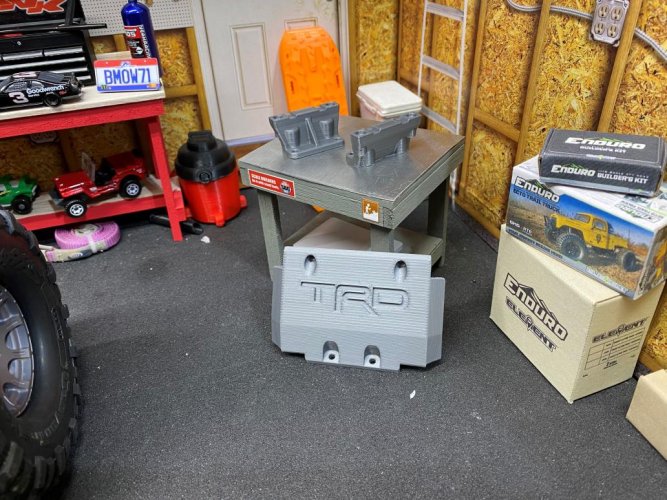
Big thanks to CODYBOY for offering up his spare IFS kit to get this build going in the right direction!"thumbsup" I have decided to try out the Knight Customs IFS lowering 3D prints to give the IFS a little more ground clearance. Got them printed up in PLA Space Gray. I'm hoping since I printed them with 100% infill that they'll hold up without breaking. We'll see!

IMG_8263 (2).jpg

IMG_8265 (2).jpg

IMG_8274 (2).jpg
 
Hey, Brian, looking forward to seeing it finished...and, how it "holds up". Think the 3D-printer parts would have looked better in black, but I'm guessing you either didn't have black at the time...or (the more likely possibility), you purposely printer them in gray, to make any 'breakage' easier to see (ie. after thorough testing, you'd probably reprint in black?).

After taking a short break from RC (due to family emergency), mine is a couple steps closer to completion (got all the Bowhouse strict upgrade parts, and LCG battery tray, installed...but, need to reinstall the trans, after installing the pinion (which finally arrived)). If I'm 'lucky', I'll finally be able to program the ESC (if I can remember where I put the Spektrum Smart programming box). Can post few photos for you (and others) to see, once the trans in back in.


~ More peace, love, laughter, & kindness would make the world a MUCH better place

You are partially right on the print color. The top mounts are in gray so that I can see where it cracks if it does. The skid I wanted it to be gray to match the 1:1 TRD skid plate. My plan is to sand the skid smooth and apply a couple coats of paint to it to match the the stock skid. Another reason I like using the space gray color is that for some reason it prints better than my black filament. Whenever I need a good looking print, I'll use the space gray and then sand a paint the part the color I want. Painting the PLA makes the part look more real.

Looking forward to seeing your pics once you get it done. I did get the Bowhouse RC steering rack and bell crank parts ordered from Amain. They should be here on Friday. I'm curious to see how these Bowhouse parts work with the Knight Customs lowering 3D prints. I'm not sure if the steering rack will line up with the knuckles. I guess I'll find out when they arrive.
 
Did some work on the IFS. I picked up a set of the hard suspension arms. I thought they would match better with the other gray hard parts that are in the GK Builders Kit and add a little extra strength too.

IMG_8324 (2).jpg


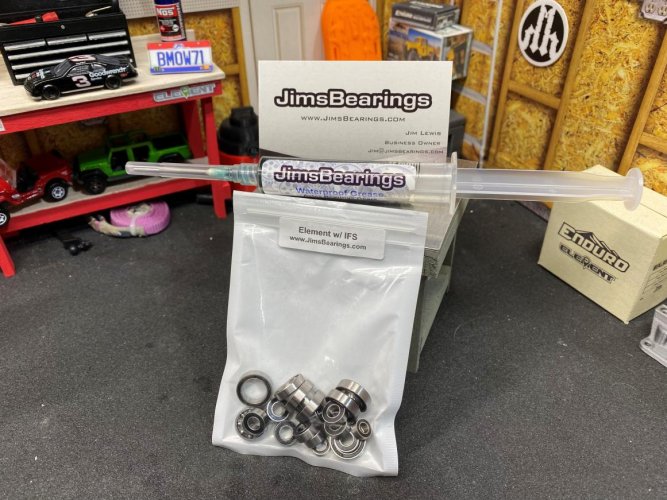
Also picked up a set of Jim's Bearings and a grease syringe. I'll be replacing all of the stock bearings with Jims's. I've had great luck using his bearings. His prices are great and they ship fast since he is located near me in Ohio.

IMG_8325 (2).jpg

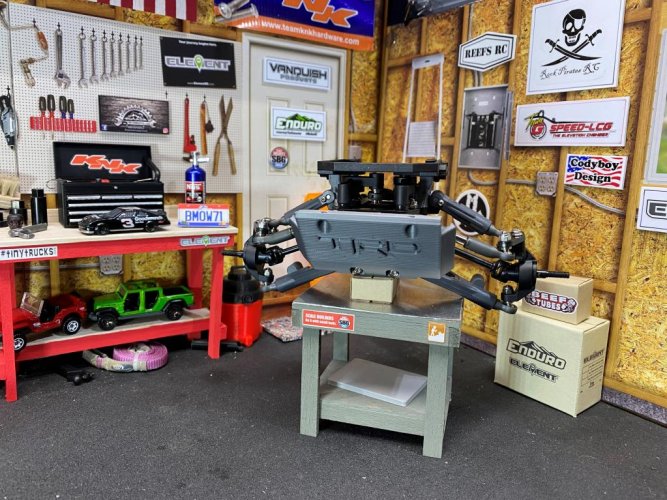
And the IFS complete for now. I do have the Bowhouse RC steering rack and bell cranks on order for it. They should be arriving here on Friday.

Another shout out to CODYBOY. As you can see on the wall, I got his sign hung up!:) Thanks for the stickers Ernie!"thumbsup"

IMG_8329 (2).jpg

Edit: I forgot to mention, as you can see in this pic, the 3D printed mount did crack where I tightened down the top screws. I pre-tapped the threads in the print, but it still cracked. Maybe I should have drilled a deeper hole in the mount. I guess I'll find out how long it last later.

IMG_8331 (2).jpg
 
Last edited:
Edit: I forgot to mention, as you can see in this pic, the 3D printed mount did crack where I tightened down the top screws. I pre-tapped the threads in the print, but it still cracked. Maybe I should have drilled a deeper hole in the mount. I guess I'll find out how long it last later.

View attachment 399787

I had my first set of those mounts break in exactly the same spot and I didn't even notice until I switched them out for a PLA Pro set I printed. I don't think those cracks will matter if you're not too rough on the truck.

If you are going to drive it more aggressively, it'd probably be a good idea to redo them and either drill the holes slightly deeper (I did on the PLA Pro set) or use slightly shorter screws.

Sent from my LM-V600 using Tapatalk


Good to know it wasn’t just mine that cracked. I do think it needs drilled a little deeper to prevent the cracking.

I don’t plan on bashing this rig so I’m thinking these will hold up fine. This rig will more for easy scale trailing and mild rock crawling.

I did reprint the mounts at an angle to use if the originals don’t hold up. I thought printing at an angle may help with cracking in that spot. Jus a thought. We’ll see.

21d9f8cfe52b8f68433f4e8ba2551dc7.jpg


Sent from my iPad using Tapatalk
 
Back
Top