• Welcome to RCCrawler Forums.

    It looks like you're enjoying RCCrawler's Forums but haven't created an account yet. Why not take a minute to register for your own free account now? As a member you get free access to all of our forums and posts plus the ability to post your own messages, communicate directly with other members, and much more. Register now!

    Already a member? Login at the top of this page to stop seeing this message.

1/6 Wraith/Nylint TJ Jeep + scale quad

thanks for the explanation Mike...

but I have to deal with my particular wheel offset
that is likely different then yours was.

So basically yer saying is...
that the wheel should spin freely on the threaded rod
sandwiched by the two washers... but not too tightly ?

I'd think that would wear out the wheels center holes prematurely
if used a lot. But don't know for sure.

I aim to mount the theaded shafts in a way
that I can use bearings in support and minimize wheel wear.

Basically a floating hub design on the threaded shafts, if you will.

well... that's what I'll attempt anyways.

I got another idea of printing an axle
that captures a floating threaded shaft on each end of the axle.

And will utilize the 12mm hex hubs so the tires mount and roll evenly.
Just haven't figured out how exactly !? Lol
 
Can you take pictures of the axle and how it's mounted

Are the wheels on the trailer 1.9'' or are they small 2.2'' I'm curious what size they are and how the axles work and mount

Hurry up and figure out a hitch and axle, cause I will want to take off the plastic wheels and put some 1.9'' on my trailer, cause with flat square fenders it would match the one for real Jeep Mutt

I thought about using leaf springs but never came up with a axle or how to mount every thing

Cause the axle on my 3D 1/10th scale printed trailer has a separate axle shafts that spin freely of each other and the bushing are molded into the printed axle and uses leaf springs

But its know near where wide enough for the Hasbro trailer, but a printed axle with bearing or bushings molded into the axle and uses leaf springs or springs and spring cups

but big enough or wide enough for the Hasbro trailer, I would buy an axle setup , maybe you help me out

cause I want to use a trailer also

Mike Flea is too nice of guy too you
 
Last edited:
thanks for the explanation Mike...

but I have to deal with my particular wheel offset
that is likely different then yours was.

So basically yer saying is...
that the wheel should spin freely on the threaded rod
sandwiched by the two washers... but not too tightly ?

I'd think that would wear out the wheels center holes prematurely
if used a lot. But don't know for sure.

I aim to mount the theaded shafts in a way
that I can use bearings in support and minimize wheel wear.

Basically a floating hub design on the threaded shafts, if you will.

well... that's what I'll attempt anyways.

I got another idea of printing an axle
that captures a floating threaded shaft on each end of the axle.

And will utilize the 12mm hex hubs so the tires mount and roll evenly.
Just haven't figured out how exactly !? Lol

I don't know what the offset was, but they were ProLine premounted Badlands on Desperado wheels, product I.D. 1173-12.

Yes, the wheel was designed to spin freely from the other wheel if tightened to the point of 0 wobble on the axle. So not cinched all the way down, but not loose enough to cause wobble or deterioration of the plastic wheel. (Hope that makes sense). Also, I wasn't planning on carrying a lot of weight.

A floating hub with bearings would probably be more durable than my design, especially if you're going to put a lot of weight in it. "thumbsup"

Oh, and you definitely need to paint it orange to match :lmao:


Thanks for the comments Mike and kgb
 
Last edited:
That's the main reason, I never really used the my printed trailer was because there was so much wobble like Mike is talking about

I used thin washers as shims to adjust for the wobble instead over tightening the wheels , now there is a lot more drag but a lot less wobble

So even with bearing or bushing cast in the printed axle, I had problems with wobbling not sure what the solution is

but a printed axle with leaf springs or axle springs and spring cups is a step in the right direction

maybe a different axles design and different axle shafts might be the answer
 
Last edited:
Can you take pictures of the axle and how it's mounted

Are the wheels on the trailer 1.9'' or are they small 2.2'' I'm curious what size they are and how the axles work and mount

Hurry up and figure out a hitch and axle, cause I will want to take off the plastic wheels and put some 1.9'' on my trailer, cause with flat square fenders it would match the one for real Jeep Mutt

I thought about using leaf springs but never came up with a axle or how to mount every thing

Cause the axle on my 3D 1/10th scale printed trailer has a separate axle shafts that spin freely of each other and the bushing are molded into the printed axle and uses leaf springs

But its know near where wide enough for the Hasbro trailer, but a printed axle with bearing or bushings molded into the axle and uses leaf springs or springs and spring cups

but big enough or wide enough for the Hasbro trailer, I would buy an axle setup , maybe you help me out

cause I want to use a trailer also

Mike Flea is too nice of guy too you
read thru Mike's build thread... some pictures and history.

http://www.rccrawler.com/forum/large-scale-rigs/502928-new-project-me.html

I've yet to decide what I'm going to do...
still deciding if I should weld up a true steel frame.

I'm thinking that only the tub will remain original
whence I get busy with it.

Not really sure I wanna roll 2.2's on it.
as they're kinda big looking IMO.

But my current 1.9's look/fit rather short @ 4.60 (ish)

So possibly I need locate a shorter 2.2 tire.
5" (ish) maybe.

Lots of ideas running thru my brain...
but little happening to date :oops: Lol
 
Last edited:
While alcohol works for motivating me...
or making me out to be a bigger asshat then I already am.

If I become too inebriated
I'll usually just fumble with chit as I make my attempt.

And tho' it looks purdy good at that moment...
when I sober up... not so much then. Lol

Wonder how many fingers I'd still have remaining...
if I followed your approach ?! :shock:

When I'm using my cut off wheel or similar errant tools...
I'm usually stone cold sober.

I may become inebriated afterwards in celebration of my success.
But not while I'm working with dangerous tools and chit.

Can't says I trust myself when I'm inebriated. ;-)
 
I never said anything about drinking to inebriation. I keep forgetting that not everyone is huge like me, so by the time the alcohol gets to my mind, I'm done with the job.
 
See that's why I prefer to self medicate

and I don't get pulled over, cause I don't drive like an idiot, and if I do get pulled over

its for some stupid bullshit, like not using my turn signal and that's it

its not speeding or running red lights, nothing that purposely that draws there attention

I drive mello now days, I'm no longer in Ca and do not need to drive aggressively

Cause there is little traffic in Northern Nevada, unlike Ca where there is traffic every where

And they will run your ass over if your not doing a least 5 to 10 miles per hour over the speed limit

In Nevada you can actually do the speed limit and not be pushed to speed, cause they easily drive around you

In Cal your getting the finger and asked if your head is up your ass as they blow by you
 
Last edited:
I had a friend whom was also a larger person...
drank alcohol like a fish.

He thought the same thing (same attitude)...

until the CA PoPo's slapped him with a DUI :shock:

He claimed he wasn't inebriated...
but the PoPo's didn't care to listen.

Blowing .08 BAC can be had simply by sucking on a breath mint. :shock:
And yer guilty in CA... until you can prove otherwise.

Had another friend that claimed the same deal...
claimed 6 beers didn't even effect his mood.
Was all good until he drove into the back of a school bus. :shock: wow

But it's probably not illegal to hack off yer own fingers
when under the infulence...
as long as yer not hurting anyone else, right !? Lol

Denial is not a river.

Stay at home and play with yer trains when drinking...
hopefully you won't shock yerself too badly.

But if ya do fark up... it's probably only 120v :mrgreen:

Speaking of trains...
hows your backyard project going ?

Is there a link posted somewhere,
that entails your current build pics of that ?

I'm interested in seeing what changes have occurred.

Is it done ?
 
Trains, I'll have to get some pics shot, haven't really done much to it, other than the last pics from post #162 in my build thread, which oddly enough was a year ago.

The wife and I are still building structures, and I noticed yesterday that I have to raise the far section near the shed. It appears that it is sinking. We've had a very rainy, hot and humid summer, and that may have something to do with it. I'll have to do something with it soon, or risk track damage, sure don't want to run the engines until it's leveled.
 
So I've done nothing to alter Mikes original axle configuration...
nor change the leaf spring configuration.

I simply fit (spaced) my Axial SLW 2.2 type wheels/tires to the original axle's
threaded stub axle ends.
Also purchased a pair of the PL 2.2 SX TSL tires for the trailer.
Slightly shorter then the XL TSL's... but not by much.

I did have to trim the trailing edges of the trailer's fenders slightly
as well heat those up and bend them outward away from the tires slightly
to ensure they clear.
Probably a good idea that the leaf springs have no shackles
as articulation would be not so good at this time.

Good enough for show... and light wheeling operations
tho' maybe not great for long term durability/reliability.

But it looks cool IMO "thumbsup"

So I'm looking for a Stainless Steel Lobster swivel clasp
that I can use as a pintle hook to attach a lunette style ring onto.

I have a clasp currently... but don't really like it.
So I'm hesitant to weld it in place at this point.

It can't be too long... and needs be weldable steel.
Maybe around 3/4" in over-all length... guessing.

I've found a few...
but not sure if I can weld them to the mild
steel bumper or not.
I'm thinking stainless steel could be welded.
But not really sure without first trying.

I intend to cut a slot (thru) into the Rr bumper's surface
and insert the rear side ring tang into that slot...
and then secure it there by welding at the backside of the bumper.
Guess I won't know if it will work or hold up... until I make an attempt.

Looks like this...

knottology-lobster-claw-silver-march-12-2013-large.jpg


Coming up with a replicated pintle hitch is really the only thing left to do...
and then I'll be able to drag the trailer around.

Any other suggestions ?

I'm also going to be painting the trailer box with orange plastic dip
just as I did with the TJ body.
Likely without making a stand alone frame for the trailer...
at least for the time being.

The cool thing is...
my custom 1:6 quad will fit ontop (inside the box rails) of the trailer.
And so need make some homebrew portable ramps so the quad
is able to drive up onto the top of the trailer and be tied down there.

Gonna be a little top heavy... but not too bad...
if I drive slowly I'd think.

Here's a general (not great) visualization of where I'm going...

'course the trailer is yet to be PD'd orange.
Likely leave the quad blue... to offset the excessive amount of orange.
Besides it's a Yamaha... which is commonly blue.
 
Last edited:
That's not scale, the quad is bigger than the trailer

looks good if your drunk :flipoff:

And I pointed out and used one of those key rings, when I set up my 1/10th scale 3D printed trailer

There is this thing called Google on your Internet Machine, and if type in 1/6th scale Tow Hook

Wow the results shows Shapeways has this Penton Hook but its plastic

:flipoff: Lazy Bastard
 

Attachments

  • 625x465_1613670_1520488_1452899640.jpg
    625x465_1613670_1520488_1452899640.jpg
    51.1 KB · Views: 136
Last edited:
^ numbnutz ;-)

1. Quite obviously you haven't a clue.

My quad is a custom crawler quad
and sits a tad taller then yer standard low slung quad.

I'll admit... it will be difficult to find any 1:1 quad
positioned atop an 1:1 M100/M416 trailer.

But to conclude that my quad looks too big...
has me ascertaining that you've never owned
neither an MBT/M100/M416... nor a quad.

close enough...

IMG_2698.jpg


^ Notice the bike needs be angled in order to fit.
And it is not sitting on top as the quad needs to.


Not an M416 or the like... but offers an estimated visual...
tho' I'm sure the ramps will need be longer and this quad demo is too small.

attachment.php


The 1:1 M416 trailer's box length is 6'

So let me convert that for you...

6' @ 1:1 = 12" @ 1:6

My 1:6 trailer's box measures 11.95" long
so it's purdy dang close to scale.

Only thing too big is...
the 2.2 wheels/tires mounted on the trailer.
The quad looks purdy small on the ground parked next to those.

Suppose you'll tell me this couch is too big and not to scale !? :roll:


2. Yer a moron if you think a plastic pintle has any value to me.

ummm... almost forgot... :flipoff:
 
Last edited:
now that's better

you beaning slacking off lately

So I take apon my self to rattle your cage

:flipoff: because I care

:flipoff: and your high horse

your 2nd picture crashed

Dam Internet Machine
 
Last edited:
no you can't see the second picture

when you first posted it the 2nd picture was see-able, then after you added the 3rd pic of the quad on platform and the 4th one the couch picture

the 2nd one crashed after that

:flipoff: fix your picture
 
Last edited:
Dell, that's the same clasp I used for a pintle, I found mine at the local Home Depot, picked up the smallest one they had, think they cost $2.39 each. I say they, because they are made out of pot metal, and when I tried to braze to the rear bumper, it melted like wax, good thing I bought 2.

If you refer to posts #105 and #110 on pg 6 of my build, it shows the bumper and pintle attached. I used 1/2 inch flat bar for the bumper. Had to cut the loop off the clasp, and grind off the flattened end of the pivot to get the rest of the loop off, then drilled a hole in the bumper the size of the shaft on the clasp. Then I drilled a 1/16 hole through the shaft of the clasp for a tiny brad to fit through to hold the clasp onto the bumper. Be sure to put a small washer on the shaft, otherwise the clasp will pull through the bumper. For a thin washer, I used an Axial wheel washer, part #AXA1090. This way the trailer will pivot and turn in any direction.

On pg 5 of the build, post #86, cmbscx10 put a link to RC4WD's Pintle hook and Lunette ring, the dimensions and specs on their hook, is listed in post #89.
I'll take another look see. "thumbsup"

I'm contemplating making my own hi-articulation hitch...
similar to what I did with my 1:10 scale trailer/Honcho.
I tried installing a somewhat longer lunette (threaded ring end)...
But it was still not long enough to crank the trailer to 90* when backing.
And I couldn't find one any longer. ( maybe HD has one ? )

I May have to extend the tongue using my previous method...
and that'll make the pintle/lunette idea obsolete.


Then fabricate up a custom hi-articulation hitch joint...
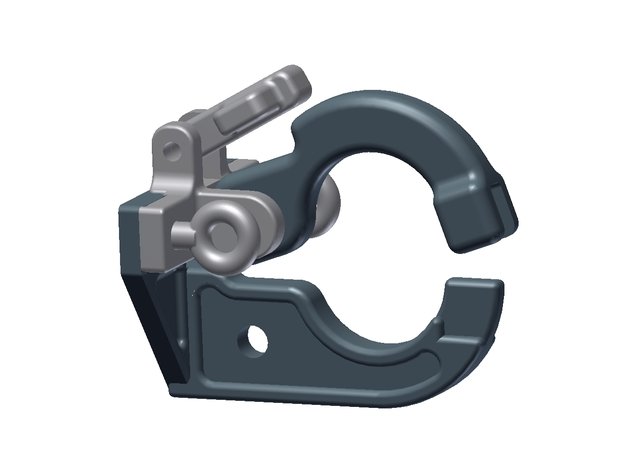
somewhat replicating the Max Coupler on my 1:1 set up.


so much for trying to be a little lazy on this one. Lol


Yeah pot metal would be bad news for my 220 MIG...
thats why I thought of cutting a slot in the center of
my steel bumper... insert the Lobster ring (end) into that.
Then weld/fill in the slot surrounding... and hope
that the ring will become embedded by the weld fill.

Would suck if the lobster clasp just melts :cry:

I'd think stainless would handle the heat better
so I'm looking specifically for that material.

I went to Lowes and they didn't have much :oops:
so I'll haft'a check out HD ;-)
 
Last edited:
Back
Top