With opening an Ebike storefront lately I haven't had a ton of chances to play on my machinery. I need to move the CNC to work now, I'm not interested in working from home at all since my shop is just a few miles away. Working two places in a day is not very effective for me.
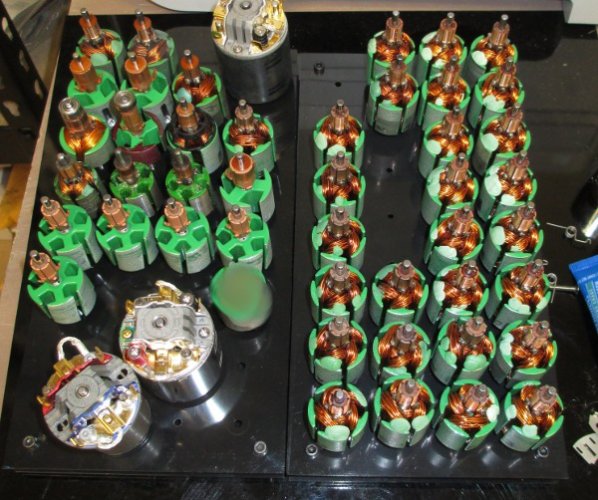
But, I did get totally sick of the resin impregnation process when we make stators and rotors. So I built up that resin chamber I was talking about in post two. Within the first batch of armatures I had already saved time on production. In four more weeks the effort and materials to build the chamber will be covered as well. The chamber was built three weeks ago, I am just now getting time to post it up.
A recap:
The second project I am working on is a Vacuum chamber for resin impregnation. No deadline on this, as we already have a dipping chamber in use. This chamber will primarily be used for 540 brushed armature work, as we have another chamber that is used for ESC impregnation and molding work. I'm a bit lazy when it comes to manual work, so when I can build a machine to work smarter instead of harder you bet I will do it!
This will technically be a VOI (vacuum only impregnation) process chamber, since VPI (vacuum pressure impregnation) also uses positive pressures and machines in the 10s of thousands of $$ range. I got chewed out by a resin rep one day about the difference of VPI and VOI . The resin we use for impregnation calls for vacuum on wire bundles thicker than 1", wire sizes smaller than 30ga, or stators where resin cannot penetrate along the longitudinal direction. Since a normal 540 armature does not meet any of these criteria, the vacuum duration and intensity is non critical. This device will use vacuum for automation, but a change in the routine could easily make it a VOI system for parts that do need vacuum for proper impregnation. I may automate the chamber with PLC, but I don't think it will be needed.
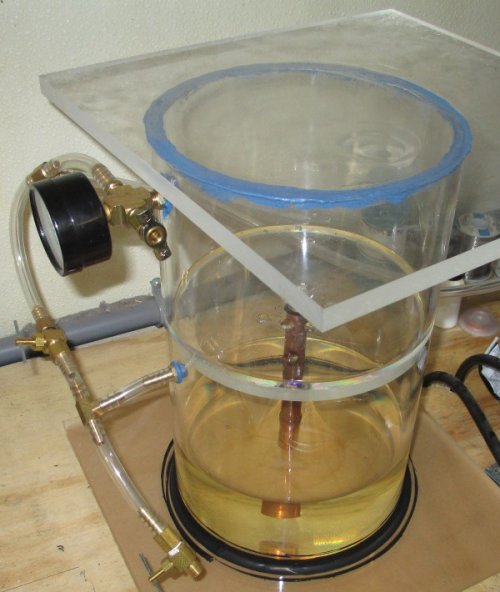
A quick rundown of how I built it. The top, middle platform, and bottom are 1/2 inch plexy, square foot. The chamber is made of 8" plexy, I think it was just a hair under 1/2" thick. I first tried drilling and tapping to install the bottom, but it was not a good process because of the wall thickness. The bit would wander and deform the walls since plexy is kinda melty. A stub drill and faster pecks would have worked better.
Instead of mechanical fastening, I decided on chemical instead. A good soak in acetone joined the bottom to an almost airtight seal, I didn't finish the tube well enough for a perfect seal. Doing it again, I would have lapped the tube on sandpaper to get it perfectly flat. The middle platform also got the acetone treatment, and made a perfect seal. To fix the bottom side seal I used black RTV around the base and pulled a vacuum on the system to bring it into the cracks. Worked perfect!
The top seal was made with blue gasket maker. I roughed up top surface of the tube and applied a generous portion of gasket maker. Then I ran over the silicon with a concave forming tool, and set the top lid down with some Vaseline as release agent. After a short cure the top was removed and the gasket allowed to fully dry. It was pretty easy.
The rest of the chamber is simply hoses, fittings, a vac gauge, and valves. I can bias the pressure between top and bottom chambers to move resin up or down. It is pretty simple to operate. Just add a bit of air to the lower chamber to push resin up, then balance the pressures or turn off the vacuum to stop the flow.
A typical resin process for my needs calls for a 60 second dip at a specified temperature at zero inches mercury (regular atmosphere). Over the last 9,000 armatures we haven't had a single resin related failure, so the resin manufacturers' instructions are sound "thumbsup". During operation of my resin chamber I let the armatures sit for 60 to 300 seconds depending on how the resin is flowing, followed by a drain period per the instruction sheet for the particular resin. Remove, clean, and bake 8)
Instead of handling 20 to 40 armatures one at a time, we can now do ONE process that takes minutes. Hello free time to do other things in life, like searching for better prices on penny whistles and candy necklaces. :mrgreen:
Next I will trim the top on my bandsaw to make the machine a bit more svelt, install a bung when it is needed, add in a few more valves for easier pressure control, and start testing PLC items to fully automate it. My biggest concern is the proximity sensor needed for automation. I think a capacitive type should work on the resin, but I don't have one here to test.
As you can see it gets dirty QUICK! The resin is super nasty and doesn't really clean off the plexy fully without getting solvents involved.

