-
Welcome to RCCrawler Forums.
It looks like you're enjoying RCCrawler's Forums but haven't created an account yet. Why not take a minute to register for your own free account now? As a member you get free access to all of our forums and posts plus the ability to post your own messages, communicate directly with other members, and much more. Register now!
Already a member? Login at the top of this page to stop seeing this message.
jebster's 6x6
- Thread starter jebster
- Start date
Bravo! Excellent execution of your idea!
Thanks. Someday I want to install an actuator to raise and lower the boom. Haven't figured that one out yet.
I just subscribed to this thread. Can't wait to see more updates and maybe a video one day?
Sent from my DROID RAZR using Tapatalk 2
Hoping to get it out on he trail soon. Once I do I will try to get some videos up.
sumquak
Rock Crawler
spool fits great. glad we got our numbers right the first time. how much line is it able to hold. a servo and a hard stop might work to lift your boom and hold it in position.
i'll keep watching the progress of this build.
i'll keep watching the progress of this build.
spool fits great. glad we got our numbers right the first time. how much line is it able to hold. a servo and a hard stop might work to lift your boom and hold it in position.
i'll keep watching the progress of this build.
it fit just like I wanted it to. thanks. I currently have 10' of winch line on there (what I have available) but i'm sure it could hold quite a bit more.
for lifting the boom with a servo could be an option. thinking about a threaded rod the would run the length of the bed under the boom with one end connected to a servo to turn it then just attached a threaded beam to run up and down. kind of like a screw drive garage door opener setup. since I have power run to the bed that is an option.
may be awhile before I tackle that project. still have to get my front winch hooked back up (the 645 didn't have a controller so I ordered one from heyok), make the lift boom and also try to get it off the workbench to have fun with it! "thumbsup"
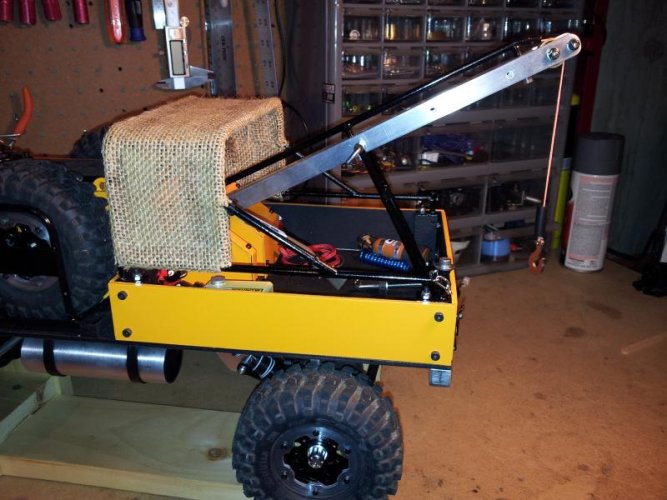
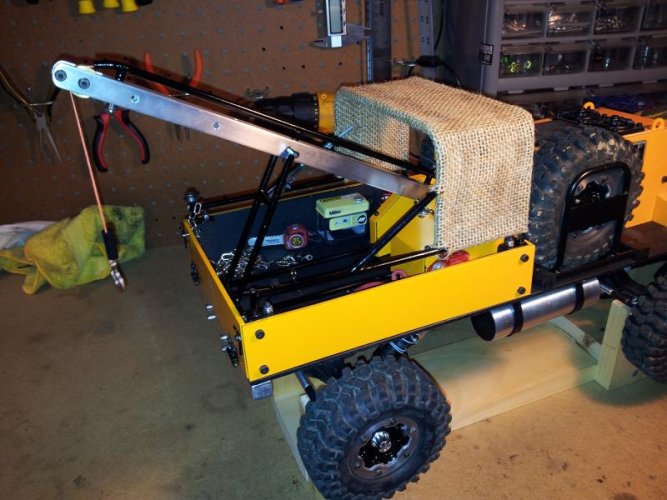
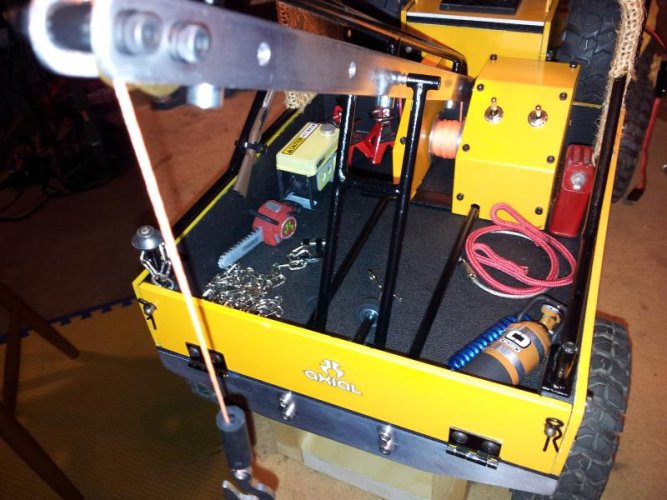
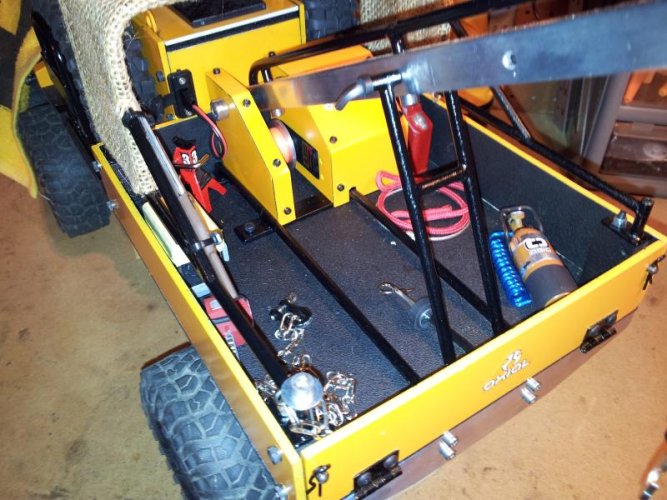
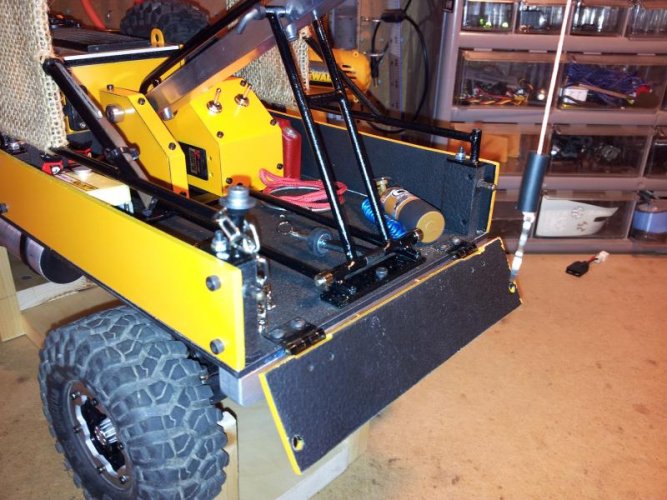
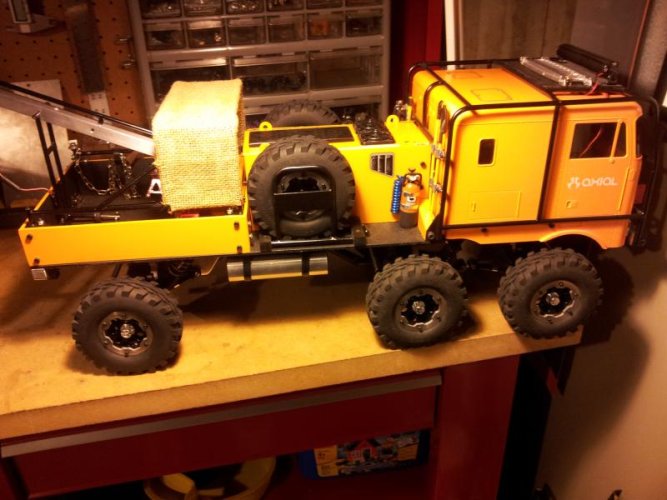
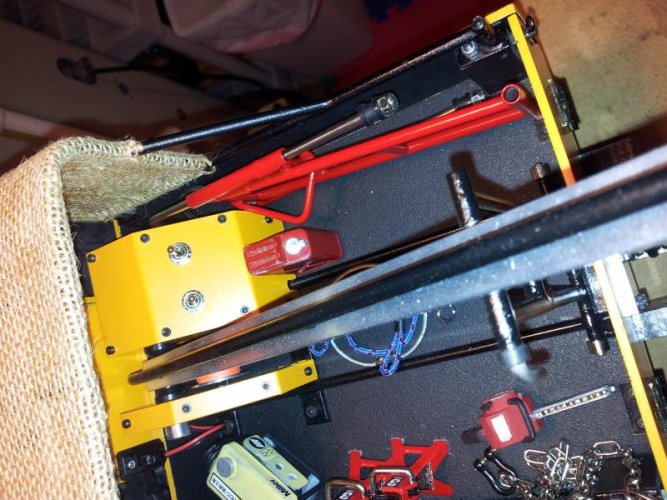
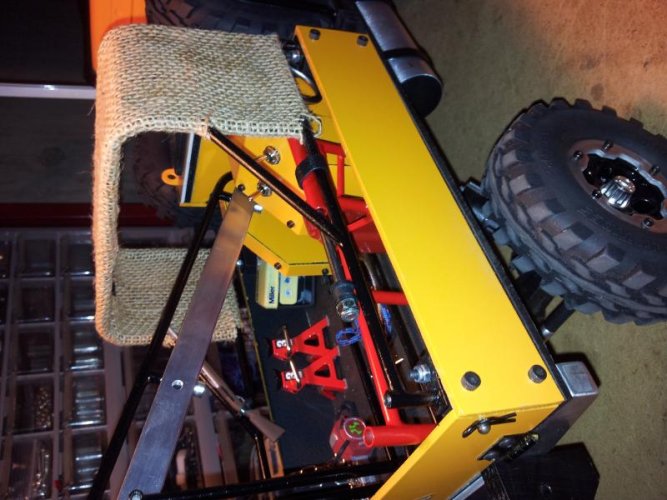
A little more work done. Got the canvas wrapped around the rear cage and started throwing some accessories in. Never know what will look right so I will just mix it up for awhile.
Attachments
Been a busy summer but got some time to work on the rig.
First up was some new tires. Decided to go with rc4wd USSR tires. A little taller than the flat irons and I like the look. Time will tell if the work better.
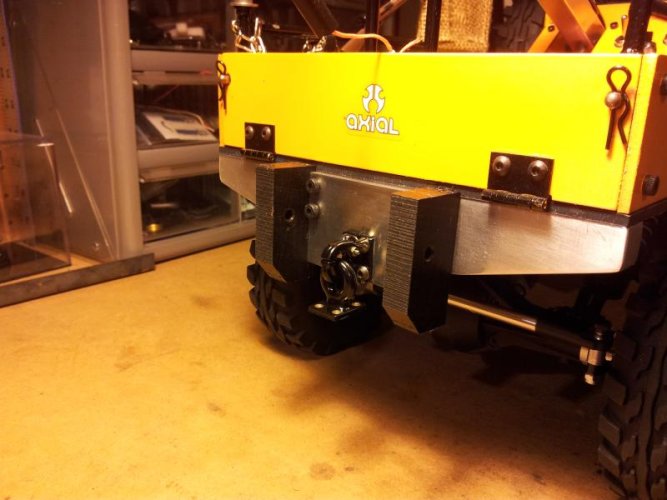
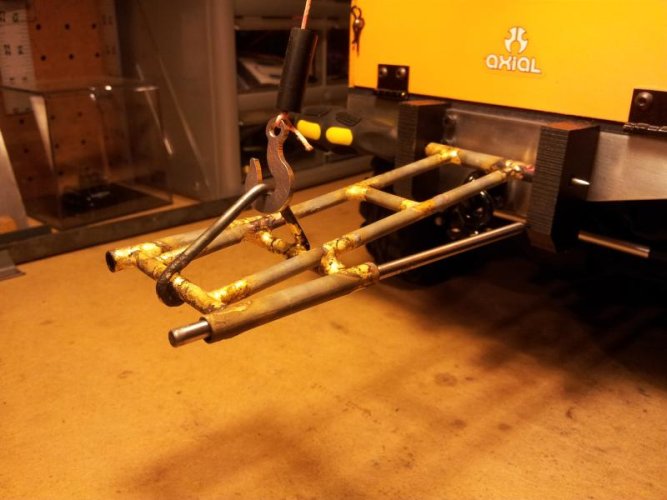
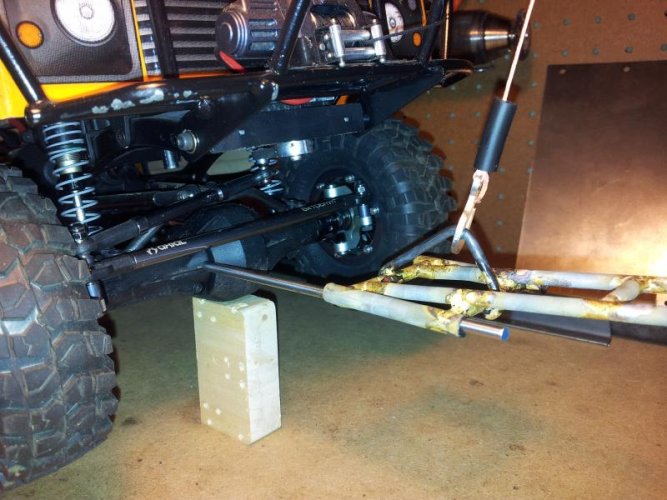
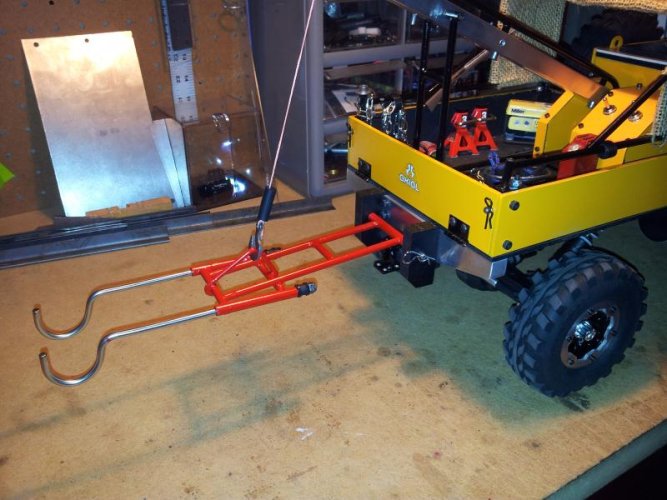
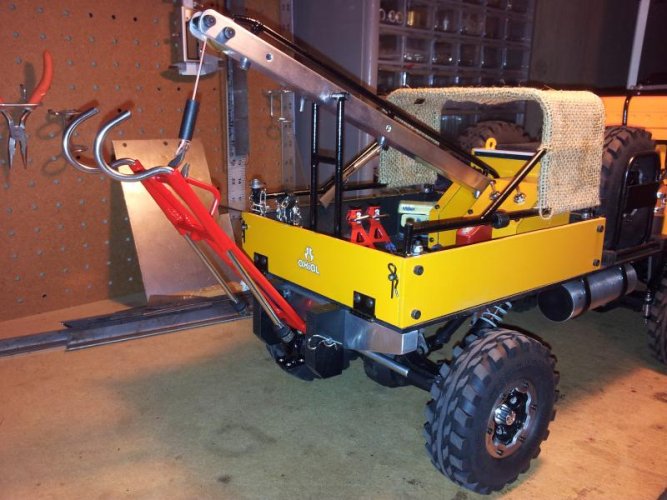
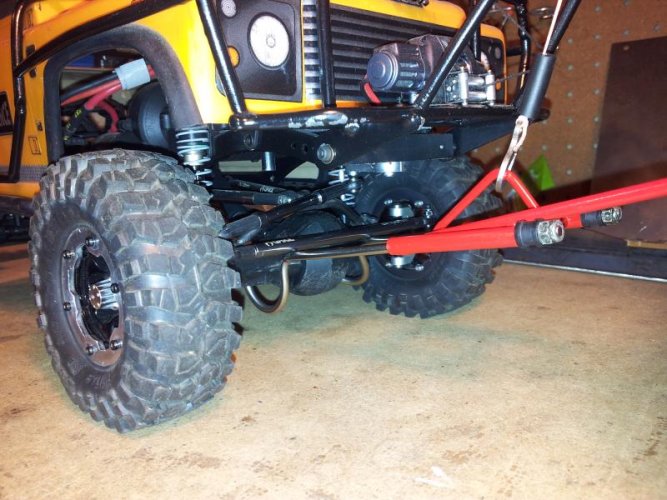
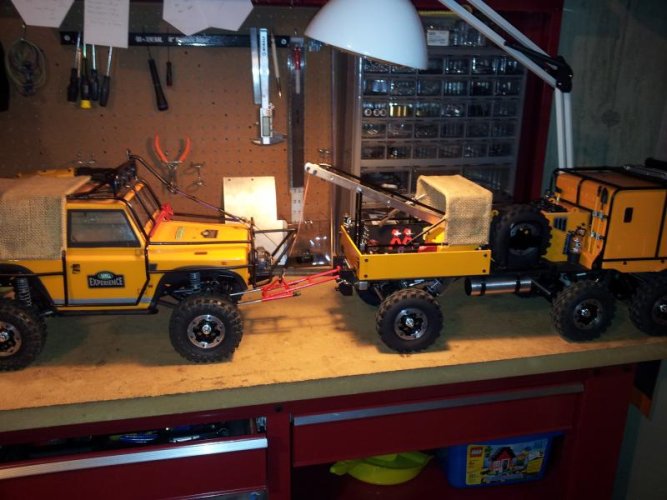
Next up was a rear hitch for a trailer I'm working on. Just added a pintle mount to a thick aluminum plate with some delrin guards on each side. Very heavy duty. You can see why I made he derlin guards stick out. They have holes so I can slide a rod through to mount my tow bar.
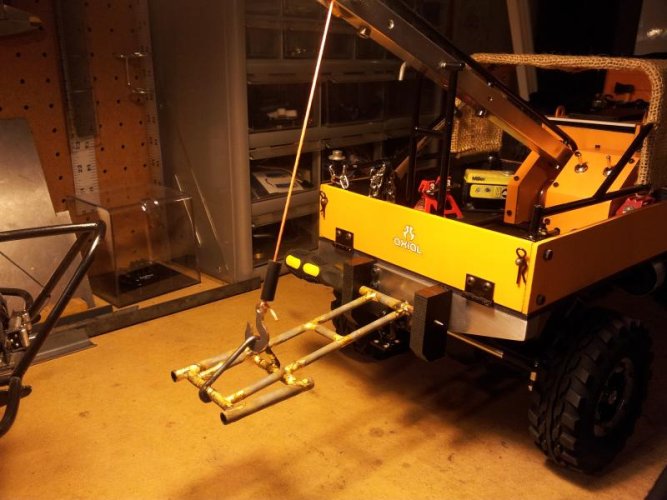
The tow bar will be raised and lowered by the hoist. Its not done yet but each side of the tow bar will have a rod with a hook that slide out to grab under another rigs front axle on each side of the diff pumpkin. Need to make the hook rods and clean up/paint but it is coming along. The goal is to make the tow bar small enough to slide in the bed of the truck next to the hoist assembly.
Now for a few pics.
Attachments
mmatthews
Rock Crawler
WOW!
"thumbsup"
"thumbsup"
very nice. "thumbsup"
will it work on an AR-60 axle
I don't have that axle on hand but my guess is you would probably need to spread the hooks further apart to clear the pumpkin of the ar-60. not a big deal because the only change would be two longer tubes.
I appreciate the positive comments guys. Love working on this rig.
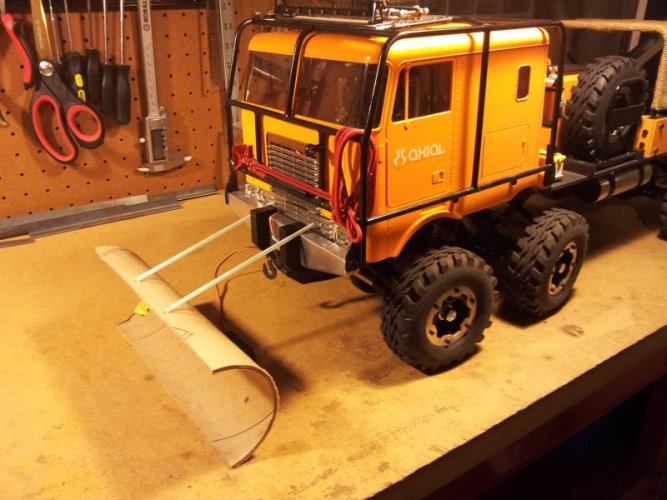
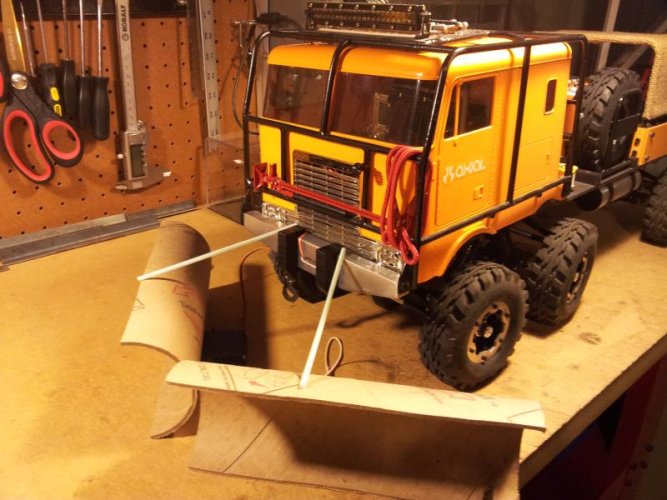
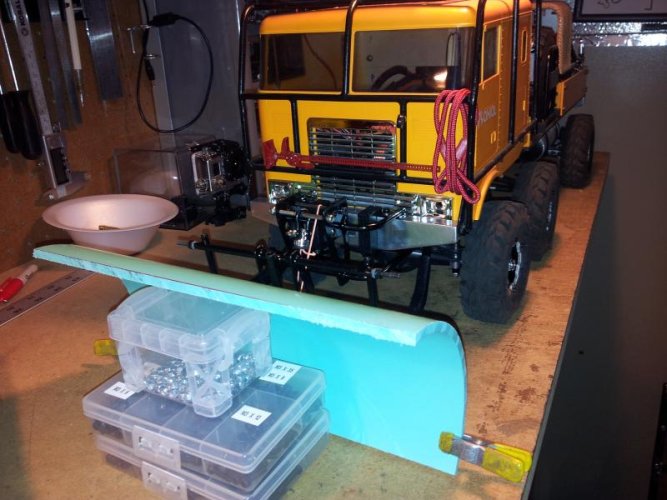
So, I'm thinking of adding a snowplow and chains on the wheels for the winter. I will be able to lift/lower the blade via the transmitter. I am looking for opinions on the blade. Do I go for a single blade or a v-blade? I have some pics for mockup. The final blades will be taller. He single blade would be wider than in the pic and the v-blade would probably be narrower.
So, I'm thinking of adding a snowplow and chains on the wheels for the winter. I will be able to lift/lower the blade via the transmitter. I am looking for opinions on the blade. Do I go for a single blade or a v-blade? I have some pics for mockup. The final blades will be taller. He single blade would be wider than in the pic and the v-blade would probably be narrower.
Attachments
benster
Pebble Pounder
awesome build, the realism is really good and I love your idea of a rear crane. I would personally go for a V blade as most plows I've seem are straight, although for opening up a spot a straight blade would be better. V plow for creating your way out.
awesome build mate love where it is and cant wait to see where going
i'm not sure where it is going either!
awesome build, the realism is really good and I love your idea of a rear crane. I would personally go for a V blade as most plows I've seem are straight, although for opening up a spot a straight blade would be better. V plow for creating your way out.
i'm starting to think i will make both. if i set up the mounting system correctly i could swap with just a few bolts. i also decided to use the front winch to raise and lower the blade. i was worried the winch spools too quickly but i experimented with some snatch block setups and i can slow it down to where it should work. i just need to convert the images in my head to metal. "thumbsup"
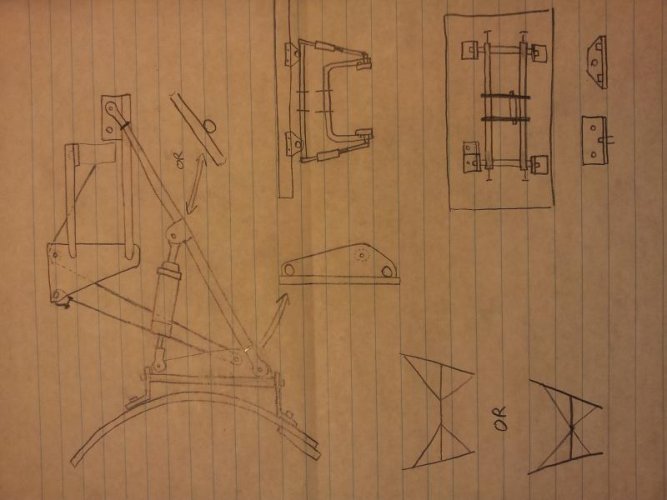
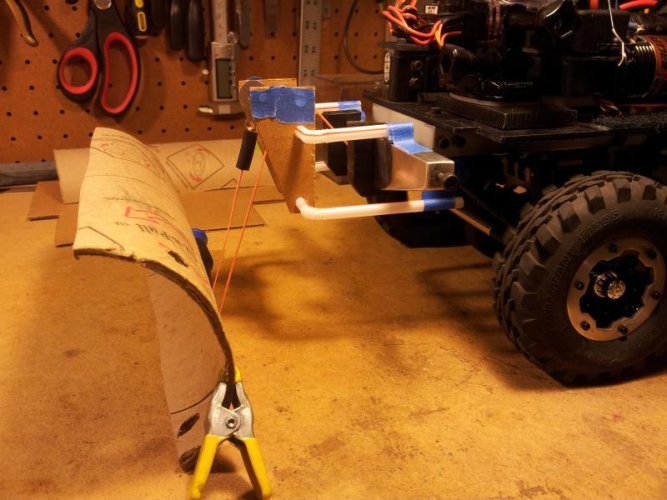
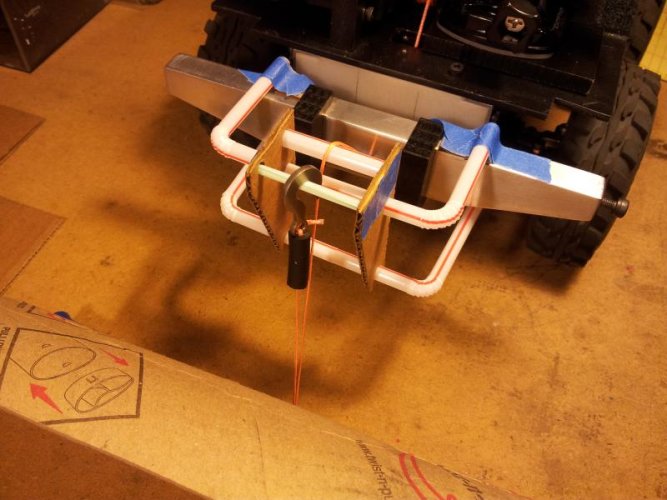
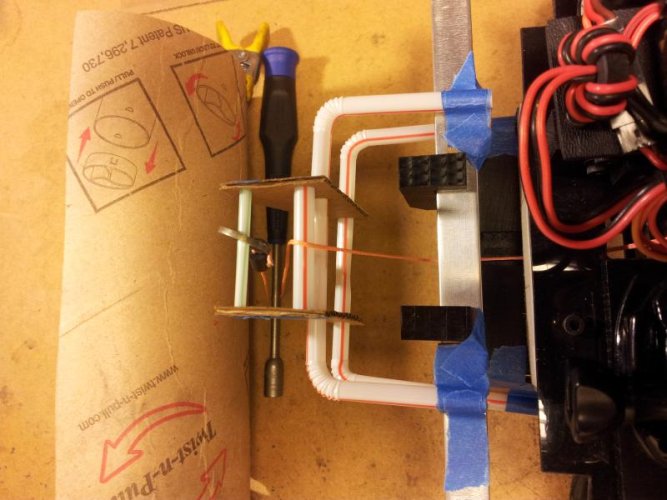
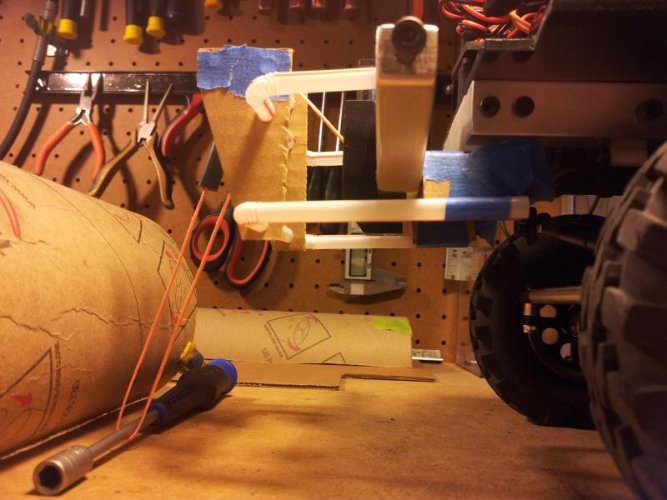
Had some time to draw up what I plan on fabbing and also did a mock up with my usual materials (bendy straws and cardboard). Everything will be thin sheetmetal and brakeline tubing wig the blade being PVC pipe. I'm hoping the whole assembly is on the lighter side so I don't have to do a lot of work on the suspension. A few features:
- shocks in drop setup with internal springs to handle blade catches
- mounting points on the blade that will allow me to run different blades (straight or v) by simply removing 4 bolts.
Lots to do but having the general plan helps get me motivated. Here are a few pics that should explain where this is going.
Attachments
I like the straight blade. Then add a side blade. "thumbsup"
Google Image Result for http://www.boschung.com/typo3temp/pics/a9c86c70e3.jpg
Google Image Result for http://www.boschung.com/typo3temp/pics/a9c86c70e3.jpg
I like the straight blade. Then add a side blade. "thumbsup"
Google Image Result for http://www.boschung.com/typo3temp/pics/a9c86c70e3.jpg
A side blade. Very interesting. Might be something to look into.
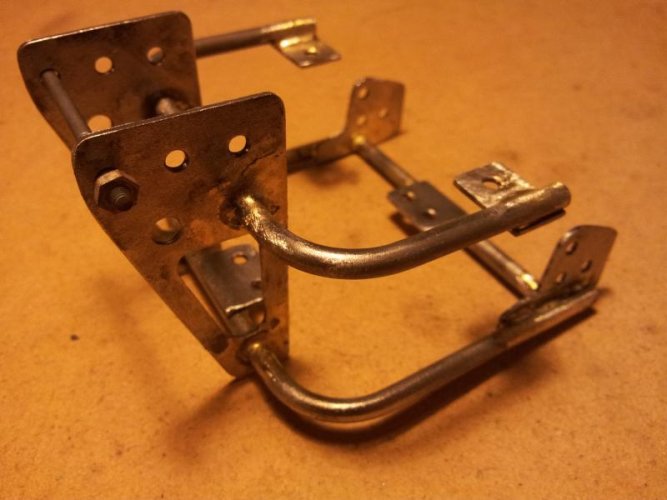
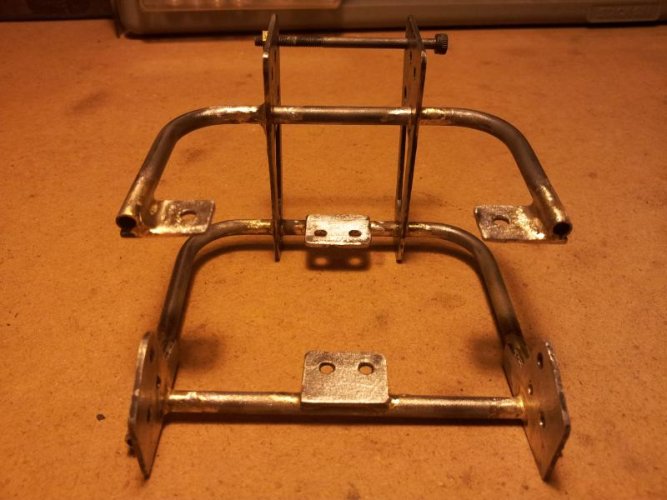
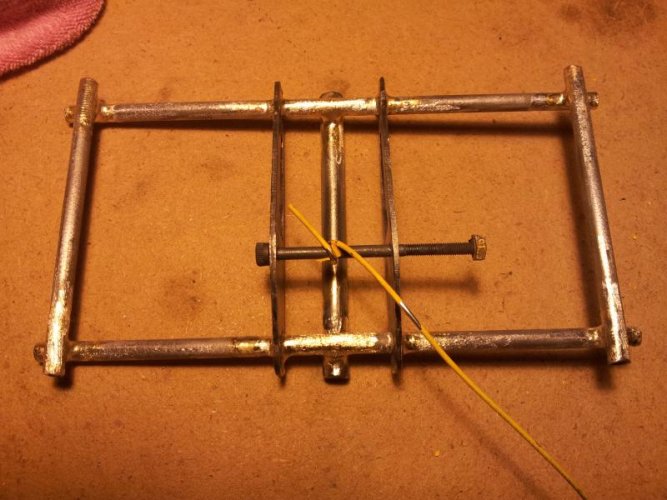
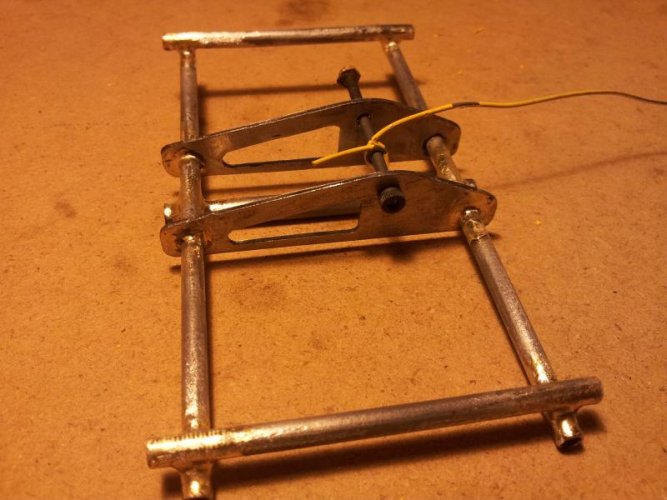
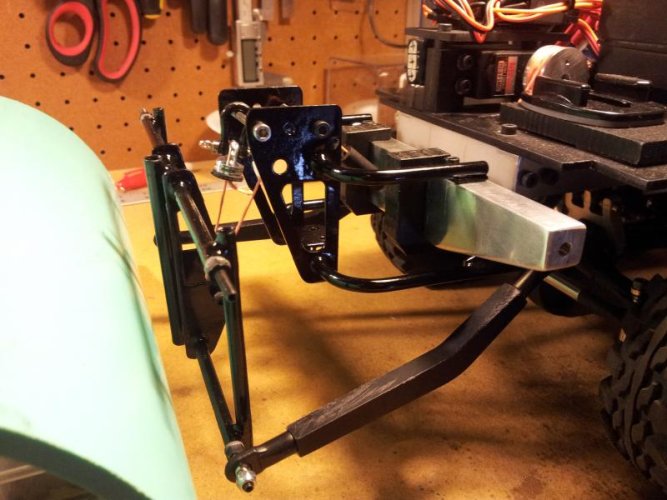
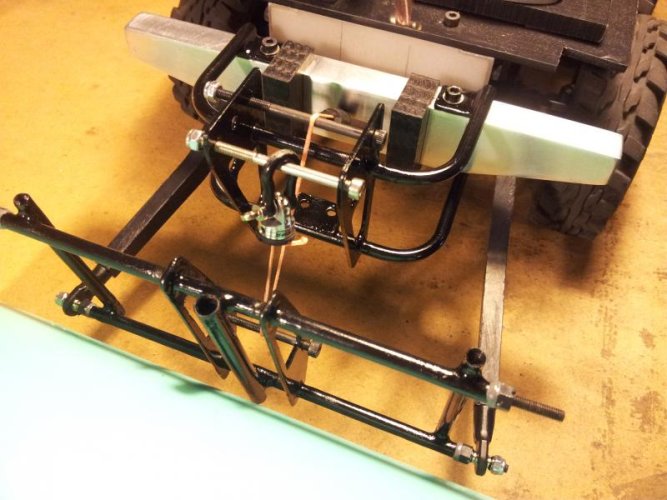
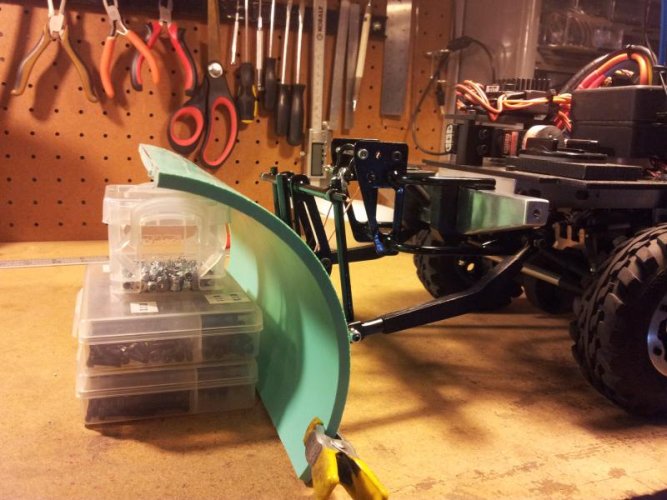
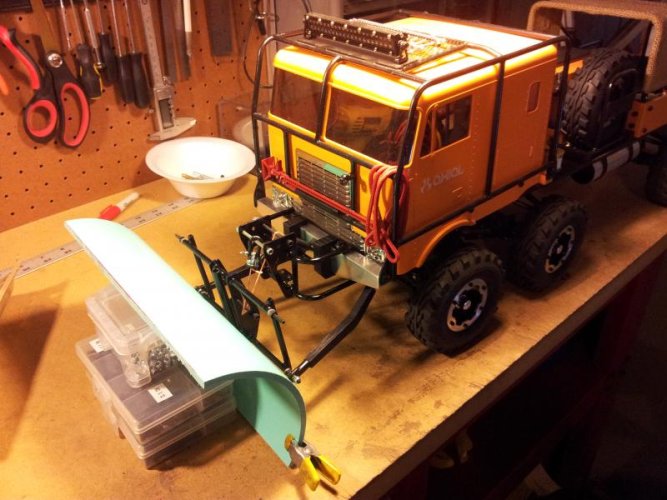
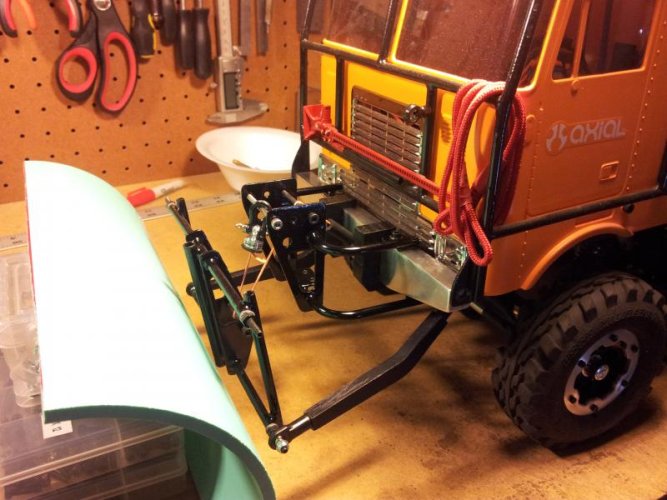
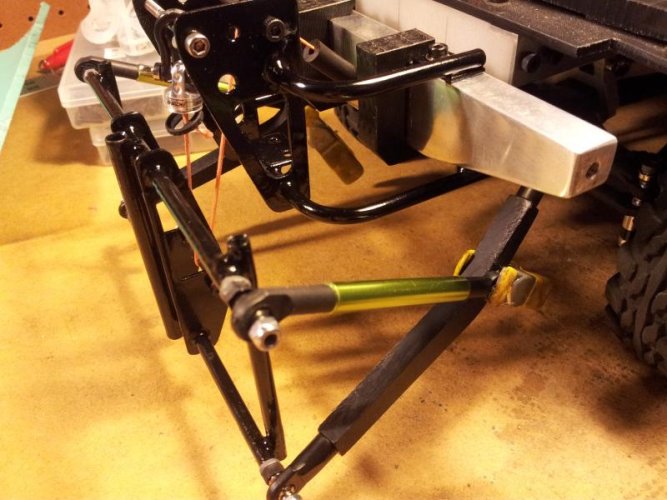
Been a little slow on this but I have made progress. Got the frame and blade mounts tabbed up and painted. They came out nice. Got some PVC pipe and cut out a blade. I think it is a little too tall so I will probably shorten it up. Where you see the green links in the pic is where the shocks will be mounted when I get them.
It is hard to tell but I did set everything up to have the blade tilt left to right with a servo mounted under he frame bracket. That will be a later update.
And now for a few pics.
It is hard to tell but I did set everything up to have the blade tilt left to right with a servo mounted under he frame bracket. That will be a later update.
And now for a few pics.
Attachments
-
 20131126_120216.jpg48 KB · Views: 588
 -
 20131126_120228.jpg60.8 KB · Views: 593
 -
 20131126_122910.jpg73.2 KB · Views: 603
 -
 20131126_122917.jpg64.5 KB · Views: 620
 -
 20131129_102617.jpg67.2 KB · Views: 586
 -
 20131129_102633.jpg70.3 KB · Views: 611
 -
 20131129_102645.jpg74.3 KB · Views: 599
 -
 20131129_102731.jpg76 KB · Views: 601
 -
 20131129_102748.jpg73.8 KB · Views: 602
 -
 20131129_102818.jpg72.5 KB · Views: 582
 -
 20131129_104400.jpg72.6 KB · Views: 562
stevetate12
Quarry Creeper
This is killer.......gonna use some ideas from this one.....
Sent from my PI39100 using Tapatalk
Sent from my PI39100 using Tapatalk
Similar threads
- Replies
- 8
- Views
- 3K

