• Welcome to RCCrawler Forums.

    It looks like you're enjoying RCCrawler's Forums but haven't created an account yet. Why not take a minute to register for your own free account now? As a member you get free access to all of our forums and posts plus the ability to post your own messages, communicate directly with other members, and much more. Register now!

    Already a member? Login at the top of this page to stop seeing this message.

Guido: Scale TTC Bronco 2015 Scale Nats Updates

I like where your going with the chassis. Is both the front and rear doved?


That rear bumper looks mean. I hope to be right with where your going with this. :twisted:

I remember talking about this around when I started The Pirate 4x4 ;-)
 
Dean's been bulking up...:shock:
Yeah, he and DJ have been eating roids like PEZ candy. :ror:
I like where your going with the chassis. Is both the front and rear doved?


That rear bumper looks mean. I hope to be right with where your going with this. :twisted:

I remember talking about this around when I started The Pirate 4x4 ;-)
The rear will not be doved, I would like to but it would require reworking too many tubes. I'd like to narrow the whole cage but again, it's just too much work. The next Bronco will be narrowed. The rear bumper and the sloping frame rails were totally inspired by JR's new Bronco. ;-) Thanks, saydee. 8)
Sounds like he's almost ready for the Nats Chris must be time to break him down and freshen his war paint.
Almost, still gotta figure out the front end tube work. Then it's time for new war paint. Thnaks Norm. "thumbsup"
Looking good Griz, Cant wait to see what you come up with for the front
Thanks Andy. I'll come up with something soon here. "thumbsup"
 
really nice work.... love that winch. wish i had a setup that looked good with my 2.2 rok loks, there just too big for my honcho or hilux body...
 
It was great to see Guido up close and on the rocks yesterday! Got the wheels spinning in the ol' noggin for my FJ, thanks for letting pull on your ear a little."thumbsup"
 
Thanks joe and R2J. 8) It was great to talk to you R2J, I like where the FJ is headed and how it looks so far. "thumbsup"

Well, since Tim has that badass new fuel cell I guess I should let you all in on what I've been working on.
I have been making an aluminum sheet metal fuel cell using the shear and brake here at work. I calculated the scale size and it will be a 30 gallon cell, just right to feed the big blown motor. :) Here is the Solidworks model.
 

Attachments

  • Guido Fuel Cell 20100401 (Small) (2).JPG
    Guido Fuel Cell 20100401 (Small) (2).JPG
    24.9 KB · Views: 1,594
Last edited:
Man I didn't think that Guido could get any better!

Great job Griz "thumbsup"

Can't wait to run with it.
Thanks Matt. I can't wait to run with you again and I'm stoked to see the S10 in person. The original is one of my favorite rigs of all time (just watched the Top Truck Challenge DVD last night in fact) and the green S10 is not far behind. "thumbsup"
I get nervous when Grizz doesn't update for a while!!:shock: What's he doing out in that garage!?!?!?
It's been a rough couple weeks Robb. Been building and cutting off front ends trying to get the right look and trying to figure out this fuel cell situation. I think I've got something good going now though. "thumbsup"
 
Sweet, I sure wish I was making this trip with you... just wasn't in the cards this year. Can't wait to see the goodness! ( Wow, I must have been around Duffy too much):ror:
 
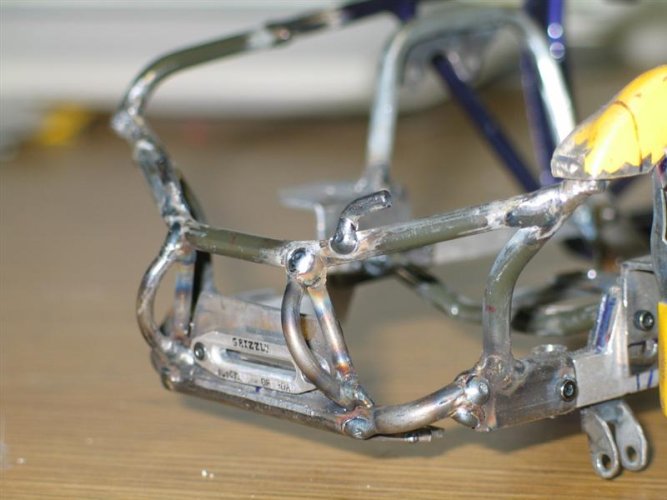
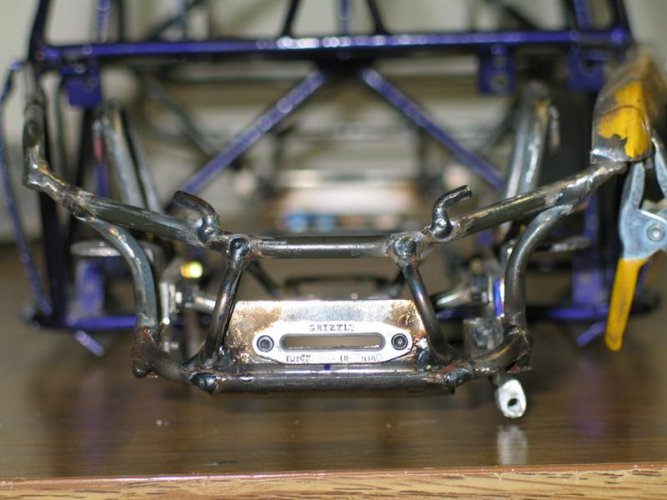
It's been a tough couple weeks but I think I got the front end figured out.
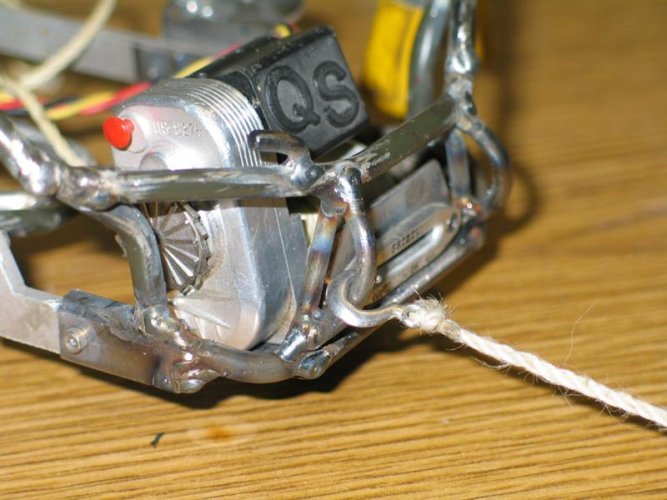
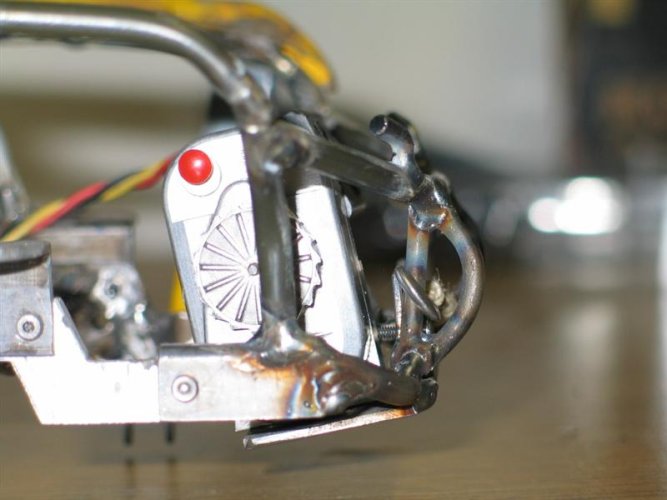
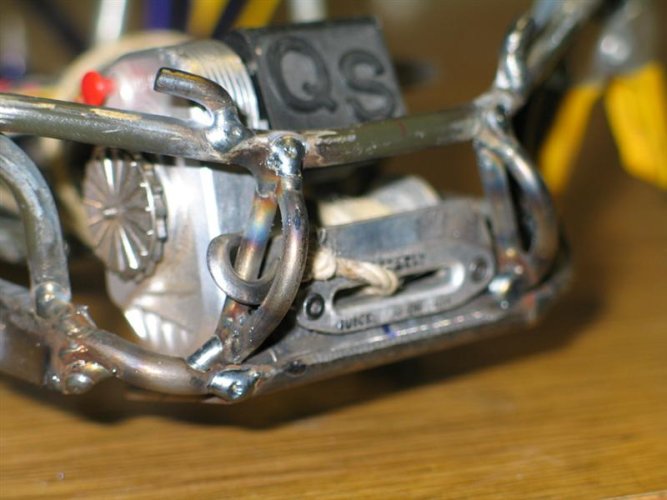
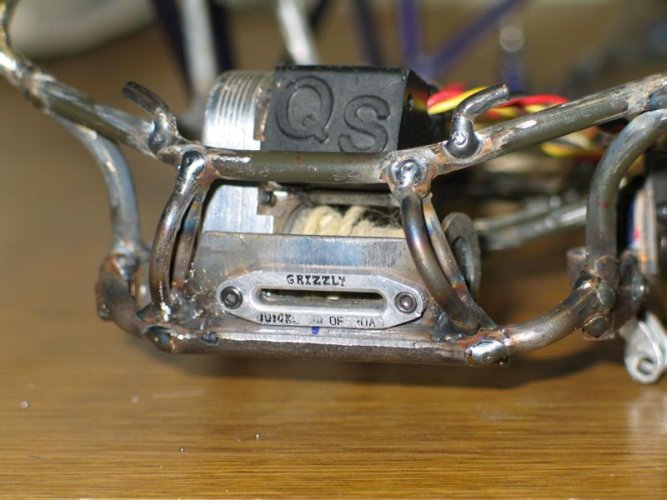
I think this design gives me the look I wanted, something that flowed nicely but didn't resemble the Bronco grill. I wanted more of a buggy look to the front end but most importantly I wanted something that would add as little front overhang as possible.

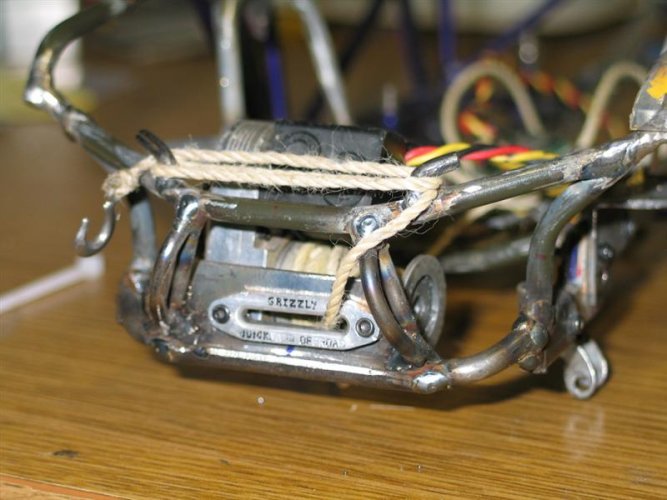
The two hoops on the front were added because I didn't want the winch fairlead to be the first thing to run into the rocks and get it all banged up. Plus the winch rope would take a beating as well. The hoops solved a couple other issues besides protecting the fairlead. When the winch hook is hung front the front bars the hoops protect it from getting banged on the rocks. They also work as my front tow hooks.

The "horns" on top of the grill bar will make a nice place to wrap my winch cable so I don't have to spool it all the way in or run it over the top of the cage.
 

Attachments

  • 330_3008 (Medium).JPG
    330_3008 (Medium).JPG
    66.8 KB · Views: 1,238
  • 330_3015 (Medium).JPG
    330_3015 (Medium).JPG
    72 KB · Views: 1,222
  • 330_3007 (Medium).JPG
    330_3007 (Medium).JPG
    50.6 KB · Views: 1,243
  • 330_3006 (Medium).JPG
    330_3006 (Medium).JPG
    57.2 KB · Views: 1,252
  • 330_3005 (Medium).JPG
    330_3005 (Medium).JPG
    65.4 KB · Views: 1,306
  • 330_3004 (Medium).JPG
    330_3004 (Medium).JPG
    53.4 KB · Views: 2,541
  • 330_3003 (Medium).JPG
    330_3003 (Medium).JPG
    64.9 KB · Views: 1,240
I also got the frame side of the Parma motor mounts done. I will make some sheetmetal brackets that mount to the engine block and the mounts will be held together by one screw per side. This way I can still remove the engine without too much work in case I have to swap out a steering servo.

I finished up the bracing for the rear bumper. It had a little flex before I added the lower outer bars and I was afraid I might bend it. Feels solid now. The inner bars will help support the sheetmetal filler panel.

I also had to cut out the lower bar on the cage because the upper links were hitting it and limiting uptravel. I made a short hoop to span the gap and added a bracket that will support the bottom of the fuel cell.

That's all I could get done today but the fab work on the chassis is close to being done. I need to add some mounting tabs for the body panels, upper mount for the fuel cell, lightbar, headlights, fuel filler, radiator, and rear bumper filler panel. Then I think I'm done with chassis fab. "thumbsup"
 

Attachments

  • 330_3009 (Medium).JPG
    330_3009 (Medium).JPG
    68.5 KB · Views: 1,264
  • 330_3010 (Medium).JPG
    330_3010 (Medium).JPG
    58.3 KB · Views: 1,257
  • 330_3011 (Medium).JPG
    330_3011 (Medium).JPG
    63.9 KB · Views: 1,226
  • 330_3012 (Medium).JPG
    330_3012 (Medium).JPG
    80 KB · Views: 2,496
  • 330_3013 (Medium).JPG
    330_3013 (Medium).JPG
    59.1 KB · Views: 1,247
Almost forgot to show you the Powertank. Norm was kind enough (a bit of persuation from Juan helped too :ror:) to include me in his last run of tanks. While they are absolutely amazing in their scalism the tank was just too tall. I took a hacksaw and cut mine down. The bottom cap wouldn't fit on because it is slightly smaller diameter than the tank so I put the cap in front of my heat lamp until it was nice and hot. Then I slid it on as the plastic was soft enough to expand an fit over the tank.

I like the size better and it will be easier to fit now. Thanks for a great product Norm. "thumbsup"
 

Attachments

  • 330_3016 (Medium).JPG
    330_3016 (Medium).JPG
    60.8 KB · Views: 1,244
Looking great Chris. Love the Bullhorn idea for the winch. I may have to do something like that for myself!!"thumbsup"
 
Back
Top