Time to start a thread to share what my workers and I have been doing with our spare time! I've been having issues lately with prototyping lead times and work flow management, so my big focus lately is tooling up to streamline tasks and allow for more in-house machine work. Over the past few years I have modeled many motor concepts (among countless other projects) that need building, and it is time to start whittling those down! Over the summer I don't have a lot of spare time since I lose one worker to his family farm, so I've been spending my weekends working on tooling whenever possible. I would like to thank JIA for encouraging me to purchase my first mill many years back. I got hooked on machining, and have slowly learning and making parts whenever time permits. That little Sherline is now in the hands of Chris_The_Battery_Man getting good use!
My three month goal is to devote myself to three major tasks: emails, motor building, and machining. Currently I am doing order fullfillment and working the Holmes Bikes biz on top of regular duties, but by the end of the summer I will have my Logistics Manager back and will be hiring another employee to take over Holmes Bikes. This will free up about 20 -25 hours a week for me. Our spoke machine stays pretty busy, so I'm really looking forwards to pawning off the Sapim Custom Spokes to somebody else. Luckily the worker coming in September is already trained on the machine so I can just hit him with a stack of invoices. I am currently training a motor winder to relieve me of another 10 hours per week sitting in front of the power winder, so I can REALLY focus on the fun stuff! OK, on to the shop work to prepare for when my duties shift...
The project that is #1 on my list is getting a CNC machine ready and running.
Parts list:
Taig 2019cr mill from a2zCNC.com, along with some basic tooling
Stepper motor controller kit from HobbyCNC.com
4th axis kit from Soigeneris.com
plus a big box of endmills from Enco and MSC
First part, assemble the stepper drivers. I liked having the kit version as I know what every part does in the controller. In case of a failure it will be very easy to troubleshoot and understand, 'cause I built it! Here you can see the driver board and power supply stuffed into a project case. I used a 36v supply since the electronics are all 50v rated.

Here you can see a bit more crammed into the case. Power cap, wiring, etc...

Next up is the heatsink for the driver FETs. They all share a common ground, so I didn't have to insulate the heatsink. I whipped this simple thing up on the mill using handcranks.

Here it is mounted up with some heatsink compound. I used layout dye to keep the nuts tight. A cheap mans loctite!

The controller box all buttoned up, just waiting for the final stepper wires and some indicator LEDs.

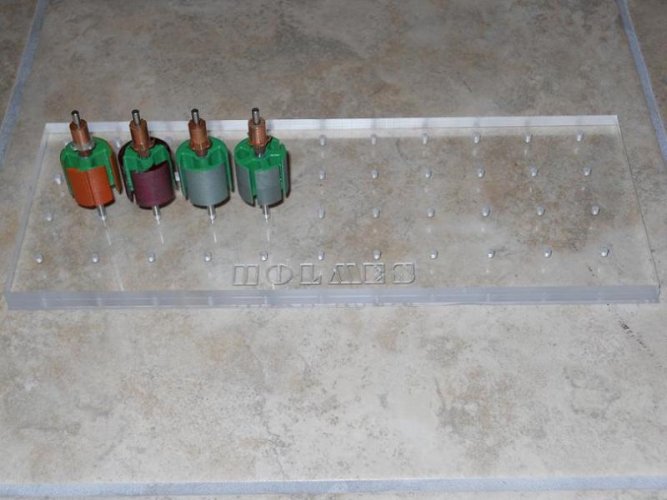
Next up is the stepper motors. 305 ounce/inches. Plenty of power for the little taig! The Stepper controller has a nifty function where it reduces current after some idle time. I have it set at 10 seconds, but right now I don't have the idle down function enabled since the system isn't tuned.

Of course since I didn't just buy a complete machine from Taig the stepper motor shafts didn't work. They are too long by 7mm. So I cheated a bit and used the mill as a manual machine to shorten them. It would have been easier to use a slitting saw for cutting, but it was easier to mount the steppers in a vice horizontally. I used a sheet of paper between the vice and the motors to keep them from getting marred. The operation was simple, just rotate the shaft by hand crank while I fed the Y axis into the bit.

The modified stepper next to the stock unit

All bolted up, easy right?

And now we have an almost functioning CNC machine!

Just wait until we get the G-Code running! I already have a few programs ready to try once the system is set up and calibrated. I will be using Mach 3 on a dedicated machine to control the stepper controllers. The goal is to be cutting parts by next Monday, and boy do I have plenty to cut! "thumbsup"
My three month goal is to devote myself to three major tasks: emails, motor building, and machining. Currently I am doing order fullfillment and working the Holmes Bikes biz on top of regular duties, but by the end of the summer I will have my Logistics Manager back and will be hiring another employee to take over Holmes Bikes. This will free up about 20 -25 hours a week for me. Our spoke machine stays pretty busy, so I'm really looking forwards to pawning off the Sapim Custom Spokes to somebody else. Luckily the worker coming in September is already trained on the machine so I can just hit him with a stack of invoices. I am currently training a motor winder to relieve me of another 10 hours per week sitting in front of the power winder, so I can REALLY focus on the fun stuff! OK, on to the shop work to prepare for when my duties shift...
The project that is #1 on my list is getting a CNC machine ready and running.
Parts list:
Taig 2019cr mill from a2zCNC.com, along with some basic tooling
Stepper motor controller kit from HobbyCNC.com
4th axis kit from Soigeneris.com
plus a big box of endmills from Enco and MSC
First part, assemble the stepper drivers. I liked having the kit version as I know what every part does in the controller. In case of a failure it will be very easy to troubleshoot and understand, 'cause I built it! Here you can see the driver board and power supply stuffed into a project case. I used a 36v supply since the electronics are all 50v rated.
Here you can see a bit more crammed into the case. Power cap, wiring, etc...
Next up is the heatsink for the driver FETs. They all share a common ground, so I didn't have to insulate the heatsink. I whipped this simple thing up on the mill using handcranks.
Here it is mounted up with some heatsink compound. I used layout dye to keep the nuts tight. A cheap mans loctite!
The controller box all buttoned up, just waiting for the final stepper wires and some indicator LEDs.
Next up is the stepper motors. 305 ounce/inches. Plenty of power for the little taig! The Stepper controller has a nifty function where it reduces current after some idle time. I have it set at 10 seconds, but right now I don't have the idle down function enabled since the system isn't tuned.
Of course since I didn't just buy a complete machine from Taig the stepper motor shafts didn't work. They are too long by 7mm. So I cheated a bit and used the mill as a manual machine to shorten them. It would have been easier to use a slitting saw for cutting, but it was easier to mount the steppers in a vice horizontally. I used a sheet of paper between the vice and the motors to keep them from getting marred. The operation was simple, just rotate the shaft by hand crank while I fed the Y axis into the bit.
The modified stepper next to the stock unit
All bolted up, easy right?
And now we have an almost functioning CNC machine!
Just wait until we get the G-Code running! I already have a few programs ready to try once the system is set up and calibrated. I will be using Mach 3 on a dedicated machine to control the stepper controllers. The goal is to be cutting parts by next Monday, and boy do I have plenty to cut! "thumbsup"
Last edited: