• Welcome to RCCrawler Forums.

    It looks like you're enjoying RCCrawler's Forums but haven't created an account yet. Why not take a minute to register for your own free account now? As a member you get free access to all of our forums and posts plus the ability to post your own messages, communicate directly with other members, and much more. Register now!

    Already a member? Login at the top of this page to stop seeing this message.

Project "JERO" The Armored SCX

Quick update... I have put the outer face of the armor on the side windows. all the windows will have a similar look.

The outer armor is made from .040" styrene...

DSC_0057.jpg


DSC_0058.jpg


DSC_0059.jpg


DSC_0060.jpg


This gives the windows a unique picture frame look...

DSC_0061.jpg


DSC_0062.jpg


1 word... 2 syllables.... BAD-ASS!!!!
Nice to see something differant, very cool.
Thanks guys"thumbsup"

Thanks again, more updates coming.
 
I wasn't sure at first how this was going to turn out using the Panjero base, but man... This is SICK! Nice work!
 
Updates!! Sorry I have been neglecting this build, but I have been slightly side-tracked...

DSC_0089.jpg


As for the update I have been working on the windows. The outer frame parts are proving to be tricky, but I think they are coming along nicely...

I am debating on whether I want to pull off the top of the hood scoop and trim down the supports to make it sit lower and flatter...Let me know what you think.


Here are some pictures of what I decided would work for support for the outer frames after I hacked at the body with a few different files...

DSC_0063.jpg


DSC_0064.jpg


DSC_0065.jpg


DSC_0067.jpg


DSC_0068.jpg


DSC_0069.jpg


DSC_0070.jpg


DSC_0071.jpg


As you could see all the windows have a small amount of trim that was added to give support.


The rear side windows were next to get framed...

DSC_0072.jpg


DSC_0074.jpg


DSC_0075.jpg


The windshield was the most tricky with the break in the middle, but I think it looks good...

DSC_0077.jpg


DSC_0079.jpg


DSC_0082.jpg


DSC_0083.jpg


DSC_0084.jpg


Here a few quick shots of the window progress...

DSC_0086.jpg


DSC_0087.jpg


DSC_0088.jpg


More progress to come, hopefully I will have the back window done this week. I will then start on filling gaps with styrene and working on the lexan window glass.


definately makin progress on this cool build

I wasn't sure at first how this was going to turn out using the Panjero base, but man... This is SICK! Nice work!

Thanks guys, it makes me happy to hear that you are enjoying it...


Thanks, and I always welcome comments, questions, and suggestions.
 
Thanks guys. I have started making progress on this build again after quite some time without updates. I'll take some pictures and get them posted up.
 
Well, hasn't it been a while? I haven't forgot about my love for the hobby. It has just been hard to find the time to devote to continuing on this project, But today I found some time and made some pretty good progress.

First I would like to show off one of my other projects that I've done this summer.

I bought an Axial Exo Terra Buggy Kit as a Graduation present from me to me."thumbsup" I was going to take lots of pictures along the way but that takes time and I was past ready to drive my new buggy. So sorry there are only a few build pictures, and one of it completed. I could take more pictures if anyone is interested, but I think that theses will do for now.

photobucket-6875-1345430345850.jpg


photobucket-2432-1345430455931.jpg


photobucket-30235-1345430393240.jpg


photobucket-32593-1345430433954.jpg


photobucket-1698-1345430483110.jpg


I have plans to paint the PIAA logos on the light rack white and to add a full light kit. This buggy is pretty sweet running on a 2s 5000mAh and a Traxxas VXL system. The tires will leave black marks on my concrete and it handles like a dream. I highly recommend this kit.


Now for some progress pictures.

I finished the styrene work on the back window frame. I then pulled out an old window set from one of those huge Walmart R/C hummers. The plastic is tinted and pretty thick. Just what I was looking for when doing the windows on the Jero.

This is the bottom of the external window frame on the rear. I made these out of the same 0.040" styrene that the others are made of.
DSC_0090.jpg


Here is the bottom piece secured in place.
DSC_0091.jpg


These pictures show the completed rear window frame.
DSC_0092.jpg

DSC_0093.jpg

DSC_0094.jpg


I did some pencil sketching on the body to show some Ideas for a paint scheme that I have thought about.

Magpul Sign...
DSC_0095.jpg


Magpul Logo...
DSC_0096.jpg


Axial Arms...
DSC_0097.jpg


Here is the Hummer R/C window part. The Hummer was Huge...
DSC_0098.jpg


Tint comparison...
DSC_0099.jpg


Broke out the Dremel Tool and cut up the windows into individual sections.
DSC_0100.jpg


To get the final window shapes I scored the plastic windows with a utility knife and snapped them down to size.
DSC_0101.jpg


Rear glass
DSC_0102.jpg

DSC_0105.jpg


Rear driver's side
DSC_0103.jpg

DSC_0104.jpg


Rear passenger
DSC_0106.jpg

DSC_0107.jpg


Front Driver's side
DSC_0109.jpg

DSC_0110.jpg


Front passenger side
DSC_0111.jpg

DSC_0112.jpg


Windshield
DSC_0114.jpg

DSC_0115.jpg

DSC_0116.jpg

DSC_0117.jpg


Here are some pictures of the body with all the windows.
DSC_0118.jpg

DSC_0119.jpg

DSC_0120.jpg

DSC_0121.jpg

DSC_0122.jpg


After trying to figure out what to use as body filler I decided to use some Devcon Plastic welder Epoxy to fill the gaps. This stuff gets really hot and melts the two parts together creating a solid bond. I looked at using Bondo body filler, but it wouldn't stay stuck to the styrene or the body. The epoxy is way stronger than the Bondo and it will add structural support.

This stuff is paintable and it sands really good.
DSC_0123.jpg


I have an idea for the armored rivets that hold in the window glass. I have plans to drill holes through the side of the body and put in small metal crafting brads. I think that this will be over the top for realism.
DSC_0124.jpg

DSC_0125.jpg


I am happy with how today's progress came. I will continue working on this project. Thank you all for your support and not giving up on this project.

More updates coming, and Thanks again.
 
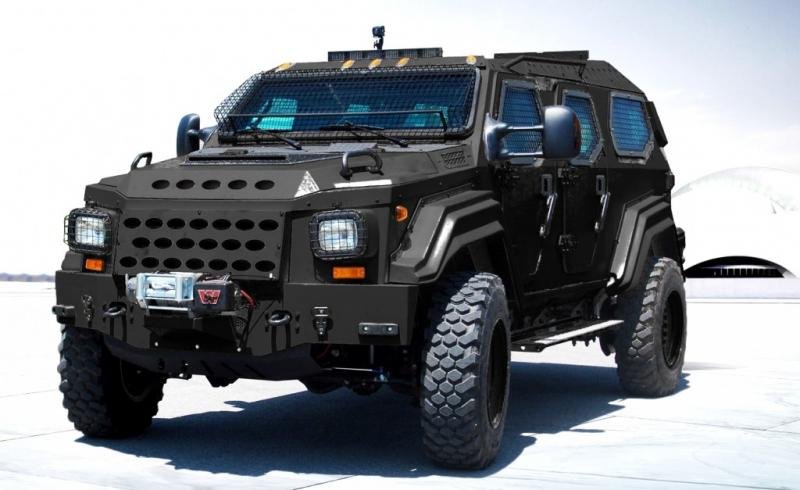
This thing is incredible! it reminds me of this rig out of Fast Five:
 

Attachments

  • GURKHA-F5-Black-1024x627.jpg
    GURKHA-F5-Black-1024x627.jpg
    49.9 KB · Views: 460
this is what i love about this forum. this is not the way i would have built a pajero but its different and thats why i like it. its gonna look tuff when its finished keep up the good work
 
Back
Top