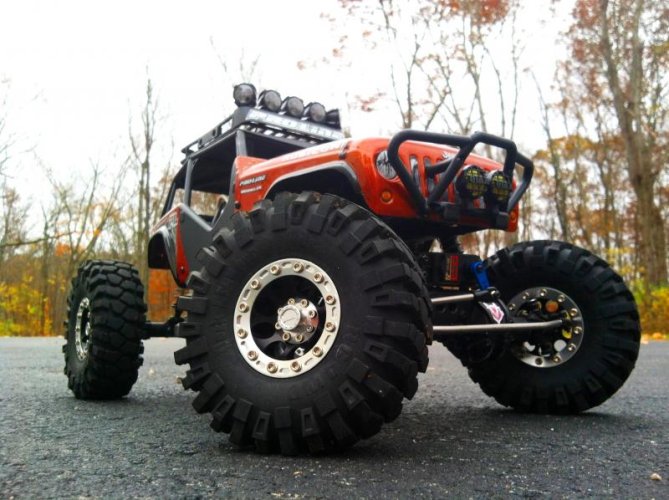
tomvaillencourt
Quarry Creeper
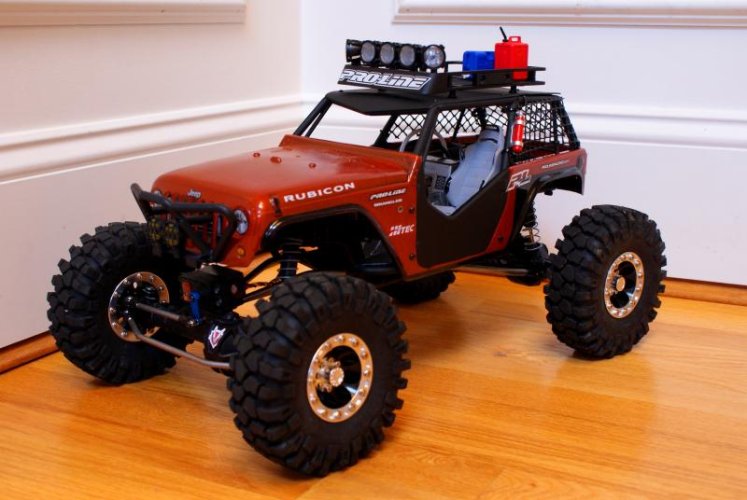
New Bright JK Wraith build - tomvaillencourt (Proline Body/accessories added!!)
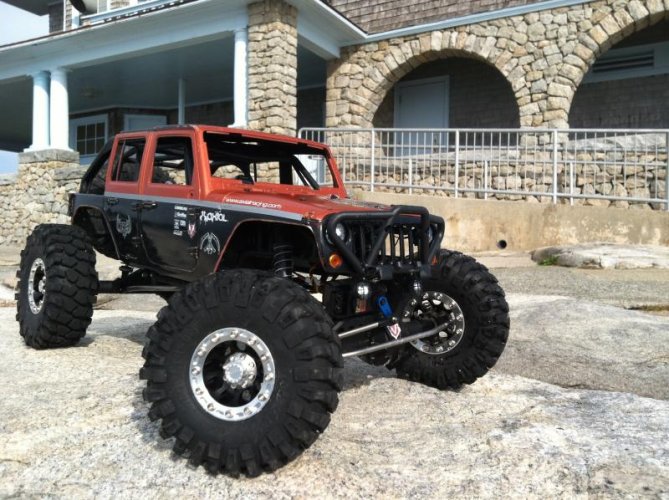
Ok so here goes... I will try to be as specific as I can, and please understand alot of what I did was "just wingin it" to find out what I needed to do, before I thought to look to forums and learned what upgrades I might need to do... Any way here goes....
So I had this New Bright Jeep hanging around for like three years, before I decided to take on the project... I had been flying RC heli's and planes for a while, but got tired of crashes always being too costly, and almost entirely inevitable... I also had been trying to get some fun in wheeling in my full size JK
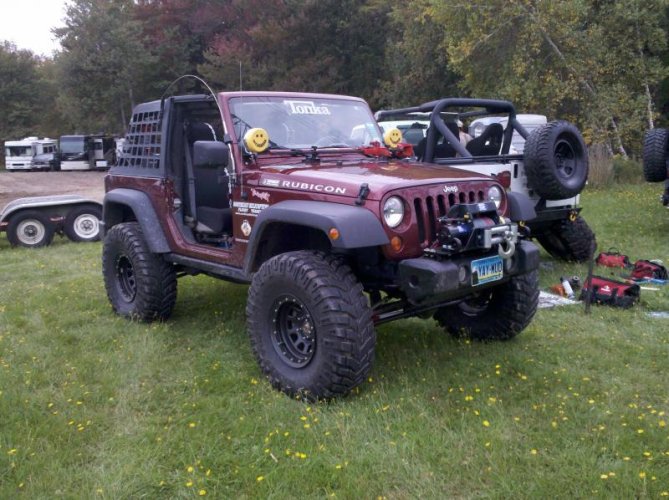
but breaking stuff was also out of the question, on top of that - my favorite (and almost only) wheeling buddy and younger Brother died late June, right before we were supposed to attend the Catskills Jeep Jamboree together in Monticello NY... I seriously needed a potent distraction to keep from spiraling into serious depression... so for many reasons, especially that, I took on this build....
Heres the New Bright I started With...
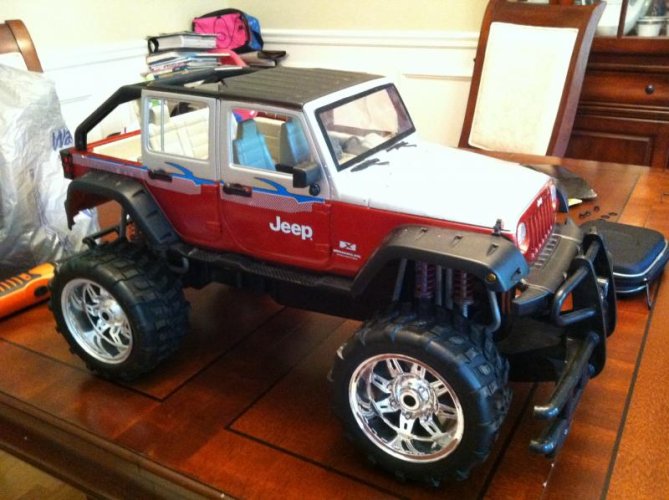
Its off of the old chassis and ready to be worked...
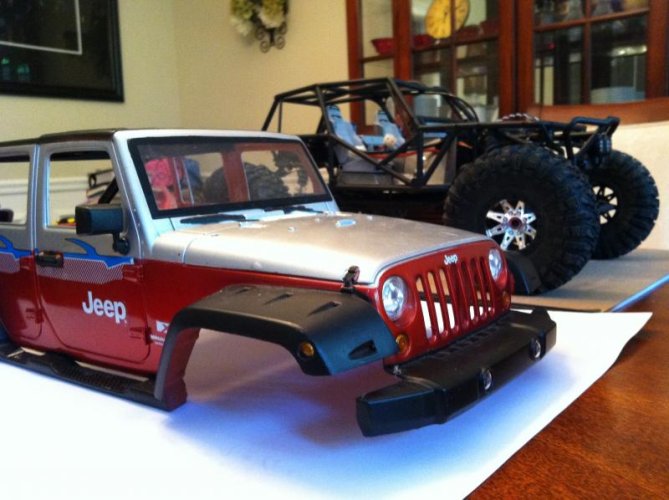
Started by trimming the bumpers and side-steps...
I would like to have kept the bumpers though to see how they fit before trimming... scale bumpers are hard to find... If you are attempting a similar build... keep the bumpers attached until you KNOW they are in the way... Then, if they are... cut 'em...
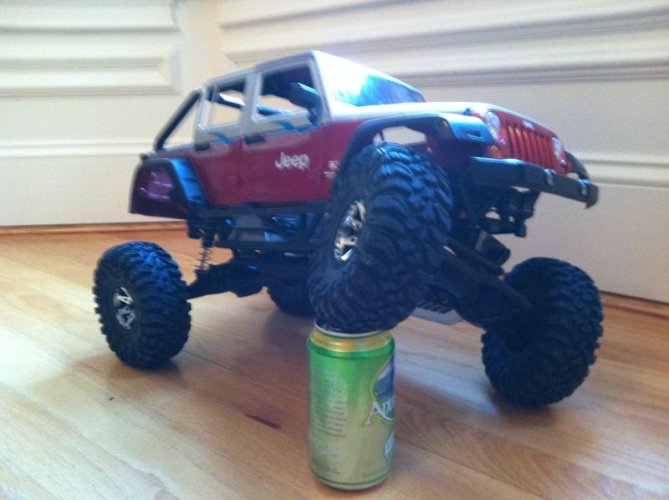
Here Is a pic during Initial fitting... Unfortunately to maintain Tire clearance for articulation and with the intention of leaving the fenders on, I knew I would either need a body lift or a suspension ilft... the body lift just looked silly... The top of the tube chassis was coming in below the windows...

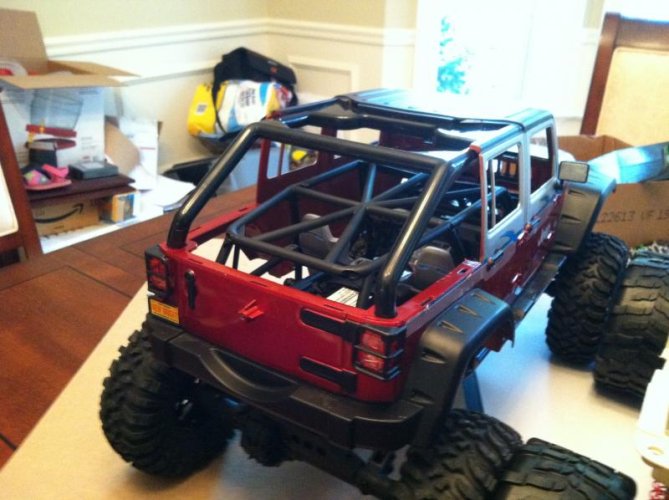
So a suspension lift would have to be tried...and was easy enough to accomplish by just moving the shock mount down in the front like this..
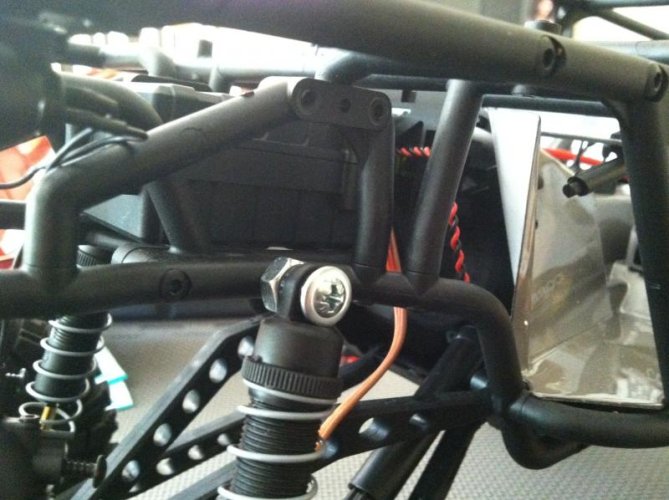
Something similar, but a little more complicated was required for the rear, but it eventually didnt work out so I wont go into it further... but the truck at that point looked like this...
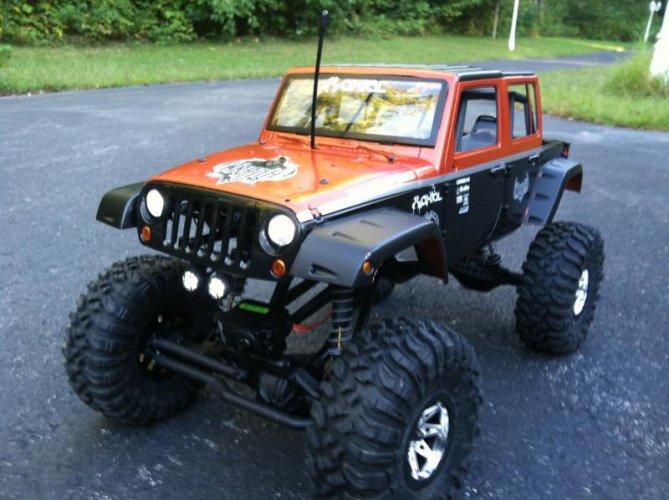
Which is ok if you like the monster truck look... I personally don't, and it wasn't really what I wanted for my rig... Besides I found out on the first drive it wanted to topple over even more than the stock Wraith, and the joints in the driveshafts were being severely over-stressed, Caster was way off too, so it just wasnt going to work....Back to the drawing board...
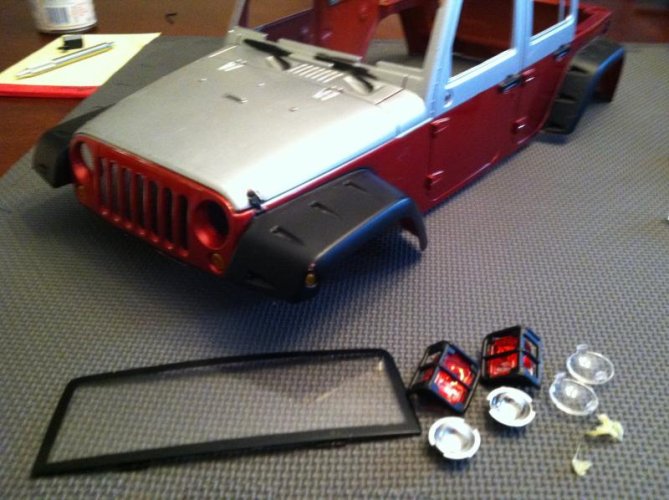
As for fitting the New Bright body, it actually was pretty easy to accomplish, as the tube chassis fits right inside of the New Bright body almost perfectly, and fittment is focused on the hood section. just trim out all the screw posts from the original model like this...
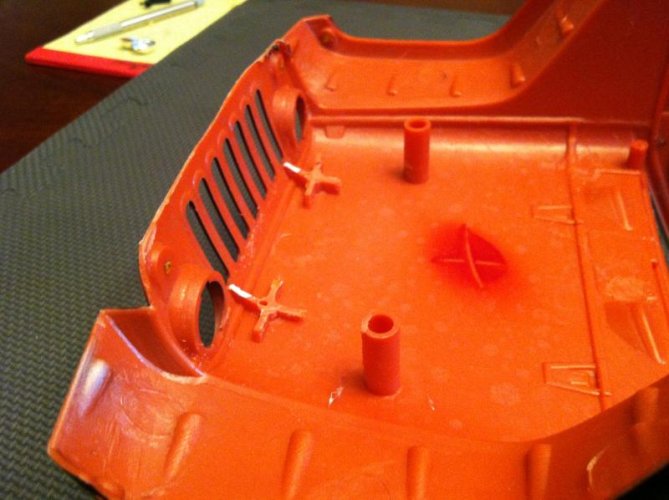
Be sure to trim the taller post too shown here before trimming....
Once you get the tube chassis fit into the hood of the body, the rest falls into place...
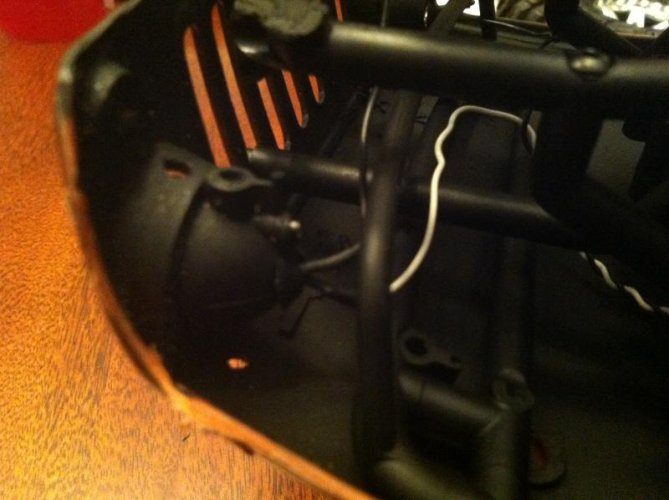
However, as you can see here the tube chassis sits further back because the thickness of the body plastic is significantly thicker than the original Lexan hood panel -but this is actually good for a few reasons.. as you can see from the picture, it allows easy wiring and clearance for the LED light cans... For this the original fog lights became the head lights, and the head lights were used for the fog lights..
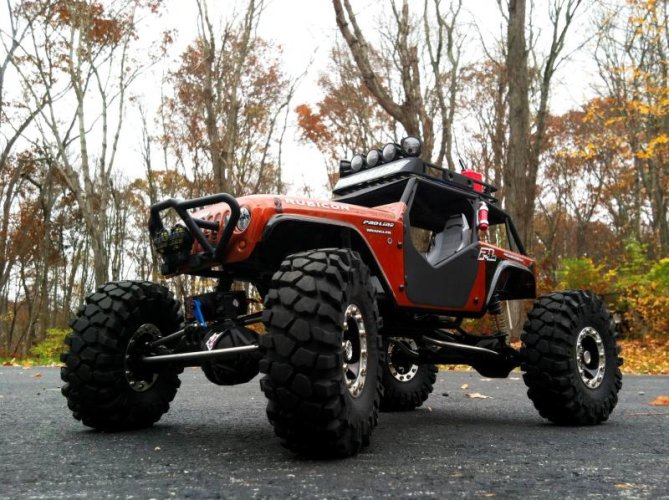
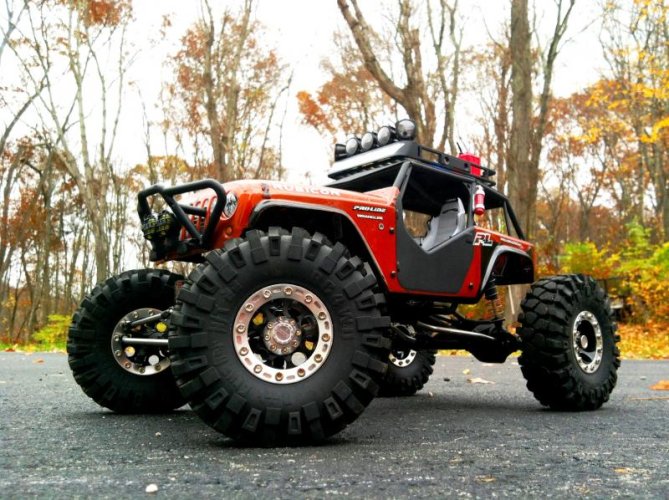
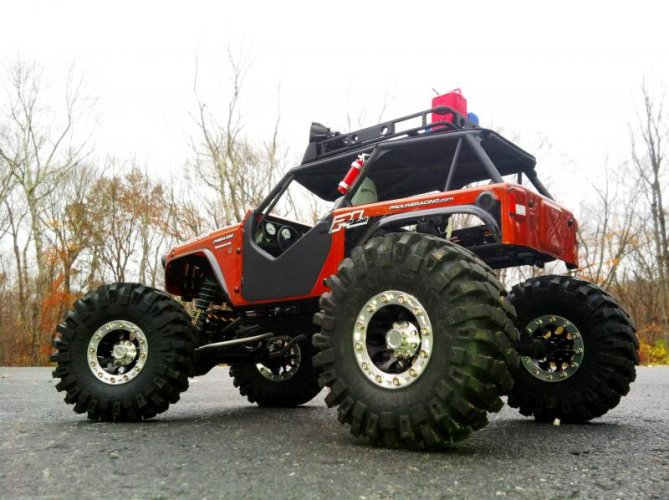
Another reason is that with the new body sitting further forward on the tube frame the wheel wells line up in a much more realistic way... The windows dont really line up with the seat positions however, so you cant really use figurines without them looking like they are in the back seat.. For some this is not acceptable, so I highly recommend the Proline body if you want to get a little more scale look out of it... albeit it will have the scale look of a very modified "King of hammers" type rig. I may go with that myself if this body gets too much damage, and already have one on stand by waiting to be cut and painted. However I really wanted to keep the "Factory body" look if I could so I sacrificed the Wrestlers. I did pick some up though.. the other Draw to this fit, is that the front rock guard needs to be removed. but the mounts help in lining up the body. the mount tubes fit right into the grille openings like this when done...
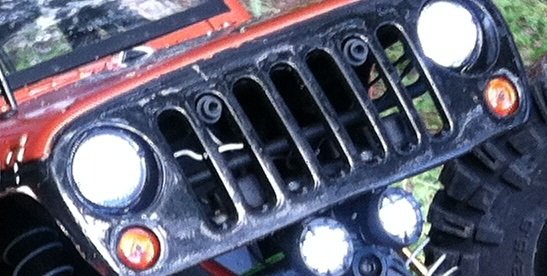
Im sure some more talented modelers would find a better way to re-mount the rock guard, but I just zip tied it to the grille after like this..
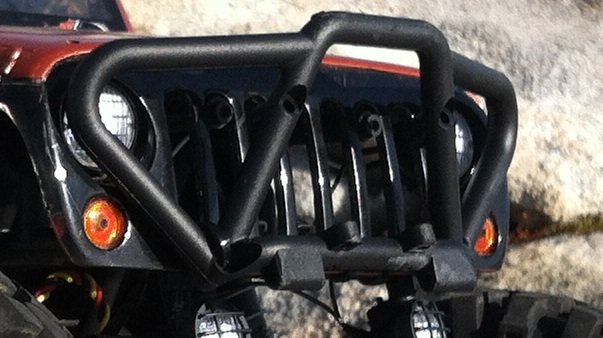
I did purchase a second rock guard though, because I wanted to maintain the rigidity of the tube frame. On the extra rock guard, I cut the bottom bar section off and remounted it to the original points behind the grille, upside down which gave me my rigidity, and fog light mounting points back.
For the actual body mounting, I simply fit the body where I wanted it, and from the underside using a very tiny finger drill I used two of the original mounting points as guides, drilling up into the body from underneith. this allowed me to align the rest of the hood holes using the original body panels for templates.
I did use the 38 size screws for mounting rather than the original short screws, so extras had to be purchased.
once the hood was aligned and mounted with screws I used the rear lower side panel spots and the very back upper spots to add screw mounts there as well. The body is a little longer than the original though, so the 39 or 40 size screws had to be used here as this picture shows...
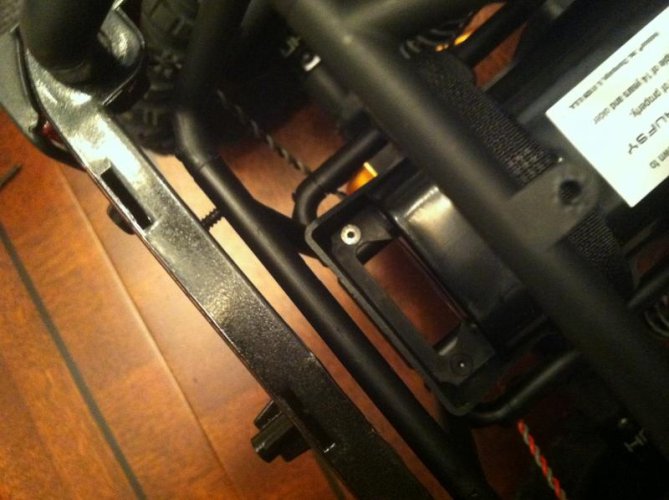
and the screws just go into the rear door...
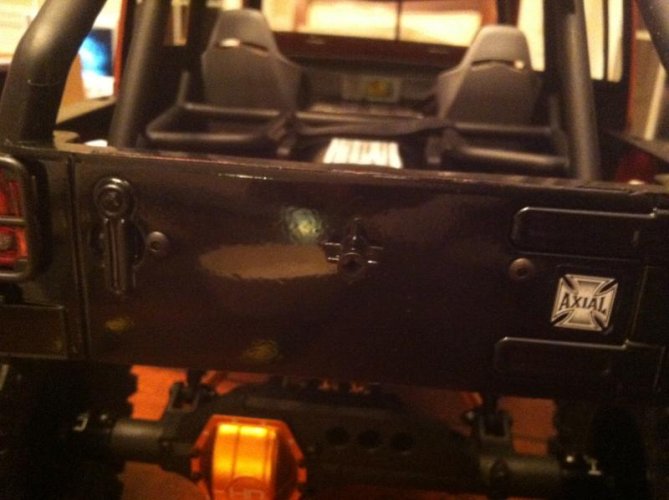
In all 8 screws are holding the body on , utilizing all stock mounting points, so its very rigidly attached... Originally I had a hole for the antenna, but eventually opted to tuck the antenna under the hood for better looks. I have yet to see this cause any communication issues...
As for the lights.... The fog lights were switched for headlights, and vice-versa. Foglight cans (now headlight cans) fit right into the holes where the newbright cans were, but had to be glued into the holes.... the Tail light cans actually fit right inside the New bright cans, so I just glued them inside and snapped the cans righ back in.
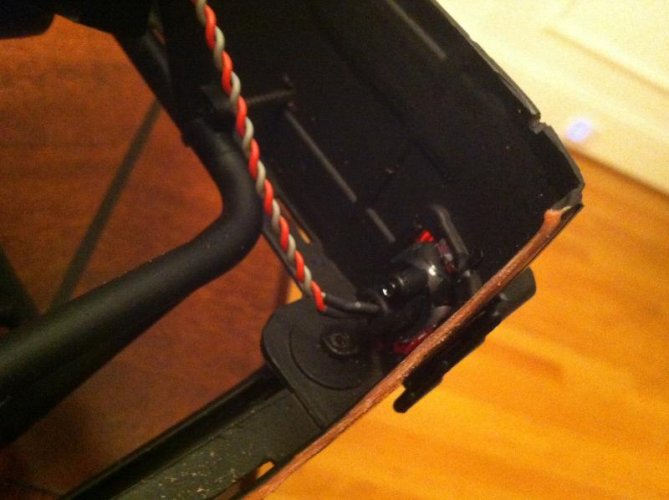
This did lead to a dilemma though. With the battery in back there was no problem with battery access, and changes were simple, but once I moved the battery up front I ran into a huge problem... the LED's had to be unrigged from the cans everytime I had to remove the body to get to the battery, and re-rigged again after re-mounting the body.. This takes way too long, so I spliced these LOSI Micro battery connectors into the LED wires to allow Fast Disconnecting for body removal ...
![losb0860-450[ekm]336x336[ekm].jpg losb0860-450[ekm]336x336[ekm].jpg](https://www.rccrawler.com/forums/data/attachments/161/161128-de16e9f0ebee0553cf98501ceabf6472.jpg?hash=3hbp8OvuBV)
Ultimately I am happy with the build however after relocating the upper shock mounts back to the stock mounting points, I had to very reluctantly trim off the Fenders to keep the tires from rubbing. I thought I would not like the look, but I actually love it, so - Win! I may try and fit some 1/10 scale tube fenders on though, we'll see. for now though I like the finished look...
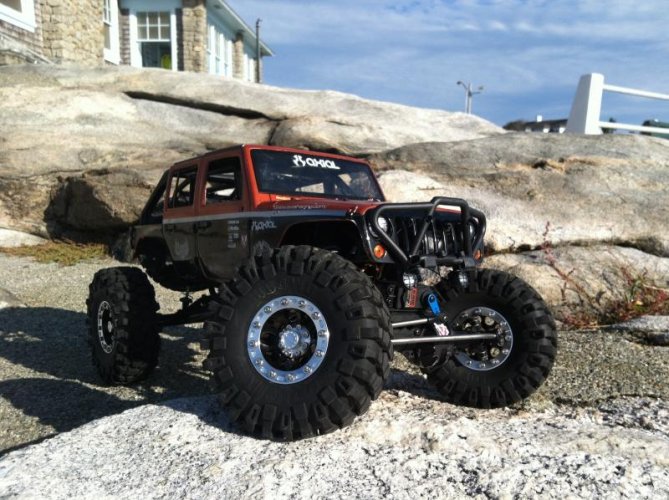
Please view My First Run video attempt here:
Wraith Crawling - YouTube
Model is Axial Wraith RTR
Upgrades/repairs include:
~New Bright JK Rubicon Unlimited body Painted with Testors 1840 Flaming Orange and 1247 Gloss Black "one coat" spray enamel. Which ironically required about 5 coats of each...
~Hot Racing CNC Aluminum Steering Knuckles and C-Hubs (replaced after two runs when screws stripped out of the plastic popping the knuckle off.)
~Hot Racing CNC Aluminum Rear axel lockouts
~Vanquish Solid Titanium Upper and Lower links front and rear (after Hot Racing Aluminum links came apart after the first, very easy run - DO NOT BUY THOSE!!!) (Knuckles, CHubs, and lockouts holding up well)
~Vanquish Solid Titanium Drag link and Tie-Rod
~Vanquish Differential covers.
~HiTec HS-7954SH steering servo with Aluminum Steering Horn (Stripped my stock horn running into a rock too hard, and Stock servo was weak with only about 130 grams of torque. HiTec HS-7954SH has about 400 grams of torque. Very adequate!)
~RC4WD 2.2 Rock Crusher X/T Soft Compound Tires (Not the original Rock Crushers that were hard and everyone complained about... These are Definately better than the stock Ripsaws...)
~Special Edition Black RPP 2.2 Beadlock Wheels (Required a little modification to the axel nuts to fit, despite being 12mm hex... Go figure)
~Running on 6 Cell 5000ma Ni-MH Battery Moved to lateral position at firewall and relocated the ESC to the Passenger seat location, and left Reciever in original spot. (unfortunately body needs to be removed for battery access... I'm trying to work that out.... I still havent run the thing long enough to require a battery change, I usually run it down and then trickle it at 1.5 amps charge rate. This gives me about an hour of battery life.)
~Relocated power switch to passenger floor to make it easier to reach.
~Everything else is stock and has been working fine through about 10 packs without issue... So far even the stock 20 turn motor has not burned out although consensus seems to show that it will burn out before long. So far so good...

Ok so here goes... I will try to be as specific as I can, and please understand alot of what I did was "just wingin it" to find out what I needed to do, before I thought to look to forums and learned what upgrades I might need to do... Any way here goes....
So I had this New Bright Jeep hanging around for like three years, before I decided to take on the project... I had been flying RC heli's and planes for a while, but got tired of crashes always being too costly, and almost entirely inevitable... I also had been trying to get some fun in wheeling in my full size JK

but breaking stuff was also out of the question, on top of that - my favorite (and almost only) wheeling buddy and younger Brother died late June, right before we were supposed to attend the Catskills Jeep Jamboree together in Monticello NY... I seriously needed a potent distraction to keep from spiraling into serious depression... so for many reasons, especially that, I took on this build....
Heres the New Bright I started With...

Its off of the old chassis and ready to be worked...

Started by trimming the bumpers and side-steps...

I would like to have kept the bumpers though to see how they fit before trimming... scale bumpers are hard to find... If you are attempting a similar build... keep the bumpers attached until you KNOW they are in the way... Then, if they are... cut 'em...

Here Is a pic during Initial fitting... Unfortunately to maintain Tire clearance for articulation and with the intention of leaving the fenders on, I knew I would either need a body lift or a suspension ilft... the body lift just looked silly... The top of the tube chassis was coming in below the windows...


So a suspension lift would have to be tried...and was easy enough to accomplish by just moving the shock mount down in the front like this..

Something similar, but a little more complicated was required for the rear, but it eventually didnt work out so I wont go into it further... but the truck at that point looked like this...

Which is ok if you like the monster truck look... I personally don't, and it wasn't really what I wanted for my rig... Besides I found out on the first drive it wanted to topple over even more than the stock Wraith, and the joints in the driveshafts were being severely over-stressed, Caster was way off too, so it just wasnt going to work....Back to the drawing board...
As for fitting the New Bright body, it actually was pretty easy to accomplish, as the tube chassis fits right inside of the New Bright body almost perfectly, and fittment is focused on the hood section. just trim out all the screw posts from the original model like this...

Be sure to trim the taller post too shown here before trimming....
Once you get the tube chassis fit into the hood of the body, the rest falls into place...

However, as you can see here the tube chassis sits further back because the thickness of the body plastic is significantly thicker than the original Lexan hood panel -but this is actually good for a few reasons.. as you can see from the picture, it allows easy wiring and clearance for the LED light cans... For this the original fog lights became the head lights, and the head lights were used for the fog lights..
Another reason is that with the new body sitting further forward on the tube frame the wheel wells line up in a much more realistic way... The windows dont really line up with the seat positions however, so you cant really use figurines without them looking like they are in the back seat.. For some this is not acceptable, so I highly recommend the Proline body if you want to get a little more scale look out of it... albeit it will have the scale look of a very modified "King of hammers" type rig. I may go with that myself if this body gets too much damage, and already have one on stand by waiting to be cut and painted. However I really wanted to keep the "Factory body" look if I could so I sacrificed the Wrestlers. I did pick some up though..

Im sure some more talented modelers would find a better way to re-mount the rock guard, but I just zip tied it to the grille after like this..

I did purchase a second rock guard though, because I wanted to maintain the rigidity of the tube frame. On the extra rock guard, I cut the bottom bar section off and remounted it to the original points behind the grille, upside down which gave me my rigidity, and fog light mounting points back.
For the actual body mounting, I simply fit the body where I wanted it, and from the underside using a very tiny finger drill I used two of the original mounting points as guides, drilling up into the body from underneith. this allowed me to align the rest of the hood holes using the original body panels for templates.
I did use the 38 size screws for mounting rather than the original short screws, so extras had to be purchased.
once the hood was aligned and mounted with screws I used the rear lower side panel spots and the very back upper spots to add screw mounts there as well. The body is a little longer than the original though, so the 39 or 40 size screws had to be used here as this picture shows...

and the screws just go into the rear door...

In all 8 screws are holding the body on , utilizing all stock mounting points, so its very rigidly attached... Originally I had a hole for the antenna, but eventually opted to tuck the antenna under the hood for better looks. I have yet to see this cause any communication issues...
As for the lights.... The fog lights were switched for headlights, and vice-versa. Foglight cans (now headlight cans) fit right into the holes where the newbright cans were, but had to be glued into the holes.... the Tail light cans actually fit right inside the New bright cans, so I just glued them inside and snapped the cans righ back in.

This did lead to a dilemma though. With the battery in back there was no problem with battery access, and changes were simple, but once I moved the battery up front I ran into a huge problem... the LED's had to be unrigged from the cans everytime I had to remove the body to get to the battery, and re-rigged again after re-mounting the body.. This takes way too long, so I spliced these LOSI Micro battery connectors into the LED wires to allow Fast Disconnecting for body removal ...
![losb0860-450[ekm]336x336[ekm].jpg losb0860-450[ekm]336x336[ekm].jpg](https://www.rccrawler.com/forums/data/attachments/161/161128-de16e9f0ebee0553cf98501ceabf6472.jpg?hash=3hbp8OvuBV)
Ultimately I am happy with the build however after relocating the upper shock mounts back to the stock mounting points, I had to very reluctantly trim off the Fenders to keep the tires from rubbing. I thought I would not like the look, but I actually love it, so - Win! I may try and fit some 1/10 scale tube fenders on though, we'll see. for now though I like the finished look...

Please view My First Run video attempt here:
Wraith Crawling - YouTube
Model is Axial Wraith RTR
Upgrades/repairs include:
~New Bright JK Rubicon Unlimited body Painted with Testors 1840 Flaming Orange and 1247 Gloss Black "one coat" spray enamel. Which ironically required about 5 coats of each...
~Hot Racing CNC Aluminum Steering Knuckles and C-Hubs (replaced after two runs when screws stripped out of the plastic popping the knuckle off.)
~Hot Racing CNC Aluminum Rear axel lockouts
~Vanquish Solid Titanium Upper and Lower links front and rear (after Hot Racing Aluminum links came apart after the first, very easy run - DO NOT BUY THOSE!!!) (Knuckles, CHubs, and lockouts holding up well)
~Vanquish Solid Titanium Drag link and Tie-Rod
~Vanquish Differential covers.
~HiTec HS-7954SH steering servo with Aluminum Steering Horn (Stripped my stock horn running into a rock too hard, and Stock servo was weak with only about 130 grams of torque. HiTec HS-7954SH has about 400 grams of torque. Very adequate!)
~RC4WD 2.2 Rock Crusher X/T Soft Compound Tires (Not the original Rock Crushers that were hard and everyone complained about... These are Definately better than the stock Ripsaws...)
~Special Edition Black RPP 2.2 Beadlock Wheels (Required a little modification to the axel nuts to fit, despite being 12mm hex... Go figure)
~Running on 6 Cell 5000ma Ni-MH Battery Moved to lateral position at firewall and relocated the ESC to the Passenger seat location, and left Reciever in original spot. (unfortunately body needs to be removed for battery access... I'm trying to work that out.... I still havent run the thing long enough to require a battery change, I usually run it down and then trickle it at 1.5 amps charge rate. This gives me about an hour of battery life.)
~Relocated power switch to passenger floor to make it easier to reach.
~Everything else is stock and has been working fine through about 10 packs without issue... So far even the stock 20 turn motor has not burned out although consensus seems to show that it will burn out before long. So far so good...
Last edited:


