• Welcome to RCCrawler Forums.

    It looks like you're enjoying RCCrawler's Forums but haven't created an account yet. Why not take a minute to register for your own free account now? As a member you get free access to all of our forums and posts plus the ability to post your own messages, communicate directly with other members, and much more. Register now!

    Already a member? Login at the top of this page to stop seeing this message.

CMAX #2 by new2rocks - Mojave 2 on 152s with help from Roo

new2rocks

I wanna be Dave
Joined
Apr 2, 2014
Messages
2,254
Location
North Carolina
Once I had CMAX #1 up and running, I stumbled into another shortcut to get CMAX #2 up and running. As was the case with #1, guilt over my procrastination was beginning to get the best of me, though in this case because I had yet to put together a running truck with our 152mm NCYotas. You know, these little guys:
DSC00212.jpg

At the same time I came across that crappy, beat-up Blazer body that found its way onto CMAX #1 a couple of months ago, I also stumbled upon a nice blue and white Blazer body in the classifieds here. Which gave me an idea...
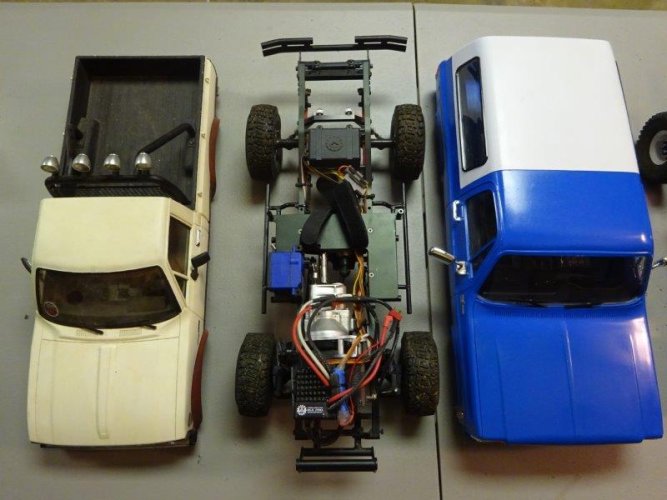
DSC09870.jpg

You can probably see where I'm going with this, even if you didn't see the thread I put up a few weeks ago in the TF2 section. Why not take the Mojave 2 body that I finished when it was first released, put it on a CMAX, and put the blue and white Blazer body on the TF2? That would give me a TF2 Blazer and a CMAX Blazer, plus a TF2 Hilux/Mojave and a CMAX Hilux/Mojave. So that's exactly what I did.

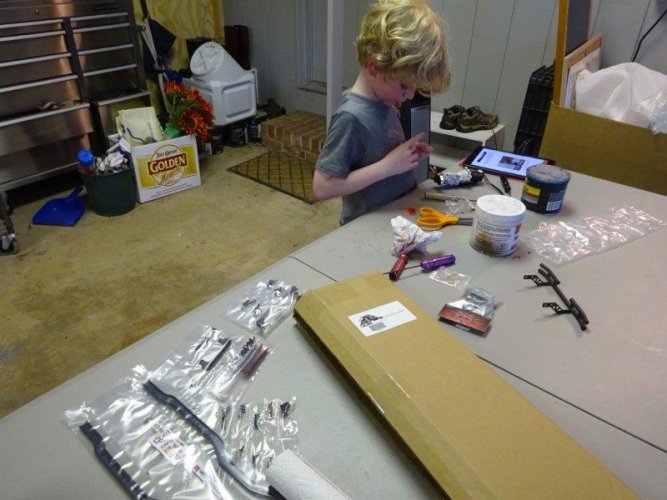
This idea was only slightly less lazy than CMAX #1, because I actually did all of the paint and detailing on this body myself (granted it was a couple of years ago, but who's counting). With other projects going on at the same time, I decided to outsource chassis and axle assembly to Roo. He's getting pretty good at it by now:
DSC09937.jpg

DSC00183.jpg

The story behind the 152s is fun. When we originally developed the NCYotas, we wanted to keep the axles as narrow as possible for maximum tire tuck under the Hilux/Mojave and LC70 bodies, which are quite narrow. Because the first version of the NCYotas was made for the TF2, the location of the front leaf and shock mounts on the TF2 chassis essentially eliminated the possibility of making a bolt-on axle any narrower than stock (approx. 170mm pin-to-pin) without sacrificing steering. Why, you ask? The width of the axles on the TF2 chassis is dictated by the stock leaf and shock mounts, which in turn is dictated by the width of the chassis rails. If we narrowed the axles between the leafs and the knuckles, we'd lose steering. But trying to narrow the axles by moving the leafs and shock mounts inward would require major modifications to the shock and suspension mounts, and even then, it's not clear that it could work. Here's a pic to show you what I mean:
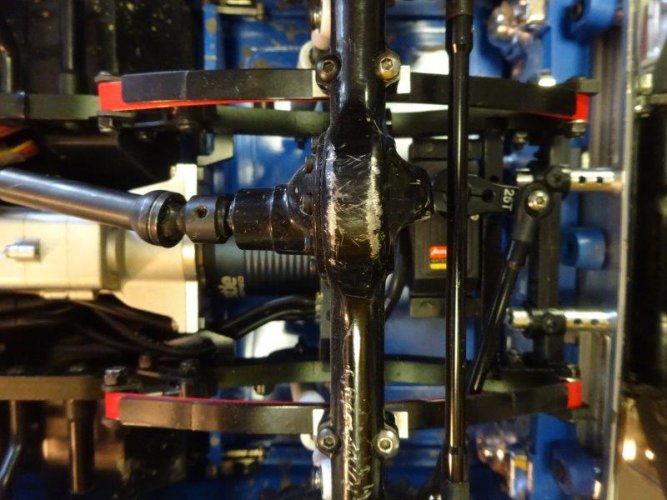
DSC09950.jpg

Which brings us to the CMAX. The CMAX rails are much narrower than stock TF2 rails. If you look at a similar view from underneath, you can see that mounting standard-width (i.e., RC4WD and Tamiya width) leafs to the CMAX rails requires placing the leafs fully outside the rails:
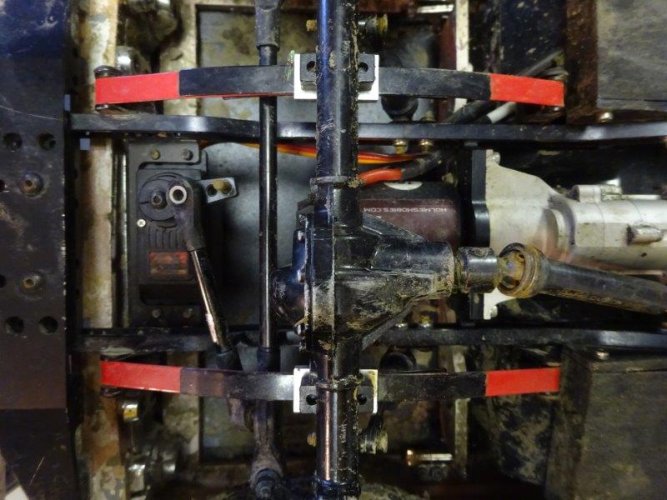
DSC09949.jpg

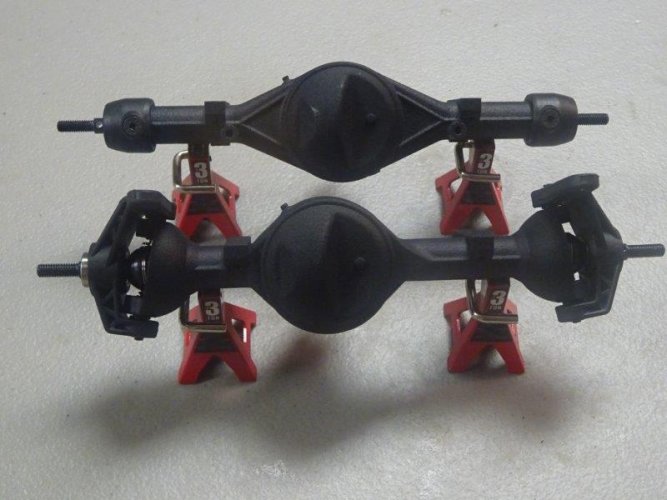
That meant we had room to narrow the front leaf and shock mounts simply by moving the leafs closer to the rails. That in turn would allow us to narrow the axles without compromising steering. Through our collaboration with GCM, we were able to figure out the perfect width to fit these axles under the Hilux/Mojave and LC70 bodies - 152mm pin-to-pin. We get to that measurement by trying multiple different wheel/tire combos on both the Hilux/Mojave and LC70 bodies with a variety of different axles. By moving the leaf and shock mounts inward, we could leave the spacing between the leafs and knuckles in tact, which gave us full steering even with the narrow axles. The rear leaf mounts didn't need to change, so we left them as is. This view of the front and rear axles shows the different offsets for the front vs rear leaf mounts:
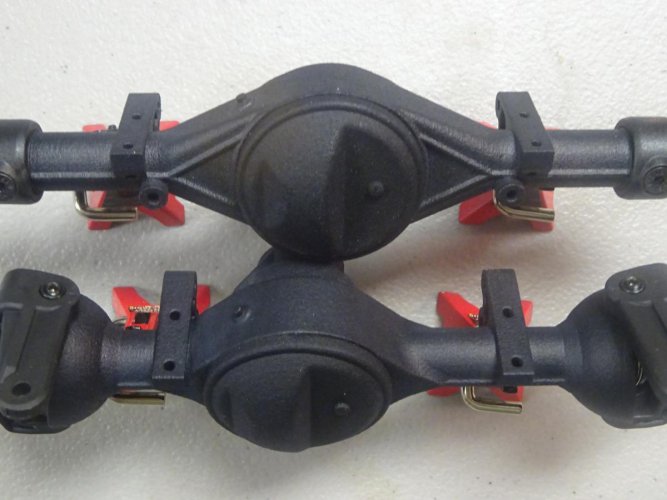
DSC00213.jpg

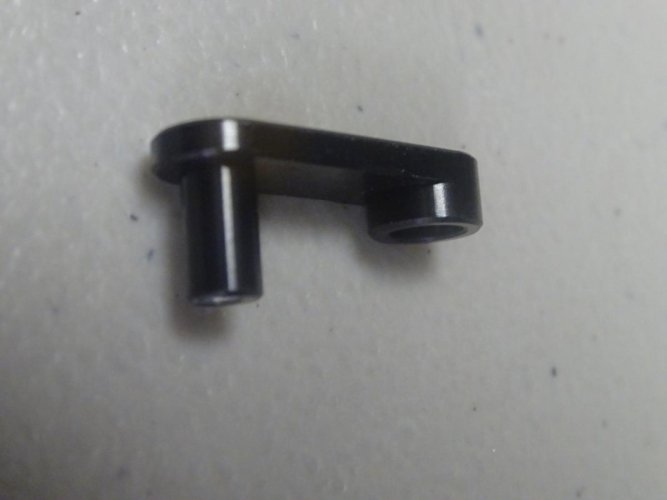
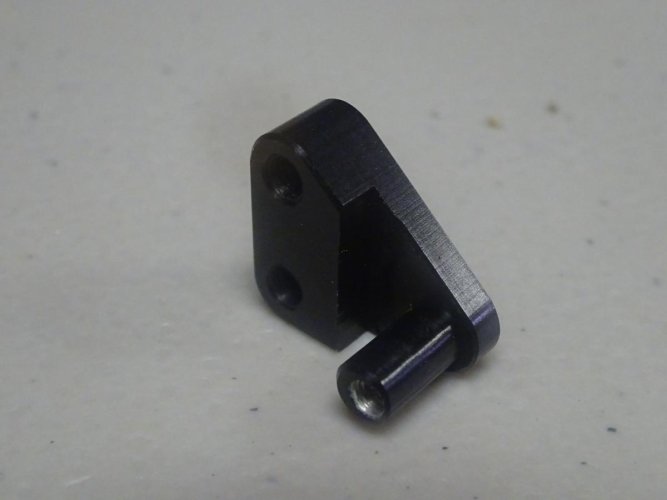
To make all of this possible on the chassis side, GCM created these new front leaf mounts:
DSC00217.jpg

DSC00218.jpg

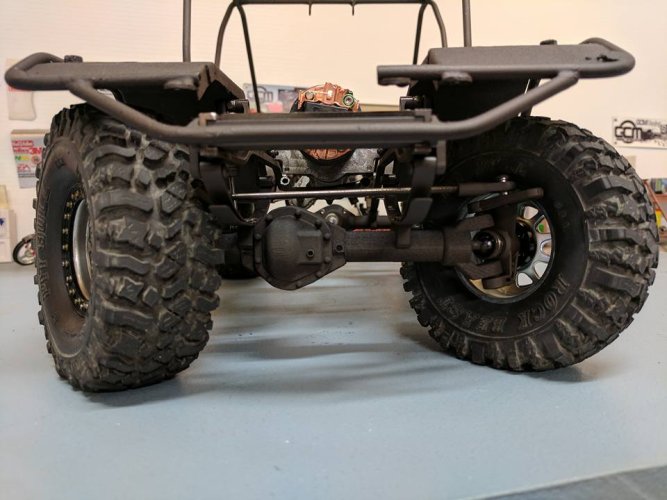
Together, these little mounts place the front leaf almost directly under the CMAX chassis rails. In fact, GCM liked the setup so much, they decided to use this on their new TMX axle housings even at wider axle widths, as seen here under that amazing Comp Toy:
Comp Toy narrow leaf front.jpg

So that's the story of how the 152s came to be. In the next few days, I'll update this thread with some more info on the build and setting up the narrow leafs with the 152s, as well as some details from the body. And within the next week or two, we should be ready to announce a cool new product specifically for this Hilux/Mojave/CMAX combination. So stay tuned...
 
First, to fill you in on a bit more of the inspiration and history. There were a few reference pix that really grabbed me. For the exterior, I really liked this color scheme:
Mojave reference 3.jpg

And those wheels...oh, those wheels...

So off I went to work on the body and ended up with this as it sat on a TF2 chassis:
DSC00875.jpg

DSC00879.jpg

For the interior, I ended up using the CC Hand interior. That interior was my first attempt at using dry brushing for weathering (taught to me by the owner of my favorite LHS), and I was very pleased with how it came out:
CC Hand interior 1.jpg

CC Hand interior 5.jpg

A side note on the interior is worth mentioning: I had originally bought the CC Hand kit for my OG TF2 (pre Mojave 2) 3 years ago, in part because the OG Mojave body set came with the older, less detailed dash. That OG TF2 turned into my class 1 comp truck, so I decided at the time to hang on to the interior for a future project. Now that RC4WD has added so much more detail to the stock dash that comes with the Mojave 2 body, it's much harder to justify the CC Hand kit, especially given its high cost.

Let's get back to those wheels. Oh, those wheels. My love affair with those gold-faced ENKs presented a problem. Gear Head makes ENKs, but the 1.55s are glue-ons, and I just don't do glue-ons. The 1.9s are beadlocks, but they're too big for this rig. Hmm...what to do...

I decided to have a go at turning the Gear Head 1.55 Classic 12-Holes into ENKs. Here's what they look like to start:
Gear Head wheel stock image cropped.jpg

I tried masking off everything but the inner face and then spraying them with a metallic gold header paint. But the paint bled under the tape, and then some of the paint pulled off when I went to remove the tape. It was a mess. So then I decided to try to remove the paint. I was getting ready to de-chrome some bits for a D110 using Easy Off oven cleaner, so I figured...why not toss the wheels in to see what happens? I mean...how bad could it be?

Well...this is what happens:
DSC00008.jpg

Yuck. And perfect. Sometimes, the mistakes turn out better than the original plan. To this day, I don't know if the chemical reaction inside that repurposed gelato container had more to do with the de-chroming that was underway or simply the reaction between the Easy off and the aluminum. Don't know and don't care. They ended up looking much better than I think I ever would have if I didn't muck them up so badly.

But that still left me with one significant unresolved issue. This picture from USTE shows it well:
DSC08891.jpg

Those wheels just stuck out way too much on the TF2, due to the combination of the width of the stock RC4WD Yota axles and those Gear Head wheels, which have quite a bit of negative offset. And then along came the 152s...

As I mentioned earlier, to make this possible, GCM had to design new leaf mounts for the CMAX chassis, and they did their typically fantastic job. Here are a few more pix to show the setup:
DSC00027.jpg

DSC00030.jpg

Here are a couple of a neat head-to-head comparisons to my CMAX #1 with the standard leaf offset mounts (the Blazer with RC4WD cast K44s mounted):
DSC00025.jpg

And head-to-head with a TF2 front end with 170mm NCYotas and GCM mini mag wheels:
DSC00033.jpg

You probably noticed that the axle width differential is much more pronounced in the CMAX head-to-head than the TF2 head-2-head, and that's due to the difference in offset between the Gear Head wheels (tons of negative offset) and the GCM mini mags (as much positive offset as you can get without rubbing everything). If I were to mount the GCM wheels to the 152s, the difference would be much more pronounced.

There's one other interesting note about the narrow offset leaf setup. The basic physics of a lever dictate that, as you move the leafs inboard, you need to stiffer leafs to achieve the same effective spring rate at the tire's contact patch. So while I normally prefer soft leafs like the RC4WD red leafs that you saw on CMAX #1 and the TF2, the 152mm front setup requires a much stiffer spring. GCM recommends the Tamiya Hi Lift Tundra springs (9808205), and they feel just right.

Once Roo had the chassis together, I dropped the body on for a test fit using some of the the GCM Hilux body mounts off their Shapeways store (more on that in a minute). This is how she sat:
DSC00237.jpg

Wow...what a difference! Hard to believe that's the exact same body and wheels from the earlier pic. I couldn't have been happier with the stance. The combination of the narrow axles and the CMAX's naturally lower ride height just looks so right.

The test fit also showed some opportunities to take the body and bumper mounting to the next level. We already have some of it sorted out, and we have a trick new rear body mount in development that should be ready to go in another week or two.
 
Let's talk body mounting, since this presented another neat product development opportunity working in collaboration with GCM. And I'm a bit giddy at the moment after picking up the truck from Nick yesterday with our newest BowHouse parts.

GCM has donea great job developing CMAX body mounting kits for many of our favorite hardbodies on the market (Hilux/Mojave, Blazer, D90, D110, XJ...with more on theway). For the Hilux/Mojave, the mounting kit consists of side trays/sliders that double as electronics/battery trays and a rear mount that fits under the bed and uses body clips through the holes molded into the bed. There's also an optional receiver box that mounts between the rails. Here's a pic of the side trays and receiver box:
DSC00185.jpg

Here's what a side tray looks like mounted up to the chassis:
DSC00225.jpg

One of the cool features of this side tray, similar to the one GCM has developed for the Blazer, is the ability to have it swing down for easy battery swaps while out on the trail. More on that later.

With a great starting point, there were a few things I wanted to accomplish. First, I really don't like seeing screws on the outside of my trucks. When I originally built this body for the TF2, it was my first time experimenting with using captured screws in the rocker panels to secure the body to the TF2's body posts. It looks something like this from the inside:
DSC00258.jpg

From the outside:
DSC00259.jpg

After a bit of glazing putty with a scribed groove:
DSC00261.jpg

It worked fairly well on the TF2, though it could get dislodged during a rough tumble. It really needed a mount in back, which I never got around to. Based on that experience, I knew that relying on the side trays alone wasn't a great idea the CMAX, especially knowing that I would be setting up at least one of side trays as a flip down for a battery. And if I don't like seeing screws showing on the outside of my bodies, you can imagine how I feel about body clips. Which meant I needed a new rear body mount. Oh...and did I mention that I don't like having to use tools to take my bodies on and off?

After speaking with GCM, Nick and I got to work. First, I whipped out the Dremel and drill and modded the GCM side trays to allow room for the captured screws to slide in and out of the side trays:
DSC00150.jpg

I handed the side trays and bumper mount over to Nick to do his magic, and he came up with these:
DSC00137 cropped.jpg

You might notice a few other tweaks to the side trays. For added strength, we added a little bit of material above the holes for the captured screws, as well as an additional screw into the chassis rail in the upper rear corner of the vertical side plate.

I also needed a mount for that awesome looking CC Hand Push Bar front bumper. With Nick busy on other projects, I decided to experiment with the bumper mount that GCM made for the Blazer body. Because of the short front overhang on the Hilux/Mojave body, I had to get creative with the Dremel to make room for the steering servo:
DSC00041.jpg

Then did a test fit to make sure it all worked (it did):
DSC00128.jpg

Once again, Nick worked his magic, this time integrating the servo mount into the bumper mount:
DSC00137.jpg

DSC00125.jpg

DSC00142.jpg

We have a couple of small tweaks to make for these parts, and then they'll go up on our Shapeways store. In the meantime, the next order of business was the rear body mount...
 
Once we had the side plates and front bumper/steering servo mount sorted, it was time to tackle the rear mount. For the rear body/bumper mount, we wanted to accomplish the following: (1) entire body hinges open at the rear, (2) allows rear bumper to hinge with body while maintaining structural attachment to the chassis, (3) accepts both styles of TF2 rear bumper (twin posts between chassis rails and brackets that mount outside chassis rails), (4) eliminates the need for body clips or screws visible from outside the truck. Oh...and for bonus points, how about filling in the holes in the bed to match the corrugated pattern of the bed floor. Simple, right?

This is what we've come up with:
DSC00106.jpg

We've included tubes for the post-style bumper, as well as mounting screw locations that mirror the TF2 chassis screws for bumpers that attach to the outside of the TF2 chassis.

Everything hinges:
DSC00103.jpg

With body on:
DSC00163.jpg

DSC00115.jpg

DSC00116.jpg

DSC00117.jpg

I did have to make a slight modification to the full cab back for all of this to work. I trimmed two notches to clear the chassis rails, and I trimmed off the very bottom lower corners off to clear the side tray. Here's what it looks like now:
DSC00118.jpg

And remember the folding battery tray I mentioned? Here's how it works. Instead of using a regular button head screw to secure the lower rear corner of the side tray to the mounting plate, you use an m3 threaded rod. Then pull the rocker panel away from the chassis:
DSC00167.jpg

Slide the threaded rod out of the mounting plate to allow the side tray to drop down:
DSC00169.jpg

Super easy! As soon as Nick finishes the bonus points (integrated plugs to fill in the holes on the bottom of the bed), we'll be getting this mount, along with the rest of the updated mounts in the previous post, up on our Shapeways store for ordering.

We can't thank GCM enough for their collaboration on this little project and for their willingness to let us take a crack at enhancing their already quite clever body mounts. Time to film another episode of Shut Up & Drive!
 
How is the bed attached to the hinge? Great build by the way really makes me want to build one of these up as well but I have to finish up my TF2 first.
 
How is the bed attached to the hinge? Great build by the way really makes me want to build one of these up as well but I have to finish up my TF2 first.

Glad you like what you see. It's even better to drive! I used E6000 to secure the bed to the hinge because the bed was already painted, and it's very strong. For bare plastic to bare plastic, I probably would use a combination of MEK to start followed by E6000 around all of the contact edges.
 
Love this latest build with CMAX and TF2, nice collaboration with Shapeways and GCM too! These axles use Ascender internals, except front uses super narrow GCM version of their CVDs? :)
 
Love this latest build with CMAX and TF2, nice collaboration with Shapeways and GCM too! These axles use Ascender internals, except front uses super narrow GCM version of their CVDs? :)

Glad you like, sir. Re the internals, the ring/pinion/spool are stock Ascender, CVDs are narrowed and offset versions made specifically for GCM, and the rear axle shafts are also narrowed made specifically for GCM. Bearing sizes are all stock Ascender. We have been using stock Ascender knuckles and bearing caps but will be switching over to our own design (the new double-shear knuckle that we just released and a soon-to-be-released bearing cap) in the coming months. We're really happy with how everything is coming together. "thumbsup"
 
Back
Top