• Welcome to RCCrawler Forums.

    It looks like you're enjoying RCCrawler's Forums but haven't created an account yet. Why not take a minute to register for your own free account now? As a member you get free access to all of our forums and posts plus the ability to post your own messages, communicate directly with other members, and much more. Register now!

    Already a member? Login at the top of this page to stop seeing this message.

6x6 Peterbilt Semi Truck

Better fitting wheel plus they look like the factory option peterbilt aluminum wheels Alcoa offered. They were the peterbilt oval emblem design in the wheels so they look more correct than the European style wheels you had.
Keep up the good work.
Ben
 
That's much better... like no question

I concur with that guy. ^^^

And I concur with these guys who concur with the original guy!

Better fitting wheel plus they look like the factory option peterbilt aluminum wheels Alcoa offered. They were the peterbilt oval emblem design in the wheels so they look more correct than the European style wheels you had.
Keep up the good work.
Ben

Ah, good stuff, Ben! Thanks for the info! Yes, I'm definitely pleased with these wheels and their fitment. They're staying. "thumbsup"
 
Smugmug is having issues right now so I can't link, but hopefully attaching the photo will work instead....

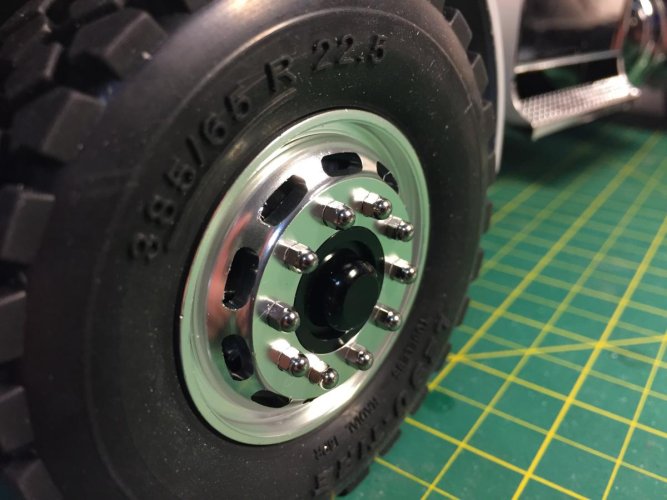
I couldn't use standard ol' socket head cap screws on these wheels in such a prominent location! Locked Up RC scale hardware to the rescue!
 

Attachments

  • image1.jpg
    image1.jpg
    98 KB · Views: 1,403
Luv the look and stance of those HH wheels. Just an opinion on the steering angle- a few years ago when I built a 6x6, I was trying to get tight front steering until I realized that the overall wheel base, plus 4 more high traction driven wheels, was just going to make the front end "push" if the steering got too sharp.

I adopted your attitude- it was easier, and a bit more "scale", if I had to take a few backups to swing it around a corner. :mrgreen:
 
Thanks! And yeah, better steering would be nice, but I really just don't know it's worth the investment since it'll never turn "well". I'll save that effort for rigs that might see competition. LOL! But hopefully this rig will do okay since the axles are fully locked.

It looks like the color scheme (and maybe colors) have been decided upon. And since the sanding and bodywork are pretty much done, it'll soon be time to prime and paint the body. I'll be painting the entire chassis, too, but that'll have to wait a bit longer as I still have to mount the t-case and determine what I want to do about the driveshafts.
 
And in case anyone is interested in how to access the wheel nut with these Hercules Hobby wheels, this is how it's done. The center cover simply unscrews. What's odd is that it's completely smooth and has no way to grab it with a tool to screw/unscrew. With the heads of the hardware in close proximity, it makes it difficult to get a good grip on it with your fingers! I will likely plasti-dip the ends of a small pair of pliers so I can grab it reasonably well without marring it. Not a fan of this design, though. I may pop a hole through it so I can insert a small allen key into it to tighten/loosen it. I'm curious what others may have done?
IMG_7910-XL.jpg
 
love the new wheels. I prefer the looks of them too with the slots.

also a trick I did back when I was comping supers, I took the clod dog bone cup and removed 1-1.5mm off the end and then rebeveled the inside with a drill bit/and or counter sink bit

made a pretty significant difference.
 
Thanks, Cory! I was thinking of modifying the drive cup a little bit (as you described). Great minds think alike......and so do ours!! :lmao:
 
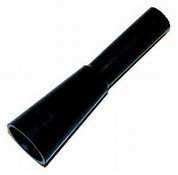
Tommy, here's a pic of a small electric bulb remover, you can find them at electronic stores, or if you have a science and surplus store nearby. It's made out of rubber, with cups at both ends.

I work at a water plant, and we have little bulbs in recessed panels that make it hard for removal and replacement with just fingers, so these come in handy, and they're under a buck a piece."thumbsup"
 

Attachments

  • bulb remover.jpg
    bulb remover.jpg
    5.4 KB · Views: 1,233
Thanks, Mike! I like that idea and will try to find one locally. :)

Got some more work done to the Peterbilt recently. First was to glue up the tires. The glue doesn't seem to bond very well between the aluminum wheel and the hard rubber of the tires. Hopefully they'll hold. Time will tell...
IMG_7946-XL.jpg


Hard to tell with my crappy pic, but I replaced the 2mm nylocks with Locked Up RC acorn nuts. Much better!
IMG_7977-XL.jpg


And paint has started! I'm waiting for a warmer day to apply the clearcoat, but so far I'm loving it.
IMG_7980-XL.jpg


IMG_7981-XL.jpg
 
Is that gold leaf, or pinstripe tape?, Looks great!

Thanks! It's gold leaf vinyl. Didn't even know such a thing existed until recently. Ha! And I added a thin black vinyl pinstripe underneath it to give it a nice contrast against the white. I cleared over all of it in hopes of protecting the vinyl from peeling off over time.

All the clearcoating is done. Just waiting on it to fully cure and I can get it all together. Next up is to get the t-case mount fabbed up and being prepping to paint the chassis.
 
Love it man, more clear coat! :ror:

I showed this to one of my friends and he wants one now. Lol
Might have to build another Mean green 6x6.
 
Back
Top