A few months ago my wife was wondering out loud about how neat it would be to have an RC Wisconsin Dells Duck. I have never built a model from scratch before but you don't look a gift horse in the mouth so I immediately started looking for a suitable 6x6 chassis!
Before I get too long winded, here's a picture of the mostly finished product:

Details:
6x6 King Kong CA30 chassis kit
Drive motor - Hobbywing Fusion Pro 2300kv (started with 1200kv SE, wanted more speed)
Prop Motor - 55t 550 brushed and Hobbywing 1040
Length - 31"
For some additional background, my wife and I are from the midwest and my wife in particular spent a good amount of time in the Wisconsin Dells as a kid. In the Dells there are two tour companies that run genuine ww2 ducks. Ours is modeled off the Original Wisconsin Ducks paint scheme.
Further background on the build, it was about mid May 2024 when my wife had the idea. We had a trip planned in July to fly back to the midwest to see family and friends and I thought it would be terrific to have the duck built and ready to take on the trip. That left me...about a month to plan and build an amphibious model from scratch. No sweat.
Also I had never built anything from scratch before.
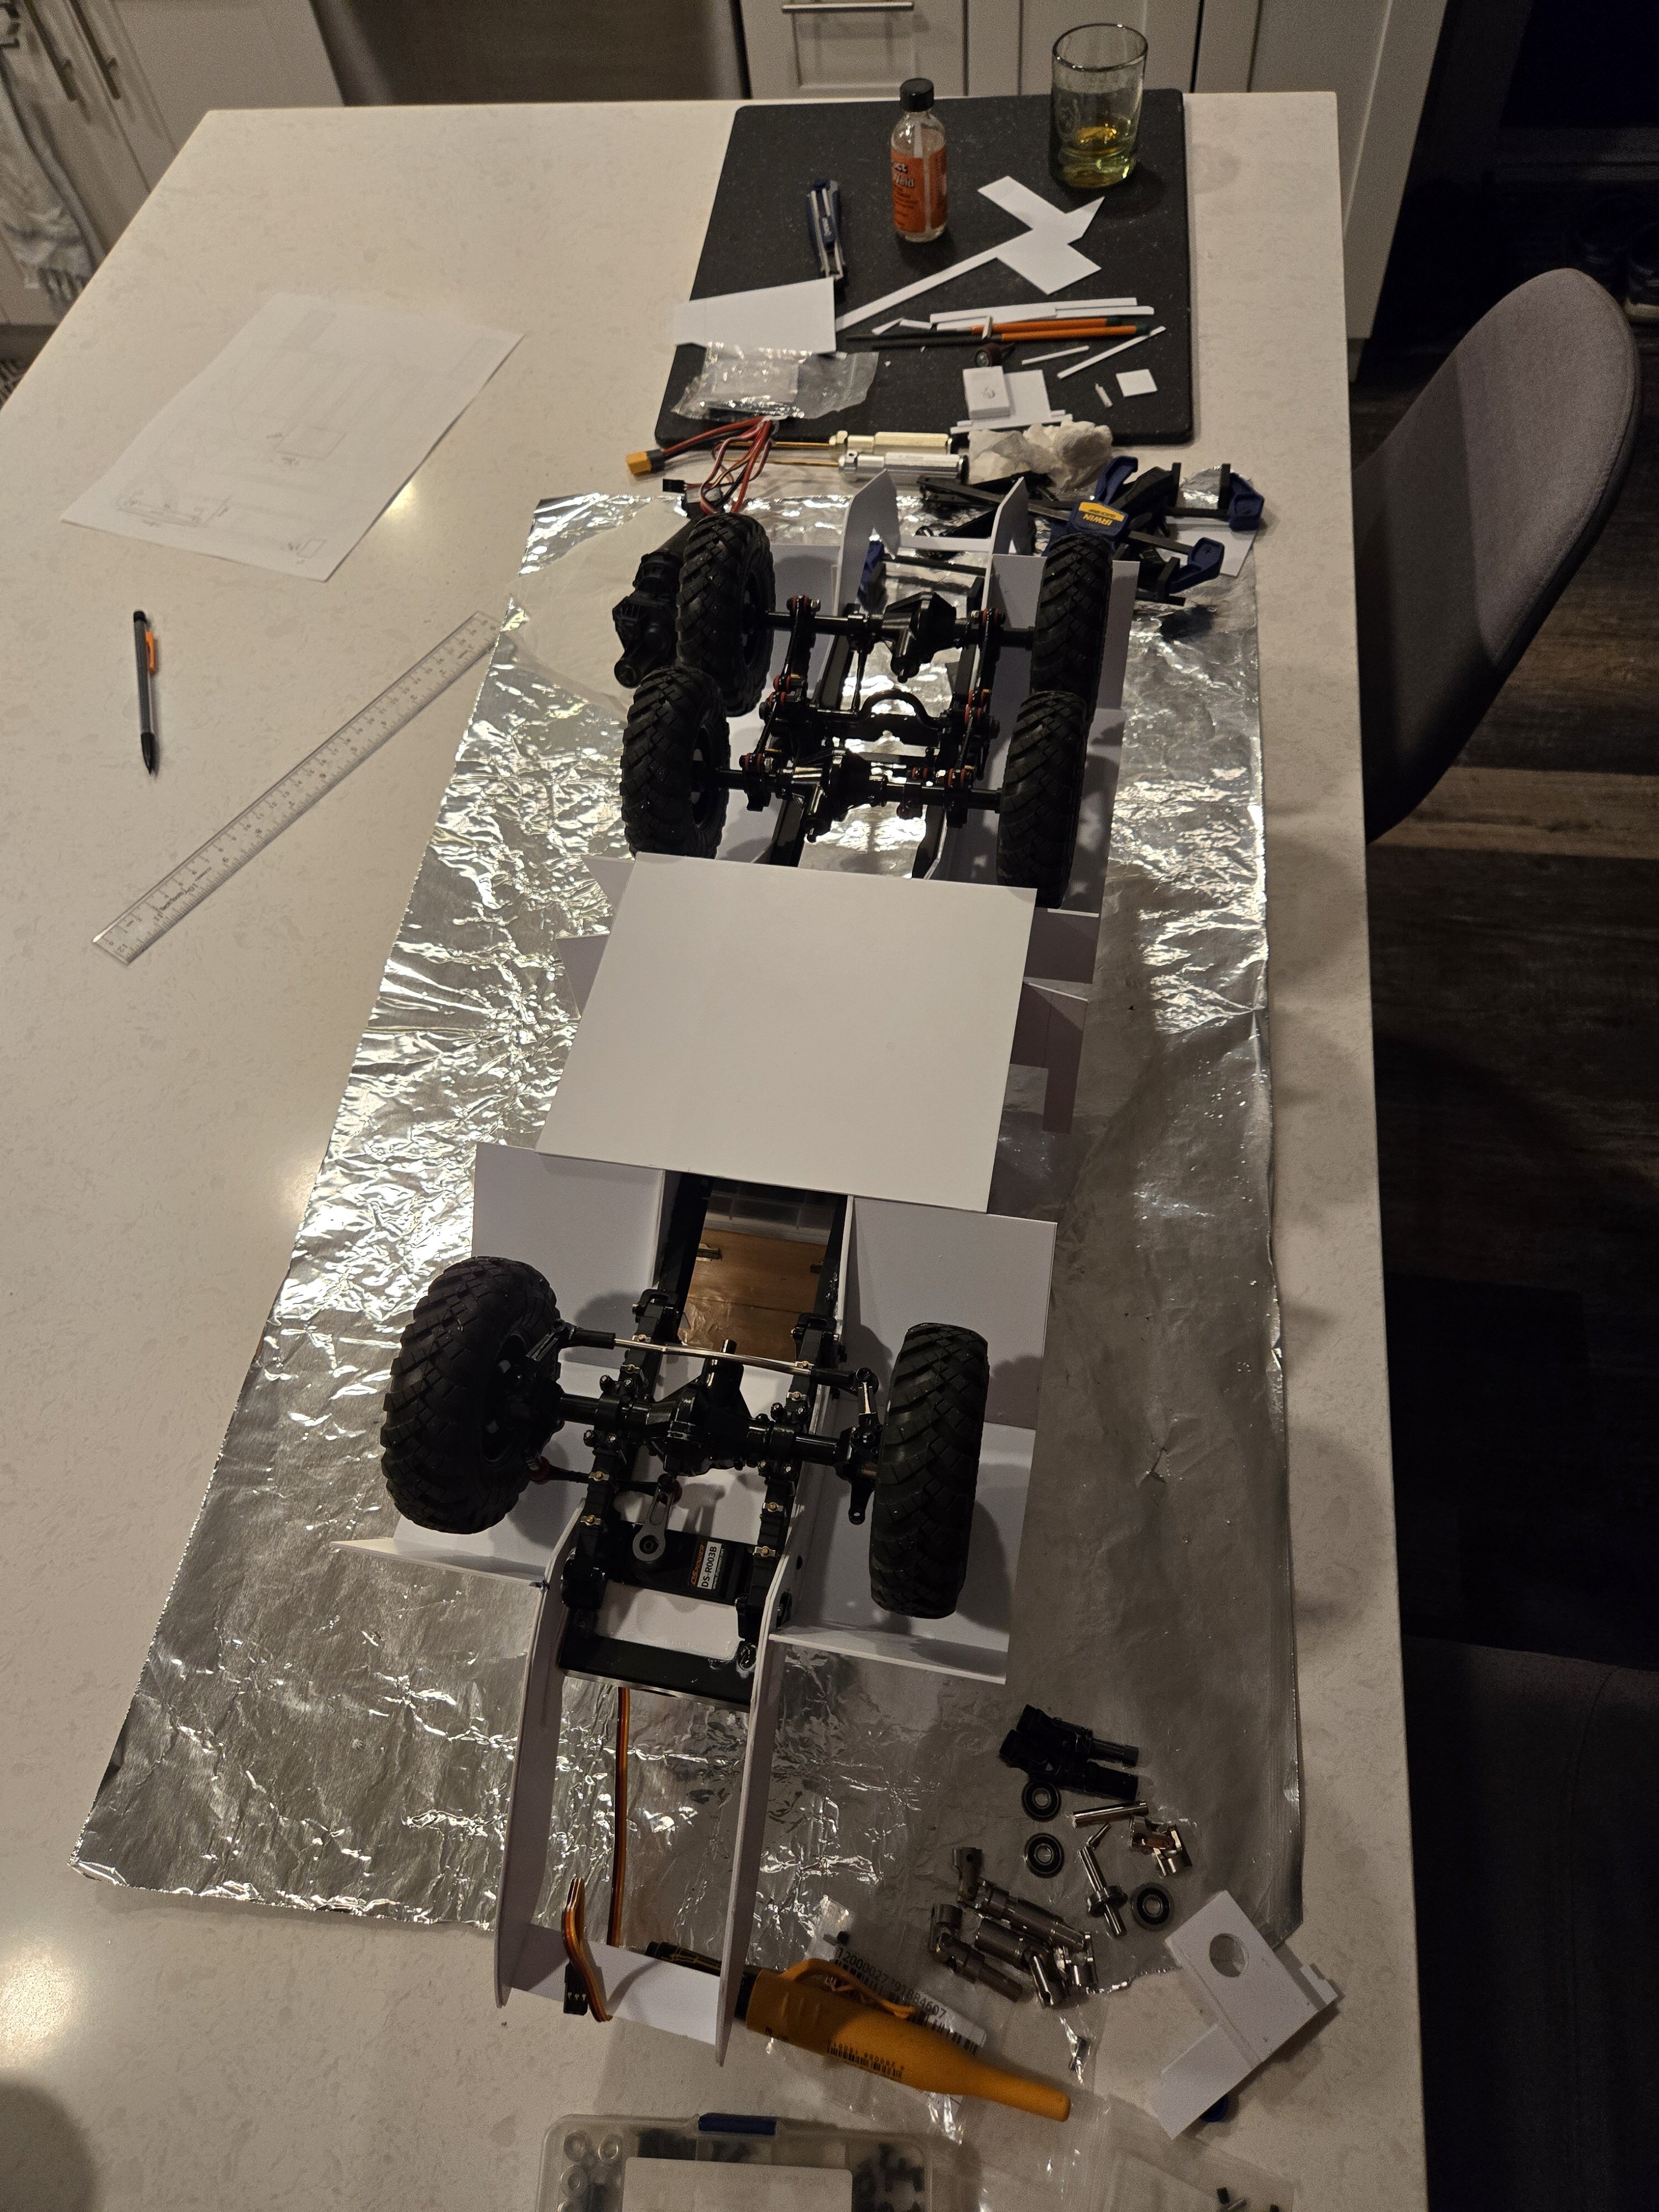
There are a few other DUKW builds out there in various scales, but most focus on the scale details/looks. I really wanted to focus on the functionality because I wanted to play with this thing. So I happily sacrificed scale looks and exact proportions in favor of function. To that end I figured I needed a quality 6x6 chassis to start with and I found the King Kong CA30 chassis kit. This thing is quite high quality, about the right size for the dukw, and not tooooo expensive. The biggest downside is that it comes mostly prebuilt and you just assemble the frame rails.
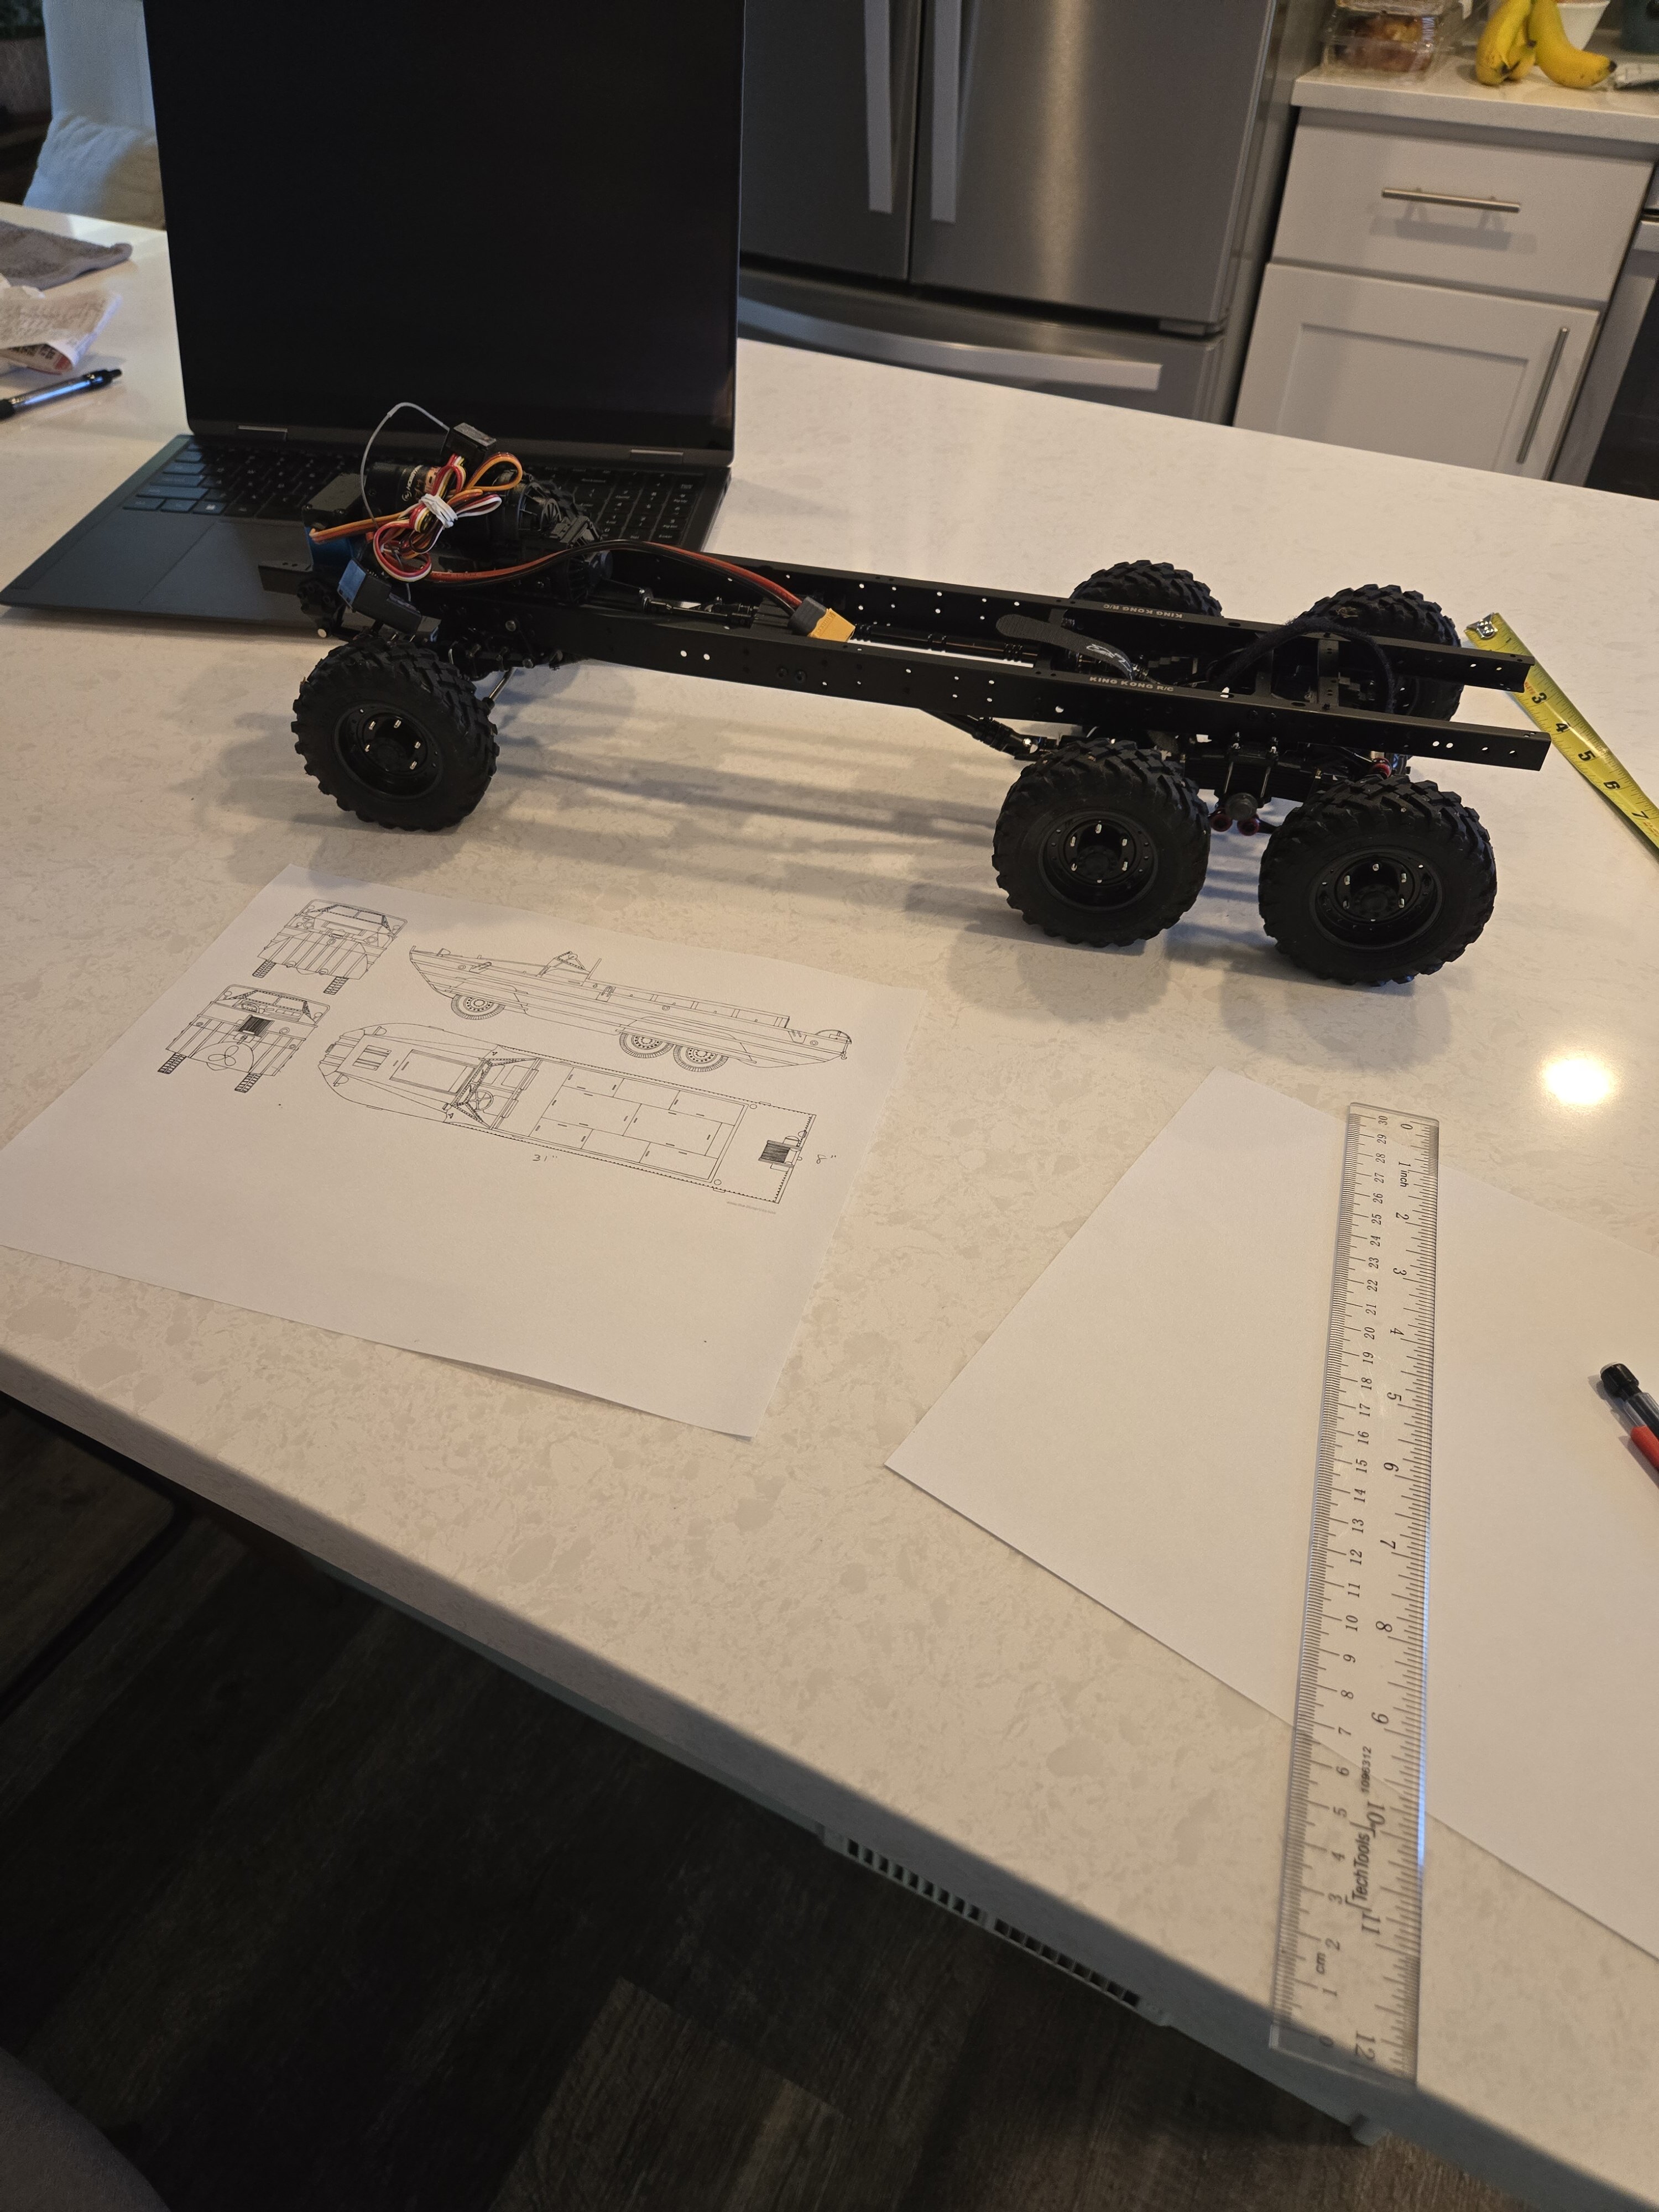
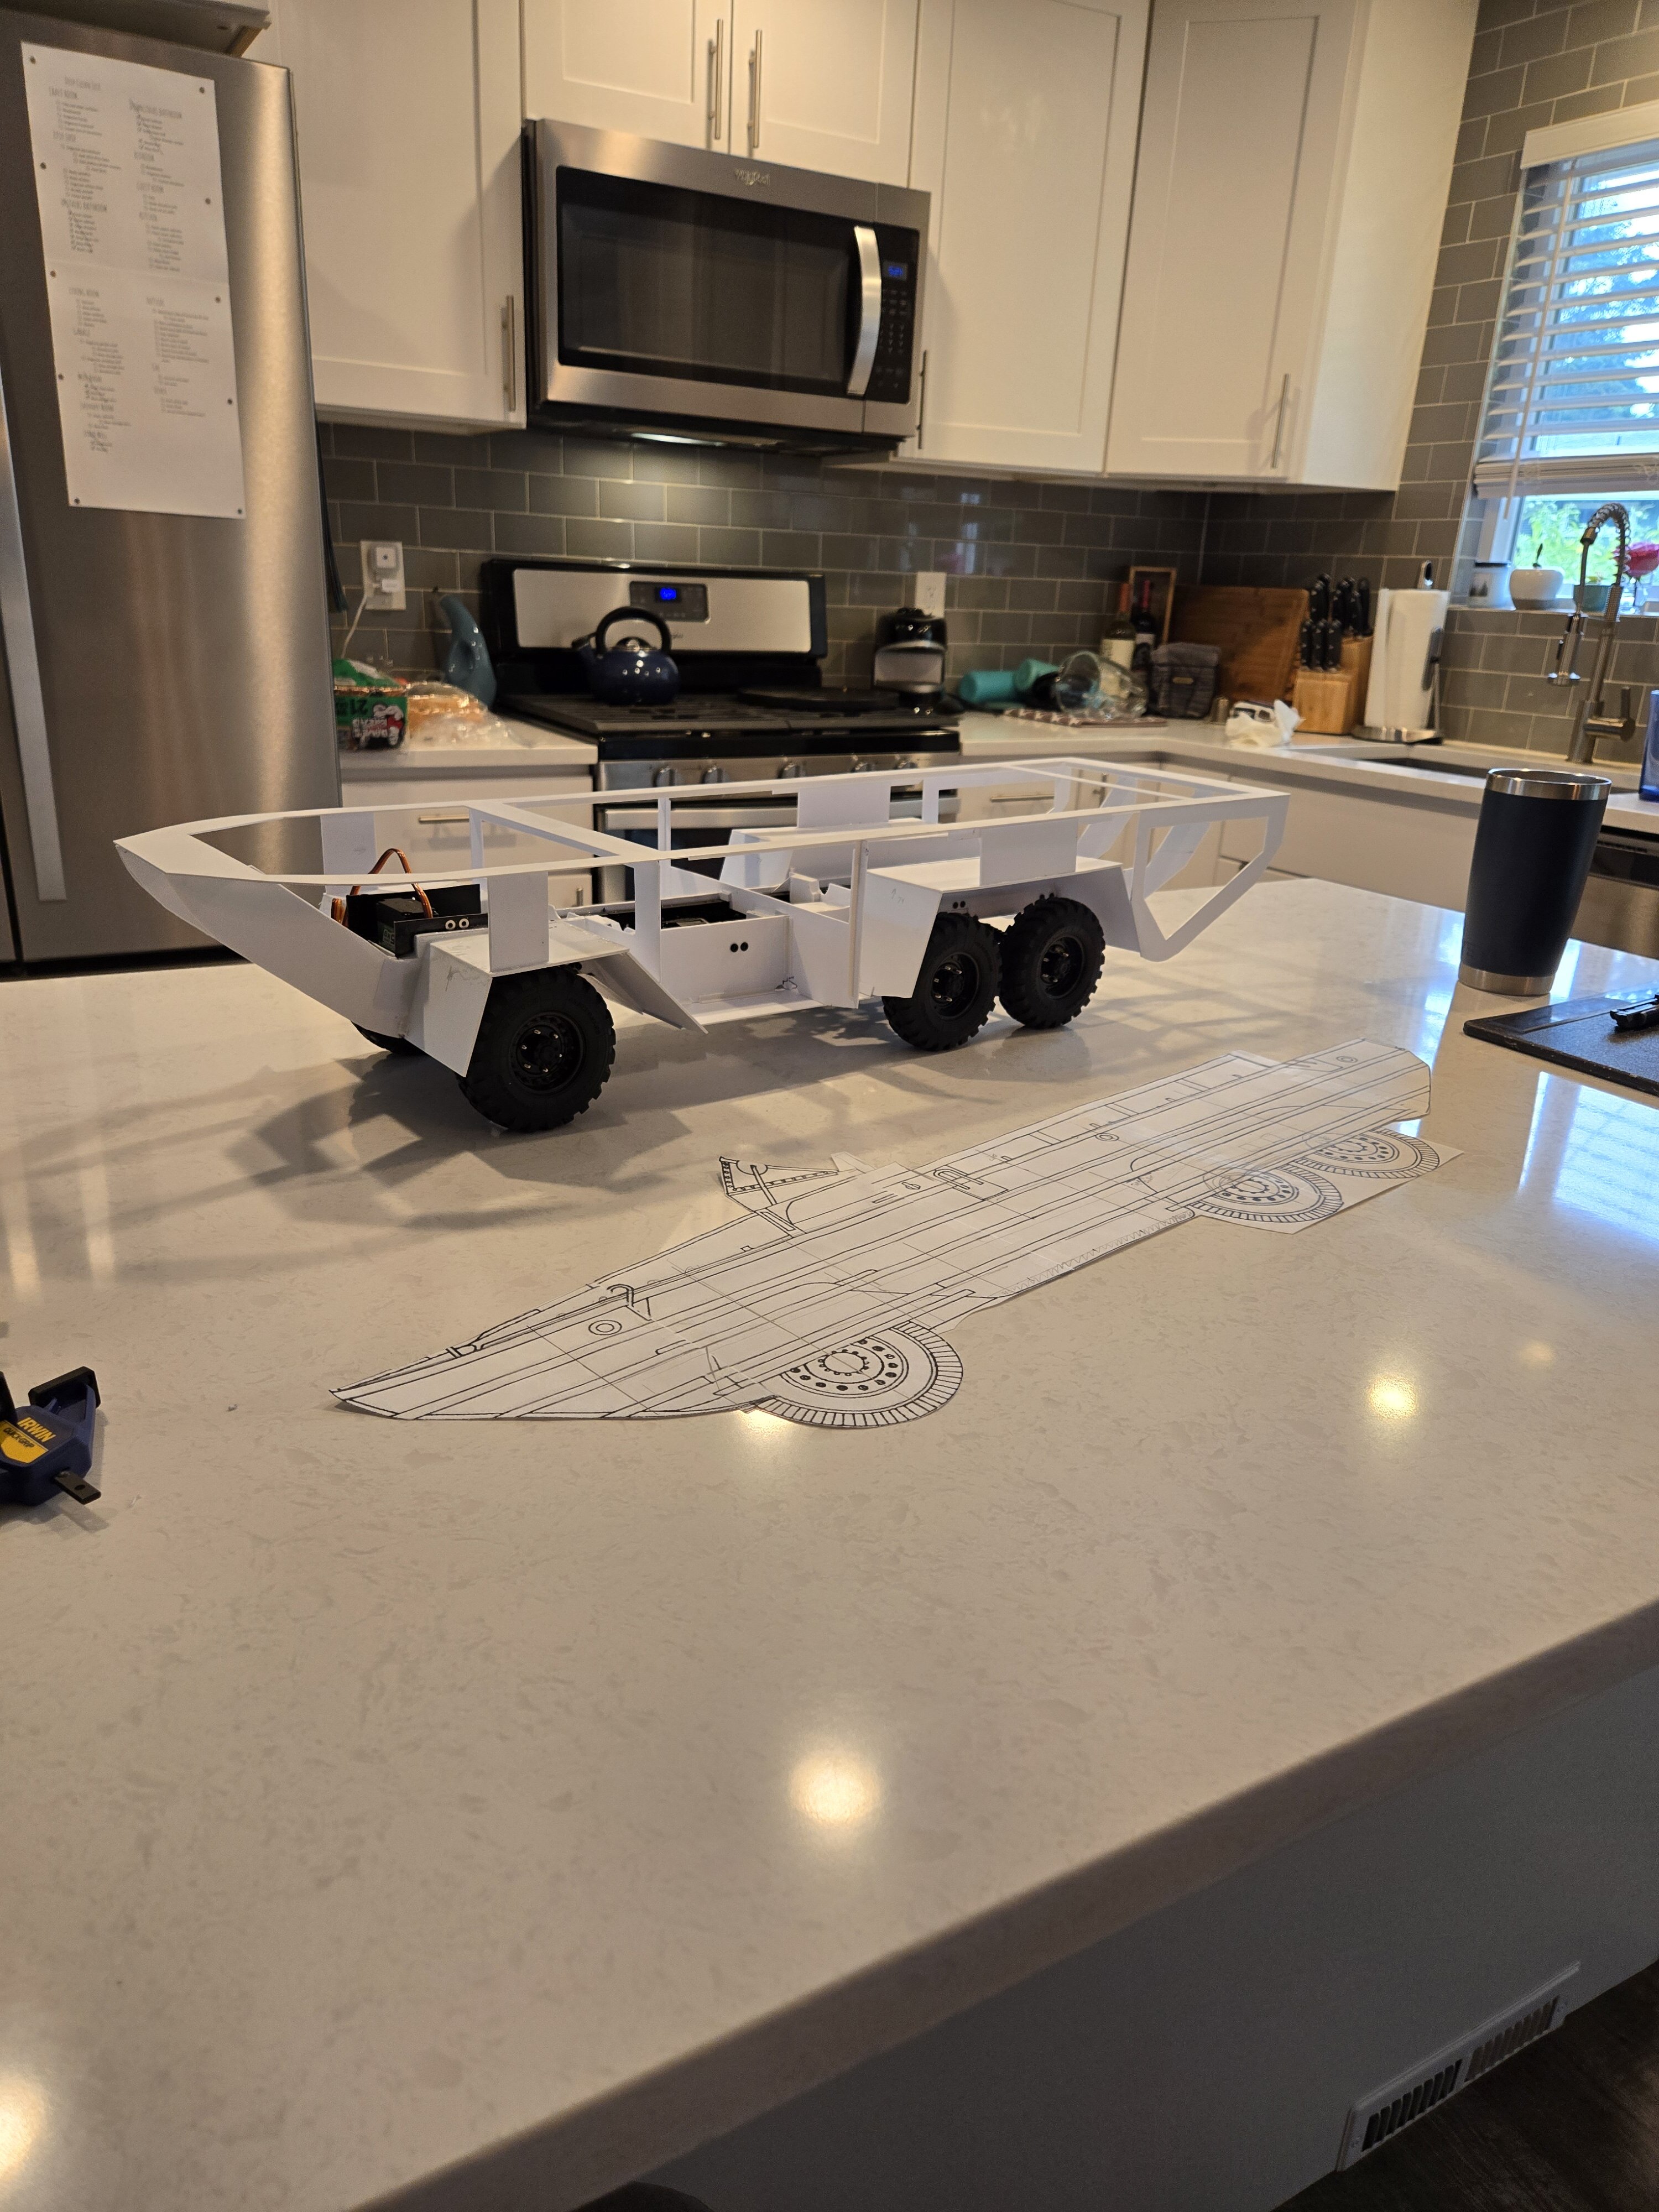
The I started trying to figure out how to wrap a boat hull around this truck chassis. Unfortunately I don't have a 3d printer and I still haven't tried any computer modeling software, so I did all this on paper and in my head using various drawings and pictures I found online. I even did the thing where you print a giant picture from Paint on several sheets of paper then tape them together. It was like making posters in elementary school again!
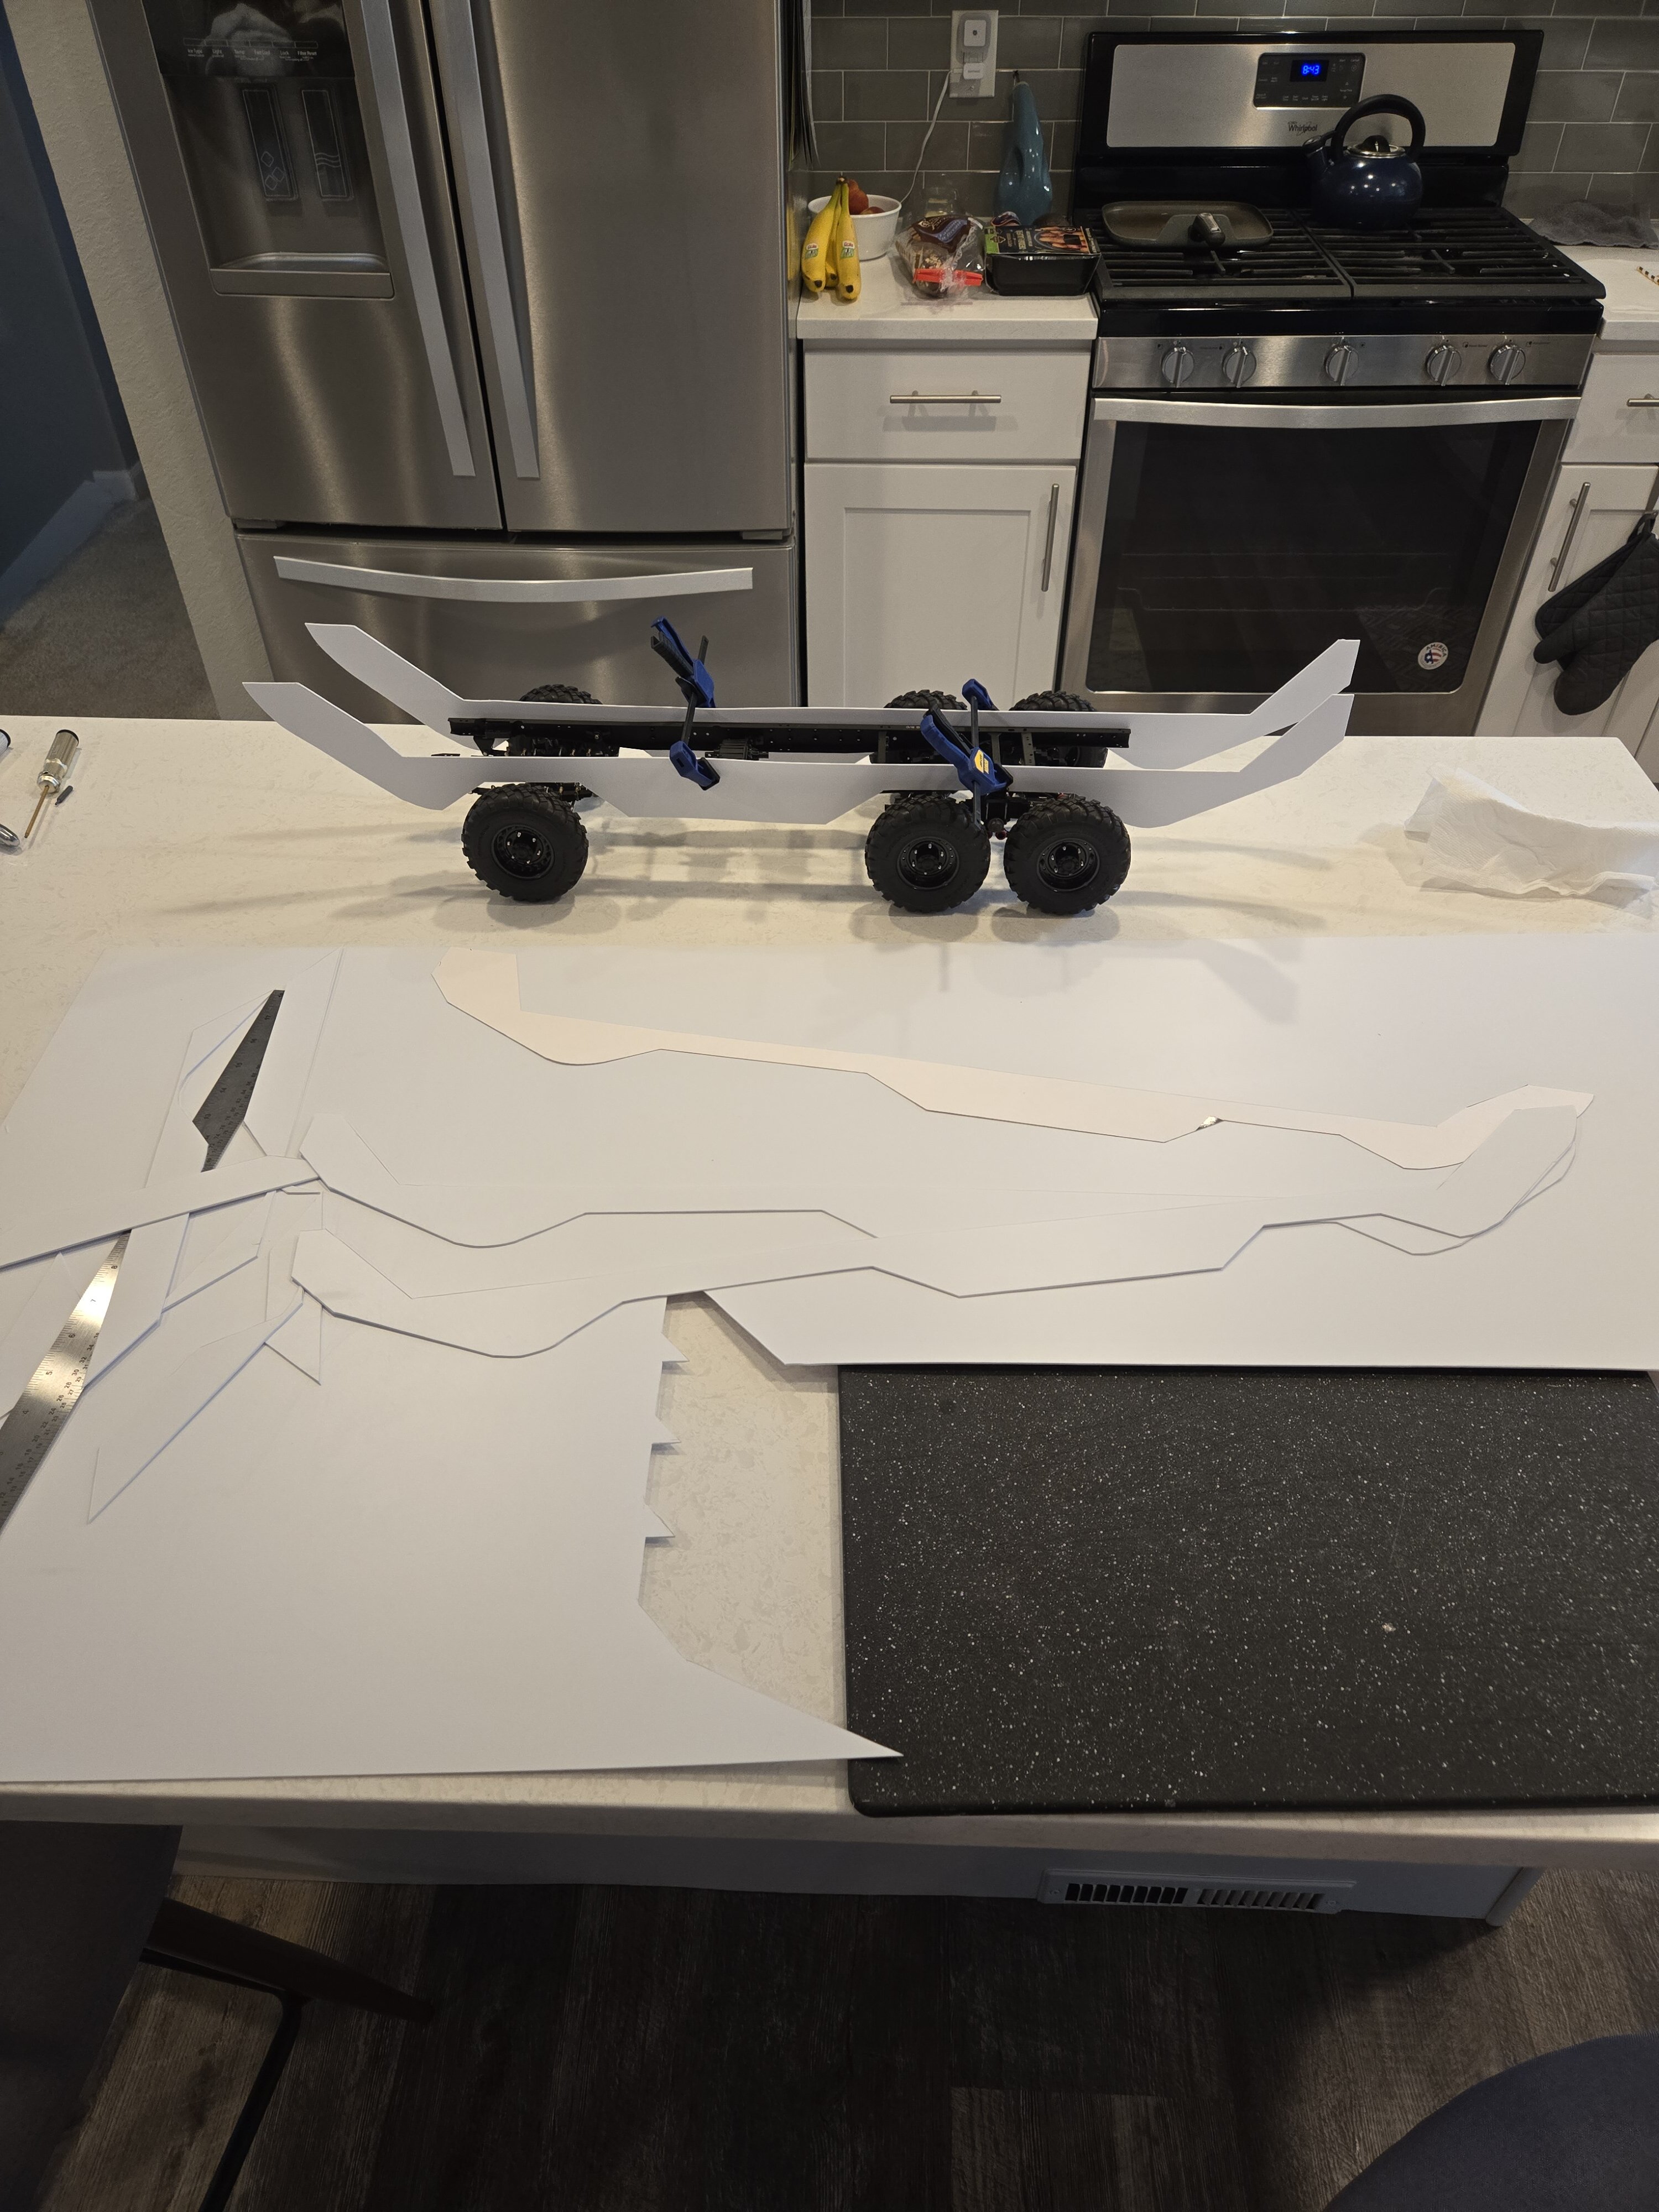
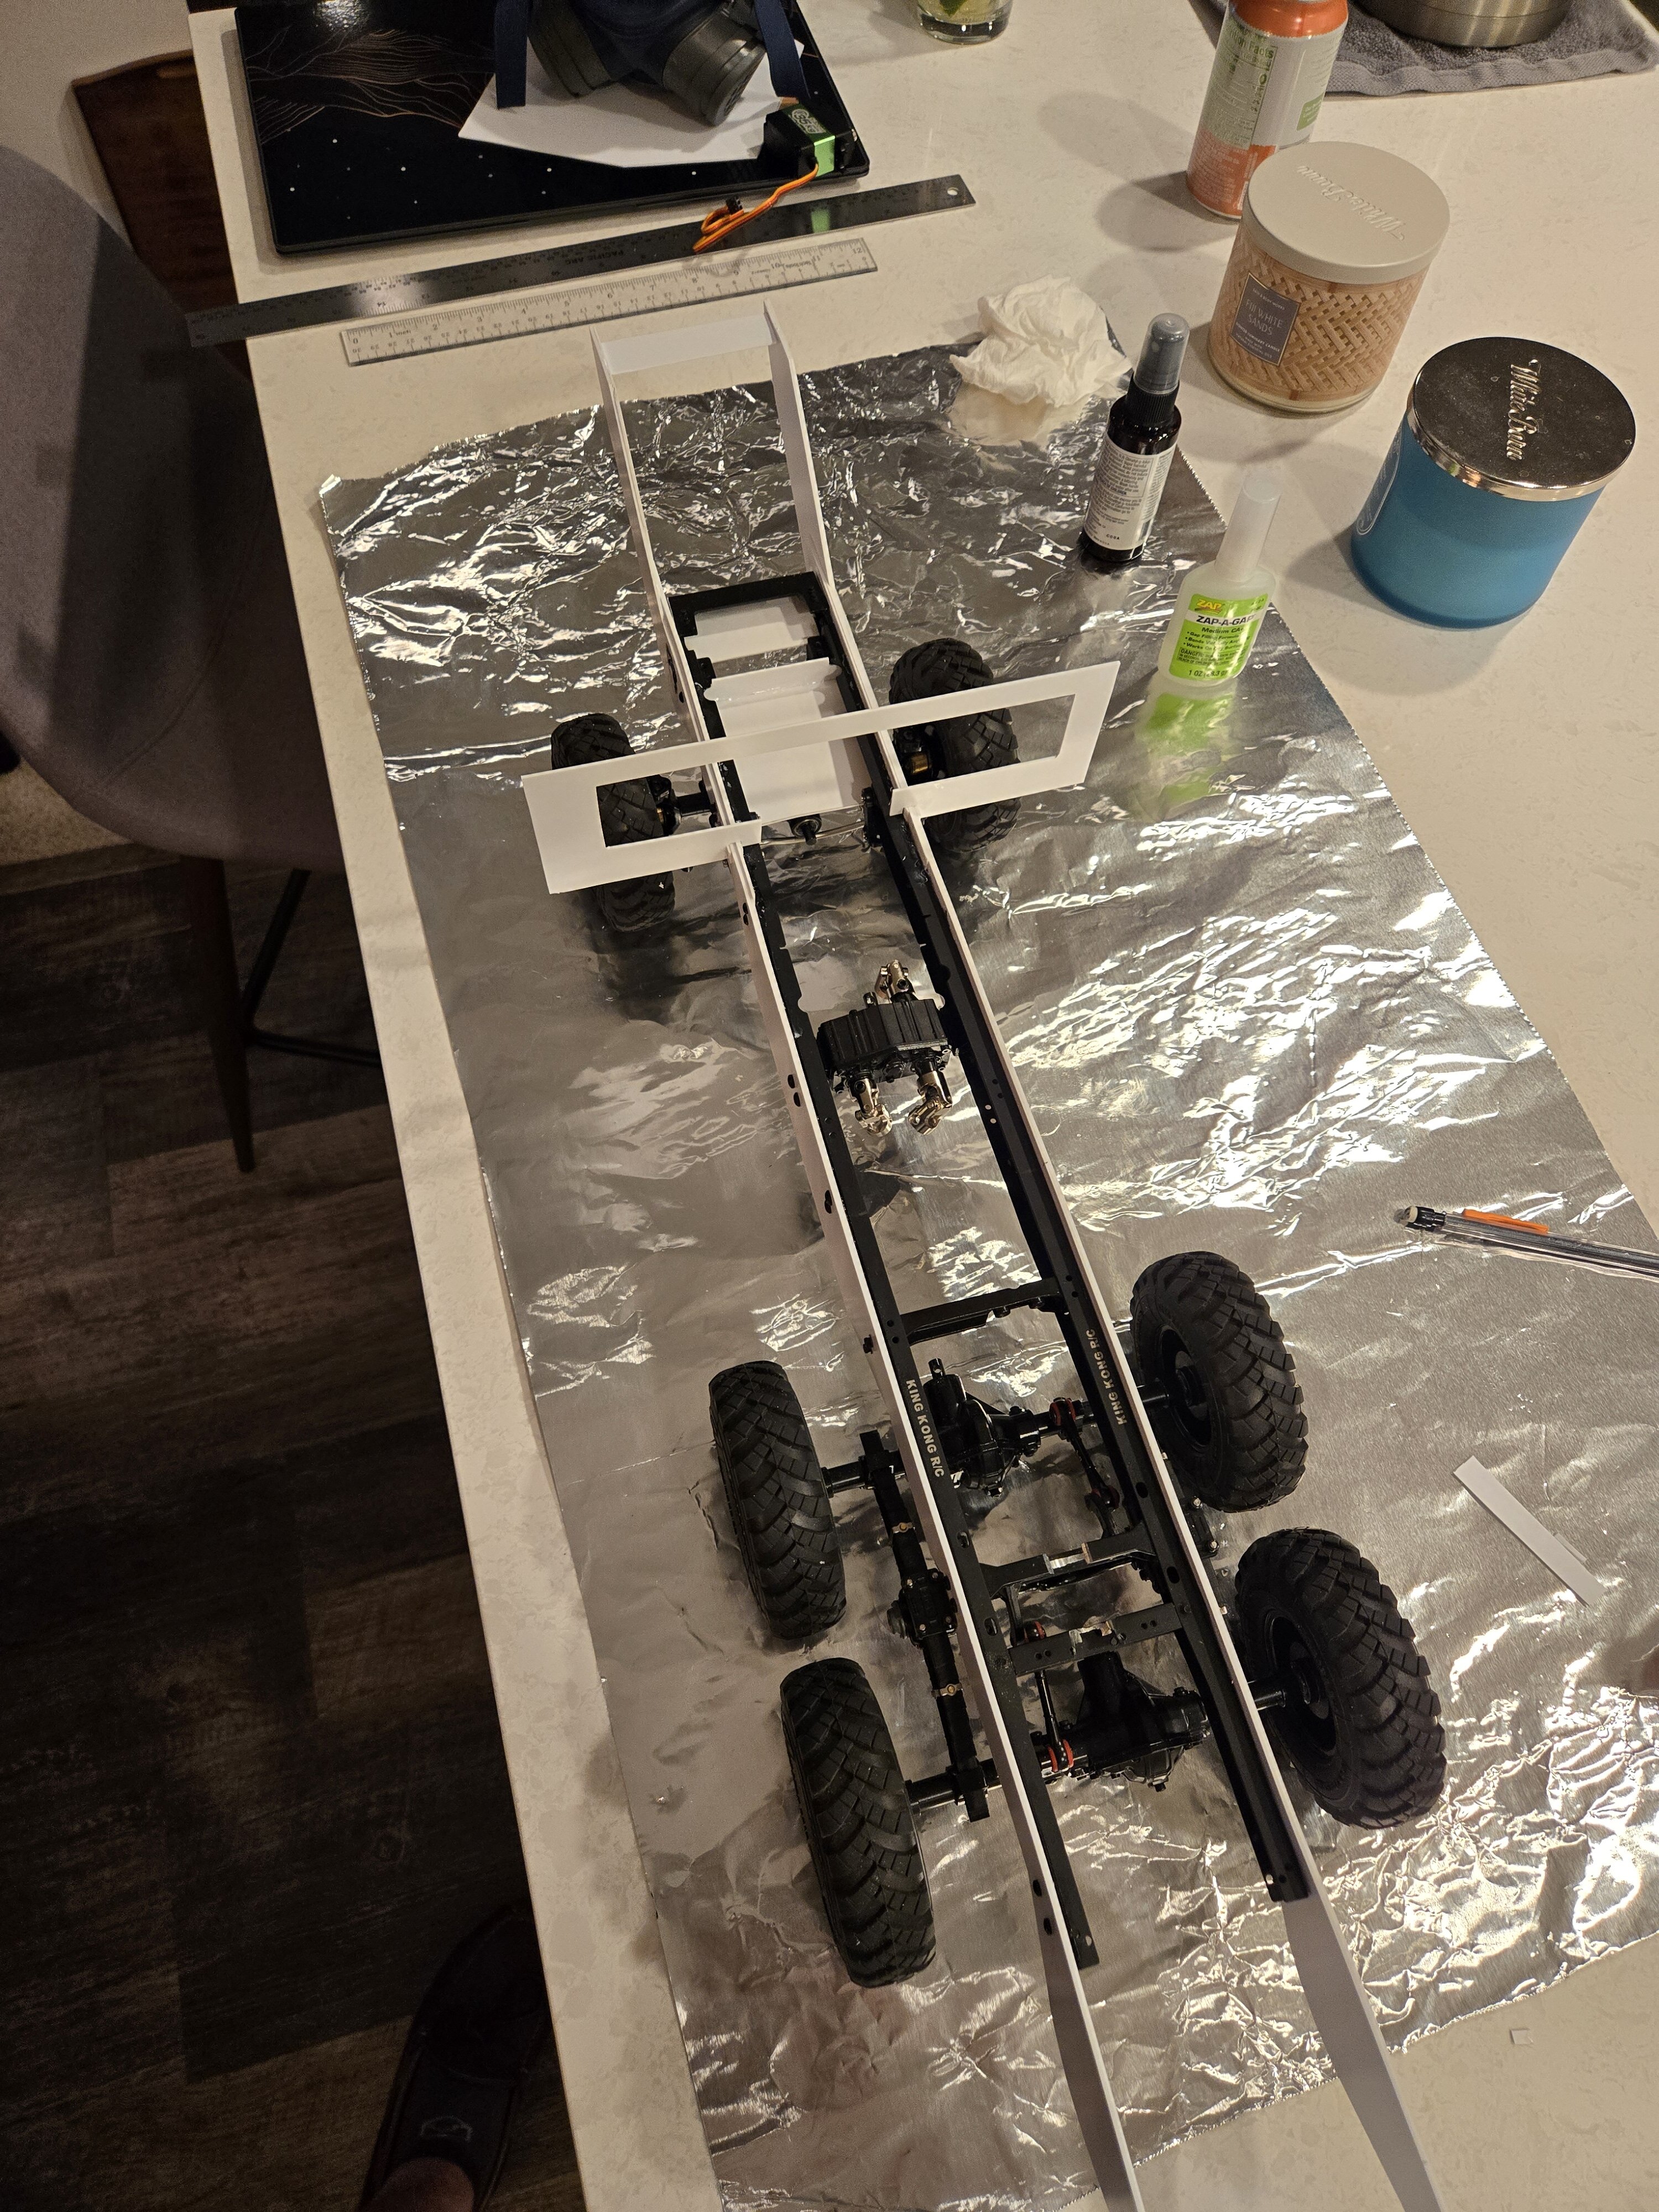
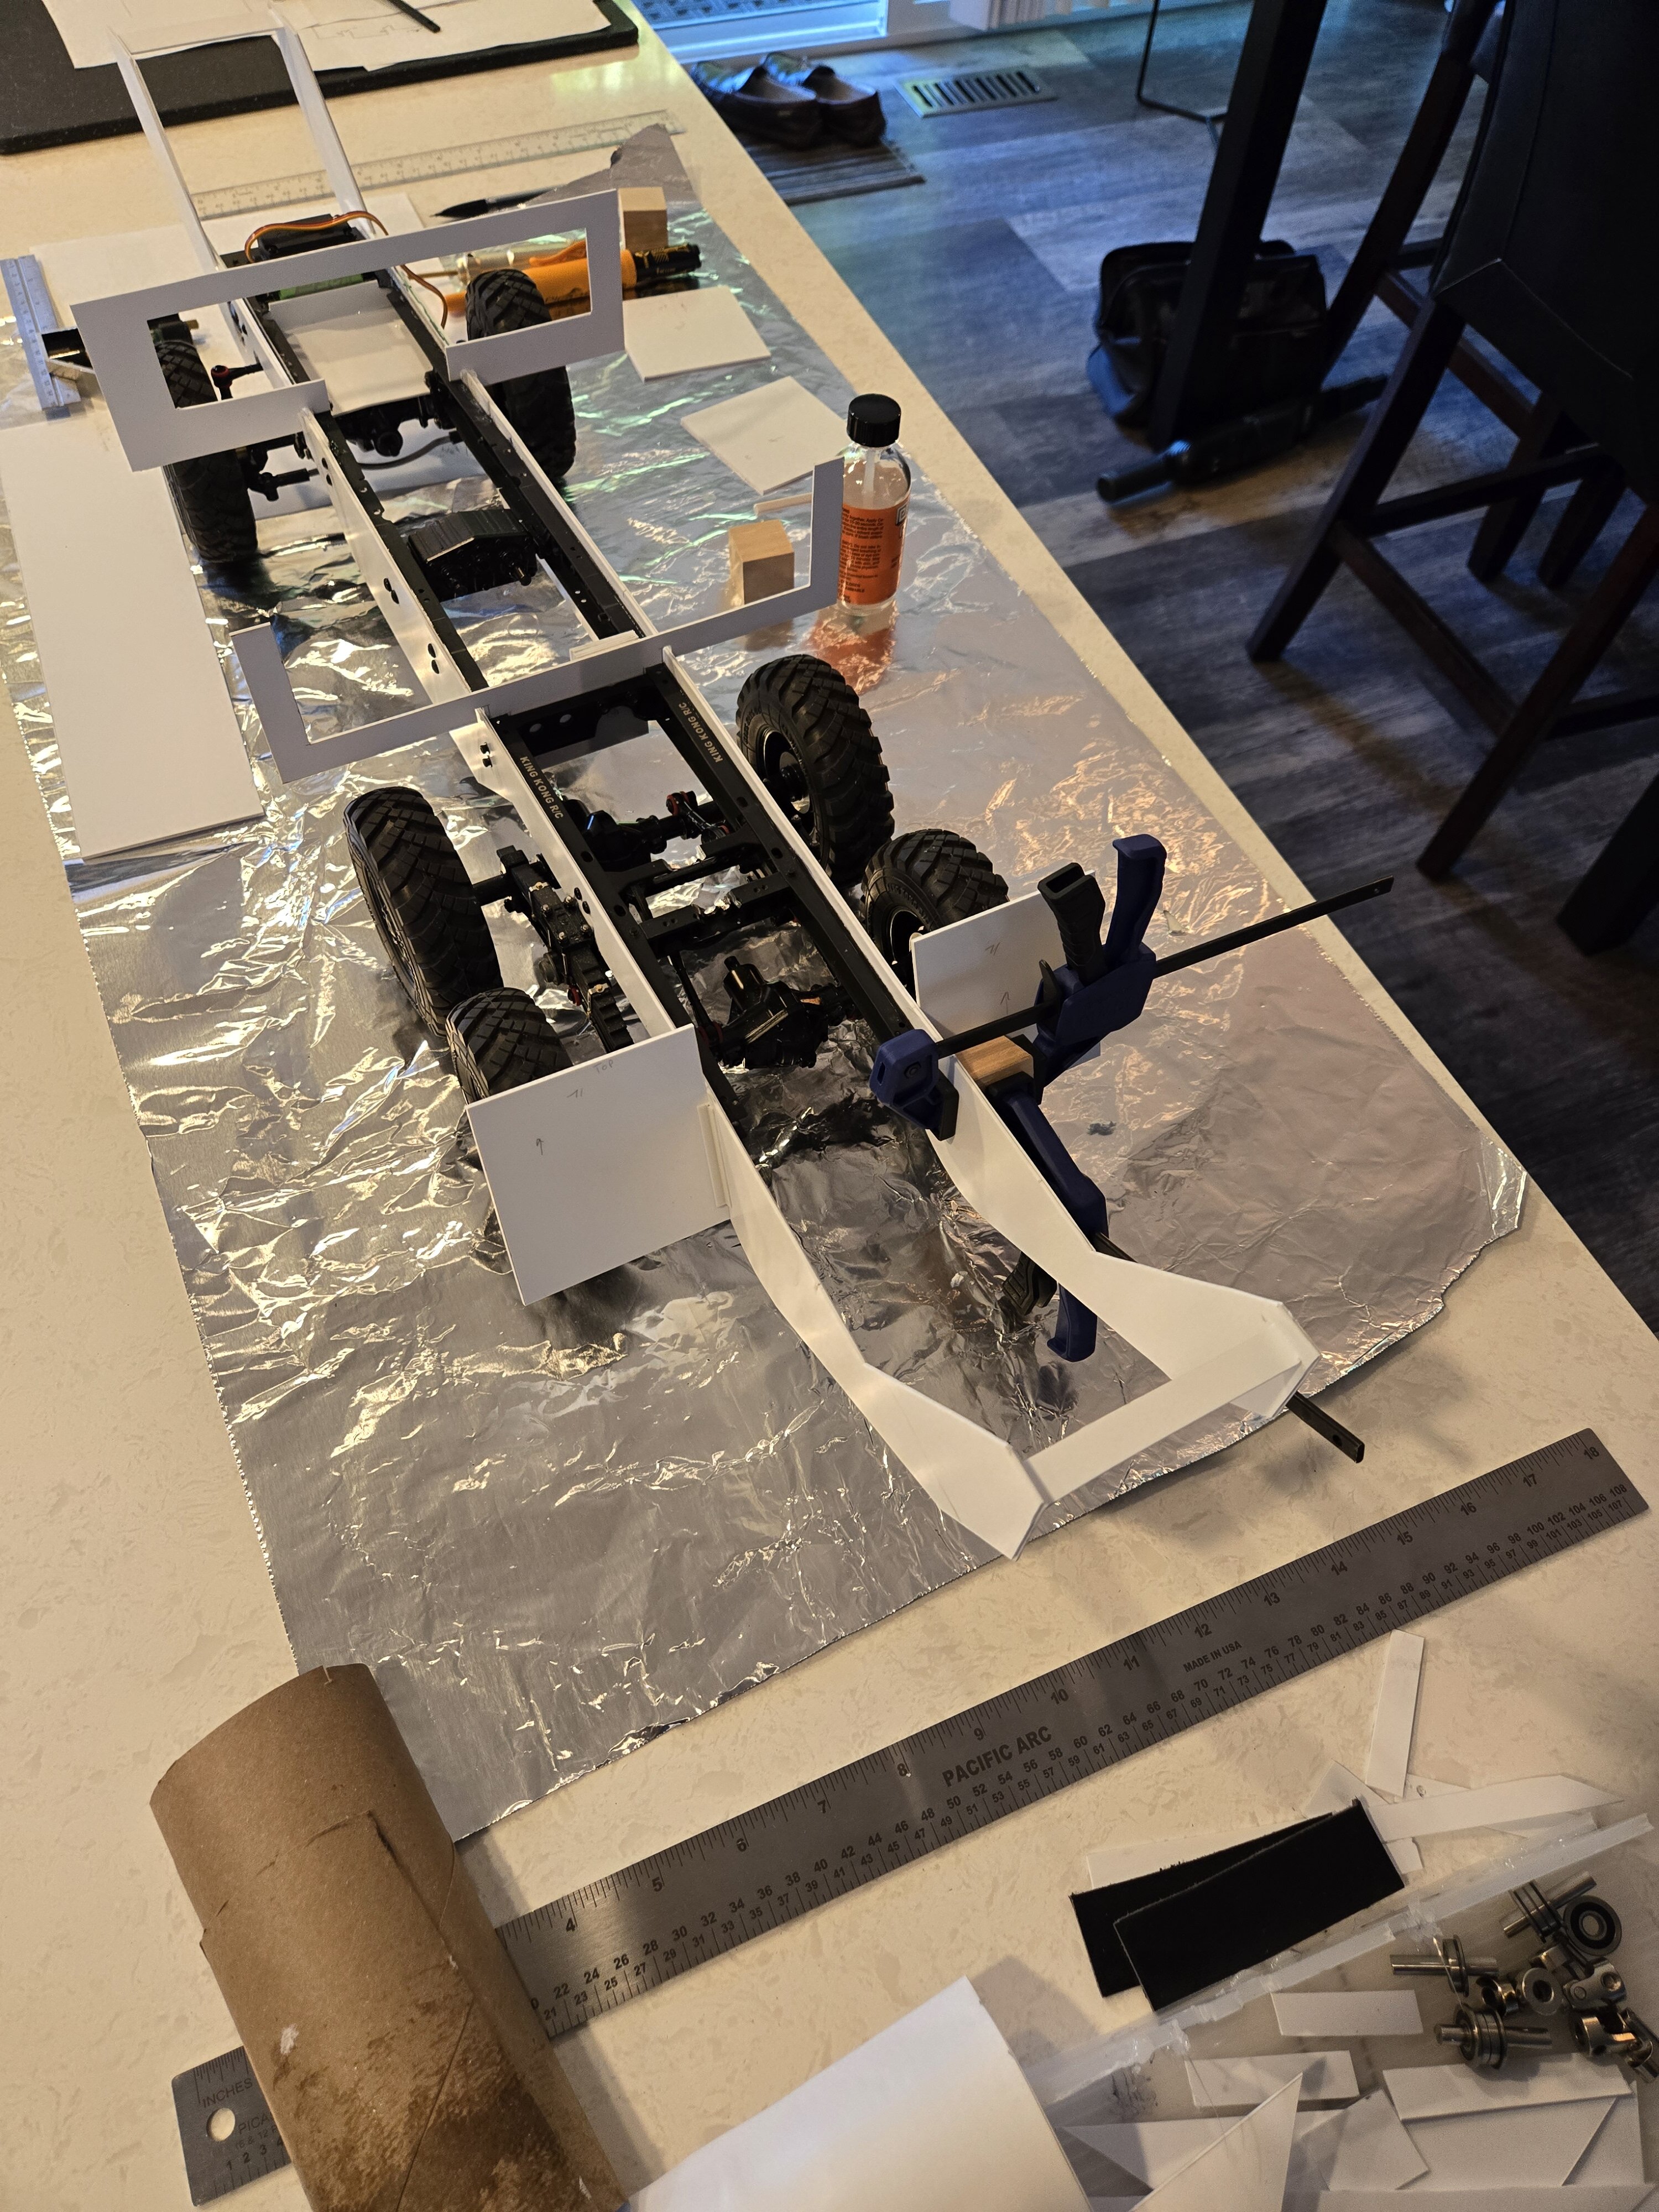
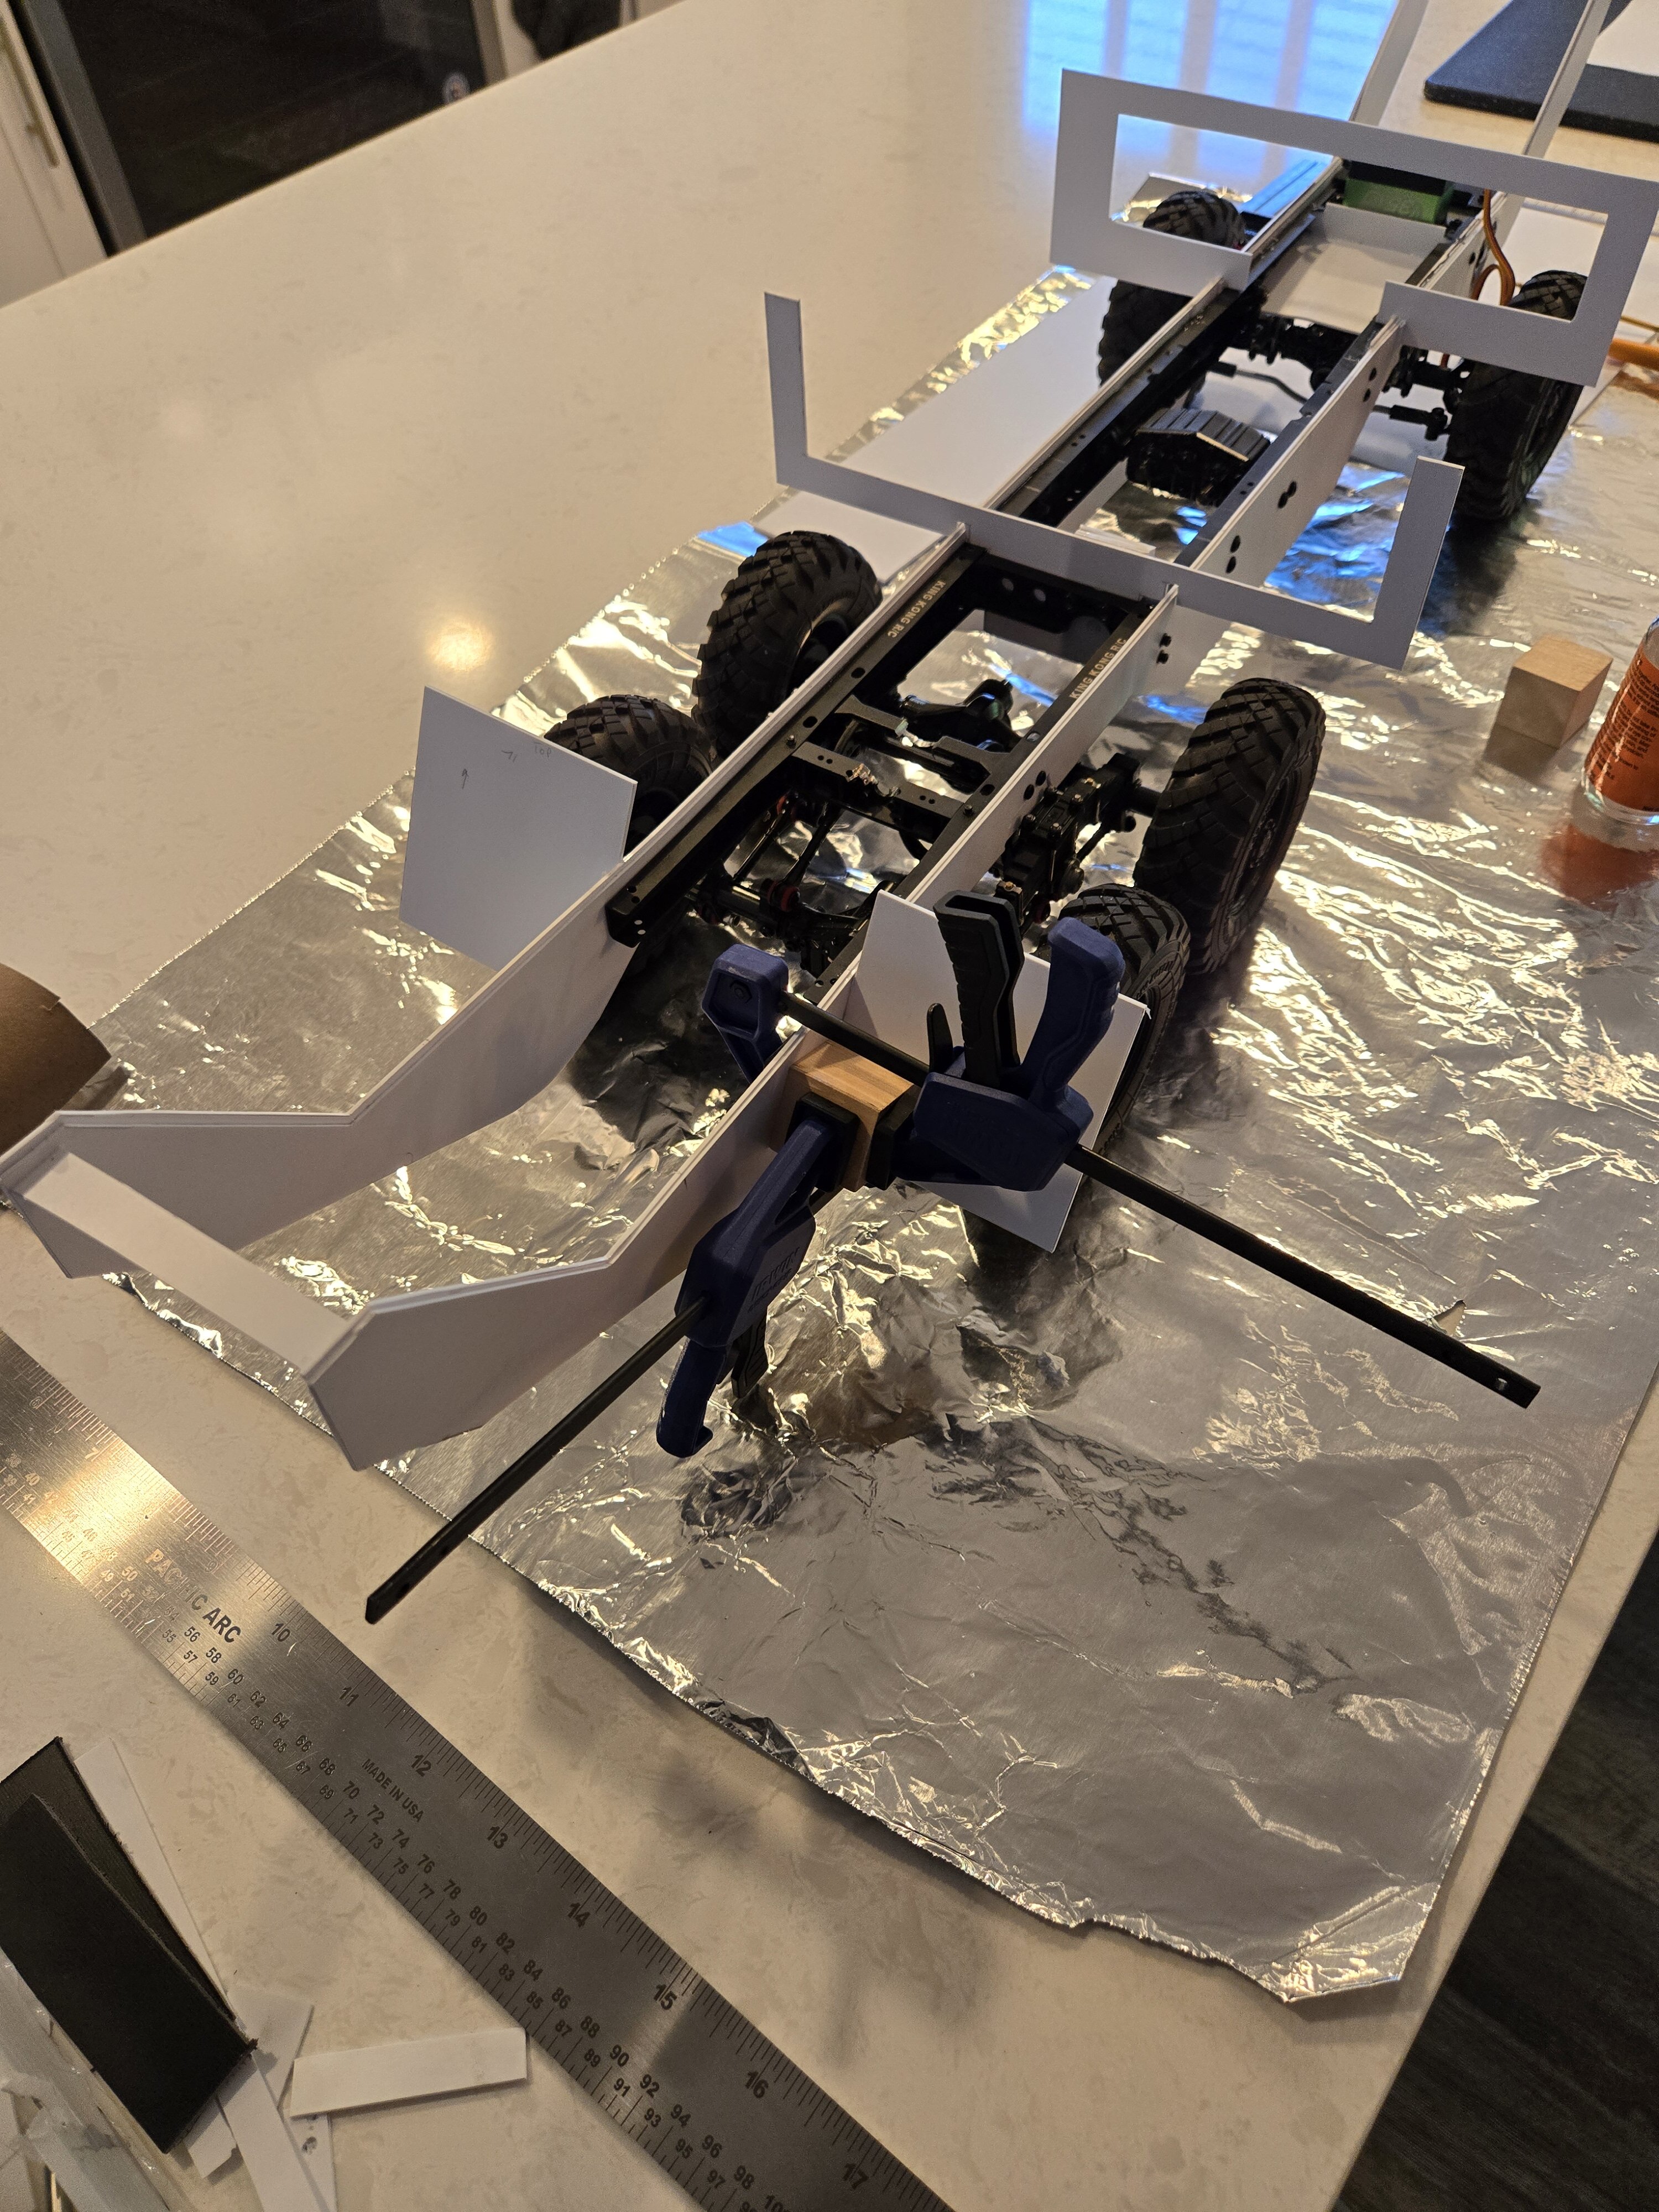
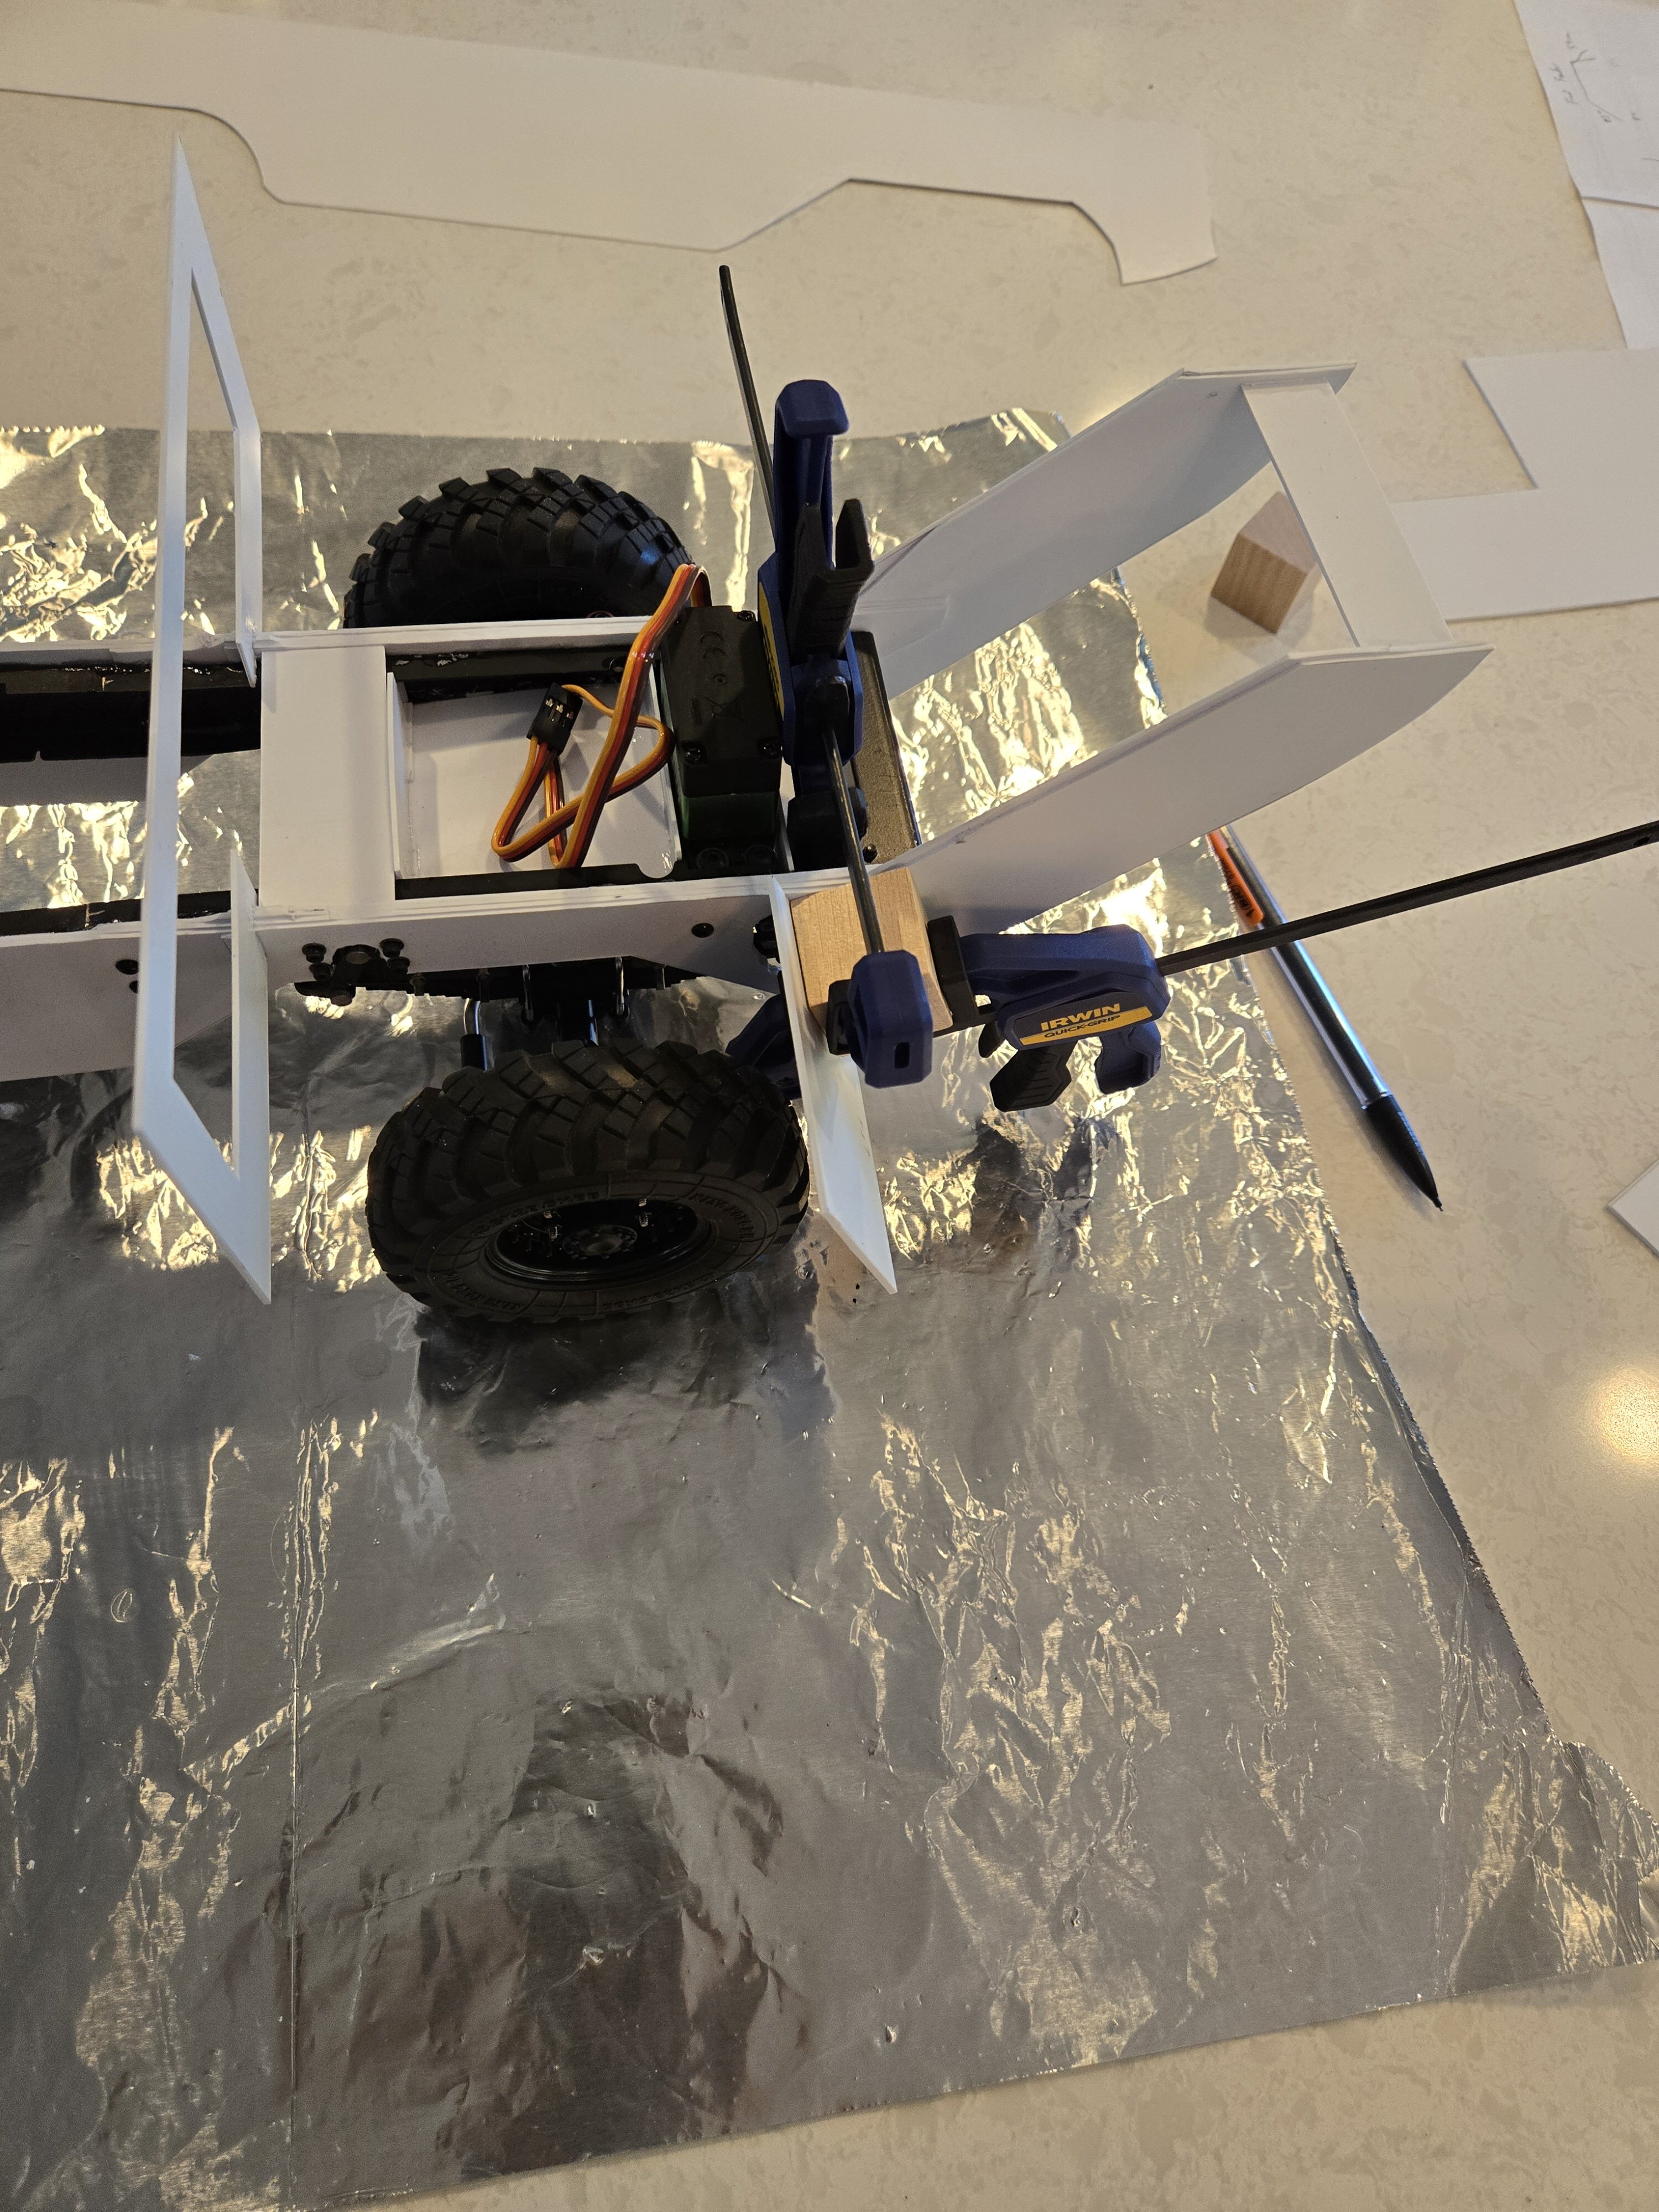
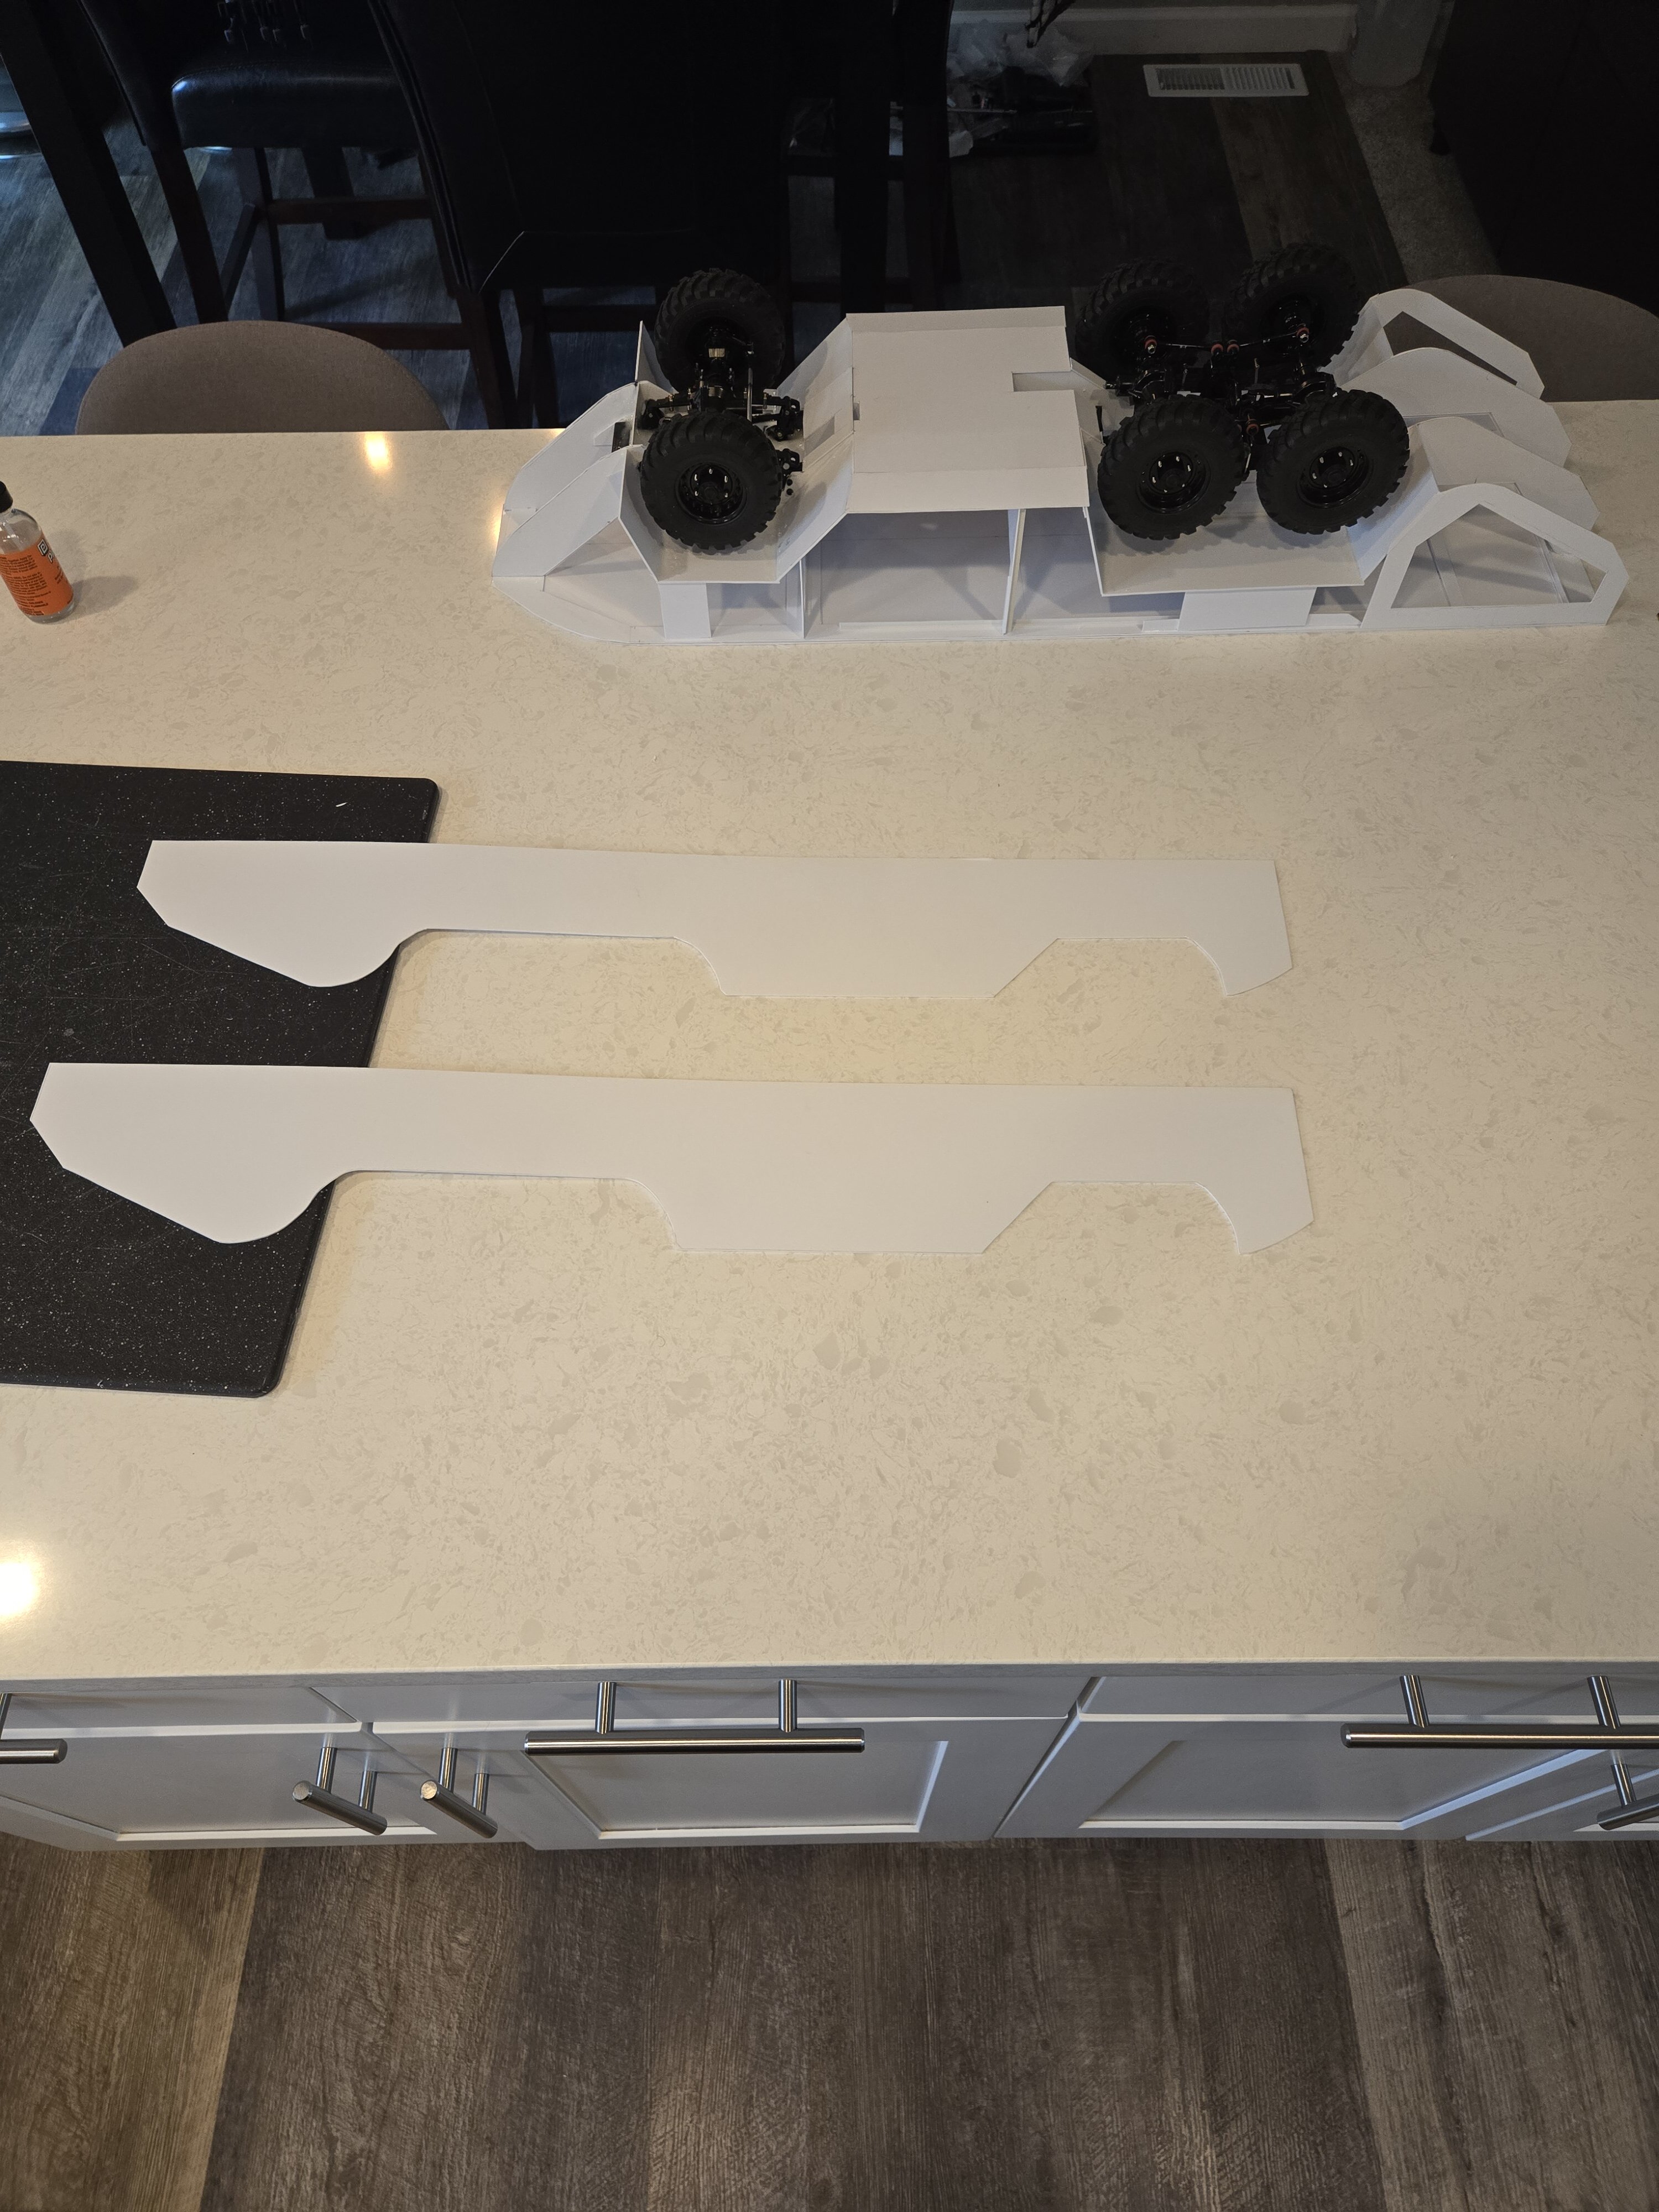
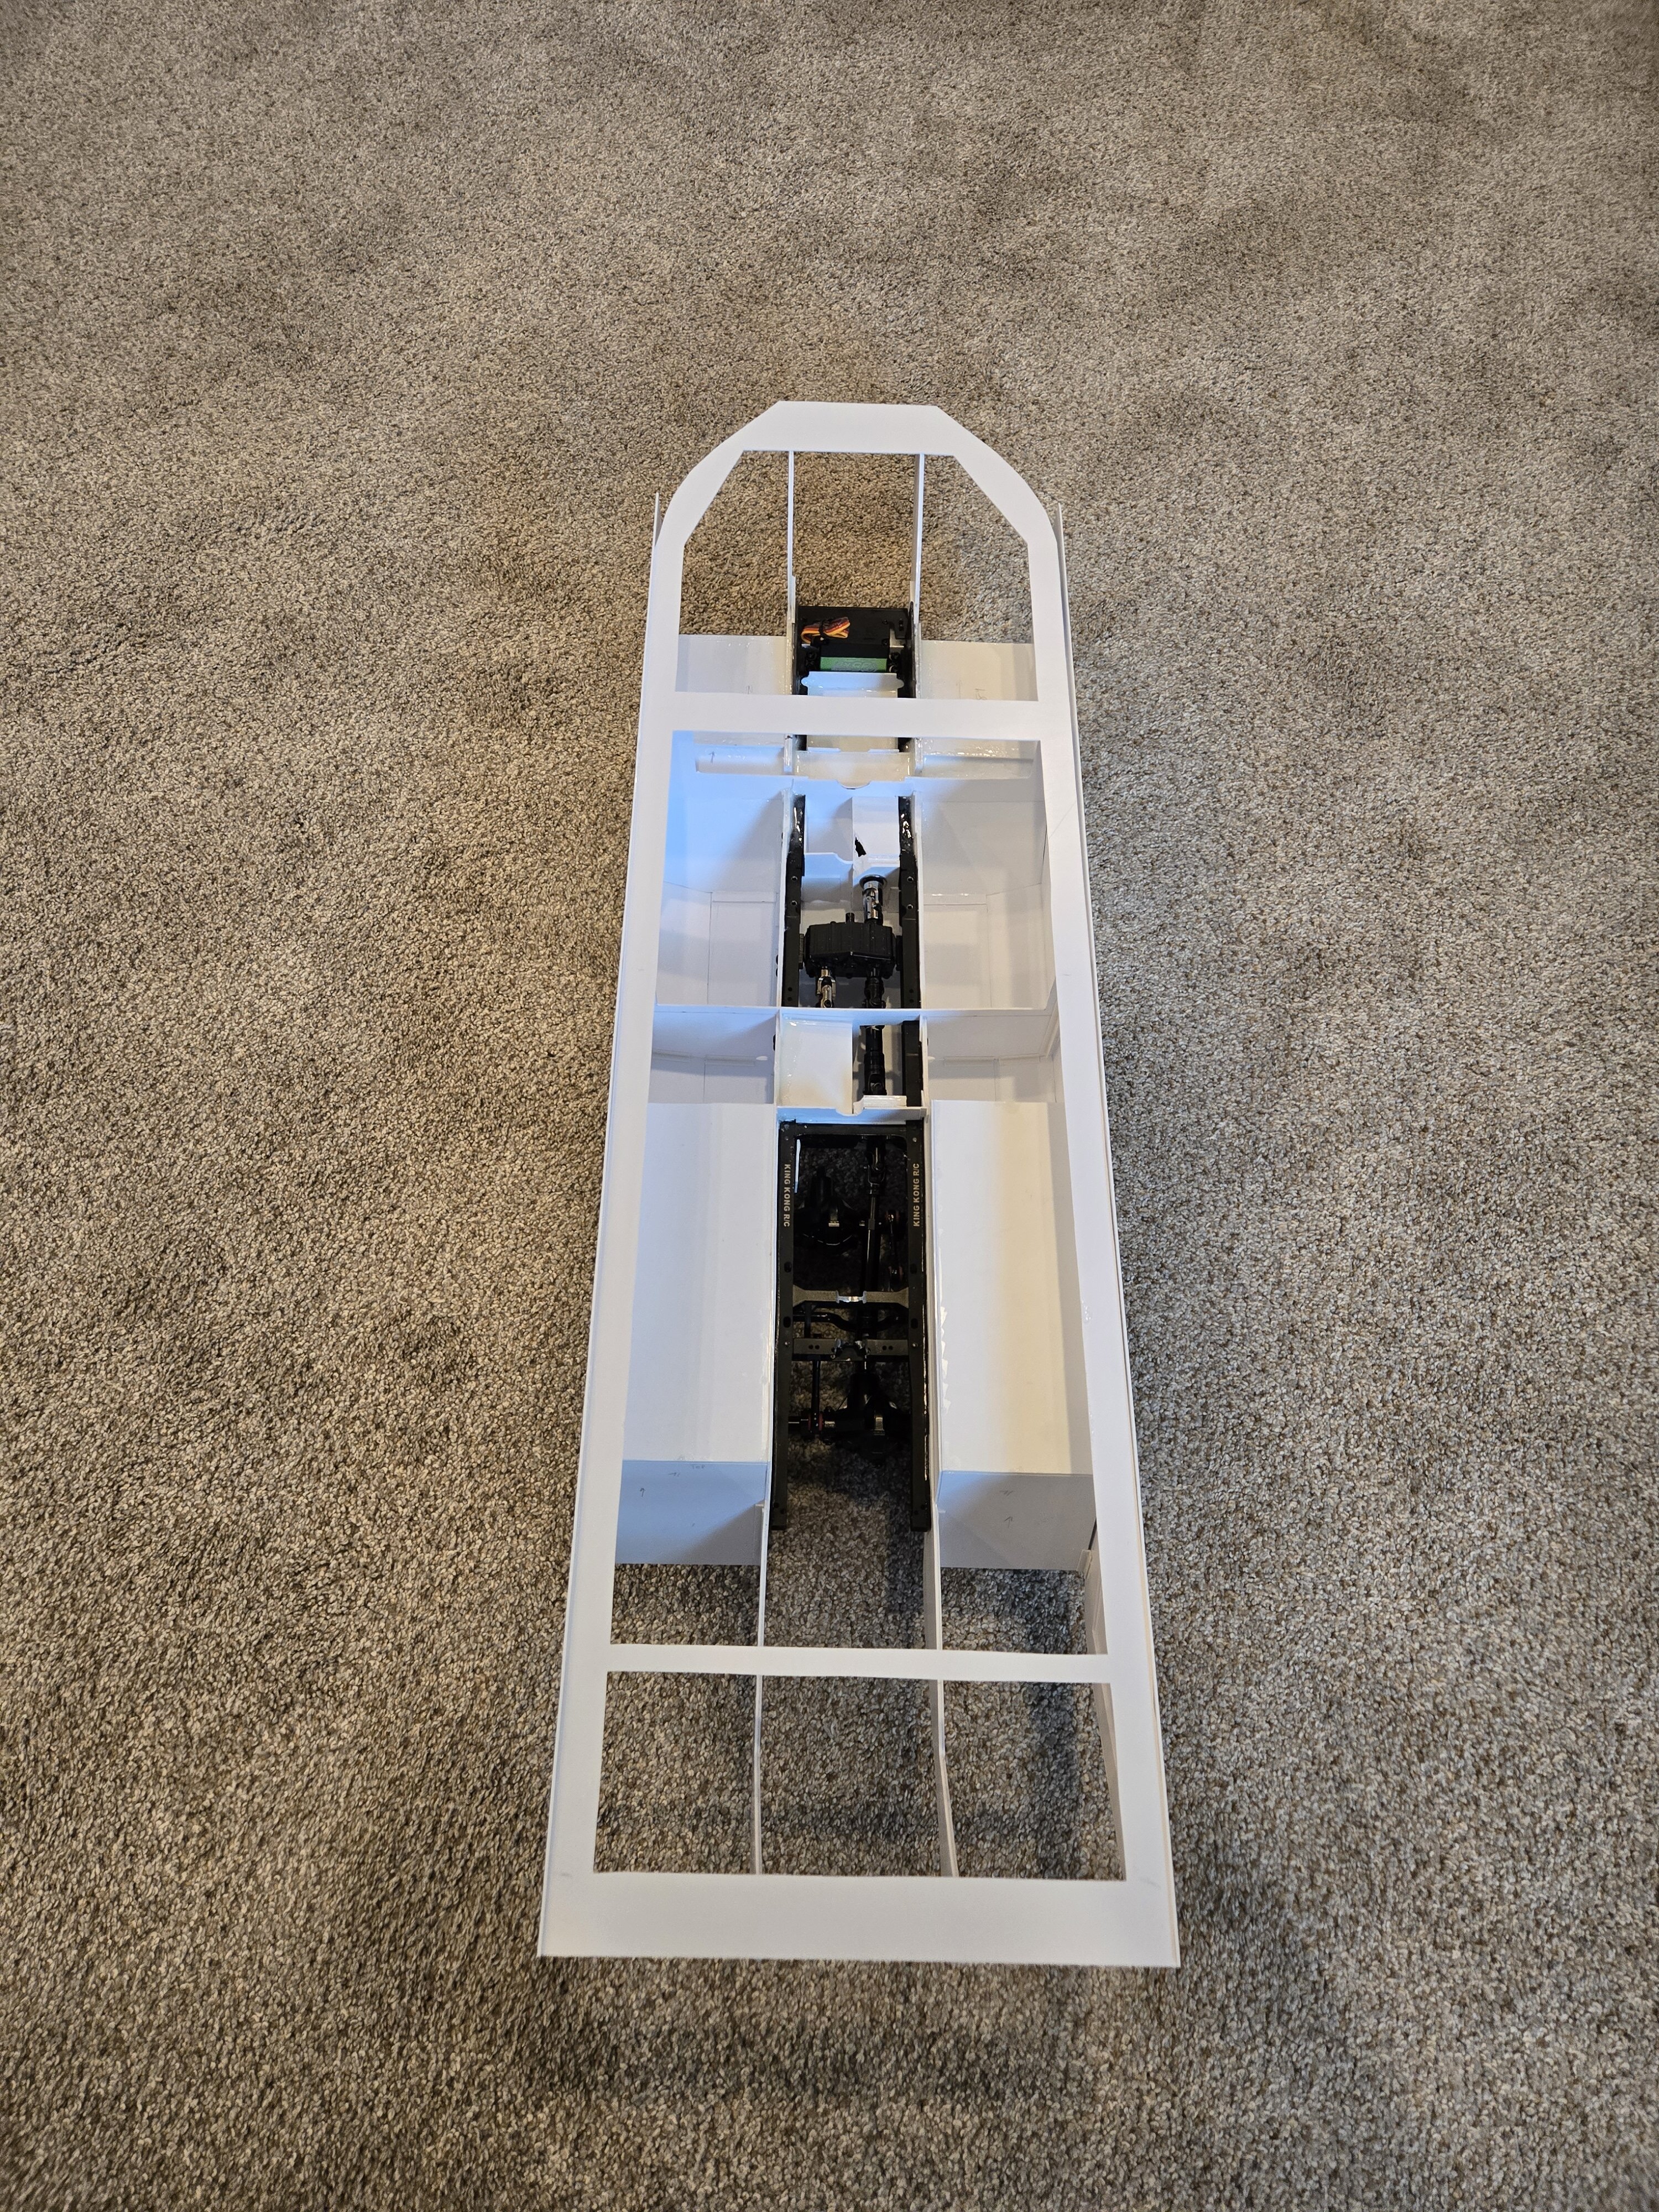
Once I had some idea of the size, I mocked it up with corrugated plastic and poster board to see if it really was possible. All along the way my biggest concern was how do I waterproof the 3 spinning driveshafts running from the transfer case to the axles, and where does everything fit in the hull. And also I wanted maintenance to be possible because I wanted to play with this thing so I needed to be able to remove everything.

The mock up seemed to be a success and it all seemed possible, though many questions remained. But it was good enough to commit to buying more materials. I decided to build it out of sheets of 1mm styrene so I ordered some giant sheets on ebay. The total length was around 31" so I needed the big stuff. Then I started drawing out the largest pieces and trying to think through the entire build so I could use the styrene as efficiently as possible. This was already going to be an expensive build without needing to buy more plastic. Then lots and lots of cutting. My hands hurt.
And I think that's where I'll leave it for this first post. It was a long build; only took a few weeks but I worked at a fever pitch trying to have it done by July. I have all the pics in an album but I'll add to this post as I have time. Definitely the most impressive thing I have ever built and I am quite proud of it!
Before I get too long winded, here's a picture of the mostly finished product:
Details:
6x6 King Kong CA30 chassis kit
Drive motor - Hobbywing Fusion Pro 2300kv (started with 1200kv SE, wanted more speed)
Prop Motor - 55t 550 brushed and Hobbywing 1040
Length - 31"
For some additional background, my wife and I are from the midwest and my wife in particular spent a good amount of time in the Wisconsin Dells as a kid. In the Dells there are two tour companies that run genuine ww2 ducks. Ours is modeled off the Original Wisconsin Ducks paint scheme.
Further background on the build, it was about mid May 2024 when my wife had the idea. We had a trip planned in July to fly back to the midwest to see family and friends and I thought it would be terrific to have the duck built and ready to take on the trip. That left me...about a month to plan and build an amphibious model from scratch. No sweat.
Also I had never built anything from scratch before.
There are a few other DUKW builds out there in various scales, but most focus on the scale details/looks. I really wanted to focus on the functionality because I wanted to play with this thing. So I happily sacrificed scale looks and exact proportions in favor of function. To that end I figured I needed a quality 6x6 chassis to start with and I found the King Kong CA30 chassis kit. This thing is quite high quality, about the right size for the dukw, and not tooooo expensive. The biggest downside is that it comes mostly prebuilt and you just assemble the frame rails.
The I started trying to figure out how to wrap a boat hull around this truck chassis. Unfortunately I don't have a 3d printer and I still haven't tried any computer modeling software, so I did all this on paper and in my head using various drawings and pictures I found online. I even did the thing where you print a giant picture from Paint on several sheets of paper then tape them together. It was like making posters in elementary school again!
Once I had some idea of the size, I mocked it up with corrugated plastic and poster board to see if it really was possible. All along the way my biggest concern was how do I waterproof the 3 spinning driveshafts running from the transfer case to the axles, and where does everything fit in the hull. And also I wanted maintenance to be possible because I wanted to play with this thing so I needed to be able to remove everything.
The mock up seemed to be a success and it all seemed possible, though many questions remained. But it was good enough to commit to buying more materials. I decided to build it out of sheets of 1mm styrene so I ordered some giant sheets on ebay. The total length was around 31" so I needed the big stuff. Then I started drawing out the largest pieces and trying to think through the entire build so I could use the styrene as efficiently as possible. This was already going to be an expensive build without needing to buy more plastic. Then lots and lots of cutting. My hands hurt.
And I think that's where I'll leave it for this first post. It was a long build; only took a few weeks but I worked at a fever pitch trying to have it done by July. I have all the pics in an album but I'll add to this post as I have time. Definitely the most impressive thing I have ever built and I am quite proud of it!


 please. Will it act more like "Jesus" or swim like a lead duck?