• Welcome to RCCrawler Forums.

    It looks like you're enjoying RCCrawler's Forums but haven't created an account yet. Why not take a minute to register for your own free account now? As a member you get free access to all of our forums and posts plus the ability to post your own messages, communicate directly with other members, and much more. Register now!

    Already a member? Login at the top of this page to stop seeing this message.

Mini Super

I've used the 3/16"x0.035" for links with M3 allthread before, but VERY quickly got tired of cutting it all, trying to match it all in length, then sitting there putting it together. I may have to try the thicker walled tube and grub screws at some point. Right now I am fighting with stainless, and not having a lot of luck. First I was using the wrong sized die, now the stainless killed the 6-32 die I just bought this morning, and I'm quickly running out of patience. Makes no sense because I just made 3/16" plain steel links for my SCX10, and the larger diameter material threaded VERY easily. Didn't think stainless was that much harder. Maybe I'll go pick up some alu tube, and give your method a whirl...at least I have all the stuff for that.
 
I don't have any fancy computers to design stuff, nor am I smart enough to use them anyway.

So I'm just hand sketching my potential chassis for this build.

The main "body" will be inside the links.

The two smaller pieces will be outside to give me double shear on all the mounts.

Also, it will move my shock attachment points outboard, similar to their current position on the mock up chassis .

Build it, try it, maybe build it again.... who knows.

NCM_1180.jpg
 
Very cool design, reminds me of the stingray chassis from UGC. Keep up the awesome work."thumbsup"
 
Cut the servo notch on the rear axle, here in the motel.

Neighbors didn't complain about the racket.... haha

Need to make the servo bracket next.

NCM_1181.jpg
 
Had a day off this week, so I went to work.....cut up a chassis.

Based on my rough sketch, with a few tweaks.

NCM_1184.jpg

Under 2 ounces with steel pivot balls, nuts, and aluminum screws.

Should shed a bit more with aluminum balls, which are already in the link ends, and some aluminum nuts.

NCM_1186.jpg
 
Nice fab work as always Merc. Can't wait to see it all put together.

I just got my shop space. All I need now are some parts.
 
Nice fab work as always Merc. Can't wait to see it all put together.

I just got my shop space. All I need now are some parts.

Thanks Chris.

A laboratory and parts...... that's how monsters are made.

Glad to see I am not the only one still hand drawing my chassis before construction :)

I use extremely expensive paper..... that way I don't feel stupid.

I love this thing! I wish I had the know how and the resources to do something like this.

Lancaster, PA?? We're not far apart. Sam Louis State Park would be halfway for us to meet, exchange ideas, and run some rigs on cool boulders.

I don't have any cool tools, just ideas I can't buy, and forgiveness towards myself when I hopelessly screw up... haha
 
Well, I've decided i suck at bending links after 5 beers.

On a good note, I've got some cool new parts to eyeball and measure.

Berg 4th gears and RCBros lockers.

The tang opening measures about 2mm.

Axial shaft's neck down area measures about 4mm.

Not sure why axial shafts couldn't be used here.

Cost vs OFNA shafts isn't significant, but some guys have axial shafts laying around.

NCM_1188.jpg

The MT tubes have a bearing in the end, near the locker.

Seems a smaller ID bearing, or bushing could be swapped in here to keep things in line, whichever universals you choose.

The Exceed tang measures about 3mm X 5mm.

NCM_1190.jpg
 
Damn, this thing just keeps looking better and better. Almost good enough to make me regret spending my mini super and 2.2 Pro budget on a 1:1 rig...almost. As usual, I'll be a day late and a dollar short, but learning a lot from you. Keep up the awesome work!
 
Thanks Chris.

A laboratory and parts...... that's how monsters are made.


I use extremely expensive paper..... that way I don't feel stupid.


Lancaster, PA?? We're not far apart. Sam Louis State Park would be halfway for us to meet, exchange ideas, and run some rigs on cool boulders.

I don't have any cool tools, just ideas I can't buy, and forgiveness towards myself when I hopelessly screw up... haha
Nah, Lancaster, SC. Quite a ways apart. Lol
 
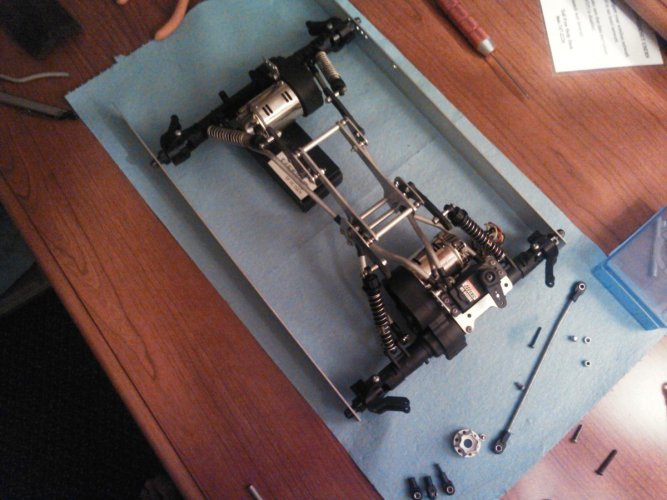
New chassis in place.

Some progress on the links.

Front uppers and lowers done.

Rear lowers done.

Rear uppers left for tomorrow.

NCM_1200.jpg

10.75" wheelbase for whatever reason.

Longer could be better, or shorter.... no clue, just picked a number.

Still building, for no other reason than to build it.

Lets see where it goes.

NCM_1201.jpg
 
I drool over your build. Just wow. And I'm concerned over shoe horning a tranny in and creating sway bars. Lol

It's all relative. I drool over many different builds for different reasons.

The fun part of this build is almost over, soon it will just be spending money.

Hubs, knuckles, unis, weights, electronics, $$$$,..... boring.
 
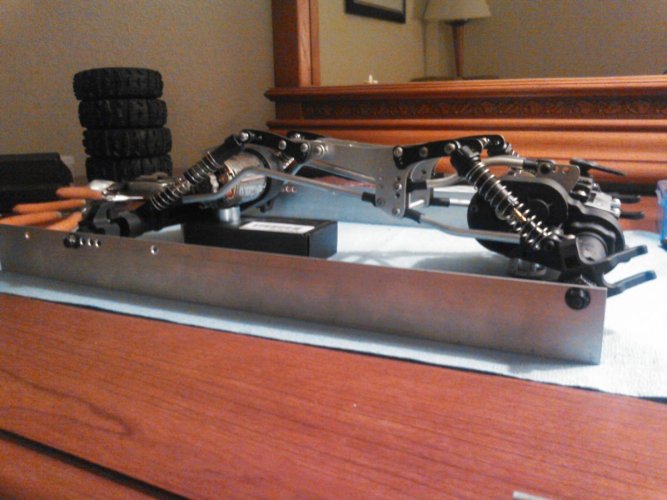
Full compression.

With no body, it may drive upside down, pretty cool.

NCM_1208.jpg

Approx ride height.

NCM_1210.jpg

Estimated full extension.

Time to build some shocks and get the rig to match the poser shots here.

NCM_1211.jpg
 
Your the shit Kevin! A one man show at this point!

I'm a bit jealous and Stoked!

As I finish project's, my bench is clearing off.. Keep up the Awesome progress.. I hope to be along soon!
 
I'm a believer that the vendors on this board offer great products and often at prices so reasonable, you can't make the stuff yourself.

Problem is, I've got no Jeepin Doug spring cups, and didn't want to order some, and then wait.

I spent more time making these cups than it was worth; but I can at least get shocks put together and move forward with the build.

NCM_1213.jpg

Some nylon spacers from the local hardware store and some dremel work.

I made them to pass over the link end completely to reduce spring preload at the low ride height I'm shooting for.

I drilled out my cups on my sportsman rig a long time ago, and thought why not do the same here, right from the beginning.

NCM_1214.jpg
 
Back
Top