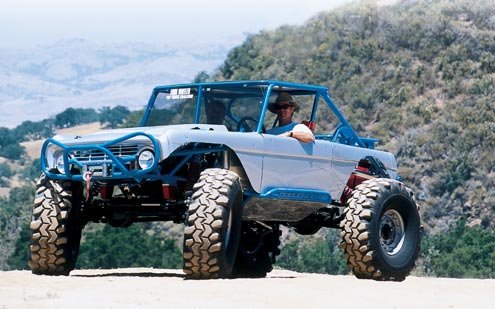
Many years ago I spotted a rig on the internet that I fell in love with upon first sight; it was John Reynold's Fat City Bronco. Then I saw it in the 2002 Four Wheeler Magazine Top Truck Challenge and ever since I’ve wanted to build something similar for the day when I enter TTC. That day is not going to be anytime real soon so I decided that I would do the next best thing, build a scale version of my TTC Bronco.
The name of this rig is Guido. 8)
Even though JR’s Bronco is the inspiration for what I want to build there are some things I would do different on my 1:1, you will see those things come up in this scale build.
I always work better under pressure so I decided that the Montana scale comp put on by Unimoger would be the perfect deadline to shoot for. As of this time I have 16 days until I leave. :shock: I actually started this a few weeks ago so I will try to bring this up to speed fairly quickly.
Pictures:
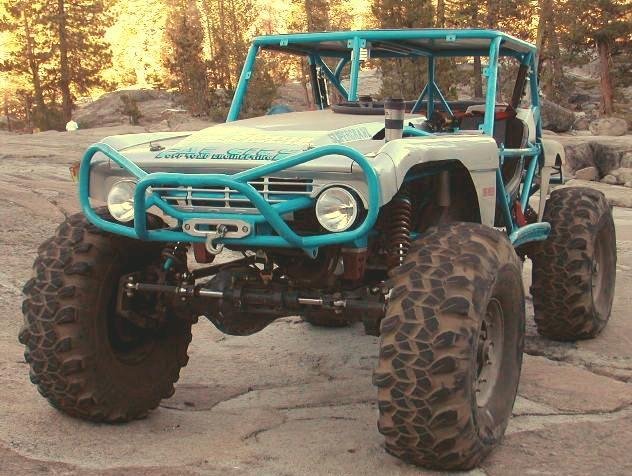
First is the inspiration for this build:
Let’s see how close it ends up. Thanks for reading and I hope yall like it.8)
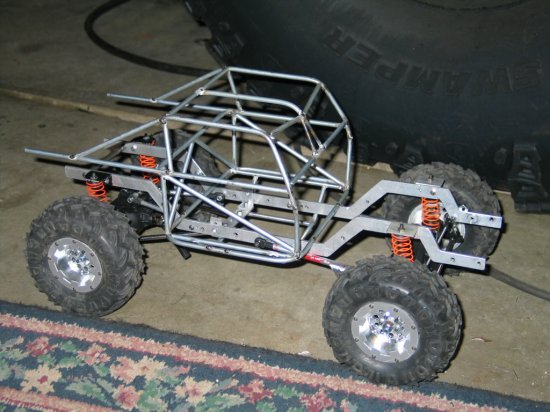
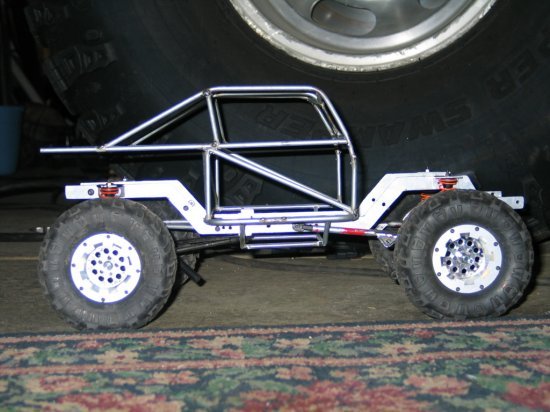
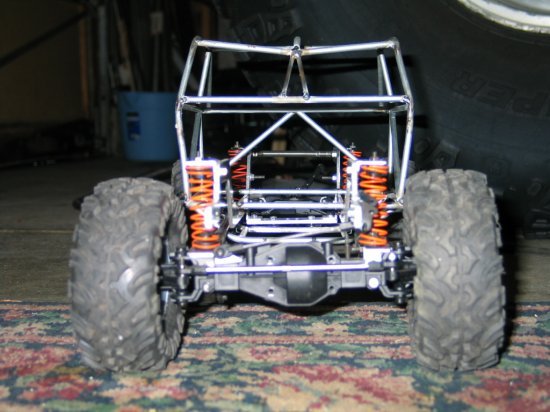
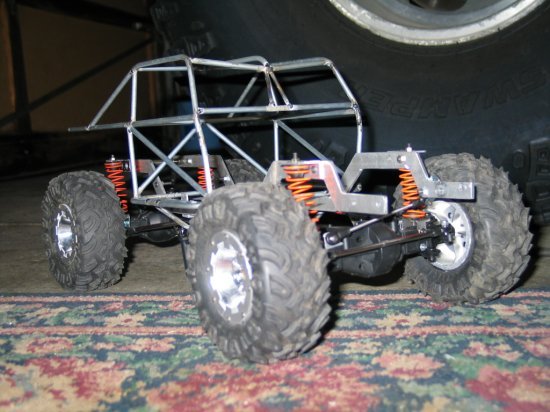
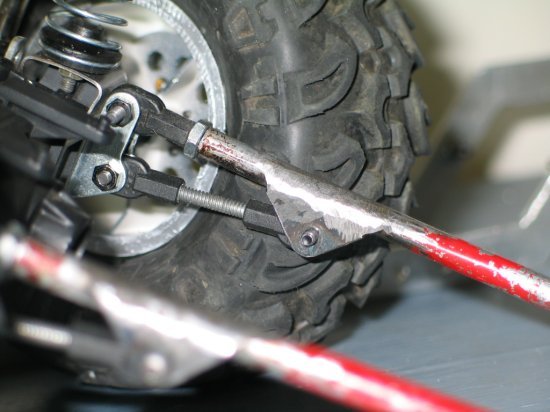
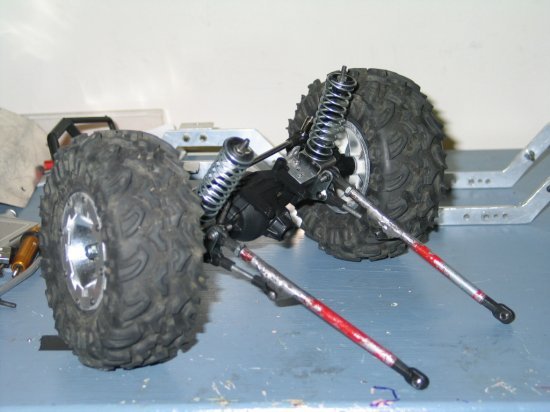
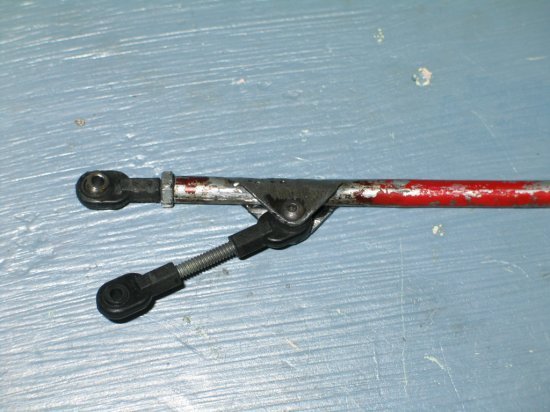
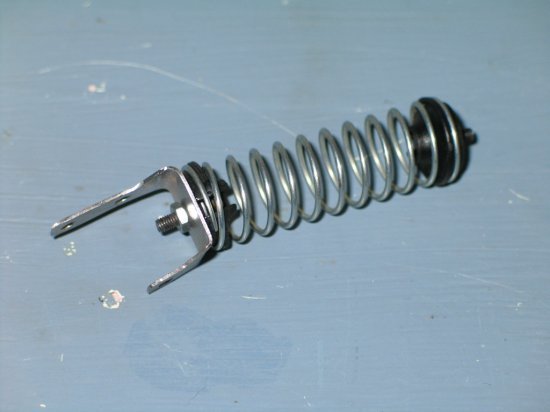
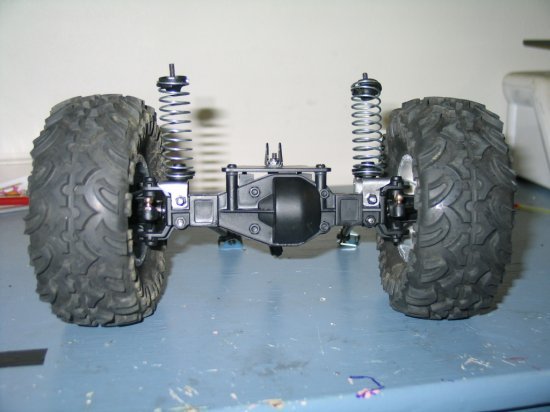
First off is the suspension design. I am not a big fan of coilovers, the reason being that if you break a link and the axle rotates you can toast a coilover and then yer done. With coil springs you can repair the link and continue on the trail. This has happened on the trail before with my friends and in TTC it is important to be able to repair things quickly. Another thing I like about coil springs is that if they are captured on both ends they provide some resistance to the axle droop, coilovers do not. Plus, it's been a long time since I built a coil spring suspension RC and I just love the way they look and the realistic performance.
For these reasons I decided on coil spring suspension front and rear. Now, on most TLT rigs I have seen people mount the coil springs under the frame because that is where the holes in the axle housing are to mount the coil. On my 1:1 I would have the coils on the outside of the frame for two reasons. Putting them out closer to the tire gives you better stability and you can run a longer coil spring which means a softer spring rate for the same amount of travel.
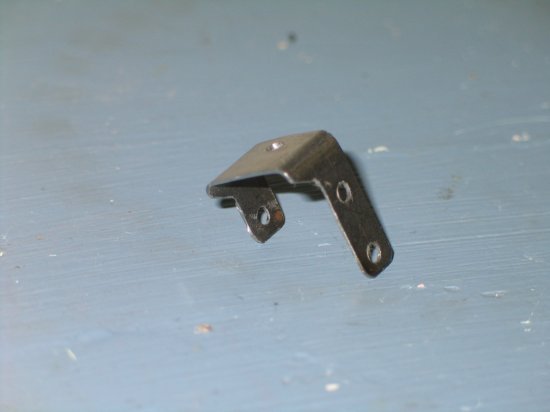
To get the springs out further on the axle I made these mounts out of 22ga steel. These move the springs out enough to run them outside of the frame rails.
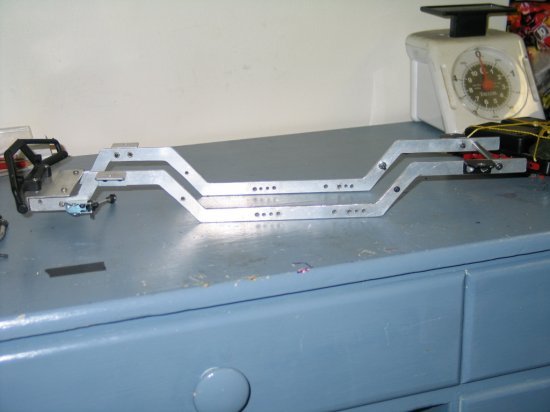
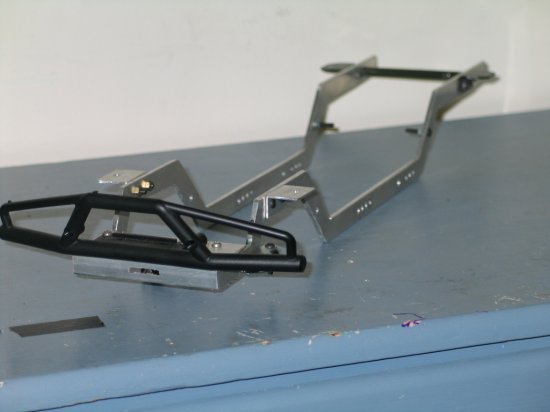
That brings us to another point. Since I would be building the 1:1 in my garage I would start with a ladder frame rather than building a full tube chassis. I say this only because it would be easier for me to build with a known starting point rather than starting from nothing.
I chose to use 1/8” thick aluminum for the frame rails, I would rather use ¼” but it is hard to find at the hardware store. I had this particular frame laying around from another Bronco build I started last year so I decided to save time by using it. There's alot of extra holes in it but I'll have to live with that for now. After Montana I'll cut out a new frame since I doubt I'll have enough time before. :lol:
Index:
Phase 2 start 2008
ready for chassis paint
Phase 2 finished for MSD Scale Nats
Phase 3 start 2010
steering servo and engine mount fab
chassis painted
Phase 3 finished for MSD Scale Nats
Phase 4 start 2012
Custom AR60/10 axle fab start
new interior fab start
machine work on axles and steering box fab
front suspension and steering fab
scale calculations and interior assembly
Electronics waterproofing
front AR60/10 axle finished
Phase 4 finished for NWSC
2013 Update Start (Back in black and green)
The name of this rig is Guido. 8)
Even though JR’s Bronco is the inspiration for what I want to build there are some things I would do different on my 1:1, you will see those things come up in this scale build.
I always work better under pressure so I decided that the Montana scale comp put on by Unimoger would be the perfect deadline to shoot for. As of this time I have 16 days until I leave. :shock: I actually started this a few weeks ago so I will try to bring this up to speed fairly quickly.
Pictures:
First is the inspiration for this build:
Let’s see how close it ends up. Thanks for reading and I hope yall like it.8)
First off is the suspension design. I am not a big fan of coilovers, the reason being that if you break a link and the axle rotates you can toast a coilover and then yer done. With coil springs you can repair the link and continue on the trail. This has happened on the trail before with my friends and in TTC it is important to be able to repair things quickly. Another thing I like about coil springs is that if they are captured on both ends they provide some resistance to the axle droop, coilovers do not. Plus, it's been a long time since I built a coil spring suspension RC and I just love the way they look and the realistic performance.
For these reasons I decided on coil spring suspension front and rear. Now, on most TLT rigs I have seen people mount the coil springs under the frame because that is where the holes in the axle housing are to mount the coil. On my 1:1 I would have the coils on the outside of the frame for two reasons. Putting them out closer to the tire gives you better stability and you can run a longer coil spring which means a softer spring rate for the same amount of travel.
To get the springs out further on the axle I made these mounts out of 22ga steel. These move the springs out enough to run them outside of the frame rails.
That brings us to another point. Since I would be building the 1:1 in my garage I would start with a ladder frame rather than building a full tube chassis. I say this only because it would be easier for me to build with a known starting point rather than starting from nothing.
I chose to use 1/8” thick aluminum for the frame rails, I would rather use ¼” but it is hard to find at the hardware store. I had this particular frame laying around from another Bronco build I started last year so I decided to save time by using it. There's alot of extra holes in it but I'll have to live with that for now. After Montana I'll cut out a new frame since I doubt I'll have enough time before. :lol:
Index:
Phase 2 start 2008
ready for chassis paint
Phase 2 finished for MSD Scale Nats
Phase 3 start 2010
steering servo and engine mount fab
chassis painted
Phase 3 finished for MSD Scale Nats
Phase 4 start 2012
Custom AR60/10 axle fab start
new interior fab start
machine work on axles and steering box fab
front suspension and steering fab
scale calculations and interior assembly
Electronics waterproofing
front AR60/10 axle finished
Phase 4 finished for NWSC
2013 Update Start (Back in black and green)
Attachments
-
 931large+1973_ford_bronco+front_side_view.jpg39.7 KB · Views: 15,184
 -
 DSCN2079_A.jpg64.6 KB · Views: 12,677
 -
 L0jtz4dvrKASPBDWaAbPv4GWDHQy-dwO0300_R.JPG69.3 KB · Views: 12,293
 -
 189_8943_R.jpg18.5 KB · Views: 12,117
 -
 189_8945_R.jpg23.6 KB · Views: 12,097
 -
 189_8946_R.jpg35.9 KB · Views: 12,132
 -
 189_8948_R.jpg44.4 KB · Views: 12,069
 -
 189_8951_R.jpg28.6 KB · Views: 11,936
 -
 189_8950_R.jpg23 KB · Views: 11,972
Last edited: