• Welcome to RCCrawler Forums.

    It looks like you're enjoying RCCrawler's Forums but haven't created an account yet. Why not take a minute to register for your own free account now? As a member you get free access to all of our forums and posts plus the ability to post your own messages, communicate directly with other members, and much more. Register now!

    Already a member? Login at the top of this page to stop seeing this message.

VW Bug Body Paint Schemes

Krawlin

Quarry Creeper
Joined
Jul 21, 2007
Messages
271
Location
Sierra Vista, Arizona
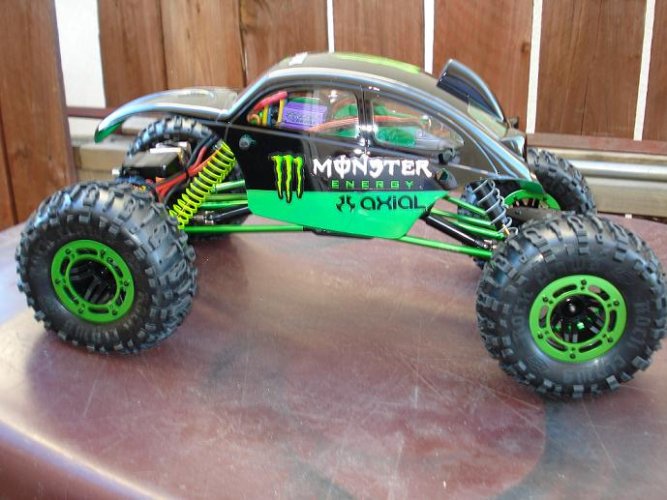
Please post all of your VW Bug body paint schemes. I just got a new one, and I need some ideas. So please, any VW bug body will be great. Thanks.

-Chris
 
on My little girls Axial
AX10031.jpg
AX10028.jpg
my Bender comp rig
BufordDamn117.jpg
bug012.jpg
 
Last edited:
Thanks for the pics guys! I really appreciate the help.

I have actually found a bunch of pictures of them on google as well, and I decided on this-

Base Coat- Chevy Orange, and I may do some marbeling with a piece of saran wrap.

Detailing (engine, air scoops, headlights, and a smile in the front)- Gloss Black

Secondary Coat- White double racing stipes right down the middle.

BTW, this body is the Mega Baja body from Team Losi.

If anyone has some info on marbeling techniques with saran wrap, please post them. Thanks again.

-Chris
 
If anyone has some info on marbeling techniques with saran wrap, please post them. Thanks again. -Chris

The marble look is easy. I usually use a plastic bag instead of saran wrap, only because I can always find one. I'll pick the two colors that I want to use and for me at least I always use the lighter color first. I pour a little paint on something and dab the bag into the paint. I always blot the bag a few times to make sure that the first time I put it on the body it does not come out too thick. Cover area wanted, then fill in secondary color.
100_5714.jpg
 
The marble look is easy. I usually use a plastic bag instead of saran wrap, only because I can always find one. I'll pick the two colors that I want to use and for me at least I always use the lighter color first. I pour a little paint on something and dab the bag into the paint. I always blot the bag a few times to make sure that the first time I put it on the body it does not come out too thick. Cover area wanted, then fill in secondary color.

Alright, I dont think I fully understand your directions, but I have another question...

If I just spray the base coat (Chevy Orange), can I take a piece of a plastic bag or saran wrap, and lay it on the paint, and then take it off, leaving me with a marbeling effect?

Or do I need to spray, then lay/dab plastic on the paint, then take the plastic off, and spray black behind the orange, then do I get a marbeling effect?

The second one is right. Spray, dab, let dry, then back. If you did the first, all you'd have is the orange with clear spots with the lexan showing through!

Depending on the colours used, you can do a three step marbeling effect. If you use a metallic or candy that is semi-transparent, spray that on first in a light coat, let dry, back with silver, blot this, let dry, back with white or black.

The following picture isn't mine (off of the CFX forums), but shows the results:

6sjfp5z.jpg


Note also this was done by a pro, but it's still a relatively simple effect to create!

Chris

Edit: Practice on scrap lexan first! No point trashing a $30 body by screwing up the paint job.
 
Last edited:
The second one is right. Spray, dab, let dry, then back. If you did the first, all you'd have is the orange with clear spots with the lexan showing through!

Depending on the colours used, you can do a three step marbeling effect. If you use a metallic or candy that is semi-transparent, spray that on first in a light coat, let dry, back with silver, blot this, let dry, back with white or black.

The following picture isn't mine (off of the CFX forums), but shows the results:

6sjfp5z.jpg


Note also this was done by a pro, but it's still a relatively simple effect to create!

Chris

Edit: Practice on scrap lexan first! No point trashing a $30 body by screwing up the paint job.

Hey, thanks man. I appreciate that ;-)"thumbsup". I am for sure going to do marbeling on this body, providing I have the time. I am trying to get it ready for a crawl on Sunday, so I may not.

I really appreciate everyones help. Thanks guys. ;-)"thumbsup"

-Chris
 
Alright, I dont think I fully understand your directions, but I have another question...

If I just spray the base coat (Chevy Orange), can I take a piece of a plastic bag or saran wrap, and lay it on the paint, and then take it off, leaving me with a marbeling effect?

Or do I need to spray, then lay/dab plastic on the paint, then take the plastic off, and spray black behind the orange, then do I get a marbeling effect?

If you look at my Betty body that I did. I masked off the body in three different sections. Bed, silver sections on hood and doors, fuel cans.
The marbled section was left clear, being the first section painted.
The first step in painting was to put the purple in for the marble. I poured paint out on some paper and then wadded up a plastic bag and blotted the bag into the paint. Then blotted the paint/bag onto a clean section of paper to remove some of the paint so it is not just a big blob being put on to the body. I repeated this step until I had enough coverage. You really don't need it very thick, unless you plan to have the base color lighter then the marble color.
The second step was to use black over the purple.
Third step was to use gold and silver to get the carbon fiber look
Fourth step was to pull off all masking except for the silver and gas cans and paint black.
Fifth step was to pull of masking for silver on doors and hood and paint.
Sixth step was to spray in the chrome paint.
Last step was to back the chrome in black and to give every thing one last coating in black.
I plan on painting another body tonight and I'll try to do it with step by step pictures.
 
I spray on a light candy coat and dab it with a bag, wait for it to dry then spray on the 2nd color when that's dry I use a cover coat either black, gold, or silver.
 
Back
Top