• Welcome to RCCrawler Forums.

    It looks like you're enjoying RCCrawler's Forums but haven't created an account yet. Why not take a minute to register for your own free account now? As a member you get free access to all of our forums and posts plus the ability to post your own messages, communicate directly with other members, and much more. Register now!

    Already a member? Login at the top of this page to stop seeing this message.

Lexan Body Painted Inside, Weathered Outside

djc32294

Newbie
Joined
Feb 12, 2019
Messages
38
Location
Central Maine
Anybody have some tips/pointers/products that I can use to weather the outside of a lexan body? I prefer to paint lexan bodies from the inside, but like the lightly weathered look. I have been reading on different methods and weathering products, but have yet to see a good explanation of weathering the outside of lexan.

Thought about buying the vallejo weathering kit, but not sure it will work with lexan (maybe use matte clear to lock it in?)

Any tips are appreciated.
 
I'd recommend scuffing the outside so your wash has something to key into, this also looks a lot better that seeing glossy paint under it.

I go the easy route and just use watered down house paint, it may rub off over time but I'm okay with that.

Here's an example of a lexan body I weathered on the outside though I also painted the outside which I think gives the best results. This paint has held up pretty well over time BTW.
http://www.rccrawler.com/forum/hpi-...power-wagon-3d-printed-parts.html#post5929873
 
Dudes, I just finished a totally underwhelming paint job, interior paint because I was playing with clear iridescent pink backed with silver and purple backed with black.

Flat over decals, is that a thing? If that works I’d like to try HumboldtEF’s weathering with (latex exterior?) household paint. The idea is flatten the shiny lexan and decals first.
 
When I have shot flat or matte clear over my Lexan bodies, I've noticed that it typically doesn't stick very well to most decals. Not really a big deal. and was actually helpful when I had a little bleedover onto the Traxxas Defender window decals that I had masked off - it allowed me to use a toothpick to scratch the window edges to near perfection.
 

Attachments

  • IMG_20190212_200558.jpg
    IMG_20190212_200558.jpg
    125.2 KB · Views: 707
  • IMG_20171229_133727.jpg
    IMG_20171229_133727.jpg
    117.7 KB · Views: 686
@Durok...thanks, man. I was just getting all crazy and asking this again somewhere else, you’ll prolly see it. It’s the fancy Easter egg colored Yeti shell over in the TRX4 page.

So looking at your examples, the exterior matte coat looks pretty clean. But you didn’t go sticker crazy, either. Kind of hard to see anything other than “that’s really clean” on the Ascender from your photo. I’m gonna hold and improve on your advice. Much appreciated. Lincoln.

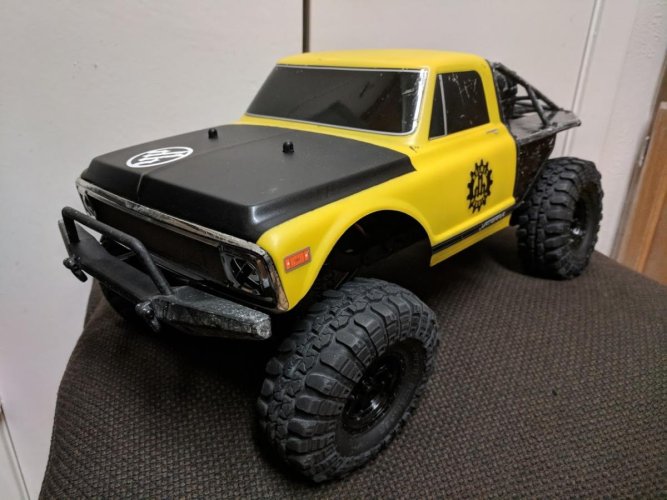
The Ascender had been driven quite a bit prior to the paint, was pretty scratched up. I washed it, did a little scuffing on the bad scratches to get dirt out of them and then I masked off the hood, shot it in black. Then I shot the entire underside of the shell (this was an RTR yellow shell, so I was tired of seeing the sun shining through) in black as well. Then I did a quick and dirty mask of the front and back windows (totally forgot about the side windows) and hit it with Tamiya matte clear. Came out pretty good. I didn't mask the insides of the windows when shooting black because I was being lazy, and this was just going to be my beater body.

I have another of the same bodyshell unpainted, going to most likely paint it Tamiya anodized blue - it looks like the old vintage silvery blue that was used a lot in the '60s. I will do it up right, and it will be easier to do because it comes with window masks (obviously RTR bodies don't!)... I also got another of the rear tubular bed with aluminum panels - I have some scale diamond plate that I may wrap them in.

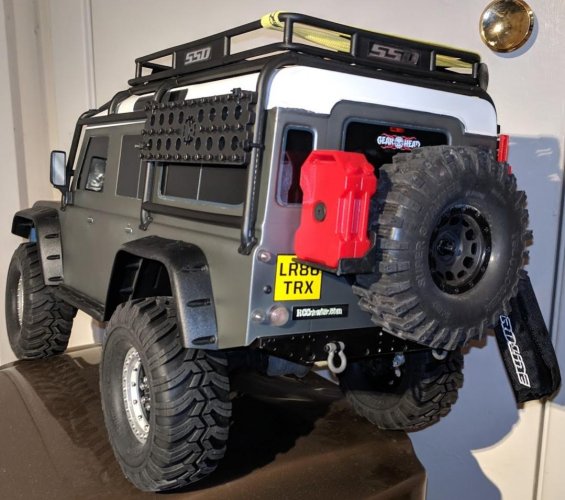
The TRX-4 Defender RTR comes with hideous black sticker windows, and was brand new when I shot it. It took forever to remove all the fenders, spare tire holder, roof rack, etc. I did mask all the windows, and around the roofline. Hit it with white, a whole can's worth. Then I undid the masking around the roofline and shot the body in Tamiya matte clear. It makes it look a nice dull grey instead of the glossy metallic silver original look. Much more like a work truck than a grocery getter!

The TRX-4 came out so nice that I may not change the body unless I really tear it up. I am very happy with it, and am going to keep it as my top-heavy long-wheelbase harder-to-drive truck... "thumbsup"

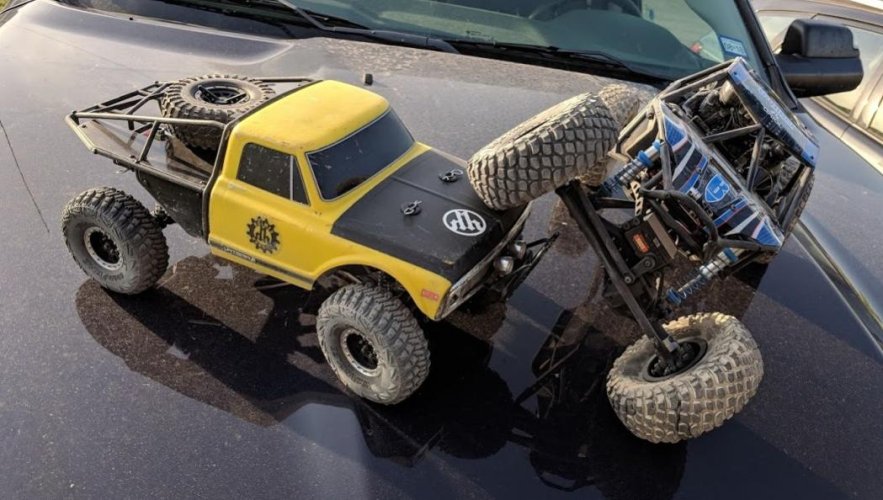
A couple more pics, the Ascender and my crawlin' buddy's Bomber, and the Defender from the back with a couple small decals added (after being painted with matte clear):
 

Attachments

  • IMG_20180609_191859.jpg
    IMG_20180609_191859.jpg
    103.1 KB · Views: 642
  • IMG_20190212_202005.jpg
    IMG_20190212_202005.jpg
    124.4 KB · Views: 747
Last edited:
Back
Top