• Welcome to RCCrawler Forums.

    It looks like you're enjoying RCCrawler's Forums but haven't created an account yet. Why not take a minute to register for your own free account now? As a member you get free access to all of our forums and posts plus the ability to post your own messages, communicate directly with other members, and much more. Register now!

    Already a member? Login at the top of this page to stop seeing this message.

A Black Cat, and a White Goat: A Tale of Galactic Proportions

Great read Panther! Love the Star Wars theme!"thumbsup"

Star Wars fan here too!"thumbsup" I grew up in the 70's & 80's so Star Wars has always been a big part of my life. Heck, I still have all of my OG Star Wars action figures! It's hard to part with them since I have so many great memories with them.

Congrats on the VS4-10 PRO! It is an awesome build and you won't be disappointed!;-)
 
Ok, I'm happy. I returned home today, from visiting my parents in Vegas (no, that's not what I'm happy about...I would have preferred to start at least a few more days), to find several packages waiting for me. Among them were my Vitavon parts:

1) Brass portal weights (for this Capra)
2) Machined aluminum transmission housing (for this Capra)
3) Flat black CF body panels (for the 2nd Capra, whenever I get around to building it)

~ More peace, love, laughter & kindness would make the world a MUCH better place
 
Today, the Imperial Buggy got an upgrade of Galactic proportions, courtesy of Vitavon Racing. I finally had the time to dismantle the stock plastic transmission case, disassemble the transmission, and put it back together inside this nice, shiny machined aluminum case.

Except for a couple of screws, I did not use the screws that came with the case. This was NOT because I'm worried about rust (one person who received the same transmission case has claimed that it came with rusty screws, although no one else has reported such), but because I had already ordered the SS screw kit from KNK, and figured that, not only should I use them (after all, I did pay for them), but they just look cool with the machined tranny case.
3d8495bb9755109dcda8e94297dd80ba.jpg
c5e55afb798f884f06cec807616fee77.jpg

The replacement dig servo (actually, servos, and Horizon Hobby is sending me two) was supposed to have arrived today (the box was loaded into a truck for delivery today, but the truck never departed the FedEx depot), so I could put it completely back together. In the meantime, I'm also working on a shock mount mod, although that will have to wait until another day to continue.

~ More peace, love, laughter & kindness would make the world a MUCH better place
 
Last edited:
Dig servo update...and, it's a doozie.

The two replacement servos arrived...and both are dead. Technically, the second of the two was DOA...it didn't "die" in the Capra. As for the first, it does in the same way as the previous 5 servos. But, there is good news on the horizon (no pun intended towards Horizon Hobby), as the cause of the problem may have been discovered.

As everyone is aware, there have been several "problems" with the kit since it was released - there were several errors in the original manual (wrong part numbers, incorrect screw sizes, missing info, etc), and some kits contained additional and/or missing parts. In my case, I was missing a few parts (the most "interesting" if which were the two plastic that attach to the underside of the hood in step H-1), except that one such part want discovered until today - I was missing a 2.5x12mm screw, and had an "extra" 2.5x14mm screw.

During the build, I skipped certain steps (as many people do), going back once parts arrive (such as electronics). Two steps skipped were H-3 & H-4 (hadn't yet decided on a motor/ESC). Upon returning to H-3, I discovered I had no more 2.5x12mm screws...but, I did have an "extra" 2.5x14mm screw. Figuring this was another manual error, I used the 2.5mmx14mm screw to attach the horn/servo-saver.

Anyway, I just got off the phone with Horizon Hobby, and, as was discovered, the 2.5x12mm screw mentioned in step H-3 was correct. The additional 2mm in length must have been pressing on something inside the servo, effectively "killing" it. Thankfully, Horizon Hobby, and their outstanding CS, are sending me another replacement servo, as well as the correct 2.5x12mm screw. Technically, it is my fault for having used a longer screw...but, it's not my fault that an incorrect number of screws were in the kit. For those just starting their build, double-check EVERYTHING before you start. If there are ANY problems...e especially missing parts/screws...call Horizon Hobby. Their CS is outstanding, and, if anything is missing, defective, etc, they won't hesitate to ship out a replacement.


~ More peace, love, laughter & kindness would make the world a MUCH better place
 
Ugh, you have me wondering if I used the correct length on mine. I mean I didn't skip around, but whether or not they provided the right screw...
 
Dig servo update...and, it's a doozie.

The two replacement servos arrived...and both are dead. Technically, the second of the two was DOA...it didn't "die" in the Capra. As for the first, it does in the same way as the previous 5 servos. But, there is good news on the horizon (no pun intended towards Horizon Hobby), as the cause of the problem may have been discovered.

As everyone is aware, there have been several "problems" with the kit since it was released - there were several errors in the original manual (wrong part numbers, incorrect screw sizes, missing info, etc), and some kits contained additional and/or missing parts. In my case, I was missing a few parts (the most "interesting" if which were the two plastic that attach to the underside of the hood in step H-1), except that one such part want discovered until today - I was missing a 2.5x12mm screw, and had an "extra" 2.5x14mm screw.

During the build, I skipped certain steps (as many people do), going back once parts arrive (such as electronics). Two steps skipped were H-3 & H-4 (hadn't yet decided on a motor/ESC). Upon returning to H-3, I discovered I had no more 2.5x12mm screws...but, I did have an "extra" 2.5x14mm screw. Figuring this was another manual error, I used the 2.5mmx14mm screw to attach the horn/servo-saver.

Anyway, I just got off the phone with Horizon Hobby, and, as was discovered, the 2.5x12mm screw mentioned in step H-3 was correct. The additional 2mm in length must have been pressing on something inside the servo, effectively "killing" it. Thankfully, Horizon Hobby, and their outstanding CS, are sending me another replacement servo, as well as the correct 2.5x12mm screw. Technically, it is my fault for having used a longer screw...but, it's not my fault that an incorrect number of screws were in the kit. For those just starting their build, double-check EVERYTHING before you start. If there are ANY problems...e especially missing parts/screws...call Horizon Hobby. Their CS is outstanding, and, if anything is missing, defective, etc, they won't hesitate to ship out a replacement.


~ More peace, love, laughter & kindness would make the world a MUCH better place

Imagine the slightly longer screw gets the a new servo to prematurely fail a real frustrating experience. It's the reason why I did a write-up on installing the dig, not aware of this problem. Thanks for theheads-up! "thumbsup"

I managed to get the dig to work the first time, BUT after some test runs thought that the glitch when shifting was due to powering the servo at 7.2v. and Now maybe be3casue of the longer screw.

Anyways I was going to swap for a new servo to fix the glitch, but still using the original servo.

I backed down internal BEC Voltage to 6v, used a countersunk washer (as the servo horn was popping-off - maybe I lost a plastic part on top of the horn I honestly don't know.) And took extra care NOT to OVER-TIGHTEN screws that secures horn to servo and to the dig shifter. Maybe with the shorter screw, it is safe to Tighten, as we often do.

IMG_6642.jpg

Dig is at Neutral (Front Wheel Drive) Position

Then made sure I did not over tighten the screw that fastens dig servo horn to the servo and the the horn to the dig sihifter. Powered dig servo to make sure it is is centred before installing the servo horn.

NEXT, securing servo horn at a right Angle. Then adjusting the Sub Trim so Dig shifter is at centre/neutral front wheel drive position. Then set Left and right End Points to +20 and -20. incasing value in mall increments while test shifting between 4WD, Front Wheel drive, and dig position.

Sometimes, I needed to "slightly" pull the trigger forward/reverse to engage/disengage the dig. Got a spare dig servo, just in case setting fails. Can do sap in 25-40 minutes once familiar.
 
Ugh, you have me wondering if I used the correct length on mine. I mean I didn't skip around, but whether or not they provided the right screw...
Being a completely brand-new kit, there were bound to be "mishaps"...it happens. Thankfully, the problem was finally figured out (interesting that the tattoo previous CS reps didn't think of having me check the screw, but I won't hold that against them...they tried to help, and that's what matters).

My only 'worry' is that, by having to stick with the Spektrum servo, I'll have to either keep the BEC down to 6.0V, or add a HH Receiver Bypass Adapter & external CC BEC 2.0 (seeing the external @ 7.4V (for steering), and internal @ 6.0V (for dig & lighting)...unless anyone can recommend any non-Spektrum micro servos with approx the same dimensions, the same diameter spline w/the same number of teeth, and (preferably) slightly more torque?

==================================

Between last night, and this morning, I've also made some changes. I installed some longer 6mm links (lowers are bent), which lengthens the wheelbase, lowers the ride height, and lowers the COG.
a8e6e5c974a8417787ad9570b7b67b75.jpg
f0f20c6a2e0e01e8da365f60c46a60c0.jpg
4b48bcf701261e03832ae9c2eb79b8d3.jpg

I also finished my custom shock mounts, which lower the mounting positions, as well as moving the front shocks slightly forward, and the rear shocks slightly back. Between the longer/lowered wheelbase, and the new shock mounts, this should keep the angle of the shocks approx the same.
cc4f041efe15c79031f312d1e964dba3.jpg
46405afbeee71a8bfb920ea6b39a6d51.jpg

I haven't yet determined if 90mm shocks will be needed, as I still need to mount the new Landmines (which I'll do tonight, while my clients are enjoying "The Nutcracker")...but, as you can tell, the front has 2 mounting positions, while the rear had 3 positions.
1974f9ba0034357ca5380b549b4bbcb4.jpg
f63cd1e0f521bae904725791349cc160.jpg


~ More peace, love, laughter & kindness would make the world a MUCH better place
 
Last edited:
So maybe I missed something, but why the change to mounts? It seems to me that will make them mount lower which makes it sit higher? Or am I wrong?
 
So maybe I missed something, but why the change to mounts? It seems to me that will make them mount lower which makes it sit higher? Or am I wrong?
The new links I installed make the wheelbase longer, which also changed the mounting angle of the F&R shocks. Additionally, the change in links lowered the ride height.

My theory...and, in all honesty, that's all it is until the new shocks arrive...is this. By moving the front shocks further forward, moving the rear shocks further back, and switching to shorter length shocks, it should not only return the ride height to the original height (or closer to it), it should also restore the angle of the shocks to nearly the same as the original mounting position's angle (when using the stock-length links).

The new shocks, as well as the M3 nylock nuts, should be delivered tomorrow...Monday, at the latest. Then I'll be able to test my theory. If it works, great...and, if not, I'm only out a few bucks (the cost of the shock relocation kit), as I'll definitely find uses for the 90mm shocks, and the nylock nuts.

~ More peace, love, laughter & kindness would make the world a MUCH better place
 
This is a doozy of a thread! Nice rig and nice write up. The captioned photos are great as well. "thumbsup"
 
Today's upgrade-update is brought to you by by the letters SS, and the numbers 6, 8, 3 & 4.

Recently, I made a lightspeed jump to an alternate universe, and stopped by some cantina called "Quark's Bar" (very "interesting" owner), and found some small piece of metal called Latinum. Evidently, the owner, and others like him, appear to prize this crap as some sort of "ultimate money source". Since it looked like someone left it by accident, I decided to take it, and see what I could trade it for. Once I was back in my own sector, I contacted this guy I had heard about. According to rumors, he was the shafty type, but carried quality goods. From what I'd heard, he wasn't just "kinda" shafty, or even "really" shafty...he's (supposedly) "super" shafty....the kind that rebels, and Imperials, alike, love.

Anyway, I told him about what I had 'found', and asked what it might be worth in trade. He said, "I ain't got much right now for your vehicle, but, if you can wait a little longer, I've got some really sweet things coming soon." Figuring that whoever had 'lost' this piece of metal might come looking for it, I told this shafty guy I'd prefer to pick from whatever he currently had in stock. He said, "The best I can do is this piece of aluminum, but I'll toss in a couple of these spinning things for good measure."
9537f13f8082506ebed88d5fe70f6b74.jpg

I was about to tell him he could take that piece of aluminum, and shove it up his rear, when, all of a sudden, he suggested that I shove it up my own rear...so I did. And, to be completely honest, it gives it a really nice "lift"...but not so much as to flip me over.

I'd show y'all what I did with those spinning things, but I can't, as I shoved them inside. However, in order to properly shove them inside, I had to grind a little here, and grind a little there. Once I finished all that grinding, not only was I able to shove those spinning things in a couple of holes, but those long, hard shafts could finally seats seat themselves in those holes much more tightly.

The moral of today's story is, the SuperShafty rear link relocation bracket, and rear portal bearings, are fantastic. However, in order to properly fit the bearings, you will have some work to do, as you'll need to grind off some metal at each end (less than 0.25mm) of both axles. You'll also need to grind off the "disk-like" area of the axles, just past where the top portal gear sits. Removing that part of the axles won't affect the axles...the portion of the axle where the gear is seated is 'square', and smaller in diameter than the rest of the axle shaft, so, it's not as if the gear could slide inside the axle housing.

As for installing the rear upper link relocation bracket, you'll need 2 additional 3x14mm buttonhead screws. User the original screws to attach the relocation bracket to the axle housing, then user the additional screws to attach the rear upper links to the bracket. Simple. Here's what it looks like installed:
23a0a726adb5c3a79850e799d1c3436b.jpg
848d29a262bf0ec24cfaba15daa8709c.jpg
37048fee8d2c6dfb440f6c3cb3c503e2.jpg
ef9e83546278760d159482d06e811f2f.jpg


This is a doozy of a thread! Nice rig and nice write up. The captioned photos are great as well. "thumbsup"

Thank you. For my first crawler build, I'm pleased with what I've done so far...tho, it's not finished. One of today's upgrades required more work than I expected...thankfully, I had the right to to do it (even tho, when someone else, in another thread, mentioned what needed to be done, I didn't think I'd be able to). Once the new shocks (and M3 nylock nuts) arrive, I'll finish the shock mount upgrade.

~ More peace, love, laughter & kindness would make the world a MUCH better place
 
Last edited:
Where do those bearings get placed? In the bearing recess in the portal that's not really a bearing seat?

What mod did you think you wouldn't be able to do?

I ordered the rear link riser and TGH OD gears from SS last night. I'm anxious to see how they change the truck.
 
Where do those bearings get placed? In the bearing recess in the portal that's not really a bearing seat?

What mod did you think you wouldn't be able to do?

I ordered the rear link riser and TGH OD gears from SS last night. I'm anxious to see how they change the truck.

Yup, that's exactly where they go. After removing the rear portal covers, and pulling out the rear axles, those bearings for right into that recess. When you look at the bearings, you'll notice one side is sealed, and the other is 'open'...place the 'open' end towards the middle, and the sealed end towards the wheels. Then, grind down/off the areas of the axles that I mentioned. Work both bearings in place, if you start by only grinding one axles, and place them both inside the axle housing, you'll easily see how the modified one sits further inside, which will allow the rear portal cover to sit flush.

As for the "mod I didn't think I'd be able to do", that would be the grinding of the axles. I've got a lot of hand tools, for working on computers, my motorcycle, and other household-type stuff, but I don't exactly have a lot of power tools - a cordless drill, and a Dremel...that's it. It wasn't until I remembered that my new Dremel kit includes a grinding bit...then I realized I could do the mod.

The riser is simple to install. If a crawlers newb like me can do what I've already done, anyone can. For others who've already installed the Rusty, I've noticed that they installed the links in the top position. Not knowing/understanding what difference the top vs bottom pairing will make, I decided to start with the lower of the two, see how it does, them move them to the upper position, and see how it compares (running the same lines). I won't threadlock the screws until place until I see how the Capra handles the rocks in both positions.

The best thing is, the new shocks (and M3 nylock nuts) are "out for delivery". If they arrive at least 2hrs before I have to leave for work, I can get them filled & installed before heading to pick up the bus...maybe even have a few minutes to test them outside.

~ More peace, love, laughter & kindness would make the world a MUCH better place
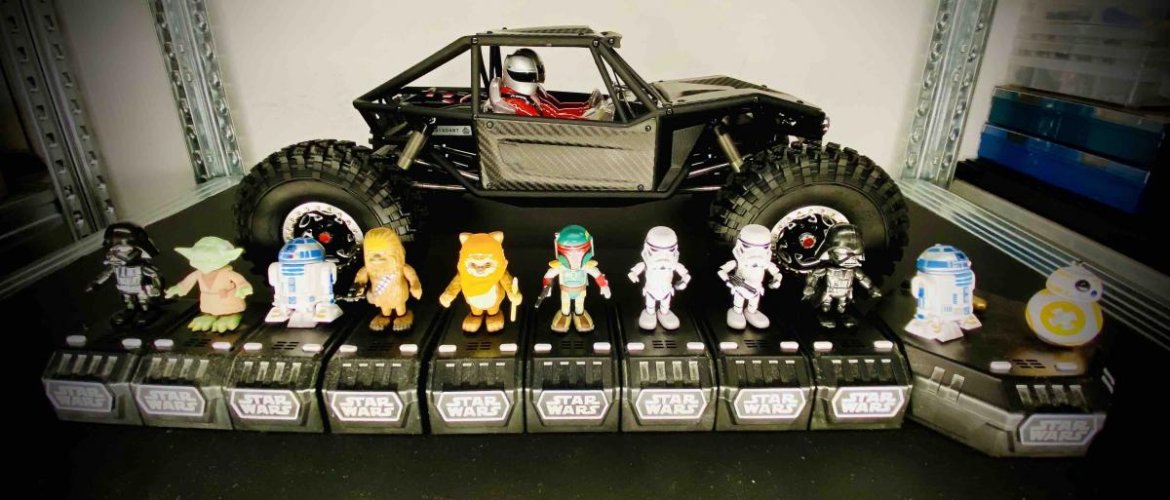
 
With the exception of the flat skid (coming from InTheWorks), my Imperial Goat is finally finished. Although I mounts the JConcepts 1.9 Landmines into the Vanquish KMC 2.2 XD229 wheels several days ago (after removing the Pit Bull Growlers, which, after being modified, will make their way to some other vehicle), I didn't get to print them on the Capra until today...but, not before I finished everything else I did today.
69eff6250d7557c3035bdd964622d517.jpg
fb0f976d8965fe91cf23f031a4e40ebd.jpg
Today started by removing the stock shocks, and replacing them with 90mm Desert Lizard internal spring shocks. Considering all the included tuning pieces, these things are incredible. They give you 4 pair of pistons (1-hole, 2-hole, 3-hope, & 4-hole), as well as 3 pair of full-length shocks, 3 pair of 2/3-length shocks, & 3 pair of 1/3 length shocks (soft, med, & hard). The springs, alone, allow for over 20 possible spring combinations. They also include a bag of spare parts, and a bag with the mounting parts.

Initially, I was planning on going with the 2/3 soft & 1/3 med in front, and 2/3 med & 1/3 hard (all above the pistons, no droop), but both combos proved slightly more firm than I wanted, so I ended up with full soft in front, and full med in the rear. The rear sits a little high right now, bit I kinda like it. As for the oil, I knew I needed to increase the weight (originally 20wt front & 25wt rear), and was planning on going with 32.5wt up front, & 40wt in the rear, but (at least for now) decided to use 32.5wt on all four. The front definitely appears to be "baby bear", while the rear could prove to be a little "papa bear" on the springs, and a little "mama bear" on the oil. I'll run it a bit, and then decided whether to keep the current rear spring setup, or switch the rear springs for 1/3 soft & 2/3 med, and to see whether to stick with the correct rear oil weight, or increase it (to worked 35wt, or 40wt).
45a159a350ac64a51828ad9dd132aad3.jpg
9cdb8aa5e0f5d736ca4355024329c6c4.jpg
Lastly, the dig servo problem has 100% finally been resolved...the screw length WAS the problem. As I mentioned previously, my kit was shortchanged a 2.5x12mm flathead screw, but also had an extra 2 5x14mm screw. Thinking this to be just another error in the manual, I had used the 14mm screw to hold the horn/servo-saver onto the dig servo, and that's what was "killing" the servos. With the most recent replacement SX107, Horizon Hobby also included a bag of 2.5x12mm screws. Not only do I finally have a fully-functional dig, but I also have it set as a 3-position (4WD, FWD w/ freewheeling rear, FWD w/locked rear). I am still fine-tuning the sub-trim & endpoints, but at least it's finally working.

With the (slightly longer) bent links in place, the steering servo horn still clears the front grill/frame as but work only 1mm to spare. In the rear, with the longer links, & the SS upper link relocation bracket, the bracket is directly below the rear-most part of the chassis/frame...but, thankfully, under fill compression, stops 2mm short of hitting the frame, so all is good there.
2079ea0e88f7d63b54afb9826c9594db.jpg
44128435eb40e535d27aa009dc867ffd.jpg
Finally, with the longer links, and Desert Lizard shocks, ground clearance (at the skid) is slightly more than 2.75", and front & rear articulation is just under 4.75".
9f6bd2093a13adb53c5292b680292783.jpg


~ More peace, love, laughter & kindness would make the world a MUCH better place
 
Last edited:
talk to us about the tires!!! your thoughts? have you run them yet?"thumbsup"
Not yet...just got them on the Capra. Was going to take it out for a short test this afternoon, but it started raining. While the rain has stopped, I don't think the Stormtroopers feel like getting muddy. They're very particular about keeping their uniforms nice & shiney (their boss has anger issues, ya know).

~ More peace, love, laughter & kindness would make the world a MUCH better place
 
While I've taken the Capra out for several short tests, and one slightly longer test, it wasn't until today that I finally took her out for some real climbing tests (mostly because I had been waiting for the Landmines to be delivered & mounted). Ran through 2 batteries, so not too shabby. This video is just some highlights of the climbing efforts accomplished today:
https://youtu.be/S36MclSuRLw

~ More peace, love, laughter & kindness would make the world a MUCH better place
 
Back
Top