• Welcome to RCCrawler Forums.

    It looks like you're enjoying RCCrawler's Forums but haven't created an account yet. Why not take a minute to register for your own free account now? As a member you get free access to all of our forums and posts plus the ability to post your own messages, communicate directly with other members, and much more. Register now!

    Already a member? Login at the top of this page to stop seeing this message.

new2rocks probes the Vanquish VS4-10 Pro

new2rocks

I wanna be Dave
Joined
Apr 2, 2014
Messages
2,254
Location
North Carolina
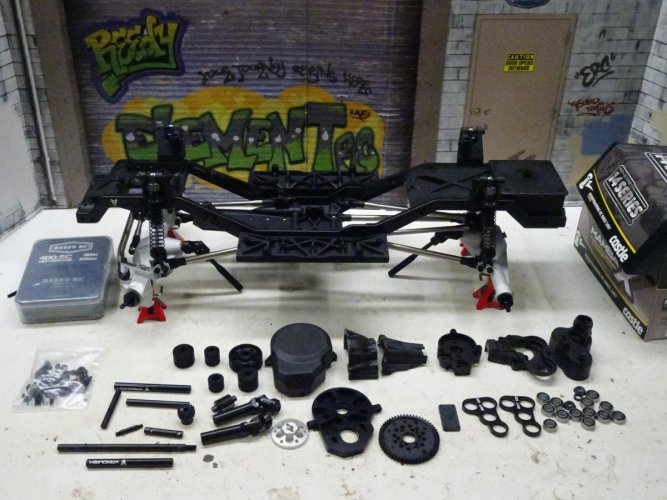
You PRObably figured out from the title what my next PROject is:
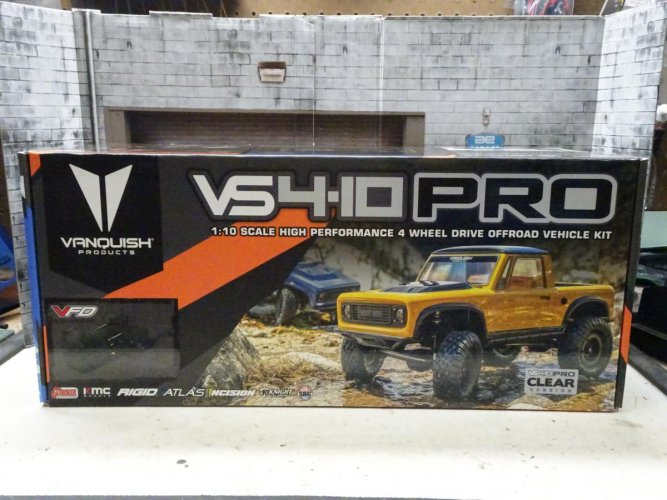
DSC05496.jpg

This is my first experience with a VS4-10. The original Origin version didn't tickle my fancy. I couldn't get past the combination of a steep price ($899 when announced), use of the same AX10-based 3-gear, center-mounted tranny that's been around forever, and an SUV-style body whose PROportions seemed a bit off thanks to the ultra-short rear overhang.

That changed with Vanquish's announcement of the Origin's PROgeny, the VS4-10 Pro. New price ($750), new transmission to PROpel this #tinytruck (more on that below), and new pickup-style body with better PROportions than the original Origin, combined with the beautiful Currie axles found in the Origin and other Vanquish/Incision goodies, were enough to pique my interest. I had no PROblem with the trade-offs in the Pro version (plastic bumpers and sliders instead of aluminum in the Origin), so I PROmptly PROcured one.

When the package arrived, I PROduced an unboxing video:
<iframe width="560" height="315" src="https://www.youtube.com/embed/htnhNAZ-LUY" frameborder="0" allow="accelerometer; autoplay; encrypted-media; gyroscope; picture-in-picture" allowfullscreen></iframe>
https://youtu.be/htnhNAZ-LUY

Vanquish offers this in 2 versions: clear and black, referring to the finish on the aluminum axles. I'm not normally one to gravitate toward bling for bling's sake, but I opted for the clear version so I could more easily see the star of the show, namely those Currie axles. But enough rambling. Time to get to work. Let's see if I can do this build proud.

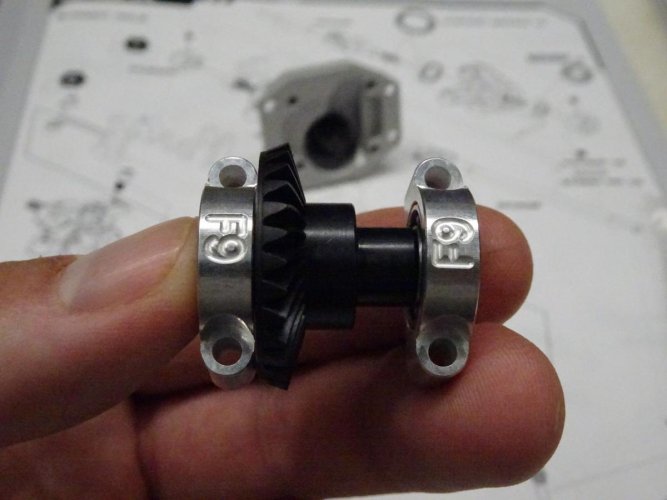
Fittingly, the PROceedings commence with the axles. There are so many details to admire, including ones you'll PRObably never see again after assembly:
DSC05513.jpg

Mechanicals are as you'd expect...hardened steel gears, 6-bolt lockers, universals, aluminum knuckles, etc.

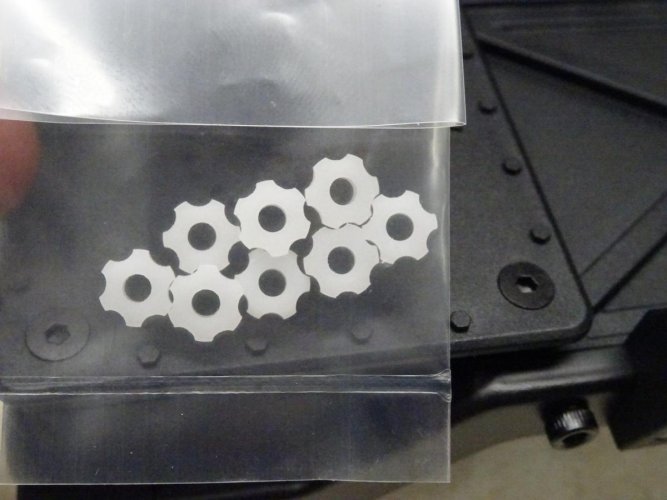
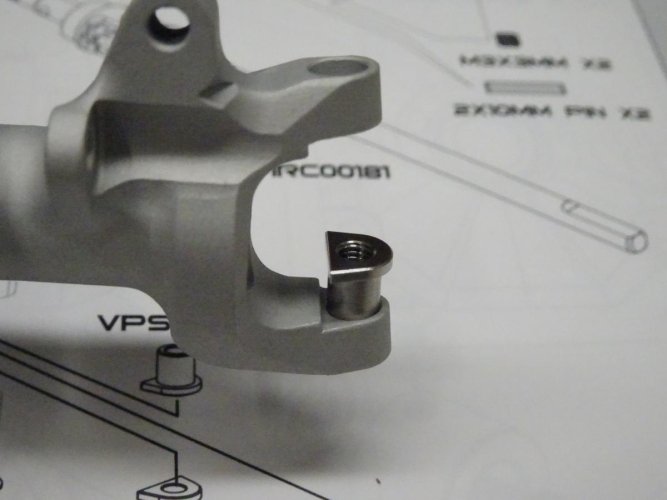
Manufacturing tolerances are typical Vanquish, which is to say very, very tight. So tight, apparently, that Vanquish included an extra bag of revised threaded kingpin screw inserts that slide in more easily than the ones included in the original bag with the axles:
DSC05514.jpg

I didn't notice the little bag with the new ones until after I had assembled the axle. Ironically enough, though the old ones were a little more difficult to insert, I liked the way 2 of the old ones went in better than 2 of the new ones, lol. But no matter...I followed the instructions (for a change) and used the new ones.

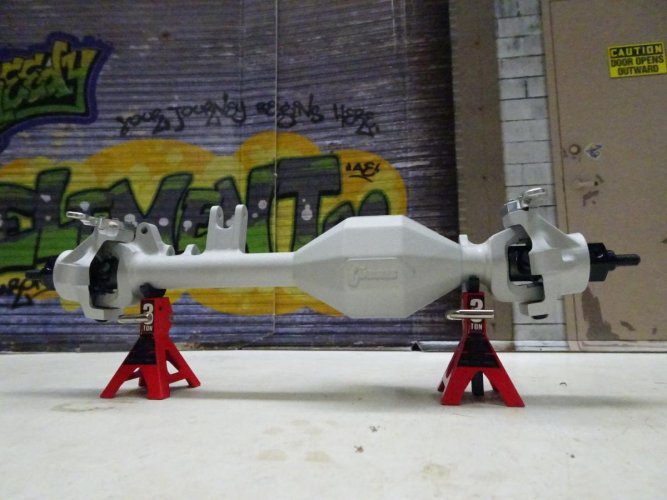
Here's PROof of my PROwess in assembling things:
DSC05520.jpg

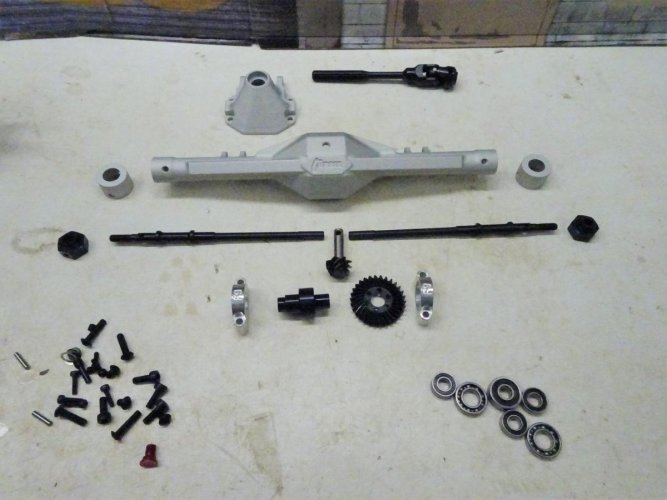
The rear axle is similarly elegant. Here's a look at the components:
DSC05528.jpg

Note the fill plug PROtruding PROudly from the rear pumpkin once assembled:
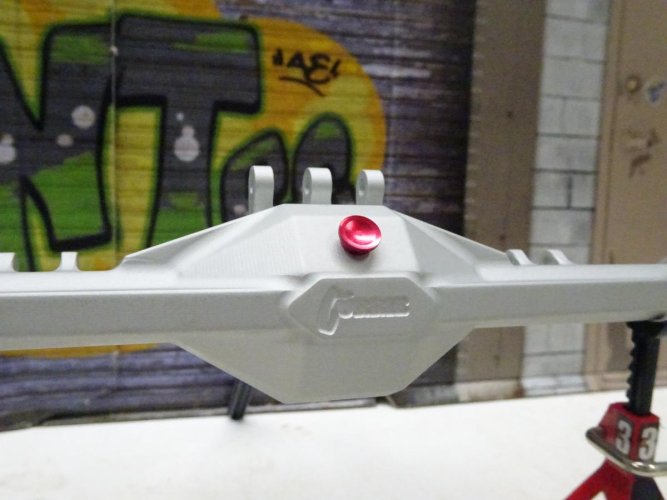
DSC05530.jpg

Now that's PROper!

Here's the happy couple:
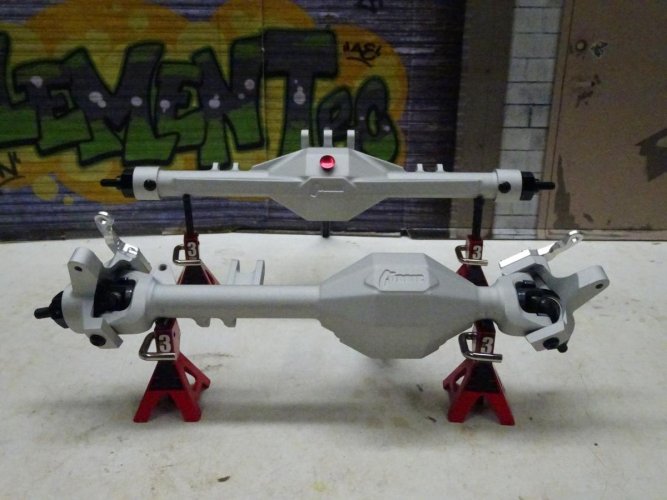
DSC05529.jpg

I must profess PROfound admiration for the axles. I have a hard time swallowing the price on their own (which is why I haven't previously purchased a set), but they are much easier to justify as part of this kit. And they are gorgeous. There is a downside, of course, namely that aluminum housings don't slide over rocks as easily as nylon or steel housings. But if you're okay with that trade-off you won't be disappointed with these.

Next up was the chassis. As you may recall, some of the early adopters of the Origin experienced bending of the chassis rails at the angled corners around the front shock tower. To Vanquish's credit, they quickly responded by PROducing a revised servo mount/bumper mount that reinforced the entire front section of the chassis. The Pro includes the revised mount:
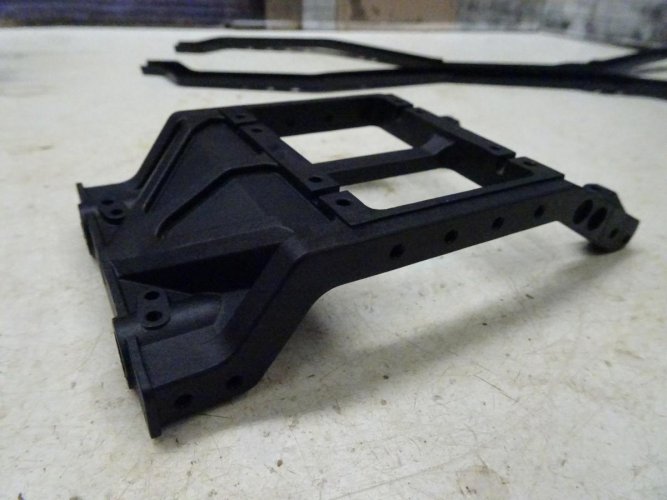
DSC05542.jpg

This piece in particular is PROfoundly beefy, which is a good thing. It also includes a servo winch mount. I'm not usually a PROponent of servo winches, but I think I'm going to have to make an exception this time.

Here's the chassis assembled:
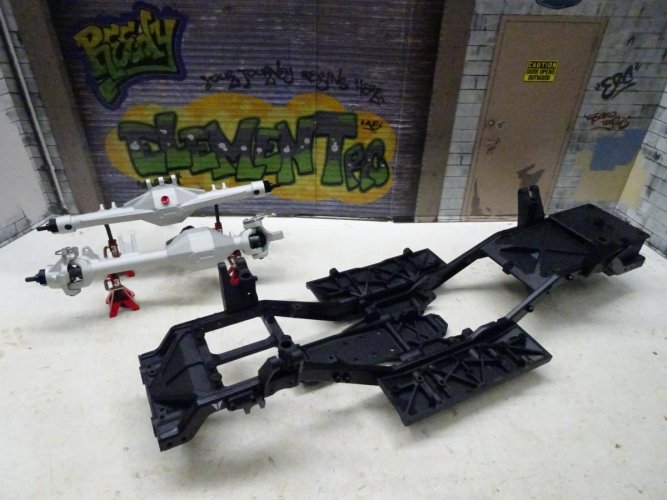
DSC05545.jpg

The rear is noteworthy for the obligatory fuel cell receiver box, which Vanquish has chosen to integrate into a one-piece rear chassis brace and bumper mount (with the fuel cell lid being the second piece):
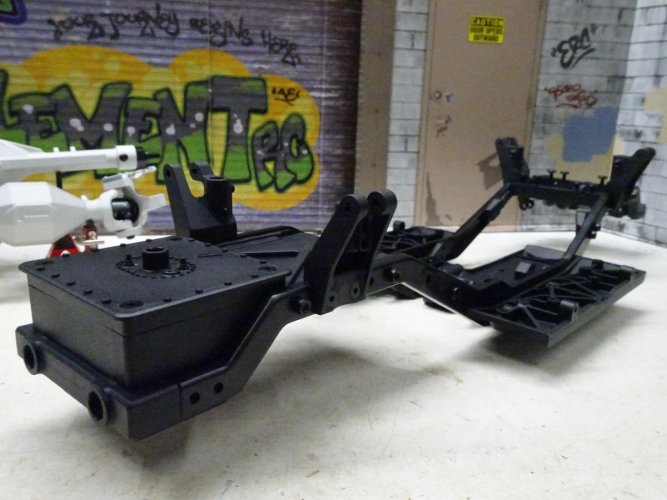
DSC05547.jpg

Material quality is very good, as it should be in a premium kit. The servo/front bumper mount, rear bumper mount/fuel cell/chassis brace, and sliders all feel particularly stout, owing to a combination of material choice and hefty design. Once assembled, the chassis leaves the impression that it is worthy of the admission price.

So far, so good, Vanquish. I'm looking forward to PROceeding with the rest of the build.
 
Last edited:
Liked and subcribed!"thumbsup"

Congrats on joining the VS4-10 family! These new Pro's and the OG Origin are the best kits I have ever built. I received my Pro on Monday and am in the process of building mine.

Looking forward to watching your build!:)
 
Great detailed observations. Its always nice to see people catch some of the small things we put into the kits.

I watched your video as well, looking forward to seeing it complete.
 
Liked and subcribed!"thumbsup"

Congrats on joining the VS4-10 family! These new Pro's and the OG Origin are the best kits I have ever built. I received my Pro on Monday and am in the process of building mine.

Looking forward to watching your build!:)

Great detailed observations. Its always nice to see people catch some of the small things we put into the kits.

I watched your video as well, looking forward to seeing it complete.

Thanks, guys. I'm really looking forward to this, as well. And great job on the kit, Brandon. The time and effort you spent on, well, everything, shows.

Let's PROceed with our PROject. Next up are the shocks:
DSC05550.jpg

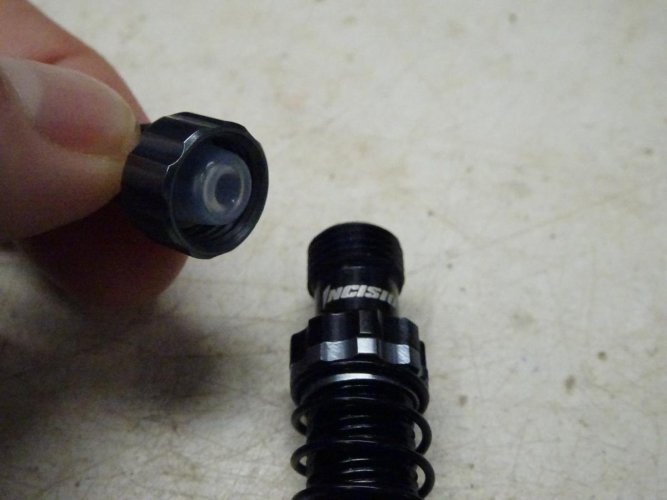
This is my first experience with the Incision scale shocks. They come pre-assembled, which spares the indignity of chasing e-clips all over the garage. They also have bladders, which is rare in narrow-bodied scale shocks:
DSC05553.jpg

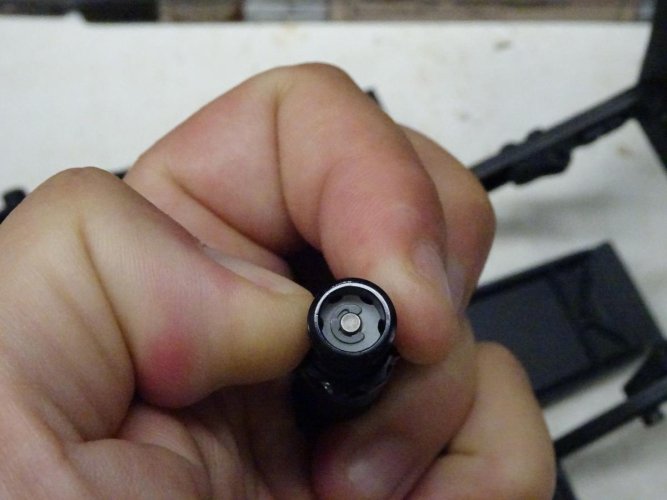
One thing I noticed right away was the size of the slots in the pistons:
DSC05554.jpg

DSC05560.jpg

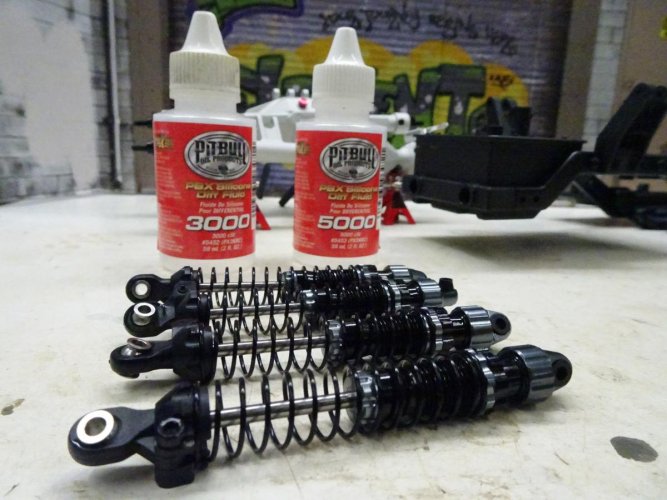
These are a bit bigger and more numerous than typical, so I thought I should go with a thicker oil than normal. Since I typically use 1k-3k diff fluid, I was thinking 3k-5k should be about right:
DSC05562.jpg

I decided to try 5K and generally liked the feel. The only difficulty was trying to get rid of all of the air before putting the bladder on. It would be easier with thinner oil, but that would come at the expense of allowing the suspension to be bouncier.

Even though the shocks are pre-assembled, it's always a good idea to check things out. The lower rod ends needed to be screwed on a little further:
DSC05559.jpg

Speaking of those rod ends, note the tab. It's there for a pass-through screw that keeps the spring cups from popping off in the middle of a run:
DSC05555.jpg

A little bit of overkill? PRObably. But it certainly doesn't hurt, and offers further PROof of Vanquish being PROactive. No PROtests here.

As with the Origin, the Pro includes a complete set of Incision stainless links:
DSC05565.jpg

Everything went together very nicely:
DSC05567.jpg

The only issue I noticed was a little bit of toe-in up front, but that's an easy fix.

Now for the really fun part...the new VFD transmission. Here are the parts laid out:
DSC05581.jpg

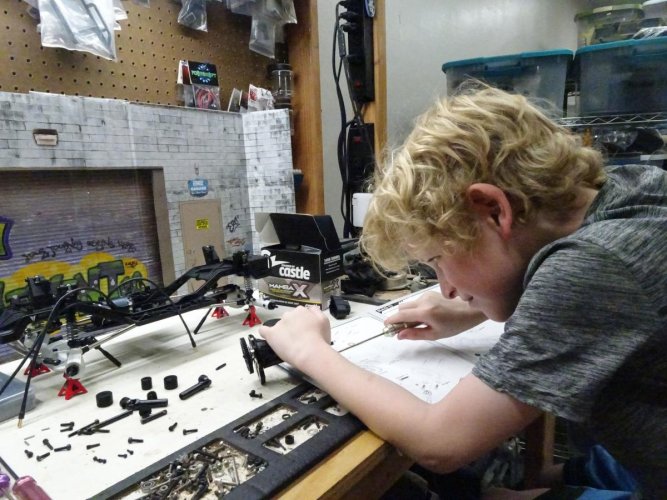
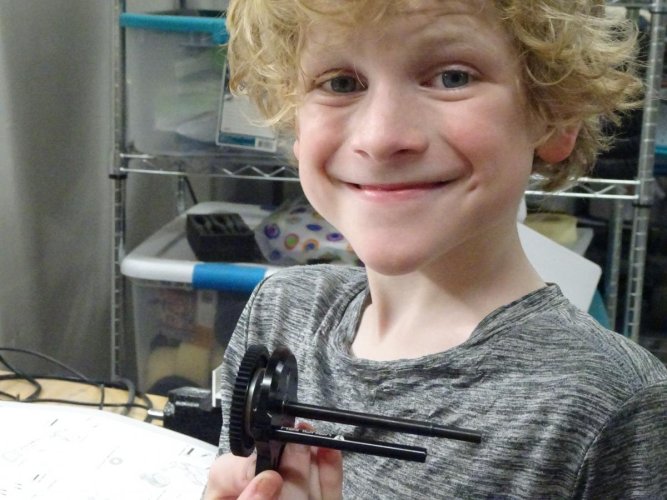
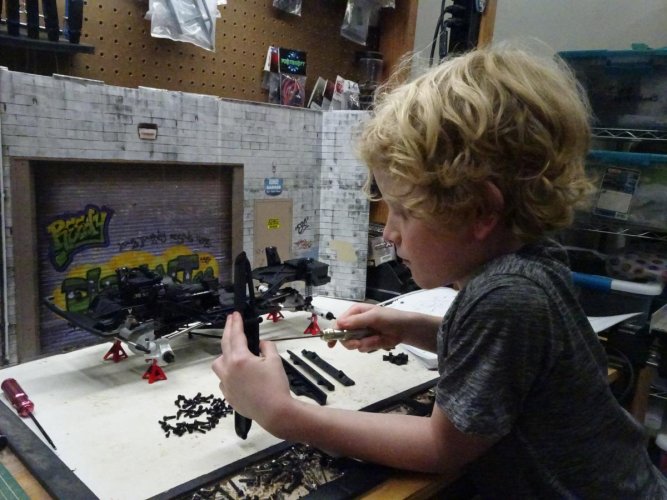
Care to PROffer a guess as to who appeared at the bench just in time to assemble this transmission?
DSC05595.jpg

DSC05590.jpg

Roo liked it, as well. Another pic:
DSC05594.jpg

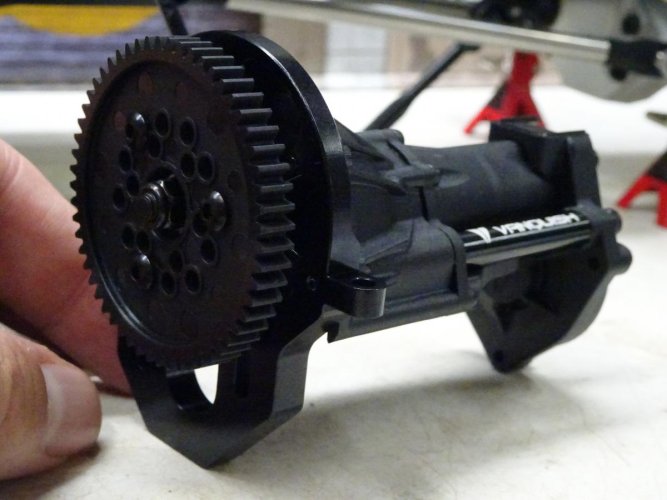
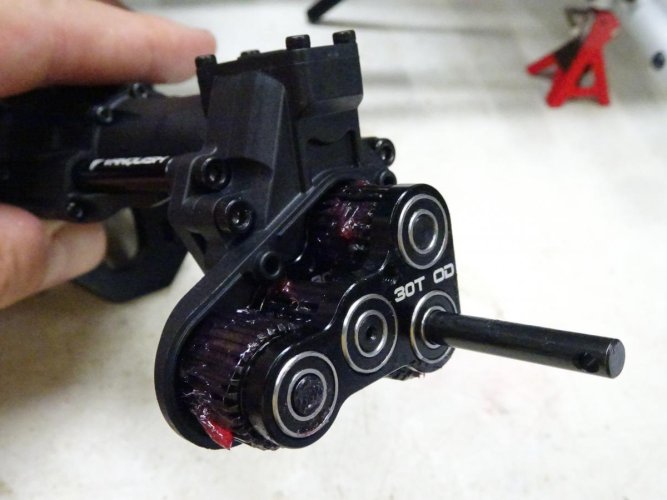
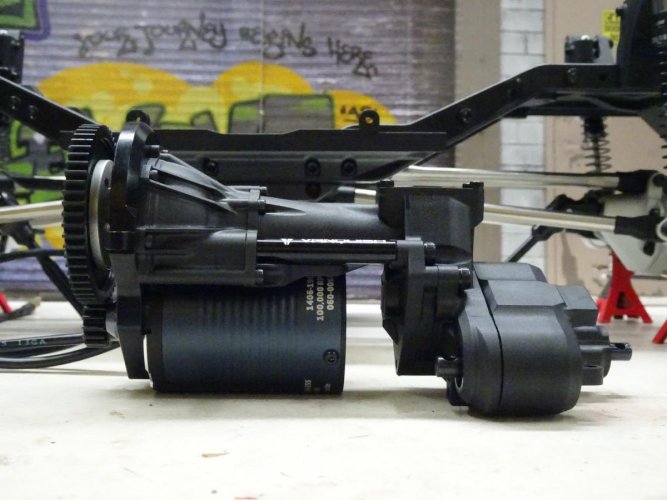
As you can see, the motor sits directly under the 56T 32P spur gear, placing the heaviest component just about as low as possible for weight distribution. The input shaft runs all the way across the top of the motor, covered by a plastic transmission housing made to look like a really tranny. Behind the motor on the top shaft sits a 23T upper gear and a 52T output gear, with an output shaft connected to the attached transfer case:
DSC05602.jpg

Here's a PROfile view of the transmission with Castle Slate 1900kv motor installed:
DSC05608.jpg

Total gear reduction with stock gearing (15T pinion) is a healthy 41.3:1 at the front and 44:1 at the rear, with 6.5% overdrive to the front. Note that, as best I can tell, 15T is probably the largest pinion that would fit using the stock spur. Vanquish PROmises the VFD tranny will support optional t-case gears, which sounds like other overdrive ratios may become available soon.

One small note regarding assembly...the instructions call for 2 bags (D-1 and D-2). That's a mistake. There's only 1 bag (D-1), and it has everything you need. Well...everything you need to assemble the tranny, that is.

Hats off to Vanquish on this one. They made a serious attempt to re-invent the transmission, and they've come up with something quite clever. Well done!
 
Last edited:
It's looking great! Glad to see Roo in there lending a hand!"thumbsup"

One thing I noticed in your last pic. It looks like the t-case is not together all the way. I'm seeing a little gap in the case. I had the same issue with mine at first and I had to squeeze it together evenly and then it snapped together nicely. Once the bolts are tight it should look somewhat seamless.

That is a good tip on the shock oil. I'm currently running 40w in front and 70w in the rear on my VS4-10 Origin and was thinking about trying something a little heavier. I'm going to look into using the diff oils to see if it works out better.
 
Great write up, as usual!

The VFD transmission is an engineering win for sure. VP nailed it and should be VERY proud of this.
 
Like I said earlier, one lucky man!!! Great write up, will be following this one too!! Great video too!!
brian
 
I just assembled my axles. Do you have any play on your rear axles side to side? I have a little bit of movement and the hex will get pretty close to the axle cap. Just wondering if that's normal?
 
Last edited:
I just assembled my axles. Do you have any play on your rear axles side to side? I have a little bit of movement and the hex will get pretty close to the axle cap. Just wondering if that's normal?

I'm glad you brought this up. I just noticed on my Pro that I too have quit a bit of play in the rear axle also. I took the hex off and noticed the hex pin is rubbing on the bearing cap. I checked my Origin and there is hardly any side to side movement and there is about 1mm of space between the hex and the bearing cap.


There will be some but if you find it to be excessive, email customer service and they'll help you out.

I am going to email customer service right away. I took a pic of the rear axle showing how close the pin is to the cap. I will send the pic in the email.
 
There will be some but if you find it to be excessive, email customer service and they'll help you out.

I Think i will contact them just to get a second opinion. Thanks.

I'm glad you brought this up. I just noticed on my Pro that I too have quit a bit of play in the rear axle also. I took the hex off and noticed the hex pin is rubbing on the bearing cap. I checked my Origin and there is hardly any side to side movement and there is about 1mm of space between the hex and the bearing cap.


I am going to email customer service right away. I took a pic of the rear axle showing how close the pin is to the cap. I will send the pic in the email.

I have only had time to build the axles. So i haven't ran it to see if it'll actually scrape the cap.
 
I just assembled my axles. Do you have any play on your rear axles side to side? I have a little bit of movement and the hex will get pretty close to the axle cap. Just wondering if that's normal?

There will be some but if you find it to be excessive, email customer service and they'll help you out.

Thanks for pointing this out. On mine, there is about 1mm of in/out play on each side when measuring the gap between the wheel hub and the bearing cap (the gap ranges from 2mm-3mm):
DSC05724.jpg

DSC05725.jpg

Harley - Is this within normal tolerances?

Like I said earlier, one lucky man!!! Great write up, will be following this one too!! Great video too!! brian

Great write up, as usual! The VFD transmission is an engineering win for sure. VP nailed it and should be VERY proud of this.

Thanks, guys! If the VFD tranny ends up being as durable as I'm expecting it to be, I completely agree.

It's looking great! Glad to see Roo in there lending a hand!"thumbsup"

One thing I noticed in your last pic. It looks like the t-case is not together all the way. I'm seeing a little gap in the case. I had the same issue with mine at first and I had to squeeze it together evenly and then it snapped together nicely. Once the bolts are tight it should look somewhat seamless.

Lol on Roo...I can't keep him away from the bench if I tried. Thanks for pointing that out about the t-case. I'll have to pull it out for a closer look.

Before PROceeding with the build, how about a little #tinytruck poetry:

Mystical e-clip,
I'm complete in your embrace.
Why so elusive?

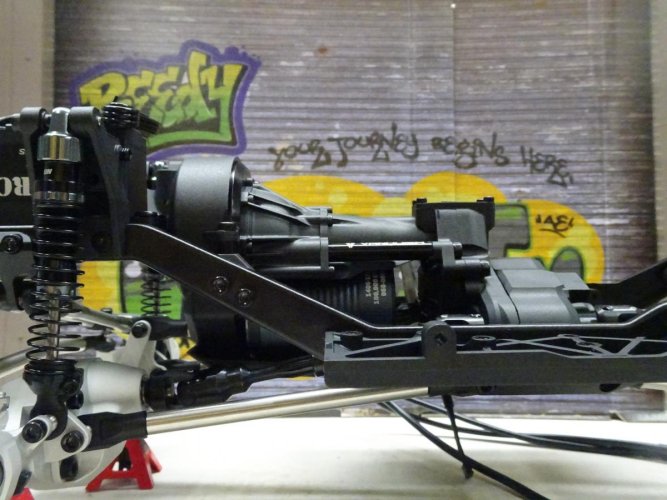
Okay, back to our little PROject. Let's take a look at the VFD transmission installed:
DSC05618.jpg

DSC05617.jpg

As you can see, the motor sits low, and most of the stuff up high is nylon (which is light). The faux housing/cover has some nice details and looks transmission-like from above, adding a bit of scale appeal even though it's not truly a scale driveline layout.

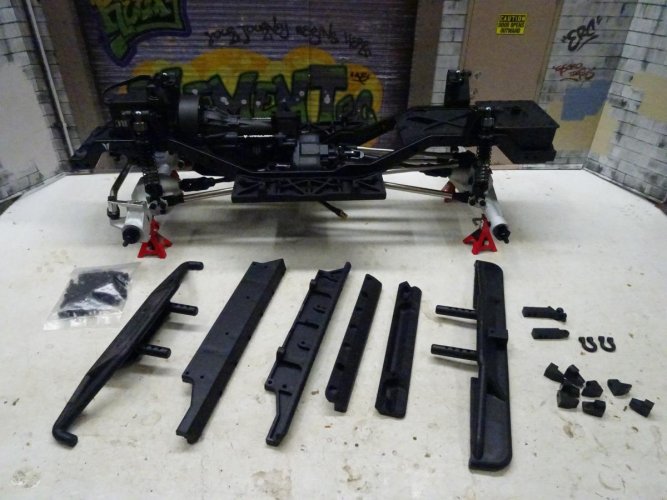
Bumpers and sliders are made of nylon and feel plenty strong:
DSC05619.jpg

Those tabs you see in the lower right corner of the last picture form a channel along the top of the sliders to keep the body's rocker panels from flopping around all over the place.

Roo showed up again to help:
DSC05620.jpg

That little bugger comes in handy.

Vanquish wisely chose a more flexible nylon compound for the bumper than for the chassis brace components to reduce the possibility of breakage. As I mentioned previously, I'm happy to have the nylon parts instead of aluminum to hep bring the cost down. I do have one quibble, though. Vanquish includes a pair of D-rings with the PRO, but the bumpers don't include any integrated D-ring mounts. Here's a look at the front bumper:
DSC05632.jpg

You do get an insert that can go into the trailer hitch mount that accepts 1 ring, but you can't use it at the same time as the trailer hitch. Integrated mounts would have been a better solution. Oh, well.

The PRO includes metal plates that screw down over the side plate/sliders (they help strengthen the sliders and capture the inner fenders - more on that below), as well as a metal battery tray that sits behind the transfer case:
DSC05621.jpg

No surprise that I opted for our own BowHouse/Helios non-slip battery straps.

Next item on the list is wheels and tires. Like the original Origin, the PRO kit includes plastic Incision 1.9" KMC Machete beadlock wheels and hubs (in your choice of 2 different offsets), along with Vanquish's own VFX tires (4.65" OD):
DSC05624.jpg

Here are a couple of pictures mounted:
DSC05629.jpg

DSC05634.jpg

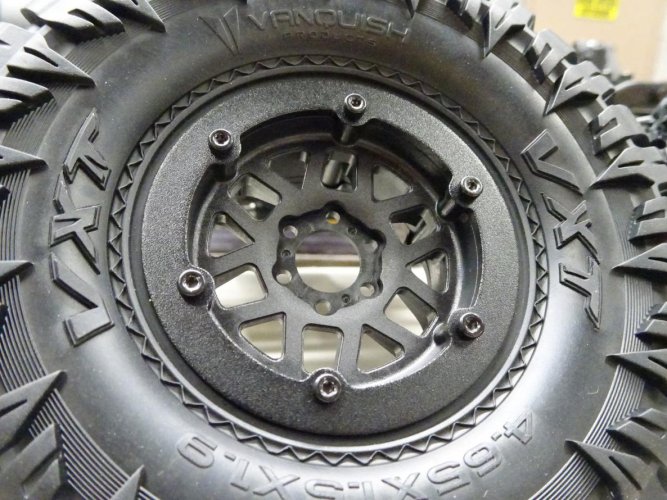
This is my first experience with Incision or Vanquish wheels, and I will confess to being a bit disappointed in them. The plastic (esp. in the hubs) seems a bit soft, and the aluminum rings don't look nearly as appealing as the rest of the machined parts on the truck. Even the 2-tone scale hubs seem a bit cheap next to some of the other pieces in this kit. If I had my druthers, I would PROpose substituting aluminum scale hubs for the plastic ones and making nicer beadlock rings. I would have even preferred paying another $50 for aluminum wheels or paying the same price with aluminum wheels and no tires. Don't be surprised if these don't last too long on this truck.

As for the tires, the compound doesn't feel as sticky on the bench as the better compounds from folks like Pit Bull (Alien), RC4WD (X2S(3), PRO-Line (Predator) and others. The sidewalls and shoulders also seem a fair bit stiffer than most other tires I've run. I've heard from a few friends I know and trust that the tires work pretty well once broken in (esp. with softer foams), so I'll definitely give them a try. But these are another candidate for replacement down the road.

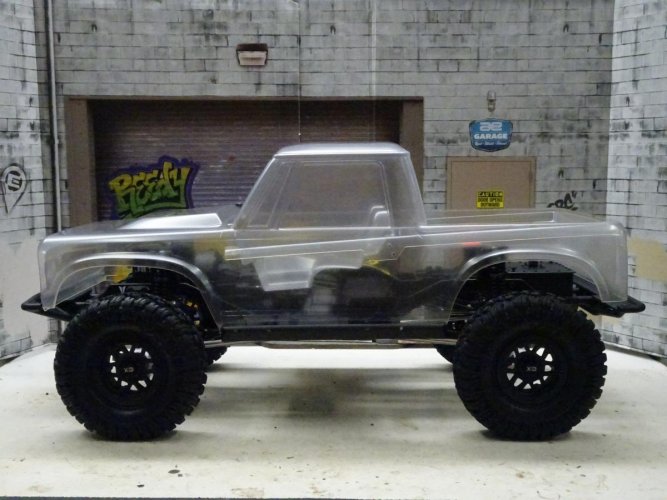
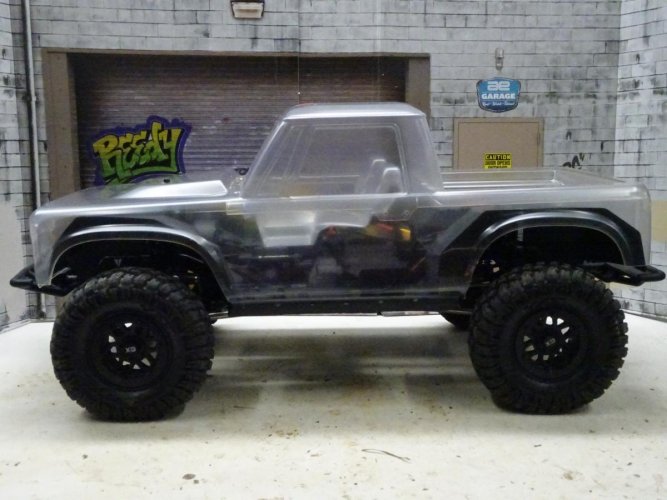
With wheels and tires mounted and installed, I PROudly present to you my VS4-10 Pro Clear:
DSC05636.jpg

Ha! See what I did there?
Don't worry, I will get around to painting the body. But I did go ahead and paint the inner fenders:
DSC05667.jpg

I like painting those with black on both sides and then a matte clearcoat. They look more realistic with a matte finish, and if they scratch, they scratch through to black. Here's how they look installed under that ghost of a body:
DSC05670.jpg

One thing to keep in mind with the inner fenders is that you would likely need to modify them or use different ones if you choose to go with a different body. I'm sticking with the stock body, so no worries for me.

I had the chance to take it out for some quick test runs in the yard, and I'm very (very) impressed with how it drives. Overall balance and stability is excellent on uneven terrain, steep ascents and descents, sidehills, etc. Vanquish has done an excellent job with this platform, and it shows.

Next on the list is painting and detailing the body, and then shooting some video. Stay tuned for more updates...
BowHouse RC, Helios RC, GCM #tinytruck Team
 
Thanks for sharing the gap of your hex. My hex pin definitely hits the cap. I contacted VP, just waiting for a reply.

Edit: Talk to VP and they are sending me new shafts.
 
Last edited:
Back
Top