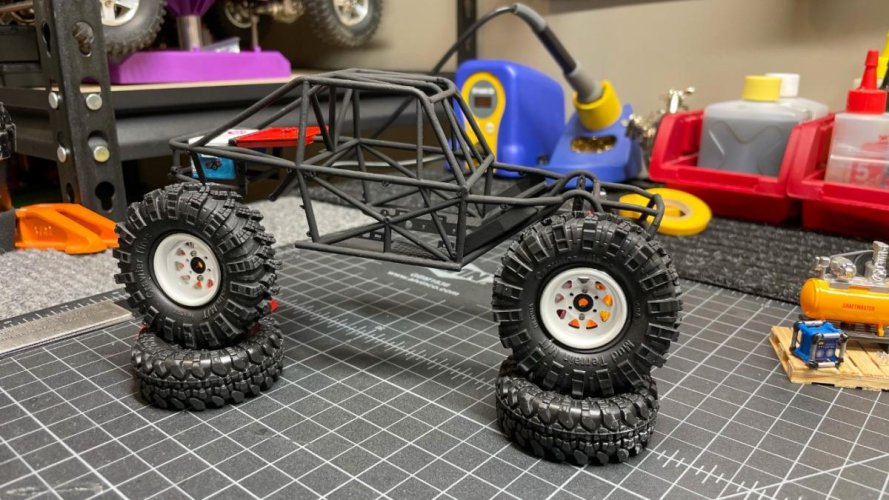
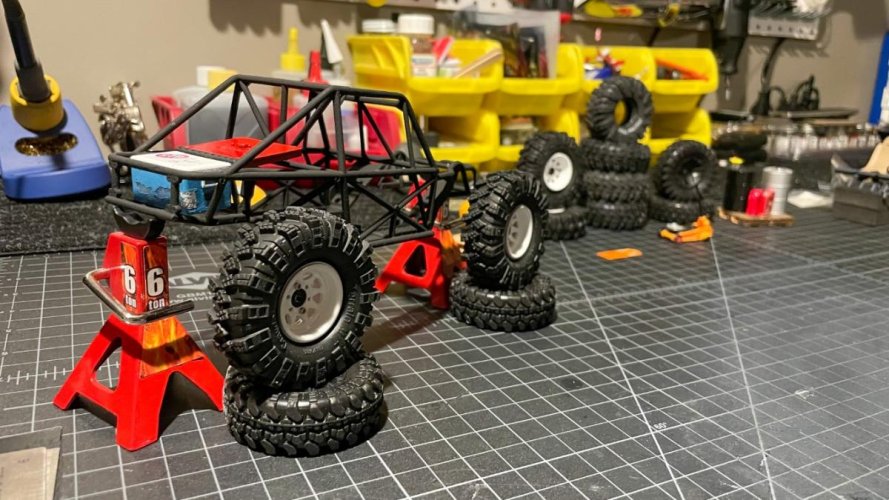
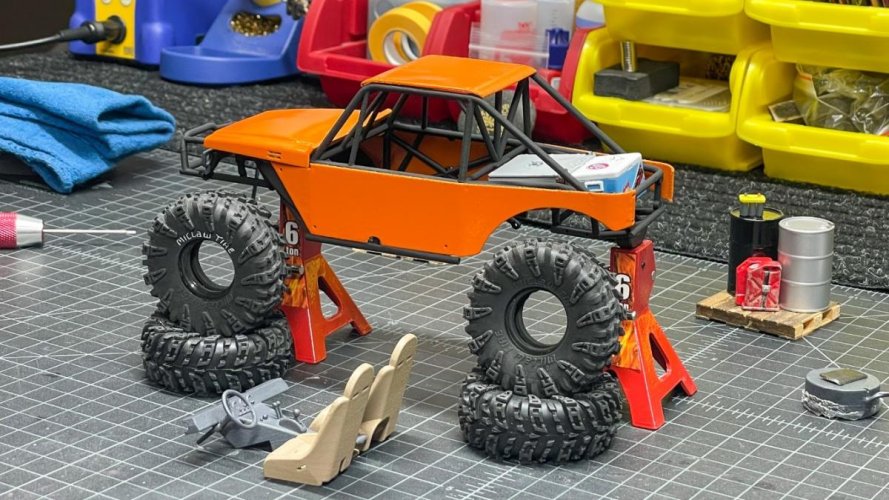
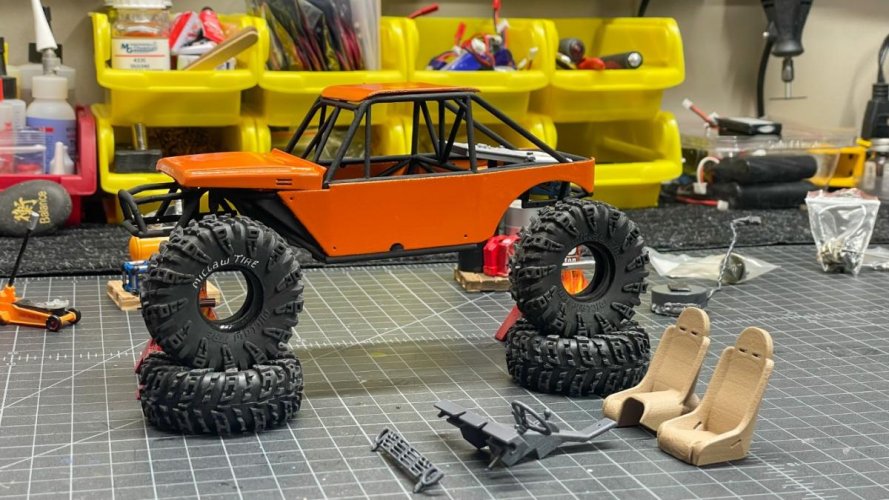
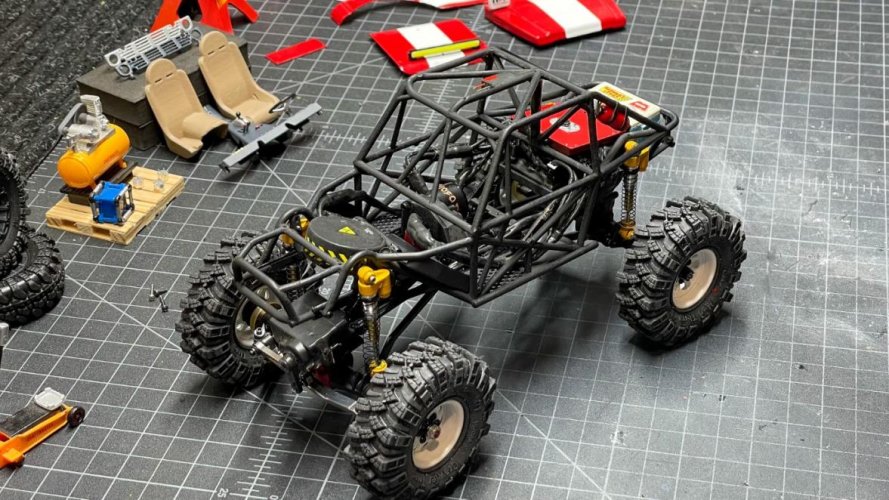
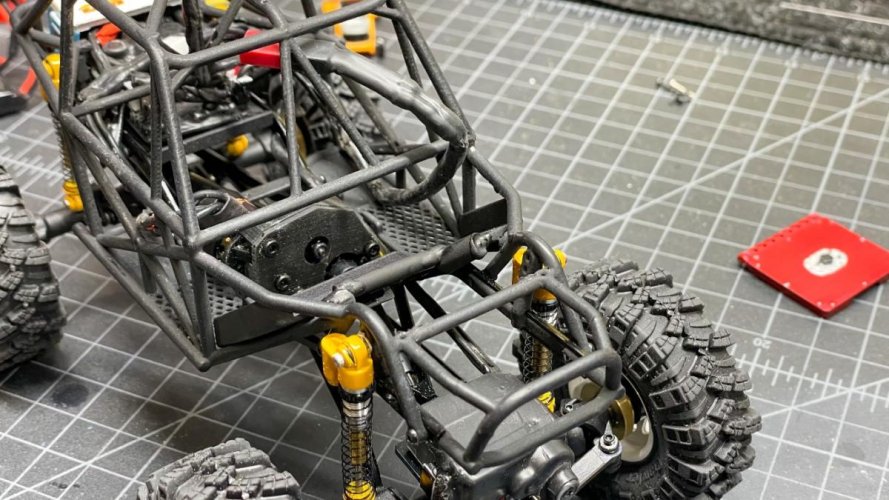
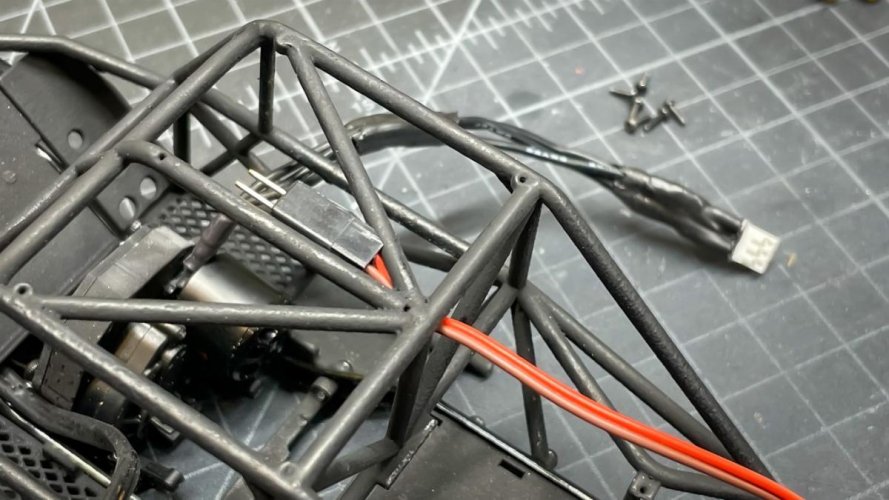
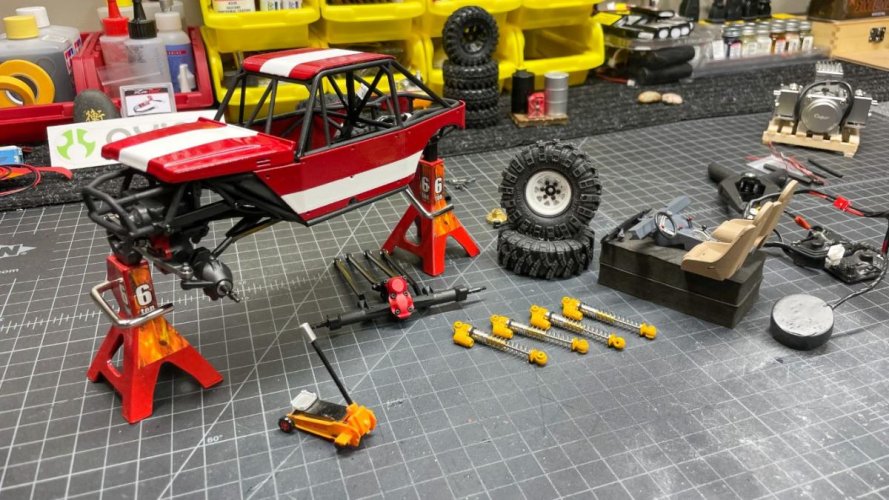
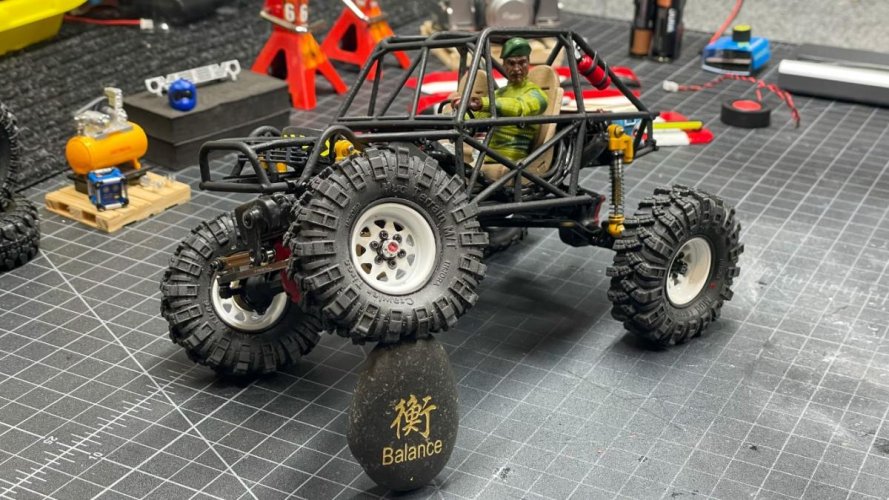
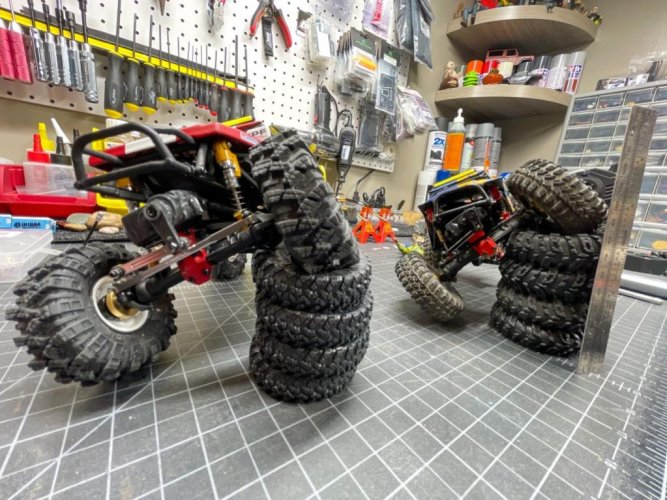
• Welcome to RCCrawler Forums.

    It looks like you're enjoying RCCrawler's Forums but haven't created an account yet. Why not take a minute to register for your own free account now? As a member you get free access to all of our forums and posts plus the ability to post your own messages, communicate directly with other members, and much more. Register now!

    Already a member? Login at the top of this page to stop seeing this message.

Builder's Notes: Jaws 2 Another Shark in the Water

TheBakedBeans

Quarry Creeper
Joined
Oct 20, 2012
Messages
327
Location
Chicago Area
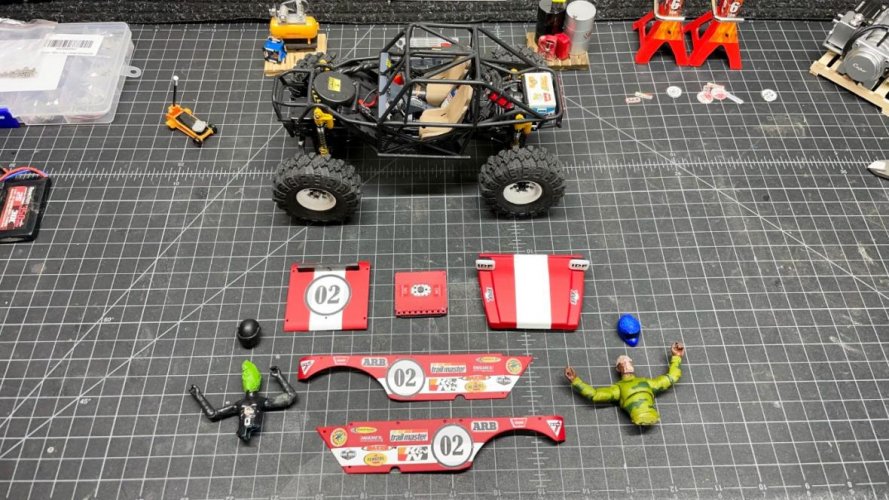
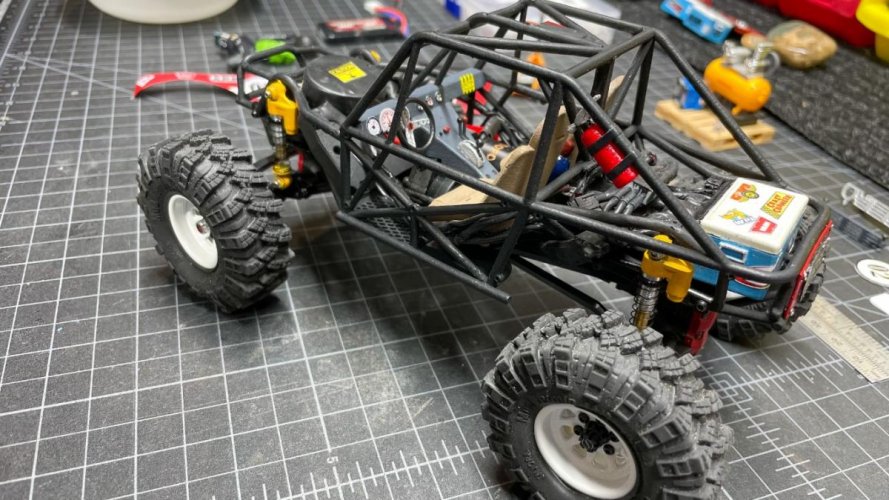
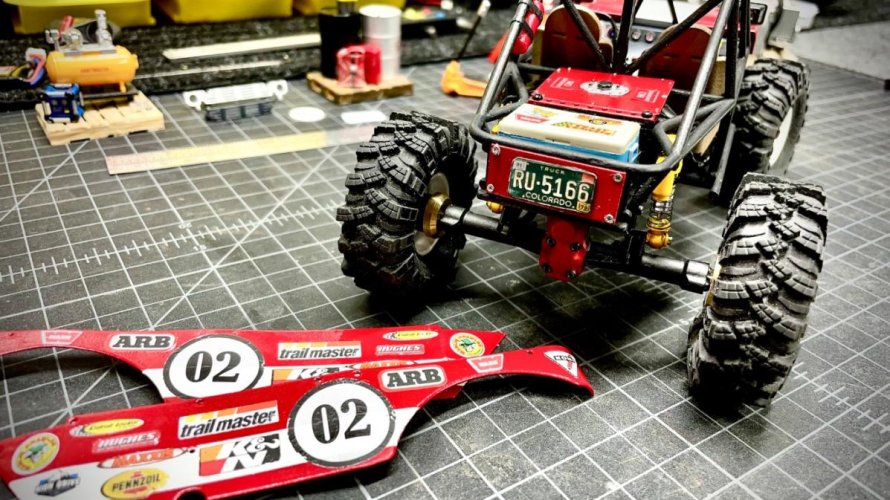
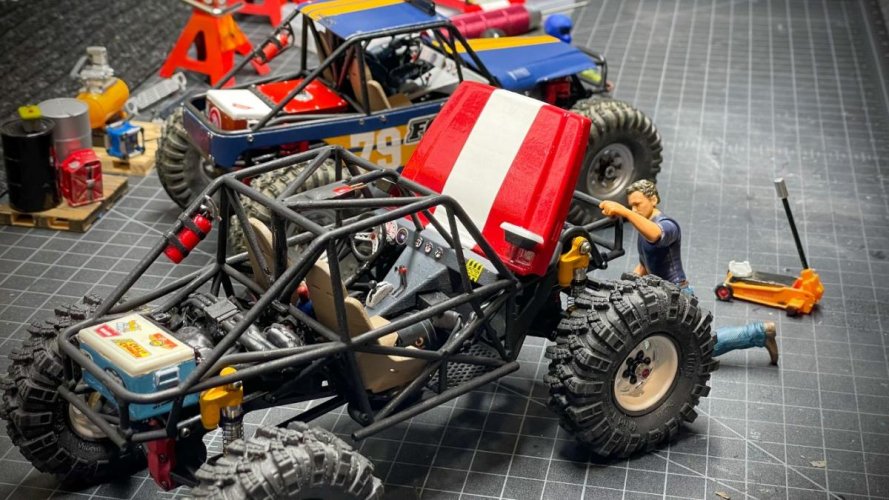
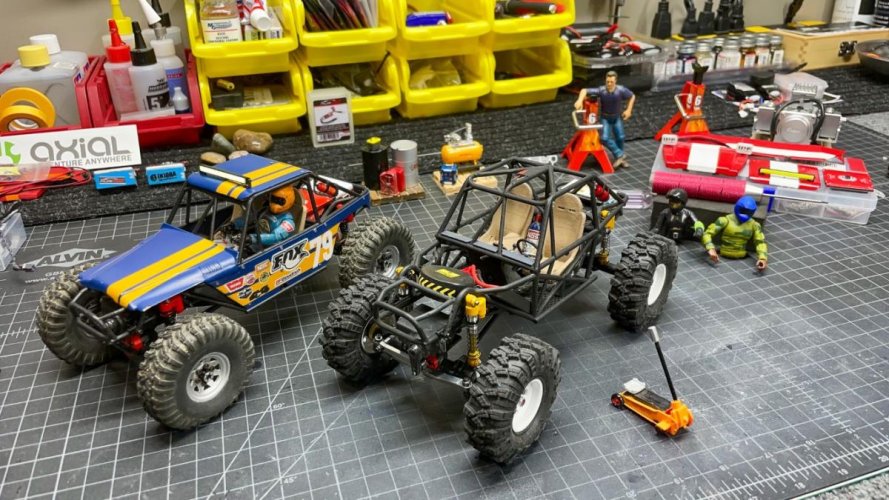
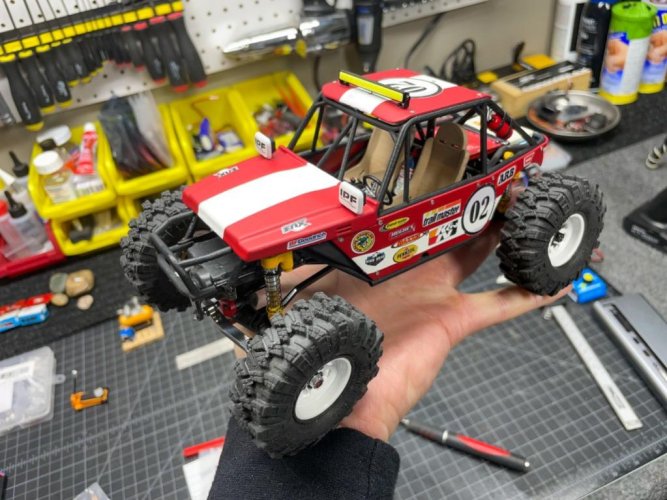
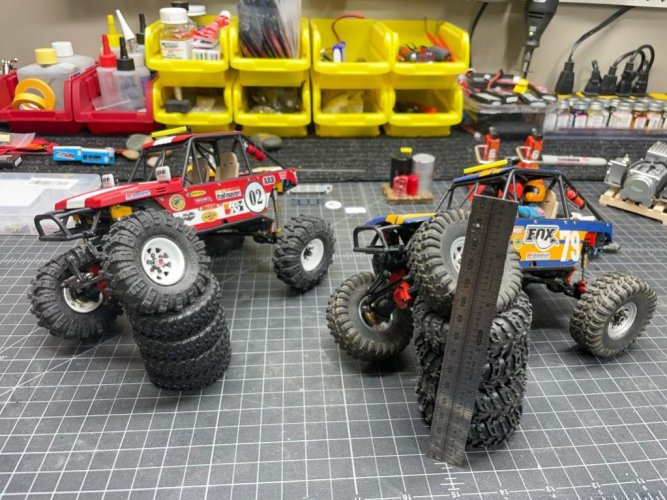
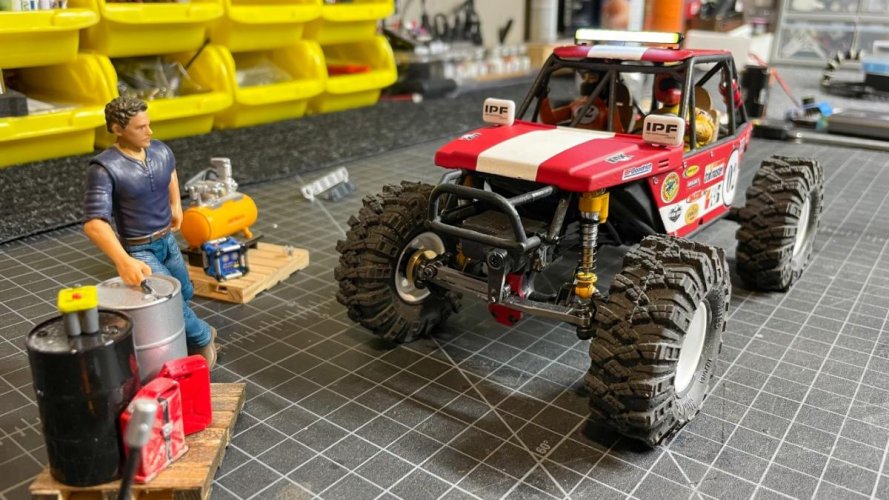
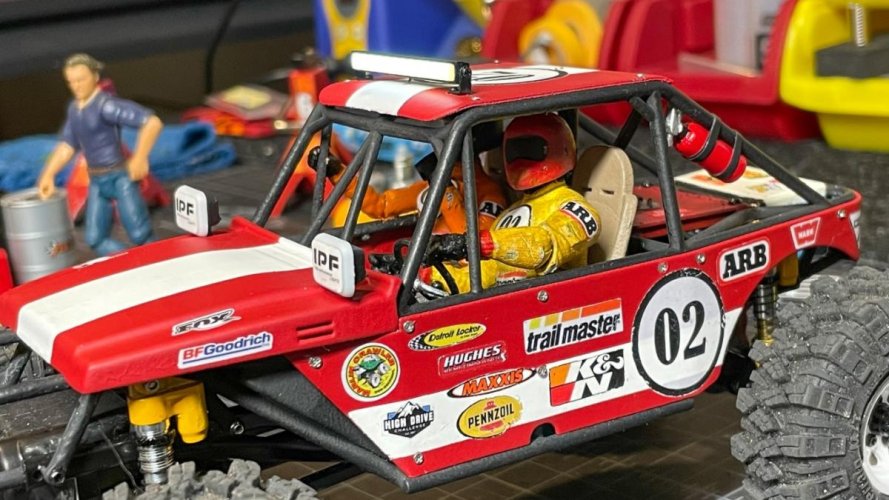
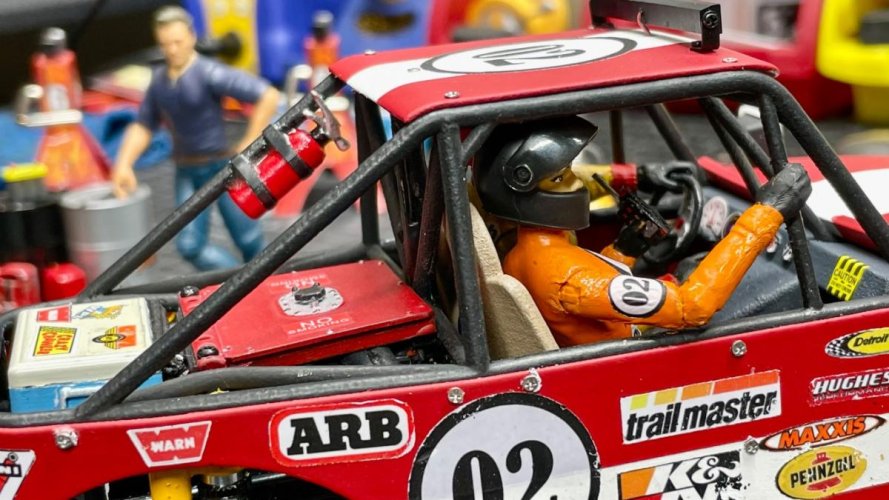
Here we go again! I loved the first Micro Shark I built, so here is another one... enjoy!

Watch the Build Video and Drive Review Here

PARTS LIST

SCX24 Deadbolt
https://www.amainhobbies.com/axial-scx24-deadbolt-1-24-rtr-scale-mini-crawler-red-axi90081t1/p977315

Furitek Lizard V2
https://www.amainhobbies.com/furitek-lizard-v2-20a-brushed-brushless-esc-ftk-fur-2123/p1418504

WPL RES v3 Receiver with Built in Light, Sound, and Winch Controls
https://www.wpl-rc.com/products/r-e-s-v3

Mofo Nano Beast Motor with Standard Mount
https://www.moforc.com/products/nano-beast-2-0-motor-and-standard-mount-kit?variant=39777532215353

Steel Transmission Gearbox Gear 0.3 Mode 51T & 19T
https://www.ebay.com/itm/114949809796?var=415072582788

Steel Spur Gear and Pinion
https://www.amainhobbies.com/yeah-r...pinion-gear-set-55t-11t-yea-axsc-074/p1358659

Shocks
https://www.ebay.com/itm/144665500544?var=443905623018

Brass Wheel Hex
https://www.ebay.com/itm/115509103817

Brass Axle Weight
https://www.ebay.com/itm/385088816134

Brass Front/Rear Diff Cover
https://www.ebay.com/itm/403102486605?var=673245722051

+4mm Steel Drive Stub
https://www.ebay.com/itm/385089784050

High Clearance Links (Deadbolt for rear, JLU for front)
https://www.ebay.com/itm/144538753011?var=443815155236
https://www.ebay.com/itm/144538753011?var=443815155240

Orlandoo Hunter Light Bar
https://www.amainhobbies.com/orlandoo-hunter-41mm-universal-lightbar-olhmx0034/p1328971

Micro Shark Type S

https://www.shapeways.com/product/PGKTN4NCC/scx24-micro-shark-frame?optionId=121784684&li=ostatus

https://www.shapeways.com/product/P...ersion-deadbolt?optionId=121786397&li=ostatus

https://www.shapeways.com/product/E...for-micro-shark?optionId=122152549&li=ostatus

https://www.shapeways.com/product/R...for-micro-shark?optionId=122152816&li=ostatus

https://www.shapeways.com/product/T...for-micro-shark?optionId=122152917&li=ostatus

https://www.shapeways.com/product/E...for-micro-shark?optionId=121964920&li=ostatus

https://www.shapeways.com/product/4...for-micro-shark?optionId=121785673&li=ostatus

https://www.shapeways.com/product/JJT22Y2A5/seats-for-micro-shark?optionId=122153497&li=shops

https://www.shapeways.com/product/UUKLZKM6U/dash-for-micro-shark?optionId=122154204&li=shops
 

Attachments

  • Micro Shark 2_1001.jpg
    Micro Shark 2_1001.jpg
    170.6 KB · Views: 286
Last edited:
I'm finally done! I don't need to go into too many details since my previous build was pretty thorough. But I do want to make a few notes to those who might use my parts list…

• The springs of the Injora double barrel shocks are too long and bouncy and they made the truck sit waaaay too high. So, I did the same thing I did on my first Shark. I kept the double barrel shock body but used the ORIGINAL spring from the SCX24. I basically put a 43mm spring on a 55mm shock. I glued the short spring to the top and bottom of the long shock and it had the affect I wanted. A truck that sat low but had long travel. The short spring acts like a limiting strap. I'm not worried about the glue breaking loose because my other Shark has the same thing and a year later it is still holding.

• The Mofo Brushless Nano Beast I'm not too sure I like this motor. The size is perfect, as I barely had to cut away the passenger seat and nothing else. With the Micro Komodo, I had to cut some of the console and the entire bottom off the passenger seat and rebuild it around the motor. BUT the Nano Beast keeps stalling out on me. I think it might be underpowered for this size of truck. I haven't done any rough driving yet, but I've been climbing the CrawlerPark.com obstacles and sometimes at a hard torque/slow speed the motor will just cut out. I have to pump the trigger and I've even had to reach my finger in and spin the barrel to get it going again. I'm also getting some weird binding that I can't figure out. It's making the truck lift a little in reverse. I know this can be common, but my other shark is EXACTLY the same setup except for the motor/transmission. I was expecting the same performance/mechanics. I took it down to a local hobby shop to crawl on their indoor course. After 20 minutes of driving, I've decided I'm replacing the Nano Beast with a Micro Komodo.

• WPL RES V3 I used my favorite little receiver/light unit/sound unit/winch unit combo again. By no means is it perfect, but where else can I find all these features in one receiver? I wish there were better options, or I wish WPL would realize the potential it has. I'd wager they'd make a lot of $ if they would simply redesign this to better fit the small RC trucks. They'd get every SCX24/FCX24/TRX4M user to buy one! Seriously... to have light control, 2 speed transmission control, winch control, along with audio... for $26. You can't beat it. The only thing I'd really change is; I wish I could change the audio to have different options so not every truck sounds the same; I wish I could change the layout of the circuit board as to better fit into smaller RCs, and I wish I could figure out why the lights keep cutting out when the servo is fully extended (maybe a BEC is needed?) Anyway, on this model, indstead of tucking the audio speaker into the passenger seat floor panel, I hid it under the hood by the battery. You'll see it in the pics.

Well, that's about all I have for this build. Now I'll dump a bunch of photos and wrap it up with a build video... enjoy!
 
Last edited:
So it started nice and easy. I thought... "yeah, I can do this over the weekend." Oh, boy was I so wrong!
 

Attachments

  • Micro Shark 2_1007.jpg
    Micro Shark 2_1007.jpg
    148.7 KB · Views: 271
  • Micro Shark 2_1009.jpg
    Micro Shark 2_1009.jpg
    147.7 KB · Views: 271
  • Micro Shark 2_1002.jpg
    Micro Shark 2_1002.jpg
    155.5 KB · Views: 269
But then I hit my first snag! Here is the original color. It looked awful!
 

Attachments

  • Micro Shark 2_1006.jpg
    Micro Shark 2_1006.jpg
    164.4 KB · Views: 267
  • Micro Shark 2_1003.jpg
    Micro Shark 2_1003.jpg
    144.6 KB · Views: 268
I literally scraped all the paint off and tried again. This time with Heritage Red as the base, and Race Orange as the stripe.


:x It looked worse. So, I scraped.... again. This should answer anyone's question if the side panels are durable. I just took a metal ruler and SCRAAAAAPED that paint off.

Around that time, I had to put my little hobby aside and do some work around the house before the season ended. I've been on this 'home improvement rampage' ever since I was diagnosed cancer free back in June. Something about sitting in a chair sick for 7 months just had me itching to 'tear down the old and build up the new'. I had to lay some landscaping stones, had to prep the lawn and yard for winter, I had to winterize the pool (it's so tiny), and I just haaaaaad to repaint the garage and put in a new cabinet system. "thumbsup"


(well no, but I did anyway). Honestly, I was getting a little jealous of all these tiny RC garages. I kept looking at my 1:1 garage... disgusted

So, with a little paint, a friendly neighborhood epoxy company, and a few days later... I'm almost done. Just waiting for the epoxy to cure so I can peel off the painter's tape, wipe the dust off the walls, and setup the cabinets.
 

Attachments

  • 20221104_212232362_iOS.jpg
    20221104_212232362_iOS.jpg
    99 KB · Views: 300
  • 20221105_141420396_iOS.jpg
    20221105_141420396_iOS.jpg
    99.2 KB · Views: 296
  • 20221105_171033463_iOS.jpg
    20221105_171033463_iOS.jpg
    69.3 KB · Views: 297
With the Epoxy drying, and all the yard work done... there was nothing left to do but get back to wrenching on my hobby! Back to the Shark, or as I like to call it JAWS II the REVENGE!

I went with a base red with white stripe color scheme. I used the Orlandoo lightbar again and glued the lead just like the first Shark.
 

Attachments

  • Micro Shark 2_1013.jpg
    Micro Shark 2_1013.jpg
    176.7 KB · Views: 263
  • Micro Shark 2_1012.jpg
    Micro Shark 2_1012.jpg
    174.6 KB · Views: 265
  • Micro Shark 2_1011.jpg
    Micro Shark 2_1011.jpg
    144.8 KB · Views: 264
  • Untitled picture.jpg
    Untitled picture.jpg
    106.4 KB · Views: 293
  • Micro Shark 2_1010.jpg
    Micro Shark 2_1010.jpg
    157.8 KB · Views: 246
Last edited:
With that done, it was time to get a driver. I went for another SGT STALKER, Go J.o.e.!
 

Attachments

  • Micro Shark 2_1014.jpg
    Micro Shark 2_1014.jpg
    162.3 KB · Views: 262
Last edited:
At this point, I was ready to wrap things up. I just needed to figure out a set of decals and decide if I was going to flatten the glossy red.
 

Attachments

  • Micro Shark 2_1028.jpg
    Micro Shark 2_1028.jpg
    150.5 KB · Views: 255
  • Micro Shark 2_1026.jpg
    Micro Shark 2_1026.jpg
    177.2 KB · Views: 254
  • Micro Shark 2_1021.jpg
    Micro Shark 2_1021.jpg
    176.9 KB · Views: 258
  • Micro Shark 2_1023.jpg
    Micro Shark 2_1023.jpg
    155.1 KB · Views: 261
  • Micro Shark 2_1020.jpg
    Micro Shark 2_1020.jpg
    176 KB · Views: 258
  • Micro Shark 2_1019.jpg
    Micro Shark 2_1019.jpg
    80.2 KB · Views: 257
  • Micro Shark 2_1018.jpg
    Micro Shark 2_1018.jpg
    176.7 KB · Views: 258
  • Micro Shark 2_1016.jpg
    Micro Shark 2_1016.jpg
    158 KB · Views: 260
  • Micro Shark 2_1017.jpg
    Micro Shark 2_1017.jpg
    150.1 KB · Views: 258
  • Micro Shark 2_1015.jpg
    Micro Shark 2_1015.jpg
    175.8 KB · Views: 260
  • Micro Shark 2_1027.jpg
    Micro Shark 2_1027.jpg
    121.4 KB · Views: 247
  • Micro Shark 2_1029.jpg
    Micro Shark 2_1029.jpg
    148.8 KB · Views: 256
And for the cherry on top, I took a 3.75" Sgt Slaughter and a Bat-woman figure I saw at Kohls... cut off some legs, added some paint and decals... viola, RC Rock Buggy Drivers!
 

Attachments

  • Micro Shark 2_1043.jpg
    Micro Shark 2_1043.jpg
    149.4 KB · Views: 247
  • Micro Shark 2_1044.jpg
    Micro Shark 2_1044.jpg
    136.8 KB · Views: 273
  • Micro Shark 2_1041.jpg
    Micro Shark 2_1041.jpg
    133.5 KB · Views: 251
  • Micro Shark 2_1040.jpg
    Micro Shark 2_1040.jpg
    114.9 KB · Views: 251
  • Micro Shark 2_1036.jpg
    Micro Shark 2_1036.jpg
    84.4 KB · Views: 251
  • Micro Shark 2_1034.jpg
    Micro Shark 2_1034.jpg
    61.2 KB · Views: 252
  • Micro Shark 2_1033.jpg
    Micro Shark 2_1033.jpg
    181.6 KB · Views: 249
  • Micro Shark 2_1032.jpg
    Micro Shark 2_1032.jpg
    132.2 KB · Views: 252
  • Micro Shark 2_1030.jpg
    Micro Shark 2_1030.jpg
    175.6 KB · Views: 257
I even found the time to finish the garage...
 

Attachments

  • 20221109_215329939_iOS.jpg
    20221109_215329939_iOS.jpg
    103.2 KB · Views: 277
  • 20221112_050313742_iOS.jpg
    20221112_050313742_iOS.jpg
    95.6 KB · Views: 276
Wow, that is impressive, you got a lot done:shock: good to hear that you kicked cancer in the nuts!"thumbsup" Looking real sweet. Are those tires good? They seem soft and good, have those also but gonna use my old ones first.

Good work as always!
 
Wow, that is impressive, you got a lot done:shock: good to hear that you kicked cancer in the nuts!"thumbsup" Looking real sweet. Are those tires good? They seem soft and good, have those also but gonna use my old ones first.

Good work as always!

Gracias Amigo!

I have only driven on them once. The little mini course at the end of the build video is at one of my LHS. It has some concrete and the tires kept slipping. Other than that, they were great.
 
Ok, thanks. Sorry to hear about the problems with the nano beast. Great advice about the shocks, I’m gonna try that at some point! I installed the double barrel shocks with my original c10 body and it was riding way too high. Watched you video: full articulation with perfect ride height. Love this forum, great to learn from the pros"thumbsup":mrgreen:
 
Ok, thanks. Sorry to hear about the problems with the nano beast. Great advice about the shocks, I’m gonna try that at some point! I installed the double barrel shocks with my original c10 body and it was riding way too high. Watched you video: full articulation with perfect ride height. Love this forum, great to learn from the pros"thumbsup":mrgreen:

Lol, thanks! But, I'm no pro... those guys are over at SBG.

And I'm not knocking the Nano Beast. It is just giving me too many problems. And with all the projects I have to catch up on, I don't have time to tinker with it. I'm just going to swap it out for a Micro Komodo and set it on the shelf, maybe for another project.
 
Last edited:
To me you definitely are a pro. I hear you, it is time consuming to build these small rigs. The parts are so small, I rarely get those in place on the first attempt.
 
Good job, Mr. Beans! I like the effort that you took on all the interior/ exterior details. I'm in the process of doing a lot of aesthetic touches to my scx24 and man, some of the details take some time simply due to how small everything is. Many parts are next to impossible to even hold onto lol.

Body looks great... They both do ( blue/ yellow too) but I love the red/ white... especially over that orange. Thank you for sharing details about the shocks, esc, etc. Always nice to hear about people's experiences, as many products are out there now.

BTW- Garage looks great. I'd love to do something like that with mine although I'm not holding my breath lol. Also, congratulations on remaining c-free.
 
Alright, now I'm jealous of your garage! Looks fantastic!"thumbsup"

Excellent work on those little rigs! The scale detail at that tiny scale is outstanding! I believe you are one of them PRO's over at SBG!:)

Love all of the little details. The more I look the more I see! Great use of the G.I. Joes and the re-outfitting! Looks like they fit the look perfectly!

I've got the head over to the Tube to check out the vid!
 
To me you definitely are a pro. I hear you, it is time consuming to build these small rigs. The parts are so small, I rarely get those in place on the first attempt.

"thumbsup" Thank you!

Good job, Mr. Beans! I like the effort that you took on all the interior/ exterior details. I'm in the process of doing a lot of aesthetic touches to my scx24 and man, some of the details take some time simply due to how small everything is. Many parts are next to impossible to even hold onto lol.

Ah yes, the devil is in the details. But it keeps my busy mind occupied

Body looks great... They both do ( blue/ yellow too) but I love the red/ white... especially over that orange. Thank you for sharing details about the shocks, esc, etc. Always nice to hear about people's experiences, as many products are out there now.

Sharing is caring 8)

BTW- Garage looks great. I'd love to do something like that with mine although I'm not holding my breath lol.

The idea had been festering in the back of my mind for a few years. With all the nice weather we had in late fall... I said 'now or never'... stop holding your breath and get to it! ;-)
 
Back
Top